SpringMvc+Spring+MyBatis 基于注解整合
最近在给学生们讲Spring+Mybatis整合,根据有的学生反映还是基于注解实现整合便于理解,毕竟在先前的工作中团队里还没有人完全舍弃配置文件进行项目开发,由于这两个原因,我索性参考spring官方文档研究出完全基于注解整合ssm框架。毕竟无配置化也是Spring官方所推行的,要不SpringBoot存在的意义为何嘛
一。整合思路
1)目标:毫无保留的将配置文件的所有配置项改变注解加创建对象的方式实现
2)Spring提供的 @Bean @Configuration @ComponentScan @EnableTransactionManagement @EnableWebMvc 等 需要知道其含义
二。创建spring-mvc的web项目
1) 项目结构目录:

在这里web.xml里不写任何配置
三。在config包下分别创建配置类与属性文件
1. AppConfig.java
package com.bdqn.lyrk.ssm.study.app;

import com.alibaba.druid.pool.DruidDataSource;

import org.mybatis.spring.SqlSessionFactoryBean;

import org.mybatis.spring.annotation.MapperScan;

import org.springframework.context.annotation.Bean;

import org.springframework.context.annotation.ComponentScan;

import org.springframework.context.annotation.Configuration;

import org.springframework.context.annotation.PropertySource;

import org.springframework.context.support.PropertySourcesPlaceholderConfigurer;

import org.springframework.core.io.support.PathMatchingResourcePatternResolver;

import org.springframework.jdbc.datasource.DataSourceTransactionManager;

import org.springframework.transaction.PlatformTransactionManager;

import org.springframework.transaction.annotation.EnableTransactionManagement;

import javax.sql.DataSource;

import java.io.IOException;

/**

 * spring的配置类

 *

 * @author chen.nie

 * @date 2018/6/24

 **/

@Configuration //表明此类是配置类

@ComponentScan // 扫描自定义的组件(repository service component controller)

@PropertySource("classpath:application.properties") // 读取application.properties

@MapperScan("com.bdqn.lyrk.ssm.study.app.mapper") //扫描Mybatis的Mapper接口

@EnableTransactionManagement //开启事务管理

public class AppConfig {

    /**

     * 配置数据源

     *

     * @date 2018/6/24

     **/

    @Bean

    public DataSource dataSource(PropertiesConfig propertiesConfig) {

        DruidDataSource dataSource = new DruidDataSource();

        dataSource.setUsername(propertiesConfig.getUserName());

        dataSource.setPassword(propertiesConfig.getPassword());

        dataSource.setUrl(propertiesConfig.getUrl());

        dataSource.setDriverClassName(propertiesConfig.getDriverClass());

        return dataSource;

    }

    /**

     * 配置mybatis的SqlSessionFactoryBean

     *

     * @param dataSource

     * @param propertiesConfig

     * @return

     */

    @Bean

    public SqlSessionFactoryBean sqlSessionFactoryBean(DataSource dataSource, PropertiesConfig propertiesConfig) throws IOException {

        SqlSessionFactoryBean sqlSessionFactoryBean = new SqlSessionFactoryBean();

        sqlSessionFactoryBean.setDataSource(dataSource);

        sqlSessionFactoryBean.setTypeAliasesPackage(propertiesConfig.getMybatisTypeAliasPackages());

        // 动态获取SqlMapper

        PathMatchingResourcePatternResolver classPathResource = new PathMatchingResourcePatternResolver();

        sqlSessionFactoryBean.setMapperLocations(classPathResource.getResources(propertiesConfig.getMapperLocations()));

        return sqlSessionFactoryBean;

    }

    /**

     * 配置spring的声明式事务

     *

     * @return

     */

    @Bean

    public PlatformTransactionManager transactionManager(DataSource dataSource) {

        DataSourceTransactionManager dataSourceTransactionManager = new DataSourceTransactionManager(dataSource);

        return dataSourceTransactionManager;

    }

    @Bean

    public static PropertySourcesPlaceholderConfigurer propertySourcesPlaceholderConfigurer() {

        PropertySourcesPlaceholderConfigurer propertySourcesPlaceholderConfigurer = new PropertySourcesPlaceholderConfigurer();

        return propertySourcesPlaceholderConfigurer;

    }

}
没什么好说的,这里主要创建Spring与Mybatis整合的相关对象以及声明式事务切面,我们把配置文件中的东西通通用java代码创建,注意@Bean注解的使用
2.DispatcherConfig
 package com.bdqn.lyrk.ssm.study.config;

 import org.springframework.beans.factory.annotation.Autowired;

 import org.springframework.context.annotation.Bean;

 import org.springframework.context.annotation.Configuration;

 import org.springframework.web.servlet.config.annotation.EnableWebMvc;

 import org.springframework.web.servlet.config.annotation.InterceptorRegistry;

 import org.springframework.web.servlet.config.annotation.ResourceHandlerRegistry;

 import org.springframework.web.servlet.config.annotation.WebMvcConfigurerAdapter;

 import org.springframework.web.servlet.handler.SimpleMappingExceptionResolver;

 import org.springframework.web.servlet.view.InternalResourceViewResolver;

 import org.springframework.web.servlet.view.JstlView;

 import java.util.Properties;

 @Configuration

 @EnableWebMvc

 public class DispatcherConfig extends WebMvcConfigurerAdapter {

     @Autowired

     private PropertyConfig propertyConfig;

     @Bean

     public InternalResourceViewResolver internalResourceViewResolver() {

         InternalResourceViewResolver internalResourceViewResolver = new InternalResourceViewResolver();

         internalResourceViewResolver.setViewClass(JstlView.class);

         internalResourceViewResolver.setPrefix(propertyConfig.getWebViewPrefix());

         internalResourceViewResolver.setSuffix(propertyConfig.getWebViewSuffix());

         return internalResourceViewResolver;

     }

     /**

      * 设置统一错误处理要跳转的视图

      *

      * @return

      */

     @Bean

     public SimpleMappingExceptionResolver simpleMappingExceptionResolver() {

         SimpleMappingExceptionResolver simpleMappingExceptionResolver = new SimpleMappingExceptionResolver();

         Properties properties = new Properties();

         properties.getProperty("java.lang.Exception", "error");

         simpleMappingExceptionResolver.setExceptionMappings(properties);

         return simpleMappingExceptionResolver;

     }

     /**

      * 添加静态资源

      *

      * @param registry

      */

     @Override

     public void addResourceHandlers(ResourceHandlerRegistry registry) {

         registry.addResourceHandler(propertyConfig.getWebStaticHandler()).addResourceLocations(propertyConfig.getWebStaticResource()).setCachePeriod(propertyConfig.getWebStaticCachedPeriod());

     }

     /**

      * 添加拦截器

      *

      * @param registry

      */

     @Override

     public void addInterceptors(InterceptorRegistry registry) {

         super.addInterceptors(registry);

     }

 }
此处配置SpringMVC的视图解析器,静态资源等,依旧照搬配置文件中的代码
3.PropertiesConfig
package com.bdqn.lyrk.ssm.study.config;

import org.springframework.beans.factory.annotation.Value;

import org.springframework.context.annotation.Bean;

import org.springframework.context.annotation.Configuration;

import org.springframework.context.annotation.PropertySource;

import org.springframework.context.support.PropertySourcesPlaceholderConfigurer;

@Configuration

@PropertySource("classpath:application.properties")

public class PropertyConfig {

    @Value("${spring.datasource.url}")

    private String url;

    @Value("${spring.datasource.driver}")

    private String driver;

    @Value("${spring.datasource.user}")

    private String user;

    @Value("${spring.datasource.password}")

    private String password;

    @Value("${spring.web.view.prefix}")

    private String webViewPrefix;

    @Value("${spring.web.view.suffix}")

    private String webViewSuffix;

    @Value("${spring.web.static.handler}")

    private String webStaticHandler;

    @Value("${spring.web.static.resource}")

    private String webStaticResource;

    @Value("${spring.web.static.cache.period}")

    private Integer webStaticCachedPeriod;

    @Value("${mybatis.type.alias.package}")

    private String mybatisTypeAliasPackage;

    public String getWebViewPrefix() {

        return webViewPrefix;

    }

    public String getWebViewSuffix() {

        return webViewSuffix;

    }

    public String getWebStaticHandler() {

        return webStaticHandler;

    }

    public String getWebStaticResource() {

        return webStaticResource;

    }

    public Integer getWebStaticCachedPeriod() {

        return webStaticCachedPeriod;

    }

    public String getMybatisTypeAliasPackage() {

        return mybatisTypeAliasPackage;

    }

    public String getUrl() {

        return url;

    }

    public String getDriver() {

        return driver;

    }

    public String getUser() {

        return user;

    }

    public String getPassword() {

        return password;

    }

    @Bean

    public static PropertySourcesPlaceholderConfigurer propertySourcesPlaceholderConfigurer() {

        return new PropertySourcesPlaceholderConfigurer();

    }

}
此处用于读取application.properties的文件内容 注意@Value与@PropertySource的含义
4.MyWebAppInitializer
 package com.bdqn.lyrk.ssm.study.config;

 import org.springframework.web.filter.CharacterEncodingFilter;

 import org.springframework.web.servlet.DispatcherServlet;

 import org.springframework.web.servlet.support.AbstractAnnotationConfigDispatcherServletInitializer;

 import javax.servlet.Filter;

 import javax.servlet.ServletContext;

 import javax.servlet.ServletException;

 /**

  * 初始化servlet WebApplicationContext 相关

  *

  * @author chen.nie

  * @date 2017/12/28

  **/

 public class MyWebAppInitializer extends AbstractAnnotationConfigDispatcherServletInitializer {

     @Override

     protected Class<?>[] getRootConfigClasses() {

         return new Class[]{AppConfig.class};

     }

     @Override

     protected Class<?>[] getServletConfigClasses() {

         return new Class[]{DispatcherServlet.class};

     }

     @Override

     protected String[] getServletMappings() {

         return new String[]{"/"};

     }

     /**

      * 添加过滤器

      *

      * @return

      */

     @Override

     protected Filter[] getServletFilters() {

         CharacterEncodingFilter characterEncodingFilter = new CharacterEncodingFilter();

         characterEncodingFilter.setEncoding("UTF-8");

         characterEncodingFilter.setForceEncoding(true);

         return new Filter[]{characterEncodingFilter};

     }

 }
在这里请大家关注一下这个类,这段代码的含义和配置SpringMVC的含义一样:
 <web-app>

     <context-param>

         <param-name>contextConfigLocation</param-name>

         <param-value>/WEB-INF/root-context.xml</param-value>

     </context-param>

     <servlet>

         <servlet-name>dispatcher</servlet-name>

         <servlet-class>org.springframework.web.servlet.DispatcherServlet</servlet-class>

         <init-param>

             <param-name>contextConfigLocation</param-name>

             <param-value></param-value>

         </init-param>

         <load-on-startup>1</load-on-startup>

     </servlet>

     <servlet-mapping>

         <servlet-name>dispatcher</servlet-name>

         <url-pattern>/</url-pattern>

     </servlet-mapping>

     <listener>

         <listener-class>org.springframework.web.context.ContextLoaderListener</listener-class>

     </listener>

 </web-app>
5. application.properties
#数据库连接

spring.datasource.user=root

spring.datasource.password=root

spring.datasource.driver=com.mysql.jdbc.Driver

spring.datasource.url=jdbc:mysql://localhost:3306/MySchool?characterEncoding=utf-8&useSSL=false

#web设置相关

spring.web.view.prefix=/WEB-INF/jsp/

spring.web.view.suffix=.jsp

spring.web.static.handler=/assets/**

spring.web.static.resource=classpath:/assets/

spring.web.static.cache.period=360000

#mybatis设置相关

mybatis.type.alias.package=com.bdqn.lyrk.ssm.study.entity
6.创建MyBatis对应的mapper
package com.bdqn.lyrk.ssm.study.mapper;

import com.bdqn.lyrk.ssm.study.entity.StudentEntity;

import org.apache.ibatis.annotations.Select;

import java.util.List;

public interface StudentMapper {

    @Select("select * from Student")

    List<StudentEntity> selectAll();

}
7.创建业务逻辑
 package com.bdqn.lyrk.ssm.study.service.impl;

 import com.bdqn.lyrk.ssm.study.entity.StudentEntity;

 import com.bdqn.lyrk.ssm.study.mapper.StudentMapper;

 import com.bdqn.lyrk.ssm.study.service.IStudentService;

 import org.springframework.beans.factory.annotation.Autowired;

 import org.springframework.stereotype.Service;

 import org.springframework.transaction.annotation.Transactional;

 import java.util.List;

 @Service

 public class StudentServiceImpl implements IStudentService {

     @Autowired

     private StudentMapper studentMapper;

     @Override

     public List<StudentEntity> selectAll() {

         return studentMapper.selectAll();

     }

     @Transactional

     @Override

     public int save(StudentEntity studentEntity) {

         return 0;

     }

 }
8.创建Controller
package com.bdqn.lyrk.ssm.study.controller;

import com.bdqn.lyrk.ssm.study.entity.StudentEntity;

import com.bdqn.lyrk.ssm.study.service.IStudentService;

import org.springframework.beans.factory.annotation.Autowired;

import org.springframework.stereotype.Controller;

import org.springframework.ui.ModelMap;

import org.springframework.web.bind.annotation.GetMapping;

import java.util.List;

@Controller

public class IndexController {

    @Autowired

    private IStudentService studentService;

    @GetMapping("/index")

    public String index(ModelMap modelMap) {

        List<StudentEntity> list = studentService.selectAll();

        modelMap.put("students", list);

        return "index";

    }

}
9.index.jsp文件中内容
<%--

  Created by IntelliJ IDEA.

  User: chen.nie

  Date: 2017/12/23

  Time: 下午8:40

  To change this template use File | Settings | File Templates.

--%>

<%@ page contentType="text/html;charset=UTF-8" language="java" %>

<%@taglib prefix="c" uri="http://java.sun.com/jsp/jstl/core" %>

<html>

  <head>

    <title>$Title$</title>

  </head>

  <body>

  <c:forEach items="${students}" var="student">

      ${student.stuName}

  </c:forEach>

  </body>

</html>
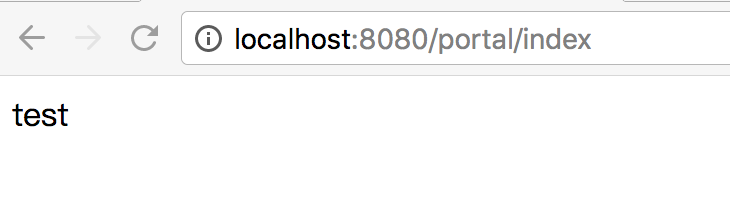
10.启动tomcat后访问http://localhost:8080/portal/index得到如下界面
OK!大功告成,注意前4步里面注解的运用,后面的步骤和往常的写法无异,想必大家都很熟悉了吧。
SpringMvc+Spring+MyBatis 基于注解整合的更多相关文章
- Spring+Mybatis基于注解整合Redis
基于这段时间折腾redis遇到了各种问题,想着整理一下.本文主要介绍基于Spring+Mybatis以注解的形式整合Redis.废话少说,进入正题. 首先准备Redis,我下的是Windows版,下载 ...
- springMVC,spring,mybatis全注解搭建框架--第一步,让框架跑起来
自己从事java开发工作也有一年多了,自己却没有亲手搭建一个完整的框架.于是今天自己动手搭建一个,过程中遇到一些问题,倒腾了大半天终于搞定了. 现在给大家分享一下过程,自己也记录下来,以后学习参考使用 ...
- SpringMVC+Spring+Mybatis+Maven+mysql整合
一.准备工作1.工具:jdk1.7.0_80(64)+tomcat7.0.68+myeclipse10.6+mysql-5.5.48-win322. 开发环境安装配置.Maven项目创建(参考:htt ...
- SSM(SpringMVC+Spring+MyBatis)三大框架使用Maven快速搭建整合(实现数据库数据到页面进行展示)
本文介绍使用SpringMVC+Spring+MyBatis三大框架使用Maven快速搭建一个demo,实现数据从数据库中查询返回到页面进行展示的过程. 技术选型:SpringMVC+Spring+M ...
- spring + Mybatis + pageHelper + druid 整合源码分享
springMvc + spring + Mybatis + pageHelper + druid 整合 spring 和druid整合,spring 整合druid spring 和Mybatis ...
- 3.springMVC+spring+Mybatis整合Demo(单表的增删该查,这里主要是贴代码,不多解释了)
前面给大家讲了整合的思路和整合的过程,在这里就不在提了,直接把springMVC+spring+Mybatis整合的实例代码(单表的增删改查)贴给大家: 首先是目录结构: 仔细看看这个目录结构:我不详 ...
- 2.springMVC+spring+Mybatis整合
前面已经说了,springMVC+spring+Mybatis的整合思路了,现在就照着这个思路来做一下: 在开始之前先来看一下工程的目录结构: config这个目录底下放的都是配置文件: mybati ...
- SpringMVC+Spring+Mybatis整合
SpringMVC+Spring+Mybatis整合 导包 配置jdbc.properties.log4j.properties jdbc.driver=com.mysql.jdbc.Driver j ...
- springmvc学习总结(二) -- maven+springmvc+spring+mybatis+mysql详细搭建整合过程讲解
@_@ 写在最前 之前分享过下面这几篇: mybatis学习笔记(五) -- maven+spring+mybatis从零开始搭建整合详细过程(上)(附demo和搭建过程遇到的问题解决方法) myba ...
随机推荐
- 【iOS】swift 让程序挂起后,能在后台继续运行任务
1,程序的挂起和退出 由于iOS设备资源有限.当用户点击了home键,或者另一个应用程序启动了.那么原先那个程序便进入后台被挂起,不是退出,只是停止执行代码,同时它的内存被锁定.当应用程序恢复时,它会 ...
- VMware虚拟机误删除vmdk文件后如何恢复?
故障描述: Dell R710系列服务器(用于VMware虚拟主机),Dell MD 3200系列存储(用于存放虚拟机文件),VMware ESXi 5.5版本,因意外断电,导致某台虚拟机不能正常启动 ...
- php的打印sql语句的方法
echo M()->_sql(); 这样就可以调试当前生成的sql语句: //获取指定天的开始时间和结束时间 $datez="2016-05-12"; $t = strtot ...
- MongoDb进阶实践之五 MongoDB修改命令详述
一.引言 上一篇文章我们已经详细介绍了MongoDB数据库的有关查询的内容,但是这只是所有查询命令的冰山一角.所有查询命令都写完也没有必要,我只是写了一些常用的命令,对MongoDB的 ...
- ELK学习总结(2-4)bulk 批量操作-实现多个文档的创建、索引、更新和删除
bulk 批量操作-实现多个文档的创建.索引.更新和删除 ----------------------------------------------------------------------- ...
- python入门(8)数据类型和变量
python入门(8)数据类型和变量 数据类型 在Python中,能够直接处理的数据类型有以下几种: 整数 Python可以处理任意大小的整数,当然包括负整数,在程序中的表示方法和数学上的写法一模一样 ...
- Spark入门(1-4)安装、运行Spark
如何安装Spark 安装和使用Spark有几种不同方式.你可以在自己的电脑上将Spark作为一个独立的框架安装或者从诸如Cloudera,HortonWorks或MapR之类的供应商处获取一个Spar ...
- python网络爬虫与信息提取 学习笔记day3
Day3: 只需两行代码解析html或xml信息 具体代码实现:day3_1 注意BeautifulSoup的B和S需要大写,因为python大小写敏感 import requests r ...
- Python入门之PyCharm的快捷键与常用设置和扩展(Win系统)
1. PyCharm的快捷键 2 . PyCharm的常用设置和扩展 ---------------------------------------------------------------- ...
- Centos系统运行nodejs
这里我们需要先搭建一下运行的环境,直接yum安装就可以了! [root@iZwz9f80ph5u8tlqp6pi9cZ ~]# yum -y install nodejs 这里我们的环境就搭好了!安装 ...