Spring Security笔记:自定义Login/Logout Filter、AuthenticationProvider、AuthenticationToken
在前面的学习中,配置文件中的<http>...</http>都是采用的auto-config="true"这种自动配置模式,根据Spring Security文档的说明:
------------------
auto-config Automatically registers a login form, BASIC authentication, logout services. If set to "true", all of these capabilities are added (although you can still customize the configuration of each by providing the respective element).
------------------
可以理解为:
     <http>

         <form-login />

         <http-basic />

         <logout />

     </http>
下面是Spring Security Filter Chain的列表:
| Alias | Filter Class | Namespace Element or Attribute |
|---|---|---|
|
CHANNEL_FILTER |
|
|
|
SECURITY_CONTEXT_FILTER |
|
|
|
CONCURRENT_SESSION_FILTER |
|
|
|
HEADERS_FILTER |
|
|
|
CSRF_FILTER |
|
|
|
LOGOUT_FILTER |
|
|
|
X509_FILTER |
|
|
|
PRE_AUTH_FILTER |
|
N/A |
|
CAS_FILTER |
|
N/A |
|
FORM_LOGIN_FILTER |
|
|
|
BASIC_AUTH_FILTER |
|
|
|
SERVLET_API_SUPPORT_FILTER |
|
|
|
JAAS_API_SUPPORT_FILTER |
|
|
|
REMEMBER_ME_FILTER |
|
|
|
ANONYMOUS_FILTER |
|
|
|
SESSION_MANAGEMENT_FILTER |
|
|
|
EXCEPTION_TRANSLATION_FILTER |
|
|
|
FILTER_SECURITY_INTERCEPTOR |
|
|
|
SWITCH_USER_FILTER |
|
N/A |
其中红色标出的二个Filter对应的是 “注销、登录”,如果不使用auto-config=true,开发人员可以自行“重写”这二个Filter来达到类似的目的,比如:默认情况下,登录表单必须使用post方式提交,在一些安全性相对不那么高的场景中(比如:企业内网应用),如果希望通过类似 http://xxx/login?username=abc&password=123的方式直接登录,可以参考下面的代码:
 package com.cnblogs.yjmyzz;

 import javax.servlet.http.HttpServletRequest;

 import javax.servlet.http.HttpServletResponse;

 //import org.springframework.security.authentication.AuthenticationServiceException;

 import org.springframework.security.authentication.UsernamePasswordAuthenticationToken;

 import org.springframework.security.core.Authentication;

 import org.springframework.security.core.AuthenticationException;

 import org.springframework.security.web.authentication.UsernamePasswordAuthenticationFilter;

 public class CustomLoginFilter extends UsernamePasswordAuthenticationFilter {

     public Authentication attemptAuthentication(HttpServletRequest request,

             HttpServletResponse response) throws AuthenticationException {

         // if (!request.getMethod().equals("POST")) {

         // throw new AuthenticationServiceException(

         // "Authentication method not supported: "

         // + request.getMethod());

         // }

         String username = obtainUsername(request).toUpperCase().trim();

         String password = obtainPassword(request);

         UsernamePasswordAuthenticationToken authRequest = new UsernamePasswordAuthenticationToken(

                 username, password);

         setDetails(request, authRequest);

         return this.getAuthenticationManager().authenticate(authRequest);

     }

 }
即:从UsernamePasswordAuthenticationFilter继承一个类,然后把关于POST方式判断的代码注释掉即可。默认情况下,Spring Security的用户名是区分大小写,如果觉得没必要,上面的代码同时还演示了如何在Filter中自动将其转换成大写。
默认情况下,登录成功后,Spring Security有自己的handler处理类,如果想在登录成功后,加一点自己的处理逻辑,可参考下面的代码:
 package com.cnblogs.yjmyzz;

 import java.io.IOException;

 import javax.servlet.ServletException;

 import javax.servlet.http.HttpServletRequest;

 import javax.servlet.http.HttpServletResponse;

 import org.springframework.security.core.Authentication;

 import org.springframework.security.web.authentication.SavedRequestAwareAuthenticationSuccessHandler;

 public class CustomLoginHandler extends

         SavedRequestAwareAuthenticationSuccessHandler {

     @Override

     public void onAuthenticationSuccess(HttpServletRequest request,

             HttpServletResponse response, Authentication authentication)

             throws ServletException, IOException {

         super.onAuthenticationSuccess(request, response, authentication);

         //这里可以追加开发人员自己的额外处理

         System.out

                 .println("CustomLoginHandler.onAuthenticationSuccess() is called!");

     }

 }
类似的,要自定义LogoutFilter,可参考下面的代码:
 package com.cnblogs.yjmyzz;

 import org.springframework.security.web.authentication.logout.LogoutFilter;

 import org.springframework.security.web.authentication.logout.LogoutHandler;

 import org.springframework.security.web.authentication.logout.LogoutSuccessHandler;

 public class CustomLogoutFilter extends LogoutFilter {

     public CustomLogoutFilter(String logoutSuccessUrl, LogoutHandler[] handlers) {

         super(logoutSuccessUrl, handlers);

     }

     public CustomLogoutFilter(LogoutSuccessHandler logoutSuccessHandler,

             LogoutHandler[] handlers) {

         super(logoutSuccessHandler, handlers);

     }

 }
即:从LogoutFilter继承一个类,如果还想在退出后加点自己的逻辑(比如注销后,清空额外的Cookie之类\记录退出时间、地点之类),可重写doFilter方法,但不建议这样,有更好的做法,自行定义logoutSuccessHandler,然后在运行时,通过构造函数注入即可。
下面是自定义退出成功处理的handler示例:
 package com.cnblogs.yjmyzz;

 import javax.servlet.http.HttpServletRequest;

 import javax.servlet.http.HttpServletResponse;

 import org.springframework.security.core.Authentication;

 import org.springframework.security.web.authentication.logout.LogoutHandler;

 public class CustomLogoutHandler implements LogoutHandler {

     public CustomLogoutHandler() {

     }

     @Override

     public void logout(HttpServletRequest request,

             HttpServletResponse response, Authentication authentication) {

         System.out.println("CustomLogoutSuccessHandler.logout() is called!");

     }

 }
这二个Filter弄好后,剩下的就是改配置:
 <beans:beans xmlns="http://www.springframework.org/schema/security"

     xmlns:beans="http://www.springframework.org/schema/beans" xmlns:xsi="http://www.w3.org/2001/XMLSchema-instance"

     xsi:schemaLocation="http://www.springframework.org/schema/beans

     http://www.springframework.org/schema/beans/spring-beans-3.0.xsd

     http://www.springframework.org/schema/security

     http://www.springframework.org/schema/security/spring-security-3.2.xsd">

     <http entry-point-ref="loginEntryPoint">

         <!-- 替换默认的LogoutFilter -->

         <custom-filter ref="customLogoutFilter" position="LOGOUT_FILTER" />

         <!-- 替换默认的LoginFilter -->

         <custom-filter ref="customLoginFilter" position="FORM_LOGIN_FILTER" />

         <intercept-url pattern="/admin" access="ROLE_USER" />

     </http>

     <authentication-manager alias="authenticationManager">

         ...

     </authentication-manager>

     <beans:bean id="loginEntryPoint"

         class="org.springframework.security.web.authentication.LoginUrlAuthenticationEntryPoint">

         <!-- 默认登录页的url -->

         <beans:constructor-arg value="/login" />

     </beans:bean>

     <beans:bean id="customLoginFilter" class="com.cnblogs.yjmyzz.CustomLoginFilter">

         <!-- 校验登录是否有效的虚拟url -->

         <beans:property name="filterProcessesUrl" value="/checklogin" />

         <beans:property name="authenticationManager" ref="authenticationManager" />

         <beans:property name="usernameParameter" value="username" />

         <beans:property name="passwordParameter" value="password" />

         <beans:property name="authenticationSuccessHandler">

             <!-- 自定义登录成功后的处理handler -->

             <beans:bean class="com.cnblogs.yjmyzz.CustomLoginHandler">

                 <!-- 登录成功后的默认url -->

                 <beans:property name="defaultTargetUrl" value="/welcome" />

             </beans:bean>

         </beans:property>

         <beans:property name="authenticationFailureHandler">

             <beans:bean

                 class="org.springframework.security.web.authentication.SimpleUrlAuthenticationFailureHandler">

                 <!-- 登录失败后的默认Url -->

                 <beans:property name="defaultFailureUrl" value="/login?error" />

             </beans:bean>

         </beans:property>

     </beans:bean>

     <beans:bean id="customLogoutFilter" class="com.cnblogs.yjmyzz.CustomLogoutFilter">

         <!-- 处理退出的虚拟url -->

         <beans:property name="filterProcessesUrl" value="/logout" />

         <!-- 退出处理成功后的默认显示url -->

         <beans:constructor-arg index="0" value="/login?logout" />

         <beans:constructor-arg index="1">

             <!-- 退出成功后的handler列表 -->

             <beans:array>

                 <beans:bean id="securityContextLogoutHandler"

                     class="org.springframework.security.web.authentication.logout.SecurityContextLogoutHandler" />

                 <!-- 加入了开发人员自定义的退出成功处理 -->

                 <beans:bean id="customLogoutSuccessHandler" class="com.cnblogs.yjmyzz.CustomLogoutHandler" />

             </beans:array>

         </beans:constructor-arg>

     </beans:bean>

 </beans:beans>
用户输入“用户名、密码”,并点击完登录后,最终实现校验的是AuthenticationProvider,而且一个webApp中可以同时使用多个Provider,下面是一个自定义Provider的示例代码:
 package com.cnblogs.yjmyzz;

 import java.util.ArrayList;

 import java.util.Arrays;

 import java.util.Collection;

 import org.springframework.security.authentication.UsernamePasswordAuthenticationToken;

 import org.springframework.security.authentication.dao.AbstractUserDetailsAuthenticationProvider;

 import org.springframework.security.core.AuthenticationException;

 import org.springframework.security.core.GrantedAuthority;

 import org.springframework.security.core.authority.SimpleGrantedAuthority;

 import org.springframework.security.core.userdetails.User;

 import org.springframework.security.core.userdetails.UserDetails;

 public class CustomAuthenticationProvider extends

         AbstractUserDetailsAuthenticationProvider {

     @Override

     protected void additionalAuthenticationChecks(UserDetails userDetails,

             UsernamePasswordAuthenticationToken authentication)

             throws AuthenticationException {

         //如果想做点额外的检查,可以在这个方法里处理,校验不通时,直接抛异常即可

         System.out

                 .println("CustomAuthenticationProvider.additionalAuthenticationChecks() is called!");

     }

     @Override

     protected UserDetails retrieveUser(String username,

             UsernamePasswordAuthenticationToken authentication)

             throws AuthenticationException {

         System.out

                 .println("CustomAuthenticationProvider.retrieveUser() is called!");

         String[] whiteLists = new String[] { "ADMIN", "SUPERVISOR", "JIMMY" };

         // 如果用户在白名单里,直接放行(注:仅仅只是演示,千万不要在实际项目中这么干!)

         if (Arrays.asList(whiteLists).contains(username)) {

             Collection<GrantedAuthority> authorities = new ArrayList<GrantedAuthority>();

             authorities.add(new SimpleGrantedAuthority("ROLE_USER"));

             UserDetails user = new User(username, "whatever", authorities);

             return user;

         }

         return new User(username, "no-password", false, false, false, false,

                 new ArrayList<GrantedAuthority>());

     }

 }
这里仅仅只是出于演示目的,人为留了一个后门,只要用户名在白名单之列,不管输入什么密码,都可以通过!(再次提示:只是出于演示目的,千万不要在实际项目中使用)
相关的配置节点修改如下:
     <authentication-manager alias="authenticationManager">

         <authentication-provider>

             <user-service>

                 <user name="yjmyzz" password="123456" authorities="ROLE_USER" />

             </user-service>

         </authentication-provider>

         <!-- 加入开发人员自定义的Provider -->

         <authentication-provider ref="customProvider" />

     </authentication-manager>

     <beans:bean id="customProvider"

         class="com.cnblogs.yjmyzz.CustomAuthenticationProvider" />
运行时,Spring Security将会按照顺序,依次从上向下调用所有Provider,只要任何一个Provider校验通过,整个认证将通过。这也意味着:用户yjmyzz/123456以及白名单中的用户名均可以登录系统。这是一件很有意思的事情,试想一下,如果有二个现成的系统,各有自己的用户名/密码(包括不同的存储机制),想把他们集成在一个登录页面使用,技术上讲,只要实现二个Provider各自对应不同的处理,可以很轻易的实现多个系统的认证集成。(注:当然实际应用中,多个系统的认证集成,更多的是采用SSO来处理,这里只是提供了另一种思路)
最后来看下如何自定义AuthenticationToken,如果我们想在登录页上加一些额外的输入项(比如:验证码,安全问题之类),
为了能让这些额外添加的输入项,传递到Provider中参与验证,就需要对UsernamePasswordAuthenticationToken进行扩展,参考代码如下:
 package com.cnblogs.yjmyzz;

 import org.springframework.security.authentication.UsernamePasswordAuthenticationToken;

 public class CustomAuthenticationToken extends

         UsernamePasswordAuthenticationToken {

     private static final long serialVersionUID = 5414106440823275021L;

     public CustomAuthenticationToken(String principal, String credentials,

             Integer questionId, String answer) {

         super(principal, credentials);

         this.answer = answer;

         this.questionId = questionId;

     }

     private String answer;

     private Integer questionId;

     public String getAnswer() {

         return answer;

     }

     public void setAnswer(String answer) {

         this.answer = answer;

     }

     public Integer getQuestionId() {

         return questionId;

     }

     public void setQuestionId(Integer questionId) {

         this.questionId = questionId;

     }

 }
这里扩展了二个属性:questionId、answer,为了方便后面“诗句问题"的回答进行判断,还得先做点其它准备工作
 package com.cnblogs.yjmyzz;

 import java.util.Hashtable;

 public class LoginQuestion {

     private static Hashtable<Integer, String> questionTable = new Hashtable<Integer, String>();

     public static Hashtable<Integer, String> getQuestions() {

         if (questionTable.size() <= 0) {

             questionTable.put(1, "葡萄美酒夜光杯/欲饮琵琶马上催");

             questionTable.put(2, "故人西辞黄鹤楼/烟花三月下扬州");

             questionTable.put(3, "孤帆远影碧空尽/唯见长江天际流");

             questionTable.put(4, "相见时难别亦难/东风无力百花残");

             questionTable.put(5, "渔翁夜傍西岩宿/晓汲清湘燃楚竹");

         }

         return questionTable;

     }

 }
预定义了几句唐诗,key即为questionId,value为 "题目/答案"格式。此外,如果答错了,为了方便向用户提示错误原因,还要定义一个异常类:(注:Spring Security中,所有验证失败,都是通过直接抛异常来处理的)
 package com.cnblogs.yjmyzz;

 import org.springframework.security.core.AuthenticationException;

 public class BadAnswerException extends AuthenticationException {

     private static final long serialVersionUID = -3333012976129153127L;

     public BadAnswerException(String msg) {

         super(msg);

     }

 }
原来的CustomLoginFilter也要相应的修改,以接收额外添加的二个参数:
 package com.cnblogs.yjmyzz;

 import java.io.UnsupportedEncodingException;

 import javax.servlet.http.HttpServletRequest;

 import javax.servlet.http.HttpServletResponse;

 import org.springframework.security.core.Authentication;

 import org.springframework.security.core.AuthenticationException;

 import org.springframework.security.web.authentication.UsernamePasswordAuthenticationFilter;

 public class CustomLoginFilter extends UsernamePasswordAuthenticationFilter {

     public Authentication attemptAuthentication(HttpServletRequest request,

             HttpServletResponse response) throws AuthenticationException {

         //解决中文诗句的post乱码问题

         try {

             request.setCharacterEncoding("UTF-8");

         } catch (UnsupportedEncodingException e) {

             e.printStackTrace();

         }

         // if (!request.getMethod().equals("POST")) {

         // throw new AuthenticationServiceException(

         // "Authentication method not supported: "

         // + request.getMethod());

         // }

         String username = obtainUsername(request).toUpperCase().trim();

         String password = obtainPassword(request);

         //获取用户输入的下一句答案

         String answer = obtainAnswer(request);

         //获取问题Id(即: hashTable的key)

         Integer questionId = obtainQuestionId(request);

         //这里将原来的UsernamePasswordAuthenticationToken换成我们自定义的CustomAuthenticationToken

         CustomAuthenticationToken authRequest = new CustomAuthenticationToken(

                 username, password, questionId, answer);

         //这里就将token传到后续验证环节了

         setDetails(request, authRequest);

         return this.getAuthenticationManager().authenticate(authRequest);

     }

     protected String obtainAnswer(HttpServletRequest request) {

         return request.getParameter(answerParameter);

     }

     protected Integer obtainQuestionId(HttpServletRequest request) {

         return Integer.parseInt(request.getParameter(questionIdParameter));

     }

     private String questionIdParameter = "questionId";

     private String answerParameter = "answer";

     public String getQuestionIdParameter() {

         return questionIdParameter;

     }

     public void setQuestionIdParameter(String questionIdParameter) {

         this.questionIdParameter = questionIdParameter;

     }

     public String getAnswerParameter() {

         return answerParameter;

     }

     public void setAnswerParameter(String answerParameter) {

         this.answerParameter = answerParameter;

     }

 }
现在,CustomAuthenticationProvider中的additionalAuthenticationChecks方法中,就能拿到用户提交的下一句答案,进行相关验证了:
     @Override

     protected void additionalAuthenticationChecks(UserDetails userDetails,

             UsernamePasswordAuthenticationToken authentication)

             throws AuthenticationException {

         // 转换为自定义的token

         CustomAuthenticationToken token = (CustomAuthenticationToken) authentication;

         String poem = LoginQuestion.getQuestions().get(token.getQuestionId());

         // 校验下一句的答案是否正确

         if (!poem.split("/")[1].equals(token.getAnswer())) {

             throw new BadAnswerException("the answer is wrong!");

         }

     }
最后来处理前端的login页面及Action
 package com.cnblogs.yjmyzz;

 import java.util.Random;

 import javax.servlet.http.HttpServletRequest;

 import org.springframework.security.authentication.BadCredentialsException;

 import org.springframework.security.authentication.LockedException;

 import org.springframework.stereotype.Controller;

 import org.springframework.web.bind.annotation.RequestMapping;

 import org.springframework.web.bind.annotation.RequestMethod;

 import org.springframework.web.bind.annotation.RequestParam;

 import org.springframework.web.servlet.ModelAndView;

 @Controller

 public class HelloController {

     @RequestMapping(value = { "/", "/welcome" }, method = RequestMethod.GET)

     public ModelAndView welcome() {

         ModelAndView model = new ModelAndView();

         model.addObject("title",

                 "Welcome - Spring Security Custom login/logout Filter");

         model.addObject("message", "This is welcome page!");

         model.setViewName("hello");

         return model;

     }

     @RequestMapping(value = "/admin", method = RequestMethod.GET)

     public ModelAndView admin() {

         ModelAndView model = new ModelAndView();

         model.addObject("title",

                 "Admin - Spring Security Custom login/logout Filter");

         model.addObject("message", "This is protected page!");

         model.setViewName("admin");

         return model;

     }

     @RequestMapping(value = "/login", method = RequestMethod.GET)

     public ModelAndView login(

             @RequestParam(value = "error", required = false) String error,

             @RequestParam(value = "logout", required = false) String logout,

             HttpServletRequest request) {

         ModelAndView model = new ModelAndView();

         if (error != null) {

             model.addObject("error",

                     getErrorMessage(request, "SPRING_SECURITY_LAST_EXCEPTION"));

         }

         if (logout != null) {

             model.addObject("msg", "You've been logged out successfully.");

         }

         //从预定义的诗句中,随机挑一个上句

         Random rnd = new Random();

         int questionId = rnd.nextInt(LoginQuestion.getQuestions().size() + 1);

         if (questionId == 0) {

             questionId = 1;

         }

         model.addObject("questionId", questionId);

         model.addObject("question", LoginQuestion.getQuestions()

                 .get(questionId).split("/")[0]);

         model.setViewName("login");

         return model;

     }

     private String getErrorMessage(HttpServletRequest request, String key) {

         Exception exception = (Exception) request.getSession()

                 .getAttribute(key);

         String error = "";

         if (exception instanceof BadCredentialsException) {

             error = "Invalid username and password!";

         } else if (exception instanceof BadAnswerException) {

             error = exception.getMessage();

         } else if (exception instanceof LockedException) {

             error = exception.getMessage();

         } else {

             error = "Invalid username and password!";

         }

         return error;

     }

 }
代码很简单,从预定义的诗句中,随机挑一句,并把questionId及question放到model中,传给view
<%@ page language="java" contentType="text/html; charset=UTF-8"
pageEncoding="UTF-8"%>
<%@ taglib prefix="c" uri="http://java.sun.com/jsp/jstl/core"%>
<!DOCTYPE html PUBLIC "-//W3C//DTD HTML 4.01 Transitional//EN" "http://www.w3.org/TR/html4/loose.dtd">
<html>
<head>
<meta http-equiv="Content-Type" content="text/html; charset=UTF-8">
<title>Login Page</title>
<link rel="Stylesheet" type="text/css"
href="${pageContext.request.contextPath}/resources/css/login.css" />
</head>
<body onload='document.loginForm.username.focus();'>
<h1>Spring Security CustomFilter(XML)</h1> <div id="login-box"> <c:if test="${not empty error}">
<div class="error">${error}</div>
</c:if>
<c:if test="${not empty msg}">
<div class="msg">${msg}</div>
</c:if>
<form name='loginForm' action="<c:url value='checklogin' />"
method='POST'>
<table>
<tr>
<td>User:</td>
<td><input type='text' name='username' value=''></td>
</tr>
<tr>
<td>Password:</td>
<td><input type='password' name='password' /></td>
</tr>
<tr>
<td valign="top">Question:</td>
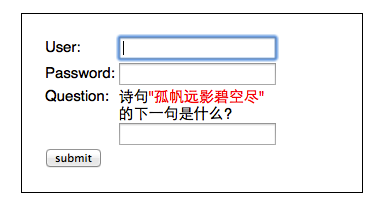
<td>诗句<span style="color:red">"${question}"</span><br/>的下一句是什么?<br /> <input type='text'
name='answer' value=''>
</td>
</tr>
<tr>
<td colspan='2'><input name="submit" type="submit"
value="submit" /></td>
</tr>
</table>
<input type="hidden" name="${_csrf.parameterName}"
value="${_csrf.token}" /> <input type="hidden" name="questionId"
value="${questionId}" />
</form>
</div>
</body>
</html>
ok,完工!
不过,有一个小问题要提醒一下:对本文所示案例而言,因为同时应用了二个Provider,一个是默认的,一个是我们后来自定义的,而对"下一句"的答案验证,只在CustomAuthenticationProvider中做了处理,换句话说,如果用户在界面上输入的用户名/密码是yjmyzz/123456,根据前面讲到的规则,默认的Provider会先起作用,认证通过直接忽略”下一句“的验证,只有输入白名单中的用户名时,才会走CustomAuthenticationProvider的验证流程。
国际惯例,最后附上示例源代码:SpringSecurity-CustomFilter.zip
Spring Security笔记:自定义Login/Logout Filter、AuthenticationProvider、AuthenticationToken的更多相关文章
- Spring Security笔记:Hello World
本文演示了Spring Security的最最基本用法,二个页面(或理解成二个url),一个需要登录认证后才能访问(比如:../admin/),一个可匿名访问(比如:../welcome) 注:以下内 ...
- Spring Security笔记:HTTP Basic 认证
在第一节 Spring Security笔记:Hello World 的基础上,只要把Spring-Security.xml里改一个位置 <http auto-config="true ...
- Spring Security笔记:使用数据库进行用户认证(form login using database)
在前一节,学习了如何自定义登录页,但是用户名.密码仍然是配置在xml中的,这样显然太非主流,本节将学习如何把用户名/密码/角色存储在db中,通过db来实现用户认证 一.项目结构 与前面的示例相比,因为 ...
- Spring Security笔记:自定义登录页
以下内容参考了 http://www.mkyong.com/spring-security/spring-security-form-login-example/ 接上回,在前面的Hello Worl ...
- spring security 3 自定义认证,授权示例
1,建一个web project,并导入所有需要的lib. 2,配置web.xml,使用Spring的机制装载: <?xml version="1.0" encoding=& ...
- Spring Security笔记:Remember Me(下次自动登录)
前一节学习了如何限制登录尝试次数,今天在这个基础上再增加一点新功能:Remember Me. 很多网站,比如博客园,在登录页面就有这个选项,勾选“下次自动登录”后,在一定时间段内,只要不清空浏览器Co ...
- Spring Security笔记:登录尝试次数限制
今天在前面一节的基础之上,再增加一点新内容,默认情况下Spring Security不会对登录错误的尝试次数做限制,也就是说允许暴力尝试,这显然不够安全,下面的内容将带着大家一起学习如何限制登录尝试次 ...
- Spring Security笔记:使用BCrypt算法加密存储登录密码
在前一节使用数据库进行用户认证(form login using database)里,我们学习了如何把“登录帐号.密码”存储在db中,但是密码都是明文存储的,显然不太讲究.这一节将学习如何使用spr ...
- spring security采用自定义登录页和退出功能
更新... 首先采用的是XML配置方式,请先查看 初识Spring security-添加security 在之前的示例中进行代码修改 项目结构如下: 一.修改spring-security.xml ...
随机推荐
- shell的一些应用场景
列出每个IP的连接数 netstat -n | awk '/^tcp/{print $5}' | awk -F: '!/^::/{print $1}' | sort | uniq -c | sort ...
- iframe框架在IE浏览器,360兼容浏览器下将白色背景设为透明色
<IFRAME ID="Frame1" SRC="transparentBody.htm"></IFRAME> iframe在大部分浏览 ...
- C# BlockCollection
1.BlockCollection集合是一个拥有阻塞功能的集合,它就是完成了经典生产者消费者的算法功能. 它没有实现底层的存储结构,而是使用了IProducerConsumerCollection接口 ...
- [UML]UML系列——用例图Use Case
用例图的概念 用例图是描述用例.参与者以及它们之间关系的图. 用例图的作用 用例图是从用户的角度来描述对信息系统的需求,分析产品的功能和行为. 用例图定义和描述了系统的外部可见行为,是分析.设计直至组 ...
- PHP系统声明式事务处理
转自:http://www.jianshu.com/p/34261804bc45 1.数据库事务 事务(Transaction)是并发控制的基本单位.所谓的事务,它是一个操作序列,这些操作要么都执行, ...
- xen下离线读取虚拟机磁盘镜像的补丁
之前在xen-3.4.2和xen-4.1.2下做过几个基于qemu模拟器的补丁,就是想着不用通过xm create(xen3下面)或xl create(xen4下面)启动虚拟机,而能直接去解析磁盘镜像 ...
- source和./的区别
熟悉Linux的朋友常使用·bash·.·sh·.·source·.·.·,但却并非每位朋友都知道其中的区别.我们通过下面一幅图来为大家说明白.
- MySQL 5.7 学习:功能性能的提升
背景: 继上次介绍 初识 MySQL 5.6 新功能.参数完之后,刚好MySQL 5.7又GA了,在官方测试里看到,MySQL5.7在功能.性能.可用性.安全和监控上又提升了很高.现在看看和MySQL ...
- Qt 配置文件QSettings
QString appDirPath = QCoreApplication::applicationDirPath(); QSettings* configIniRead = new QSetting ...
- 解决Delphi图形化界面的TEdit、TLable等组件手动拖拽固定大小,但是编译之后显示有差别的情况
经常遇到这样的情况,在我们使用Delphi的可视化工具进行UI设计的时候,我们拖拽TEdit或者Label组件,并且在可视化界面上设置它们的长.宽 但是当我们编译和运行程序的时候,却发现真正显示出来的 ...