CUDA-GPU编程
参考:http://blog.csdn.net/augusdi/article/details/12833235 第二节
新建NVIDIA项目:
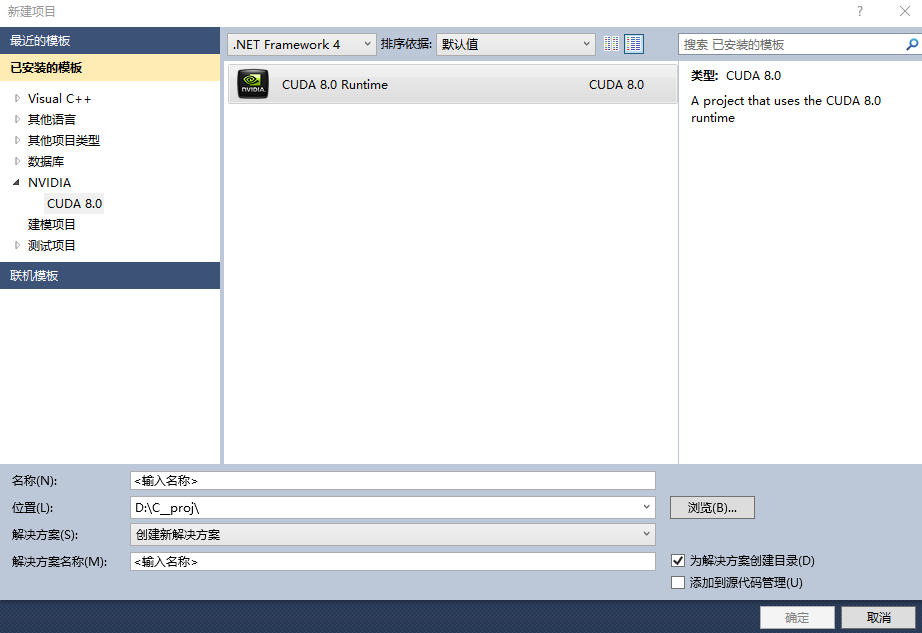
新建项目及会生成一个简单的代码demo,计算矩阵的加法,如下(main中加了一些显示显卡性能的打印):
#include "cuda_runtime.h"

#include "device_launch_parameters.h"

#include <stdio.h>

cudaError_t addWithCuda(int *c, const int *a, const int *b, unsigned int size);

__global__ void addKernel(int *c, const int *a, const int *b)

{

    int i = threadIdx.x;

    c[i] = a[i] + b[i];

}

int main()

{

    const int arraySize = ;

    const int a[arraySize] = { , , , ,  };

    const int b[arraySize] = { , , , ,  };

    int c[arraySize] = {  };

    // Add vectors in parallel.

    cudaError_t cudaStatus = addWithCuda(c, a, b, arraySize);

    if (cudaStatus != cudaSuccess) {

        fprintf(stderr, "addWithCuda failed!");

        return ;

    }

    printf("{1,2,3,4,5} + {10,20,30,40,50} = {%d,%d,%d,%d,%d}\n",

        c[], c[], c[], c[], c[]);

    // cudaDeviceReset must be called before exiting in order for profiling and

    // tracing tools such as Nsight and Visual Profiler to show complete traces.

    cudaStatus = cudaDeviceReset();

    if (cudaStatus != cudaSuccess) {

        fprintf(stderr, "cudaDeviceReset failed!");

        return ;

    }

    int deviceCount;

    cudaGetDeviceCount(&deviceCount);

    int dev;

    for (dev = ; dev < deviceCount; dev++)

    {

        cudaDeviceProp deviceProp;

        cudaGetDeviceProperties(&deviceProp, dev);

        if (dev == )

        {

            if (/*deviceProp.major==9999 && */deviceProp.minor = &&deviceProp.major==)

                printf("\n");

        }

        printf("\nDevice%d:\"%s\"\n", dev, deviceProp.name);

        printf("Total amount of global memory                   %u bytes\n", deviceProp.totalGlobalMem);

        printf("Number of mltiprocessors                        %d\n", deviceProp.multiProcessorCount);

        printf("Total amount of constant memory:                %u bytes\n", deviceProp.totalConstMem);

        printf("Total amount of shared memory per block         %u bytes\n", deviceProp.sharedMemPerBlock);

        printf("Total number of registers available per block:  %d\n", deviceProp.regsPerBlock);

        printf("Warp size                                       %d\n", deviceProp.warpSize);

        printf("Maximum number of threada per block:            %d\n", deviceProp.maxThreadsPerBlock);

        printf("Maximum sizes of each dimension of a block:     %d x %d x %d\n", deviceProp.maxThreadsDim[],

            deviceProp.maxThreadsDim[],

            deviceProp.maxThreadsDim[]);

        printf("Maximum size of each dimension of a grid:       %d x %d x %d\n", deviceProp.maxGridSize[], deviceProp.maxGridSize[], deviceProp.maxGridSize[]);

        printf("Maximum memory pitch :                          %u bytes\n", deviceProp.memPitch);

        printf("Texture alignmemt                               %u bytes\n", deviceProp.texturePitchAlignment);

        printf("Clock rate                                      %.2f GHz\n", deviceProp.clockRate*1e-6f);

    }

    printf("\nTest PASSED\n");

    getchar();

    return ;

}

// Helper function for using CUDA to add vectors in parallel.

cudaError_t addWithCuda(int *c, const int *a, const int *b, unsigned int size)

{

    int *dev_a = ;

    int *dev_b = ;

    int *dev_c = ;

    cudaError_t cudaStatus;

    // Choose which GPU to run on, change this on a multi-GPU system.

    cudaStatus = cudaSetDevice();

    if (cudaStatus != cudaSuccess) {

        fprintf(stderr, "cudaSetDevice failed!  Do you have a CUDA-capable GPU installed?");

        goto Error;

    }

    // Allocate GPU buffers for three vectors (two input, one output)    .

    cudaStatus = cudaMalloc((void**)&dev_c, size * sizeof(int));

    if (cudaStatus != cudaSuccess) {

        fprintf(stderr, "cudaMalloc failed!");

        goto Error;

    }

    cudaStatus = cudaMalloc((void**)&dev_a, size * sizeof(int));

    if (cudaStatus != cudaSuccess) {

        fprintf(stderr, "cudaMalloc failed!");

        goto Error;

    }

    cudaStatus = cudaMalloc((void**)&dev_b, size * sizeof(int));

    if (cudaStatus != cudaSuccess) {

        fprintf(stderr, "cudaMalloc failed!");

        goto Error;

    }

    // Copy input vectors from host memory to GPU buffers.

    cudaStatus = cudaMemcpy(dev_a, a, size * sizeof(int), cudaMemcpyHostToDevice);

    if (cudaStatus != cudaSuccess) {

        fprintf(stderr, "cudaMemcpy failed!");

        goto Error;

    }

    cudaStatus = cudaMemcpy(dev_b, b, size * sizeof(int), cudaMemcpyHostToDevice);

    if (cudaStatus != cudaSuccess) {

        fprintf(stderr, "cudaMemcpy failed!");

        goto Error;

    }

    // Launch a kernel on the GPU with one thread for each element.

    addKernel<<<, size>>>(dev_c, dev_a, dev_b);

    // Check for any errors launching the kernel

    cudaStatus = cudaGetLastError();

    if (cudaStatus != cudaSuccess) {

        fprintf(stderr, "addKernel launch failed: %s\n", cudaGetErrorString(cudaStatus));

        goto Error;

    }

    // cudaDeviceSynchronize waits for the kernel to finish, and returns

    // any errors encountered during the launch.

    cudaStatus = cudaDeviceSynchronize();

    if (cudaStatus != cudaSuccess) {

        fprintf(stderr, "cudaDeviceSynchronize returned error code %d after launching addKernel!\n", cudaStatus);

        goto Error;

    }

    // Copy output vector from GPU buffer to host memory.

    cudaStatus = cudaMemcpy(c, dev_c, size * sizeof(int), cudaMemcpyDeviceToHost);

    if (cudaStatus != cudaSuccess) {

        fprintf(stderr, "cudaMemcpy failed!");

        goto Error;

    }

Error:

    cudaFree(dev_c);

    cudaFree(dev_a);

    cudaFree(dev_b);

    return cudaStatus;

}
CUDA-GPU编程的更多相关文章
- 《CUDA并行程序设计:GPU编程指南》
<CUDA并行程序设计:GPU编程指南> 基本信息 原书名:CUDA Programming:A Developer’s Guide to Parallel Computing with ...
- GPU编程自学4 —— CUDA核函数运行参数
深度学习的兴起,使得多线程以及GPU编程逐渐成为算法工程师无法规避的问题.这里主要记录自己的GPU自学历程. 目录 <GPU编程自学1 -- 引言> <GPU编程自学2 -- CUD ...
- GPU编程自学3 —— CUDA程序初探
深度学习的兴起,使得多线程以及GPU编程逐渐成为算法工程师无法规避的问题.这里主要记录自己的GPU自学历程. 目录 <GPU编程自学1 -- 引言> <GPU编程自学2 -- CUD ...
- GPU编程自学2 —— CUDA环境配置
深度学习的兴起,使得多线程以及GPU编程逐渐成为算法工程师无法规避的问题.这里主要记录自己的GPU自学历程. 目录 <GPU编程自学1 -- 引言> <GPU编程自学2 -- CUD ...
- 【OpenCV & CUDA】OpenCV和Cuda结合编程
一.利用OpenCV中提供的GPU模块 目前,OpenCV中已提供了许多GPU函数,直接使用OpenCV提供的GPU模块,可以完成大部分图像处理的加速操作. 基本使用方法,请参考:http://www ...
- CUDA 标准编程模式
前言 本文将介绍 CUDA 编程的基本模式,所有 CUDA 程序都基于此模式编写,即使是调用库,库的底层也是这个模式实现的. 模式描述 1. 定义需要在 device 端执行的核函数.( 函数声明前加 ...
- 第一篇:GPU 编程技术的发展历程及现状
前言 本文通过介绍 GPU 编程技术的发展历程,让大家初步地了解 GPU 编程,走进 GPU 编程的世界. 冯诺依曼计算机架构的瓶颈 曾经,几乎所有的处理器都是以冯诺依曼计算机架构为基础的.该系统架构 ...
- GPU 编程入门到精通(五)之 GPU 程序优化进阶
博主因为工作其中的须要,開始学习 GPU 上面的编程,主要涉及到的是基于 GPU 的深度学习方面的知识.鉴于之前没有接触过 GPU 编程.因此在这里特地学习一下 GPU 上面的编程. 有志同道合的小伙 ...
- mpi和cuda混合编程的正确编译
针对大数据的计算,很多程序通过搭建mpi集群进行加速,并取得了很好的效果.算法内部的加速,当前的并行化趋势是利用GPU显卡进行算法加速.针对并行性非常好的算法,GPU加速效果将远大于集群带来的加速效果 ...
- GPU编程--宏观理解篇(1)
GPU编程与CPU编程最大的不同可以概括为以下两点: "The same program is executed on many data elements in parallel" ...
随机推荐
- BC #62 div1 02
/* 数位DP题,设dp[n][k][j]为前n位最后一位是k时mod为j的个数.操作都相同,可以使用矩阵加速.本来对于每一位是7*10,可以把它压向一个向量. 加速矩阵为70*70,再加一维计算前缀 ...
- [LeetCode][Java] Palindrome Number
题目: Determine whether an integer is a palindrome. Do this without extra space. Some hints: Could neg ...
- Apache配置基于域名的虚拟主机
一.设定 模拟域名 www.wang.org.blog.wang.org.bbs.wang.org 网站文件夹 /var/html/www./var/html/blog./var/html/bbs ...
- Google2015校招在线測试题1----扫雷最少点击次数
Problem Minesweeper is a computer game that became popular in the 1980s, and is still included in so ...
- 【二】注入框架RoboGuice使用:(Your First View Injection)
上一篇我们简单的介绍了一下RoboGuice的使用([一]注入框架RoboGuice使用:(A brief example of what RoboGuice does)),今天我们我看下View的注 ...
- 【Apio2009】Bzoj1179 Atm
目录 List Description Input Output Sample Input Sample Output HINT Solution Code Dfs 记忆化搜索 Position: h ...
- go语言笔记——指针,和C用法以及本质一样,但不支持指针的+-运算!
4.4.2 值类型和引用类型 所有像 int.float.bool 和 string 这些基本类型都属于值类型,使用这些类型的变量直接指向存在内存中的值. Go 语言的取地址符是 &,放到一个 ...
- StackExchange.Redis 使用资料
在StackExchange.Redis中最重要的对象是ConnectionMultiplexer类, 它存在于StackExchange.redis命名空间中.这个类隐藏了Redis服务的操作细节, ...
- B1072 [SCOI2007]排列perm 状压dp
很简单的状压dp,但是有一个事,就是...我数组开大了一点,然后每次memset就会T,然后开小就好了!!!震惊!以后小心点这个问题. 题干: Description 给一个数字串s和正整数d, 统计 ...
- Spark中统计程序运行时间
import java.text.SimpleDateFormat import java.util.Date val s=NowDate() //显示当前的具体时间 val now=new Date ...