一个android任务提醒程序
需求:
运行建立多个提醒,每个提醒设置一个时间,到达指定时间后跳出提醒窗体
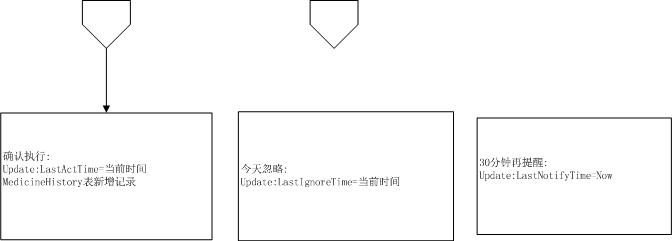
每个提醒有一个执行按钮,点击后保存执行记录,并且当天不再触发提醒窗体
提醒出现后如果任务还没执行,那么需要在30分钟后再次提醒
用户可以关闭全局提醒服务--指闹钟,或针对某个提醒关闭提醒服务,也可以针对某个提醒只关闭当天提醒服务
2个方案
使用的API-17
需要读写SD卡与自启动以及解锁屏幕的权限
A方案:
使用一个"前端服务"--StartFrontServer,在服务里每2分钟跑个任务,这个任务从数据库sqlite读取全部提醒,然后判断那个提醒需要激活,每次也只激活一个
被激活的提醒会更新LastNotifyTime=当前时间,并且在接下来的半个小时内不再触发(如果任务依然没有标记成[已执行]即LastActTime=当天),。
MedicineFrontService类:
1.在启动程序(EMApplication-onCreate方法中)以及收到开机广播或调整时间等时调用下启动服务,这个重载会立即安排个任务
2.runable代码流程参考下文的图片
3.runable只是一个接口不是自己安排线程,这里是关联到主线程调用
4.private Handler handler=new Handler();//不需要编写handler的消息处理代码
5.提醒窗体使用了AlarmAlertWakeLock来在有屏幕锁的情况下显示提醒窗体
public class MedicineFrontService extends Service {

private static final Integer ForegroundId=;

    /*

     * 启动一个前端服务, 在EMApplication中启动

     * 这个服务内部有个Handler来每3分钟检测一次是否有要触发的提醒

     * 前端服务部容易被回收

     *

     * (non-Javadoc)

     * @see android.app.Service#onCreate()

     */

      @SuppressLint("NewApi")

      @Override

    public void onCreate() {

        // TODO Auto-generated method stub

        Log.d(TAG, "onCreate");

        Notification.Builder builder = new Notification.Builder

        (this.getApplicationContext()); //获取一个Notification构造器

        Intent nfIntent = new Intent(this, MedicineMainActivity.class);

        builder.setContentIntent(PendingIntent.

        getActivity(this, , nfIntent, )) // 设置PendingIntent

        .setLargeIcon(BitmapFactory.decodeResource(this.getResources(),R.drawable.ic_launcher)) // 设置下拉列表中的图标(大图标)

        .setContentTitle("任务提醒服务") // 设置下拉列表里的标题

        .setSmallIcon(R.drawable.ic_launcher) // 设置状态栏内的小图标

        .setContentText("服务运行中,使用菜单[暂停服务]退出...") // 设置上下文内容

        .setWhen(System.currentTimeMillis()); // 设置该通知发生的时间

        Notification notification = builder.build(); // 获取构建好的Notification

        notification.defaults=Notification.DEFAULT_SOUND; //设置为默认的声音

        startForeground(ForegroundId, notification);

        runnable.run();

        super.onCreate();

    }

    //===========联合使用Handler与Runable实现类似闹钟的效果 ====

    private Handler handler=new Handler();//不需要编写handler的消息处理代码

    //Runnable只是一个接口通常需要关联到线程

    private Runnable runnable=new Runnable() {

        @Override

        public void run() {

            // TODO Auto-generated method stub

            //要做的事情

            Log.d(TAG, "---Run---");

            MNotifyDao dao=new MNotifyDao(getApplicationContext());

            List<MNotifyModel> notifies= dao.loadAliveNotifies();

            for (MNotifyModel mIt : notifies) {

                //不需要提醒服务

                if(!mIt.isUseNotifyServer()){

                    continue;

                }

                //检测是否设置忽略了

                if(mIt.getLastIgnoreTime()!=null){

                    String actDate = DateUtil.formatShort(mIt

                            .getLastIgnoreTime());

                    String curDate = DateUtil.formatShort(new Date());

                    if (actDate.compareToIgnoreCase(curDate) == ) {

                            continue;//跳到下一个

                    }

                }

                //检测是否执行了今天

                if(mIt.getLastActTime()!=null){

                    String actDate = DateUtil.formatShort(mIt

                            .getLastActTime());

                    String curDate = DateUtil.formatShort(new Date());

                    if (actDate.compareToIgnoreCase(curDate) == ) {

                            continue;//跳到下一个

                    }

                }

               //设定时间小于当前时间

               Date curDate=new Date();

               String waringTime= DateUtil.formatShort(curDate)+" " +mIt.getWaringTime() +":00";

               if(    DateUtil.parse(waringTime).after(curDate)){

                   continue;

               }

               //提醒过了需要等30分钟再次提醒

               if(mIt.getLastNotifyTime()!=null){

                Long diffMicSec=curDate.getTime() -mIt.getLastNotifyTime().getTime();

                Log.d(TAG, String.valueOf(diffMicSec));

                if(diffMicSec < **){

                    //小于30分钟

                    continue;

                }

               }

               mIt.setLastNotifyTime(curDate);

               dao.update(mIt);

               //启动提醒窗体

                Intent intent = new Intent(getApplicationContext(), MedicineAlarmActivity.class);

                intent.setFlags(Intent.FLAG_ACTIVITY_NEW_TASK);

                intent.setAction("NotificationClick");

                String note="接收消息:\r\n" +mIt.getMsg() +"\r\n 设定时间:\r\n"+mIt.getWaringTime();

                intent.putExtra("Note",note);

                intent.putExtra("AddTime", DateUtil.formatLong(curDate));

                startActivity(intent);

                break;

            }

            //---------间隔时间--------------------

            Integer loopInterval=MedicineSetting.getLoopInterval(getApplicationContext());

            handler.postDelayed(this, loopInterval**);

        }

    };

    //=================End=============

    @Override

    public int onStartCommand(Intent intent, int flags, int startId) {

        Log.d(TAG, "onStartCommand()");

        // 在API11之后构建Notification的方式

        return Service.START_REDELIVER_INTENT;

    }

    @Override

    public void onDestroy() {

        Log.d(TAG, "onDestroy");

        handler.removeCallbacks(runnable);

        stopForeground(true);

        super.onDestroy();

    }

    private static final String TAG = "TestMNotify";

    @Override

    public IBinder onBind(Intent intent) {

        // TODO Auto-generated method stub

        return null;

    }

}


B方案:

MedicineAlarmUtil类
1.在CUD或者启动程序以及执行了某个任务以及收到开机广播或调整时间等时调用下schedule(ctx),这个重载会立即安排个任务
2.而这个任务会在时间到是启动MedicineAlarmIntentService
3.schedule会同时启动守护服务,cancel会关闭守护服务
public class MedicineAlarmUtil {

    public static void schedule(Context ctx){

        schedule(ctx, getPendingIntent(ctx),Calendar.getInstance().getTimeInMillis());

    }

    public static void schedule(Context ctx,PendingIntent pi,Long triggerAtMillis){

        AlarmManager am = (AlarmManager) ctx

                .getSystemService(Context.ALARM_SERVICE);

        am.set(AlarmManager.RTC_WAKEUP, triggerAtMillis, pi);

        MedicineSetting.SetNextFireTime(ctx,DateUtil.formatLong(new Date(triggerAtMillis)));

        startFrontServer(ctx);

    }

    public static void  cancel(Context ctx) {

        AlarmManager am = (AlarmManager) ctx

                .getSystemService(Context.ALARM_SERVICE);

        am.cancel(getPendingIntent(ctx));

        MedicineSetting.SetNextFireTime(ctx, "未安排");

        stopFrontServer(ctx);

    }

    public static PendingIntent getPendingIntent(Context ctx) {

        Intent intent = new Intent(ctx, MedicineAlarmIntentService.class);

        intent.setAction("medicineNotify");

        PendingIntent pi = PendingIntent.getService(ctx, , intent,

                Intent.FLAG_ACTIVITY_NEW_TASK);

        return pi;

    }

    //启动前端守护服务服务

    private static  void startFrontServer(Context ctx){

        Intent whiteIntent = new Intent(ctx, MedicineGuardIntentService.class);

        ctx.startService(whiteIntent);

    }

    //关闭前端守护服务

    private static void   stopFrontServer(Context ctx){

        Intent whiteIntent = new Intent(ctx, MedicineGuardIntentService.class);

        ctx.stopService(whiteIntent);

    }

}
MedicineGuardIntentService类
守护服务的配置
        <service

            android:name="cn.fstudio.alarm.MedicineFrontService"

            android:enabled="true"

            android:exported="false"

            android:process=":white"

            >

        </service>

                <service

            android:name="cn.fstudio.alarm.MedicineGuardIntentService"

            android:enabled="true"

            android:exported="false"

            android:process=":white"

            >
守护服务代码,
public class MedicineGuardIntentService extends Service {

private static final Integer ForegroundId=;

    /*

     *方案B守护进程

     *

     * (non-Javadoc)

     * @see android.app.Service#onCreate()

     */

      @SuppressLint("NewApi")

      @Override

    public void onCreate() {

        // TODO Auto-generated method stub

        Log.d(TAG, "onCreate");

        build();

        runnable.run();

        super.onCreate();

    }

    @SuppressLint("NewApi")

    private void build(){

        Notification.Builder builder = new Notification.Builder

        (this.getApplicationContext()); //获取一个Notification构造器

        Intent nfIntent = new Intent(this, MedicineMainActivity.class);

        builder.setContentIntent(PendingIntent.

        getActivity(this, , nfIntent, )) // 设置PendingIntent

        .setLargeIcon(BitmapFactory.decodeResource(this.getResources(),R.drawable.ic_launcher)) // 设置下拉列表中的图标(大图标)

        .setContentTitle("提醒服务") // 设置下拉列表里的标题

        .setSmallIcon(R.drawable.ic_launcher) // 设置状态栏内的小图标

        .setContentText("提醒服务守护服务...") // 设置上下文内容

        .setWhen(System.currentTimeMillis()); // 设置该通知发生的时间

        Notification notification = builder.build(); // 获取构建好的Notification

        notification.defaults=Notification.DEFAULT_SOUND; //设置为默认的声音

        startForeground(ForegroundId, notification);

    }

  //===========联合使用Handler与Runable实现类似闹钟的效果 ====

    private Handler handler=new Handler();//不需要编写handler的消息处理代码

    private volatile boolean firsRun=true;

    //Runnable只是一个接口通常需要关联到线程

    private Runnable runnable=new Runnable() {

        @Override

        public void run() {

            // TODO Auto-generated method stub

            //要做的事情

            Log.d(TAG, "---Run---wait-");

            if(firsRun){

                firsRun=false;

            }else {

                Log.d(TAG, "---Run-Shcedule--");

                if (MedicineSetting.IsUseNotifyServier(getApplicationContext())) {

                MedicineAlarmUtil.schedule(getApplicationContext());

                }

            }

            //---------间隔时间--------------------

            Integer loopInterval=MedicineSetting.getLoopInterval(getApplicationContext());

            Integer guardLoopInterval=  loopInterval * ;

            //守护者进程轮询时间是设置时间乘以5

            handler.postDelayed(this, guardLoopInterval**);

            //这个方法不会将代码停在这个位置

            //所以下面的提示会打印出来

            Log.d(TAG, "---Run-not--wait--");

        }

    };

    //=================End=============

    @Override

    public int onStartCommand(Intent intent, int flags, int startId) {

        Log.d(TAG, "onStartCommand()");

        // 在API11之后构建Notification的方式

        return Service.START_REDELIVER_INTENT;

    }

    @Override

    public void onDestroy() {

        Log.d(TAG, "onDestroy");

        handler.removeCallbacks(runnable);

        stopForeground(true);

        super.onDestroy();

    }

    private static final String TAG = "TestMNotify";

    @Override

    public IBinder onBind(Intent intent) {

        // TODO Auto-generated method stub

        return null;

    }

}
1.守护服务启动前端服务,每个interval*5的时间调用一下schedule ,interval是参数设置里的轮询时间间隔
2.守护服务在主配置文件中的声明
3.handler.postDelayed(this, guardLoopInterval*1000*60);
//这个方法不会将代码停在这个位置
//所以下面的提示会打印出来
Log.d(TAG, "---Run-not--wait--");
MedicineAlarmIntentService类
1.这个类计算要触发的任务并形成通知文本激发通知窗口
2.在当前需要激发通知完成后(通过先更新lastNotifyTime逻辑上控制)再次计算下一次调度的时间
3.通过AlarmManager安排调度时间,并真正激发通知窗口--如果有通知文本要发布
4.重点是计算下一个要安排的任务执行时间,通过计算每个任务的下一次调用时间,并且选择近的时间做为下一次任务调度时间
参考上面的流程图与下面代码getSortedList
package cn.fstudio.alarm;

import java.lang.reflect.Array;

import java.util.ArrayList;

import java.util.Arrays;

import java.util.Calendar;

import java.util.Collection;

import java.util.Collections;

import java.util.Comparator;

import java.util.Date;

import java.util.List;

import cn.fstudio.em.MedicineMainActivity;

import cn.fstudio.medicine.notify.R;

import cn.fstudio.sqlite.dao.MNotifyDao;

import cn.fstudio.sqlite.dao.MNotifyModel;

import cn.fstudio.util.DateUtil;

import android.annotation.SuppressLint;

import android.app.IntentService;

import android.app.Notification;

import android.app.PendingIntent;

import android.content.Intent;

import android.graphics.BitmapFactory;

import android.util.Log;

public class MedicineAlarmIntentService extends IntentService {

    @Override

    public void onCreate() {

        // TODO Auto-generated method stub

        //启动下前端进行,只是看看据说这样不容易被回收

        AlarmAlertWakeLock.acquireScreenCpuWakeLock(this);

        super.onCreate();

    }

    @Override

    public void onDestroy() {

        // TODO Auto-generated method stub

        AlarmAlertWakeLock.releaseCpuLock();

        super.onDestroy();

    }

    private static final String TAG = "TestMNotify";

    public MedicineAlarmIntentService(String name) {

        super(name);

        // TODO Auto-generated constructor stub

    }

    public MedicineAlarmIntentService() {

        super("MedicineAlarmIntentService");

        // TODO Auto-generated constructor stub

    }

    @Override

    protected void onHandleIntent(Intent intent) {

        // TODO Auto-generated method stub

        Log.d(TAG, "任务执行--onHandleIntent");

        //先安排3分钟后任务再次执行的,防止后面代码执行被中断

        //如果后面代码正常执行将覆盖这次安排

        Calendar calendar=    Calendar.getInstance();

        calendar.add(Calendar.MINUTE, );

        PendingIntent pi=MedicineAlarmUtil.getPendingIntent(this);

        MedicineAlarmUtil.schedule(this, pi, calendar.getTimeInMillis());

       List<NInfo> list=GetSortedList();

       Date now=new Date();

       Date nextFireDate=new Date( now.getTime() + ***);

       StringBuilder sb=new StringBuilder();

       MNotifyDao dao=new MNotifyDao(getApplicationContext());

       Boolean needFire=false;

       for(int i=;i<list.size();i++){

             NInfo it=list.get(i);

             if(it.fireNow){

                sb.append(it.waringTime +"\r\n");

                sb.append(it.msg +"\r\n");

                sb.append("----------------------\r\n");

                //更新最近提醒时间

                it.model.setLastNotifyTime(new Date());

                dao.update(it.model);

                needFire=true;

            }

       }

       //再次计算排序后的列表

       List<NInfo> nextList=GetSortedList();

       if(nextList.size()>){

           nextFireDate=nextList.get().nextRunTime;

           //处理小于3分钟以上的情况

           if(nextFireDate.before(new Date())){

               nextFireDate=new Date();

           }

           if( Math.abs(nextFireDate.getTime() - now.getTime())<** ){

             nextFireDate= new Date((new Date()).getTime() + **);

           }

       }

       //下次执行超过8小

       if(nextFireDate.getTime() > (now.getTime() + ***)){

           nextFireDate=new Date(now.getTime() + ***);

       }

       //安排计算后的下次执行任务

       MedicineAlarmUtil.schedule(this, pi, nextFireDate.getTime());

       if(needFire) fire(sb.toString());

    }

    private void fire(String note){

        Intent intent = new Intent(getApplicationContext(), MedicineAlarmActivity.class);

        intent.setFlags(Intent.FLAG_ACTIVITY_NEW_TASK);

        intent.setAction("NotificationClick");

        intent.putExtra("Note",note);

        intent.putExtra("AddTime", DateUtil.formatLong(new Date()));

        startActivity(intent);

    }

    private List<NInfo> GetSortedList(){

        List<NInfo> list=new ArrayList<NInfo>();

        MNotifyDao dao=new MNotifyDao(getApplicationContext());

        List<MNotifyModel> notifies= dao.loadAliveNotifies();

        Date now=new Date();

        for (MNotifyModel mIt : notifies) {

            NInfo info=new NInfo();

            info.fireNow=true;

            info.recId=mIt.getRecId();

            info.msg=mIt.getMsg();

            info.waringTime=mIt.getWaringTime();

            info.model=mIt;

            list.add(info);

            //不需要提醒服务

            if(!mIt.isUseNotifyServer()){

                //当前毫秒数加8个小时

                info.nextRunTime=new Date(now.getTime() + ***);

                info.fireNow=false;

                continue;

            }

            //检测是否设置忽略了

            if(mIt.getLastIgnoreTime()!=null){

                String actDate = DateUtil.formatShort(mIt

                        .getLastIgnoreTime());

                String curDate = DateUtil.formatShort(new Date());

                if (actDate.compareToIgnoreCase(curDate) == ) {

                    Date tomorrow=DateUtil.AddDay( DateUtil.parse(DateUtil.formatShort(new Date())+" " +mIt.getWaringTime()+":00" ),);

                    info.nextRunTime=tomorrow;

                    info.fireNow=false;

                        continue;//跳到下一个

                }

            }

            //检测是否执行了今天

            if(mIt.getLastActTime()!=null){

                String actDate = DateUtil.formatShort(mIt

                        .getLastActTime());

                String curDate = DateUtil.formatShort(new Date());

                if (actDate.compareToIgnoreCase(curDate) == ) {

                    Date tomorrow=DateUtil.AddDay( DateUtil.parse(DateUtil.formatShort(new Date())+" " +mIt.getWaringTime()+":00" ),);

                    info.nextRunTime=tomorrow;

                    info.fireNow=false;

                        continue;//跳到下一个

                }

            }

           //设定时间小于当前时间

           String waringTime= DateUtil.formatShort(now)+" " +mIt.getWaringTime() +":00";

           if(    DateUtil.parse(waringTime).after(now)){

               info.nextRunTime=DateUtil.parse(DateUtil.formatShort(new Date())+" " +mIt.getWaringTime()+":00" );

               info.fireNow=false;

               continue;

           }

           //提醒过了需要等30分钟再次提醒

            String notifyDate = DateUtil.formatShort(mIt.getLastNotifyTime());

            String curDate = DateUtil.formatShort(new Date());

            //当前时间

            info.nextRunTime=now;

           if(curDate.compareToIgnoreCase(notifyDate)==){

             //是当前时间

            Long diffMicSec=now.getTime() -mIt.getLastNotifyTime().getTime();

            Log.d(TAG, String.valueOf(diffMicSec));

            if(diffMicSec < **){

                //最后提醒时间+30分钟

                info.nextRunTime=new Date( mIt.getLastNotifyTime().getTime() + **);

                info.fireNow=false;

                continue;

            }

           }

        }

        Collections.sort(list);

        return list;

    }

    class NInfo implements Comparable<NInfo>{

      public Integer recId;

      public Boolean fireNow;

      public Date nextRunTime;

      public String msg;

      public String waringTime;

      public MNotifyModel model;

    @Override

    public int compareTo(NInfo another) {

        return nextRunTime.compareTo(another.nextRunTime);

    }

    }

}
Tips:
1.AlarmManager参考:https://blog.csdn.net/lindroid/article/details/83621590
2.使用Calendar (日历)类来计算下次执行的毫秒数,或者加减Day,Minutes...等等
3.PendingIntent pi = PendingIntent.getService(ctx, 0, intent,
Intent.FLAG_ACTIVITY_NEW_TASK); // 0 就是requestCode,如果这个一样的两次任务安排调用,后一个安排会取代前一个
4.IntentService,Service中的OnCreate以及OnDestroy 在创建或销毁时执行一次,多次在Activity,Service中调用startService,OnCreate等方法不会重复执行.
默认情况下Service是单例方式执行的
5.IntentService 这个是在主线程上执行的不需要将一些如网络操作的方法做异步处理,在onHandleIntent中实现要执行的代码,需要提供一个空参数的构造函数并调用Supper("XXX")
6.B方案中,开启一个前台服务,用来避免进行被回收---到底行不行不清楚。。。
7.,提醒窗体使用了AlarmAlertWakeLock来在有屏幕锁的情况下显示提醒窗体。
一个android任务提醒程序的更多相关文章
- android开发------第一个android程序
好吧,现在我们就一起来写第一个android程序,看它带给了我们什么.sdk的使用和虚拟机的创建我就不说了.项目创建过程先略过,不太重要. 那第一个程序我们能学到什么知识呢?一起看吧.^-^ 在IDE ...
- 创建第一个Android应用程序 HelloWorld
按照博客的进程,今天应该进行程序编写啦,下面让我们开写一个简单的HelloWorld程序. 提示:这里对于如何使用Eclipse创建一个Android程序就不多讲啦,不会的同学可以去查阅相关文档. 程 ...
- 第一行代码阅读笔记---详解分析第一个Android程序
以下是我根据作者的思路,创建的第一个Android应用程序,由于工具强大,代码都自动生成了,如下: package com.example.first_app; import android.os.B ...
- Android学习笔记一之第一个Android程序
/** *Title:总结昨天下午至今天上午的学习成果 *Author:zsg *Date:2017-8-13 / 一.了解Android 1.Android架构 Android大致可分为四层架构:L ...
- Android逆向 破解第一个Android程序
这节正式开始破解编写的第一个Android工程,打开Android Killer,把第一节自己编写的Android apk拖入Android Killer. PS: 如果Android Killer不 ...
- Android逆向 编写一个Android程序
本节使用的Android Studio版本是3.0.1 首先,我们先编写一个apk,后面用这个apk来进行逆向.用Android Studio创建一个新的Android项目,命名为Jhm,一路Next ...
- 从零开始,运行一个android例子程序
电脑上连个eclipse都没装,怎么玩android?一穷二白的你, 下面就跟随我,从零开始,一步一步操作,运行我们的第一个android应用程序.我一直相信,学习开发,只有在调试过程中学的是最快的. ...
- delphi 10 Seattle 第一个Android程序
delphi 10 Seattle 第一个Android程序 1.打开Delphi RAD Studio Seattle,如下图 2.选择black application 点击OK 3. ...
- 【Android实验】第一个Android程序与Activity生命周期
目录 第一个Android程序和Activity生命周期 实验目的 实验要求 实验过程 1. 程序正常启动与关闭 2. 外来电话接入的情况 3. 外来短信接入的情况 4. 程序运行中切换到其他程序(比 ...
随机推荐
- 上传文本到hdfs上的一些命令
在hadoop下创建文件夹 bin/hdfs dfs -mkdir -p /usr/hadoop/spark/ touch wc.input 写一些文本进去. 上传到hdfs上 bin/hdfs ...
- python绘图 转
Python有很多可视化工具,本篇只介绍Matplotlib. Matplotlib是一种2D的绘图库,它可以支持硬拷贝和跨系统的交互,它可以在Python脚本.IPython的交互环境下.Web应用 ...
- 网络文件系统-NFS
1. 什么是NFS NFS是 Network File System 的缩写,即网络文件系统.一种使用于分散式文件系统的协议,有Sun公司开发,于1984年向外公布.功能是通过网络让不同的机器.不同的 ...
- AWS 存储过程
DELIMITER $$ USE `mysql`$$ DROP PROCEDURE IF EXISTS `rds_rotate_slow_log`$$ CREATE DEFINER=`rdsadmin ...
- position 的absolute会使display变成inline-block
position:absolute和float会隐式地改变display类型,不论之前什么类型的元素(display:none除外), 只要设置了position:absolute. float中任意 ...
- C#和PHP加密结果一致的DES加密解密算法。php实现和c#一致的DES加密解密
DES加密算法 des对称加密,是一种比较传统的加密方式,其加密运算.解密运算使用的是同样的密钥,信息的发送者和信息的接收者在进行信息的传输与处理时,必须共同持有该密码(称为对称密码),是一种对称加密 ...
- thinkPHP5框架路由常用知识点汇总
一.路由的模式 普通模式(默认pathinfo,不解析路由) 'url_route_on' => false 混合模式(pathinfo+解析路由) 'url_route_on' => t ...
- 第3章 常用linux命令 3.5 文件压缩命令
实验六 文件及目录的压缩解压缩相关命令的使用 [实验目的] 1.掌握linux压缩文件实质 2.掌握linux中压缩及解压缩指令的用法 [实验环境] 1. 标准配置PC一台 2. linux操作系统: ...
- what-is-the-difference-between-type-and-class
Inspired by Wikipedia... In type theory terms; A type is an abstract interface. Types generally repr ...
- Mobius
Mobius 形式一 \[ f\left(n\right) = \sum_{d|n}g\left(d\right) \\ g\left(n\right) = \sum_{d|n}\mu\left(d\ ...