JumpServer安装及应用
jumpserver安装
安装所需软件包
[root@localhost ~]# yum -y update

[root@localhost ~]# dnf install -y wget  curl tar gettext iptables python3 gcc gcc-c++ make vim mariadb*
启动mariadb服务设置开机自启动
[root@localhost ~]# systemctl enable --now mariadb

Created symlink /etc/systemd/system/mysql.service → /usr/lib/systemd/system/mariadb.service.

Created symlink /etc/systemd/system/mysqld.service → /usr/lib/systemd/system/mariadb.service.

Created symlink /etc/systemd/system/multi-user.target.wants/mariadb.service → /usr/lib/systemd/system/mariadb.service.

#设置数据库密码并验证

[root@localhost ~]# mysql

Welcome to the MariaDB monitor.  Commands end with ; or \g.

Your MariaDB connection id is 8

Server version: 10.3.28-MariaDB MariaDB Server

Copyright (c) 2000, 2018, Oracle, MariaDB Corporation Ab and others.

Type 'help;' or '\h' for help. Type '\c' to clear the current input statement.

MariaDB [(none)]> set password = password('Password@123!');

Query OK, 0 rows affected (0.000 sec)

MariaDB [(none)]> quit

Bye

#验证密码

[root@localhost ~]# mysql -uroot -pPassword@123!

Welcome to the MariaDB monitor.  Commands end with ; or \g.

Your MariaDB connection id is 9

Server version: 10.3.28-MariaDB MariaDB Server

Copyright (c) 2000, 2018, Oracle, MariaDB Corporation Ab and others.

Type 'help;' or '\h' for help. Type '\c' to clear the current input statement.

MariaDB [(none)]>
创建jumpserver数据库
MariaDB [(none)]> create database jumpserver default charset 'utf8';

Query OK, 1 row affected (0.000 sec)

MariaDB [(none)]> show databases;

+--------------------+

| Database           |

+--------------------+

| information_schema |

| jumpserver         |

| mysql              |

| performance_schema |

+--------------------+

4 rows in set (0.000 sec)

MariaDB [(none)]> grant all on jumpserver.* to 'jumpserver'@'%' identified by '111111';

Query OK, 0 rows affected (0.000 sec)

MariaDB [(none)]> flush privileges;

Query OK, 0 rows affected (0.000 sec)
上传redis和jumpserver软件包并解压
#redis版本一定要大于6.0,所以最新高版本的下载地址:https://redis.io/download/

#jumpserver下载地址:https://community.fit2cloud.com/#/products/jumpserver/downloads

#解压安装包

[root@localhost ~]# tar xf redis-7.0.11.tar.gz

[root@localhost ~]# tar xf jumpserver-offline-installer-v3.3.1-amd64-322.tar.gz

[root@localhost ~]# ls

anaconda-ks.cfg

jumpserver-offline-installer-v3.3.1-amd64-322

jumpserver-offline-installer-v3.3.1-amd64-322.tar.gz

redis-7.0.11

redis-7.0.11.tar.gz
编译安装redis
[root@localhost redis-7.0.11]# cd redis-7.0.11

[root@localhost redis-7.0.11]# ls

00-RELEASENOTES     COPYING   MANIFESTO   runtest-cluster    sentinel.conf  utils

BUGS                deps      README.md   runtest-moduleapi  src

CODE_OF_CONDUCT.md  INSTALL   redis.conf  runtest-sentinel   tests

CONTRIBUTING.md     Makefile  runtest     SECURITY.md        TLS.md

[root@localhost redis-7.0.11]# make -j 4

.......

 	CC redis-benchmark.o

    LINK redis-server

    INSTALL redis-sentinel

    INSTALL redis-check-rdb

    INSTALL redis-check-aof

    LINK redis-benchmark

    LINK redis-cli

Hint: It's a good idea to run 'make test' ;)

make[1]: Leaving directory '/root/redis-7.0.11/src'

[root@localhost redis-7.0.11]# make test

cd src && make test

make[1]: Entering directory '/root/redis-7.0.11/src'

    CC Makefile.dep

You need tcl 8.5 or newer in order to run the Redis test

make[1]: *** [Makefile:427: test] Error 1

make[1]: Leaving directory '/root/redis-7.0.11/src'

make: *** [Makefile:6: test] Error 2

#会报一个错,此时需要安装依赖包

[root@localhost redis-7.0.11]# dnf search tcl

Last metadata expiration check: 0:53:49 ago on Thu 01 Jun 2023 04:07:46 PM CST.

====================== Name Exactly Matched: tcl =======================

tcl.i686 : Tool Command Language, pronounced tickle

tcl.x86_64 : Tool Command Language, pronounced tickle

===================== Name & Summary Matched: tcl ======================

jimtcl.i686 : A small embeddable Tcl interpreter

jimtcl.x86_64 : A small embeddable Tcl interpreter

postgresql-pltcl.x86_64 : The Tcl procedural language for PostgreSQL

tcl-brlapi.x86_64 : Tcl binding for BrlAPI

tcl-devel.i686 : Tcl scripting language development environment

tcl-devel.x86_64 : Tcl scripting language development environment

tcl-doc.noarch : Tcl documentation

========================== Name Matched: tcl ===========================

nvmetcli.noarch : An adminstration shell for NVMe storage targets

targetcli.noarch : An administration shell for storage targets

========================= Summary Matched: tcl =========================

target-restore.noarch : Systemd service for targetcli/rtslib

tk.i686 : The graphical toolkit for the Tcl scripting language

tk.x86_64 : The graphical toolkit for the Tcl scripting language

[root@localhost redis-7.0.11]# yum -y install tcl tcl-devel

#再次执行make test

[root@localhost redis-7.0.11]# make test

.....

\o/ All tests passed without errors!

Cleanup: may take some time... OK

make[1]: Leaving directory '/root/redis-7.0.11/src'

#make install 安装

[root@localhost ~]# cd redis-7.0.11

[root@localhost redis-7.0.11]# make install

cd src && make install

make[1]: Entering directory '/root/redis-7.0.11/src'

Hint: It's a good idea to run 'make test' ;)

    INSTALL redis-server

    INSTALL redis-benchmark

    INSTALL redis-cli

make[1]: Leaving directory '/root/redis-7.0.11/src'

#将redis.conf文件copy到/etc下

[root@localhost redis-7.0.11]# which redis-server

/usr/local/bin/redis-server

[root@localhost redis-7.0.11]# cp ~/redis-7.0.11/redis.conf /etc/
添加一块1000G硬盘
[root@localhost ~]# df -hT

Filesystem          Type      Size  Used Avail Use% Mounted on

devtmpfs            devtmpfs  3.9G     0  3.9G   0% /dev

tmpfs               tmpfs     3.9G     0  3.9G   0% /dev/shm

tmpfs               tmpfs     3.9G  9.0M  3.9G   1% /run

tmpfs               tmpfs     3.9G     0  3.9G   0% /sys/fs/cgroup

/dev/mapper/cs-root xfs        17G   11G  6.9G  60% /

/dev/sda1           xfs      1014M  235M  780M  24% /boot

tmpfs               tmpfs     793M     0  793M   0% /run/user/0

[root@localhost ~]# lsblk

NAME        MAJ:MIN RM  SIZE RO TYPE MOUNTPOINT

sda           8:0    0   20G  0 disk

├─sda1        8:1    0    1G  0 part /boot

└─sda2        8:2    0   19G  0 part

  ├─cs-root 253:0    0   17G  0 lvm  /

  └─cs-swap 253:1    0    2G  0 lvm  [SWAP]

sdb           8:16   0 1000G  0 disk

sr0          11:0    1 1024M  0 rom

#创建物理卷,扩容卷组,扩容逻辑卷

[root@localhost ~]# pvcreate /dev/sdb

  Physical volume "/dev/sdb" successfully created.

[root@localhost ~]# vgextend cs /dev/sdb

  Volume group "cs" successfully extended

[root@localhost ~]# vgs

  VG #PV #LV #SN Attr   VSize    VFree

  cs   2   2   0 wz--n- 1018.99g <1000.00g

[root@localhost ~]# lvs

  LV   VG Attr       LSize   Pool Origin Data%  Meta%  Move Log Cpy%Sync Convert

  root cs -wi-ao---- <17.00g

  swap cs -wi-ao----   2.00g

[root@localhost ~]# lvextend -L +999G /dev/cs/root

  Size of logical volume cs/root changed from <17.00 GiB (4351 extents) to <1016.00 GiB (260095 extents).

  Logical volume cs/root successfully resized.

[root@localhost ~]# lvs

  LV   VG Attr       LSize     Pool Origin Data%  Meta%  Move Log Cpy%Sync Convert

  root cs -wi-ao---- <1016.00g

  swap cs -wi-ao----     2.00g

#格式化

[root@localhost ~]# df -hT

Filesystem          Type      Size  Used Avail Use% Mounted on

devtmpfs            devtmpfs  3.9G     0  3.9G   0% /dev

tmpfs               tmpfs     3.9G     0  3.9G   0% /dev/shm

tmpfs               tmpfs     3.9G  9.0M  3.9G   1% /run

tmpfs               tmpfs     3.9G     0  3.9G   0% /sys/fs/cgroup

/dev/mapper/cs-root xfs        17G   11G  6.9G  60% /

/dev/sda1           xfs      1014M  235M  780M  24% /boot

tmpfs               tmpfs     793M     0  793M   0% /run/user/0

[root@localhost ~]# xfs_growfs /dev/cs/root

meta-data=/dev/mapper/cs-root    isize=512    agcount=4, agsize=1113856 blks

         =                       sectsz=512   attr=2, projid32bit=1

         =                       crc=1        finobt=1, sparse=1, rmapbt=0

         =                       reflink=1    bigtime=0 inobtcount=0

data     =                       bsize=4096   blocks=4455424, imaxpct=25

         =                       sunit=0      swidth=0 blks

naming   =version 2              bsize=4096   ascii-ci=0, ftype=1

log      =internal log           bsize=4096   blocks=2560, version=2

         =                       sectsz=512   sunit=0 blks, lazy-count=1

realtime =none                   extsz=4096   blocks=0, rtextents=0

data blocks changed from 4455424 to 266337280

[root@localhost ~]# df -h

Filesystem           Size  Used Avail Use% Mounted on

devtmpfs             3.9G     0  3.9G   0% /dev

tmpfs                3.9G     0  3.9G   0% /dev/shm

tmpfs                3.9G  9.0M  3.9G   1% /run

tmpfs                3.9G     0  3.9G   0% /sys/fs/cgroup

/dev/mapper/cs-root 1016G   18G  999G   2% /

/dev/sda1           1014M  235M  780M  24% /boot

tmpfs                793M     0  793M   0% /run/user/0
编辑redis.conf文件
[root@localhost redis-7.0.11]# vim /etc/redis.conf

requirepass redispass			#去掉注释,修改成这样

bind 0.0.0.0					#修改成这样
启动redis
[root@localhost redis-7.0.11]# nohup redis-server /etc/redis.conf &

[1] 1603

[root@localhost redis-7.0.11]# nohup: ignoring input and appending output to 'nohup.out'

[root@localhost redis-7.0.11]# ss -antulp

Netid    State     Recv-Q    Send-Q       Local Address:Port       Peer Address:Port   Process

tcp      LISTEN    0         80                 0.0.0.0:3306            0.0.0.0:*       users:(("mysqld",pid=1149,fd=21))

tcp      LISTEN    0         511                0.0.0.0:6379            0.0.0.0:*       users:(("redis-server",pid=1603,fd=6))

tcp      LISTEN    0         128                0.0.0.0:22              0.0.0.0:*       users:(("sshd",pid=1074,fd=3))

tcp      LISTEN    0         128                   [::]:22                 [::]:*       users:(("sshd",pid=1074,fd=4))
查看防火墙
[root@localhost redis-7.0.11]# systemctl status firewalld

● firewalld.service - firewalld - dynamic firewall daemon

   Loaded: loaded (/usr/lib/systemd/system/firewalld.service; disabled; vendor preset:>

   Active: inactive (dead)

     Docs: man:firewalld(1)

[root@localhost redis-7.0.11]# getenforce

Disabled

#关闭命令

[root@localhost redis-7.0.11]# systemctl diable --now firewalld

[root@localhost redis-7.0.11]# vim /etc/selinux/config

SELINUX=disabled
配置jumpserver
[root@localhost ~]# cd jumpserver-offline-installer-v3.3.1-amd64-322

[root@localhost jumpserver-offline-installer-v3.3.1-amd64-322]# ls

cn-quick_start.sh   config_init  locale          scripts

compose             jmsctl.sh    quick_start.sh  static.env

config-example.txt  LICENSE      README.md       utils

[root@localhost jumpserver-offline-installer-v3.3.1-amd64-322]# vim config-example.txt

#搜索DB

DB_HOST=192.168.88.128

DB_PORT=3306

DB_USER=jumpserver

DB_PASSWORD=111111

DB_NAME=jumpserver

#搜索REDIS

REDIS_HOST=192.168.88.128

REDIS_PORT=6379

REDIS_PASSWORD=redispass
安装jumpserver
[root@localhost jumpserver-offline-installer-v3.3.1-amd64-322]# ./jmsctl.sh install

...........

  Applying terminal.0061_applet_can_concurrent... OK

  Applying tickets.0029_auto_20230110_1445... OK

  Applying users.0042_auto_20230203_1201... OK

After migration, update builtin role permissions

  - Update builtin roles

complete

>>> The Installation is Complete

1. You can use the following command to start, and then visit

cd /root/jumpserver-offline-installer-v3.3.1-amd64-322

./jmsctl.sh start

2. Other management commands

./jmsctl.sh stop

./jmsctl.sh restart

./jmsctl.sh backup

./jmsctl.sh upgrade

For more commands, you can enter ./jmsctl.sh --help to understand

3. Web access

http://192.168.250.1:80

Default username: admin  Default password: admin

4. SSH/SFTP access

ssh -p2222 admin@192.168.250.1

sftp -P2222 admin@192.168.250.1

5. More information

Official Website: https://www.jumpserver.org/

Documentation: https://docs.jumpserver.org/

#如果有以下报错

    raise ConnectionError(self._error_message(e))

redis.exceptions.ConnectionError: Error 111 connecting to 192.168.88.128:6379. Connection refused.

[ERROR] Failed to change the table structure!、

#那么大概率是redis服务未开启,或者jumpserver配置文件中,redis数据库密码不一致导致

#查看端口号,6379端口要有

[root@localhost jumpserver-offline-installer-v3.3.1-amd64-322]# ss -antlup

Netid   State    Recv-Q   Send-Q      Local Address:Port       Peer Address:Port   Process

tcp     LISTEN   0        128               0.0.0.0:22              0.0.0.0:*       users:(("sshd",pid=1096,fd=3))

tcp     LISTEN   0        80                0.0.0.0:3306            0.0.0.0:*       users:(("mysqld",pid=1173,fd=21))

tcp     LISTEN   0        511               0.0.0.0:6379            0.0.0.0:*       users:(("redis-server",pid=3894,fd=6))

tcp     LISTEN   0        128                  [::]:22                 [::]:*       users:(("sshd",pid=1096,fd=4))

#redis服务开启

[root@localhost jumpserver-offline-installer-v3.3.1-amd64-322]# nohup redis-server /etc/redis.conf &
启动jumpserver
[root@localhost ~]# cd jumpserver-offline-installer-v3.3.1-amd64-322

[root@localhost jumpserver-offline-installer-v3.3.1-amd64-322]# ./jmsctl.sh start

[+] Running 6/6

  Container jms_core    Healthy                                             25.8s

  Container jms_web     Started                                             28.9s

  Container jms_celery  Started                                             29.4s

  Container jms_koko    Started                                             28.5s

  Container jms_lion    Started                                             28.7s

  Container jms_magnus  Started                                             28.5s

[root@localhost jumpserver-offline-installer-v3.3.1-amd64-322]# ss -antlup

Netid   State    Recv-Q   Send-Q     Local Address:Port        Peer Address:Port   Process

tcp     LISTEN   0        2048             0.0.0.0:80               0.0.0.0:*       users:(("docker-proxy",pid=5075,fd=4))

tcp     LISTEN   0        128              0.0.0.0:22               0.0.0.0:*       users:(("sshd",pid=1096,fd=3))

tcp     LISTEN   0        2048             0.0.0.0:33061            0.0.0.0:*       users:(("docker-proxy",pid=5194,fd=4))

tcp     LISTEN   0        2048             0.0.0.0:33062            0.0.0.0:*       users:(("docker-proxy",pid=5176,fd=4))

tcp     LISTEN   0        80               0.0.0.0:3306             0.0.0.0:*       users:(("mysqld",pid=1173,fd=21))

tcp     LISTEN   0        511              0.0.0.0:6379             0.0.0.0:*       users:(("redis-server",pid=3894,fd=6))

tcp     LISTEN   0        2048             0.0.0.0:63790            0.0.0.0:*       users:(("docker-proxy",pid=5136,fd=4))

tcp     LISTEN   0        2048             0.0.0.0:2222             0.0.0.0:*       users:(("docker-proxy",pid=5018,fd=4))

tcp     LISTEN   0        2048                [::]:80                  [::]:*       users:(("docker-proxy",pid=5080,fd=4))

tcp     LISTEN   0        128                 [::]:22                  [::]:*       users:(("sshd",pid=1096,fd=4))

tcp     LISTEN   0        2048                [::]:33061               [::]:*       users:(("docker-proxy",pid=5199,fd=4))

tcp     LISTEN   0        2048                [::]:33062               [::]:*       users:(("docker-proxy",pid=5181,fd=4))

tcp     LISTEN   0        2048                [::]:63790               [::]:*       users:(("docker-proxy",pid=5145,fd=4))

tcp     LISTEN   0        2048                [::]:2222                [::]:*       users:(("docker-proxy",pid=5043,fd=4))
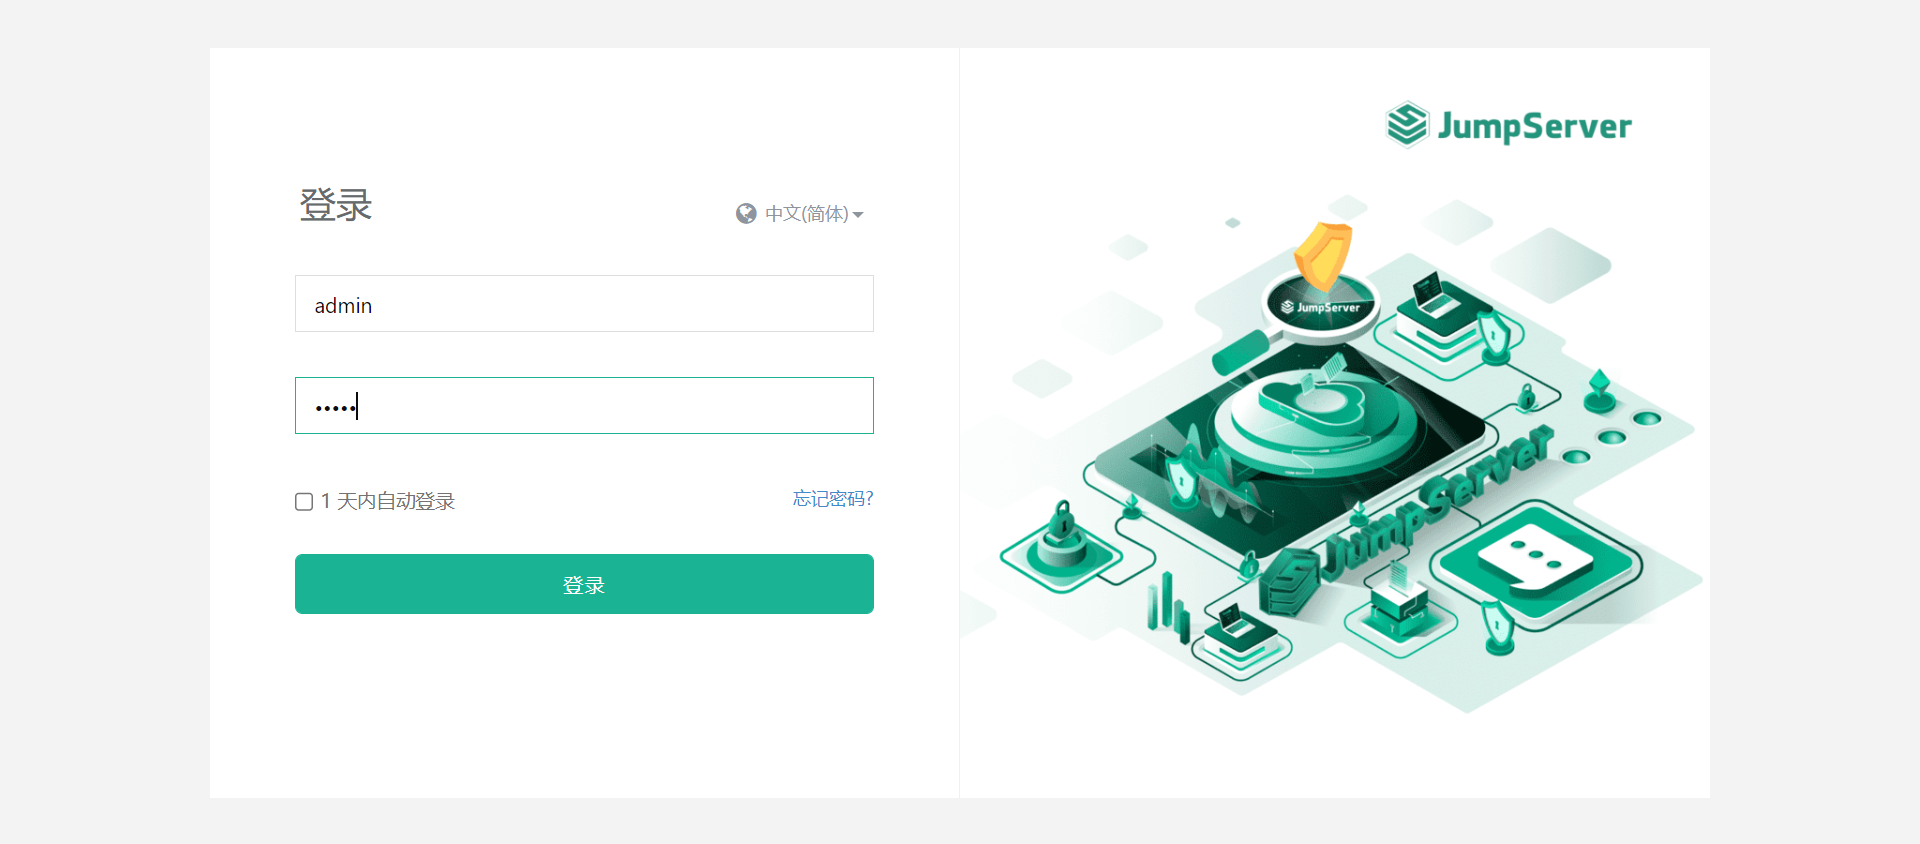
web浏览
用户名:admin
密码:admin
jumpserver应用
停止jumpserver,启动redis,再重新启动
[root@localhost ~]# cd jumpserver-offline-installer-v3.3.1-amd64-322

[root@localhost jumpserver-offline-installer-v3.3.1-amd64-322]# ./jmsctl.sh stop

[+] Running 1/0

 ? Container jms_core  Stopped                                        0.0s

[+] Running 1/1

 ? Container jms_koko  Stopped                                       10.2s

[+] Running 1/1

 ? Container jms_lion  Stopped                                       10.1s

[+] Running 1/1

 ? Container jms_magnus  Stopped                                     10.1s

[+] Running 1/0

 ? Container jms_web  Stopped                                         0.1s

[+] Running 1/0

 ? Container jms_celery  Stopped                                      0.0s

[jms_core]

[+] Running 1/1

 ? Container jms_core  Removed1.1s

[jms_koko]

[+] Running 1/0

 ? Container jms_koko  Removed0.1s

[jms_lion]

[+] Running 1/0

 ? Container jms_lion  Removed0.1s

[jms_magnus]

[+] Running 1/0

 ? Container jms_magnus  Removed0.0s

[jms_web]

[+] Running 1/0

 ? Container jms_web  Removed0.0s

[jms_celery]

[+] Running 1/1

 ? Container jms_celery  Removed1.3s

[root@localhost ~]# cd redis-7.0.11

[root@localhost redis-7.0.11]# nohup redis-server /etc/redis.conf &

[1] 7144

[root@localhost redis-7.0.11]# nohup: ignoring input and appending output to 'nohup.out'

[root@localhost redis-7.0.11]# ss -antlup

Netid State  Recv-Q Send-Q   Local Address:Port   Peer Address:Port Process

tcp   LISTEN 0      80             0.0.0.0:3306        0.0.0.0:*     users:(("mysqld",pid=1175,fd=55))

tcp   LISTEN 0      511            0.0.0.0:6379        0.0.0.0:*     users:(("redis-server",pid=7144,fd=6))

tcp   LISTEN 0      128            0.0.0.0:22          0.0.0.0:*     users:(("sshd",pid=1093,fd=3))

tcp   LISTEN 0      128               [::]:22             [::]:*     users:(("sshd",pid=1093,fd=4))

[root@localhost ~]# cd jumpserver-offline-installer-v3.3.1-amd64-322

[root@localhost jumpserver-offline-installer-v3.3.1-amd64-322]# ./jmsctl.sh start

[+] Running 6/6

  Container jms_core    Healthy                                         21.7s

  Container jms_lion    Started                                         24.5s

  Container jms_magnus  Started                                         25.1s

  Container jms_web     Started                                         24.8s

  Container jms_celery  Started                                         24.7s

  Container jms_koko    Started                                         24.1s
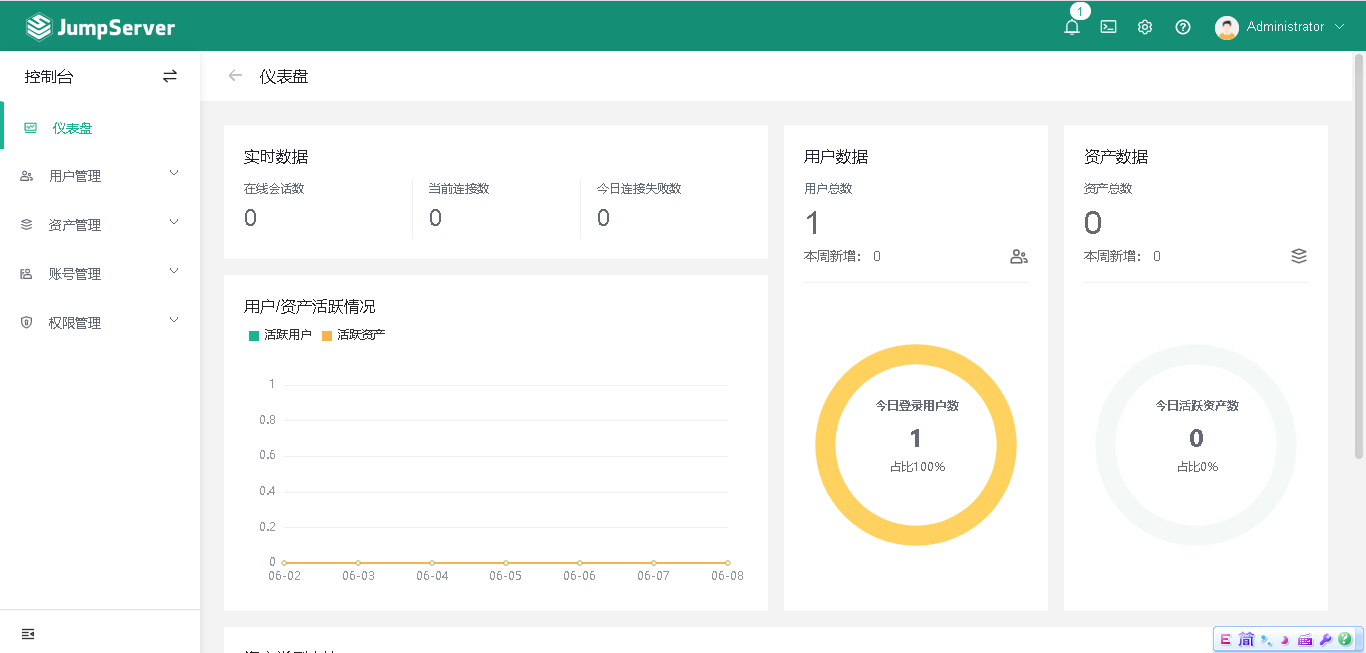
登录,设置密码:111111
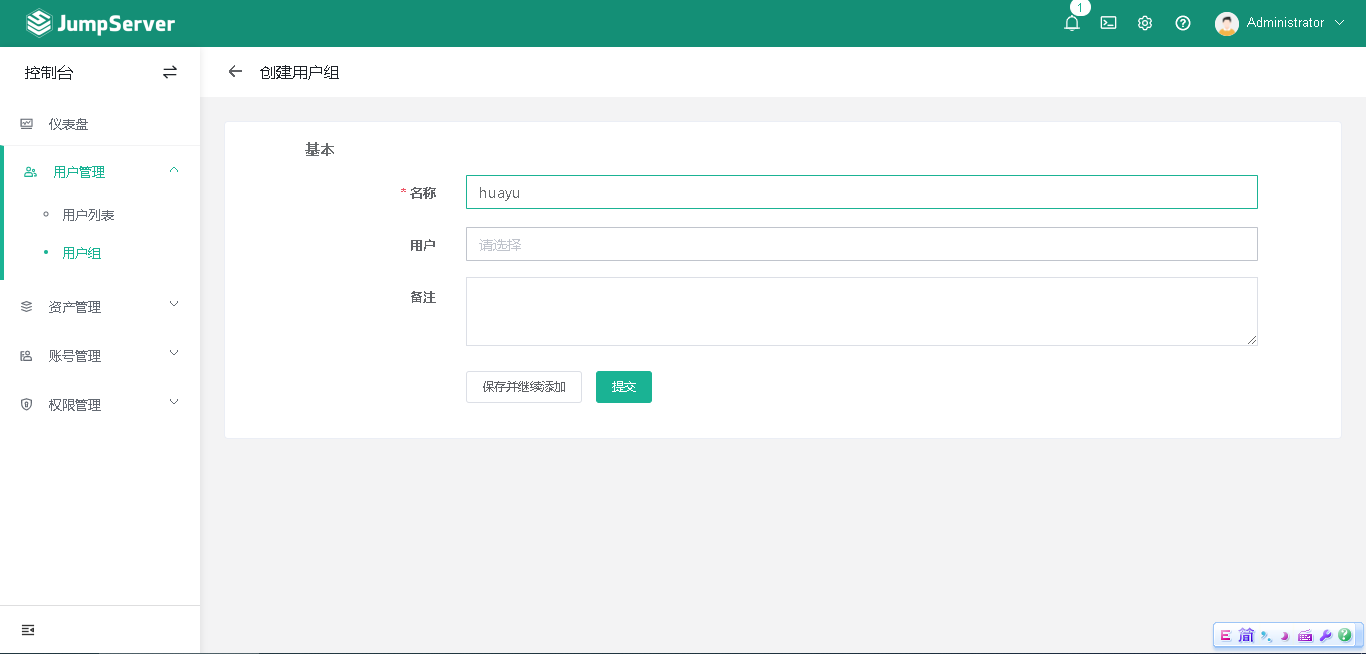
创建用户组
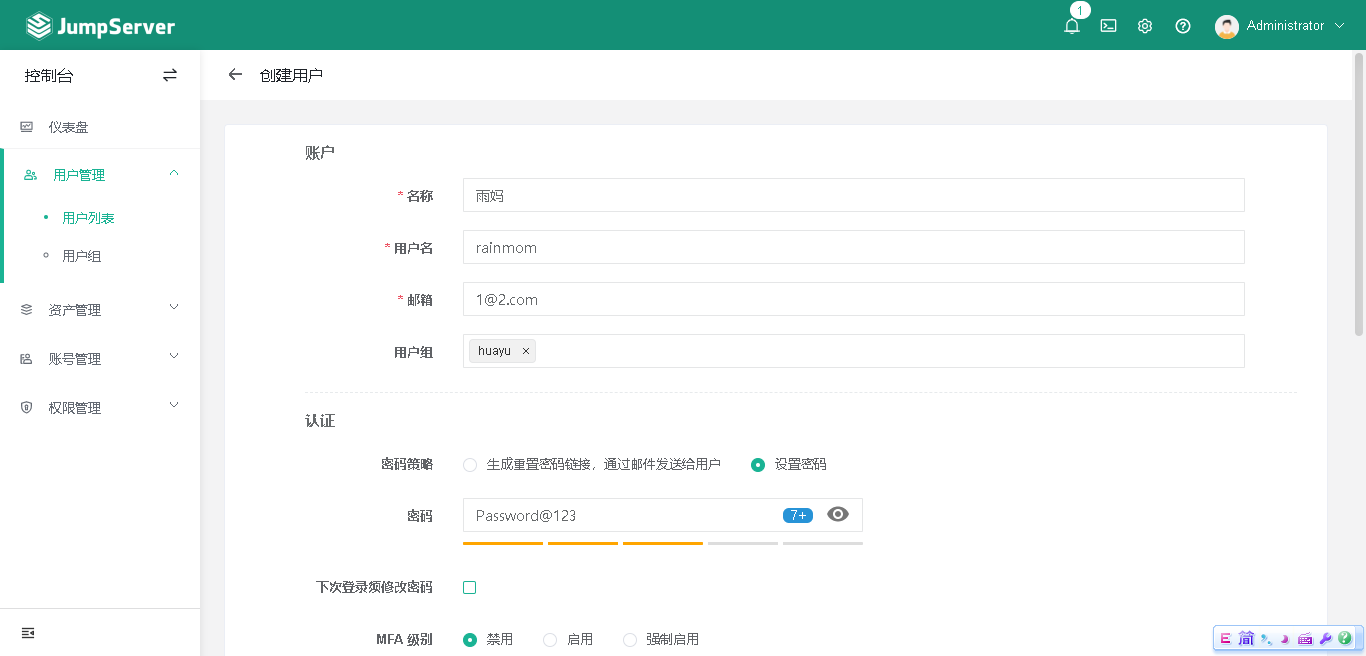
创建用户
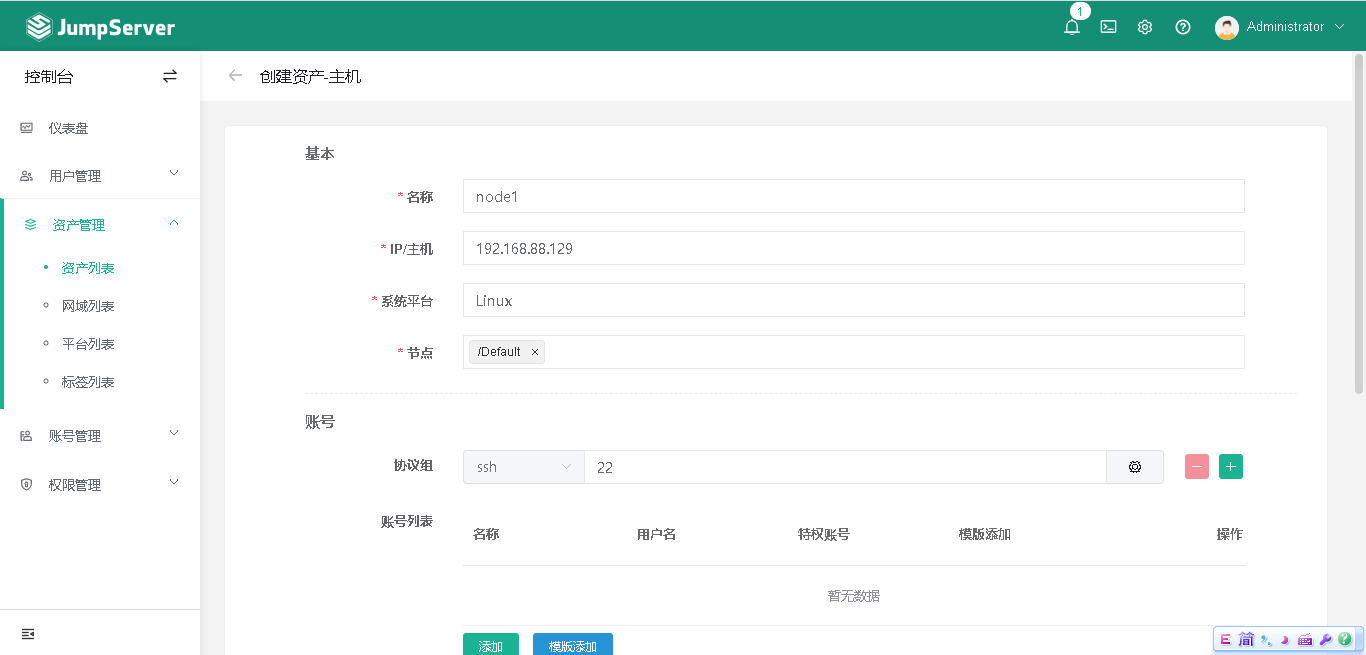
另启一台虚拟机作为被管理的虚拟,创建资产
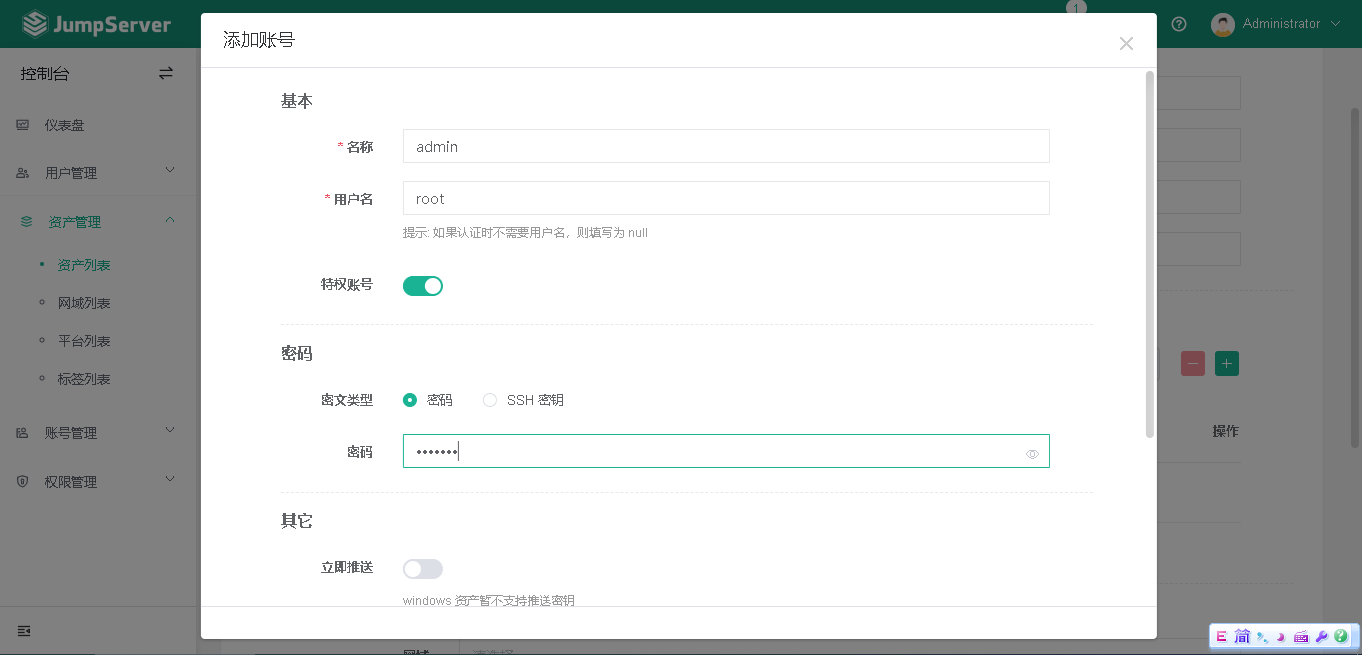
添加账号
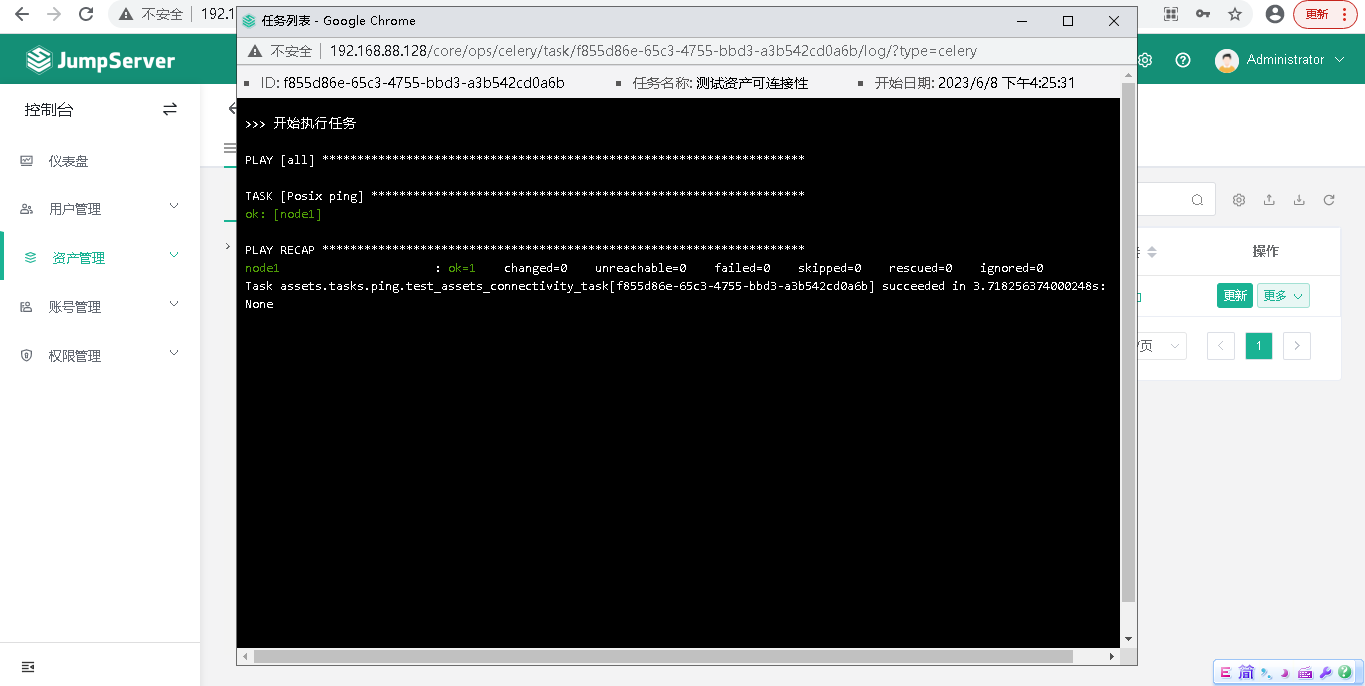
测试
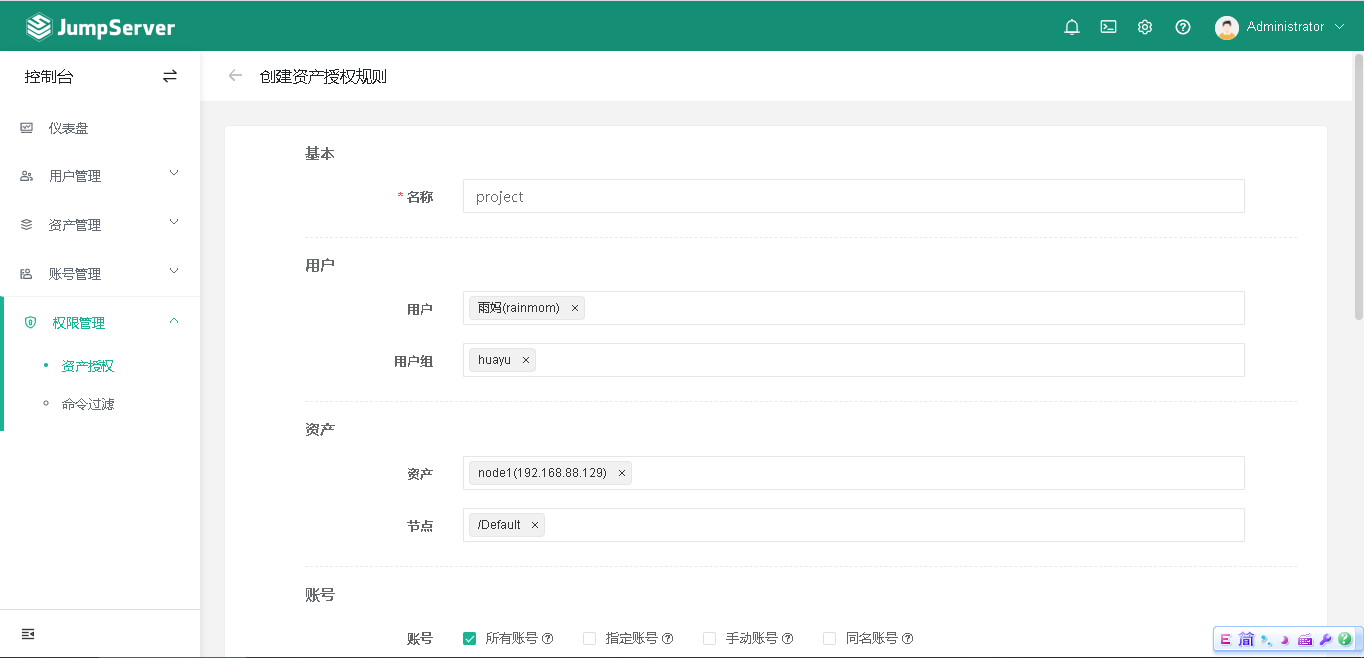
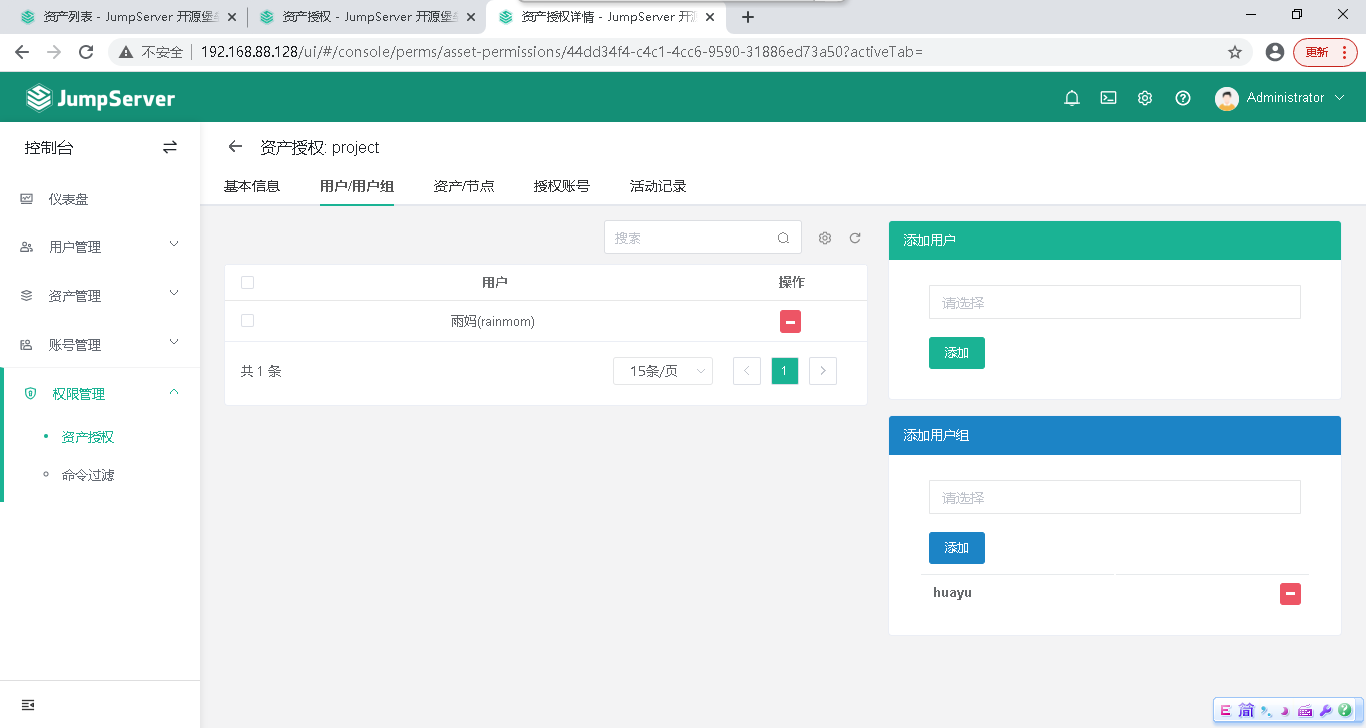
资产授权
登录新建用户(密码:Password@123),查看
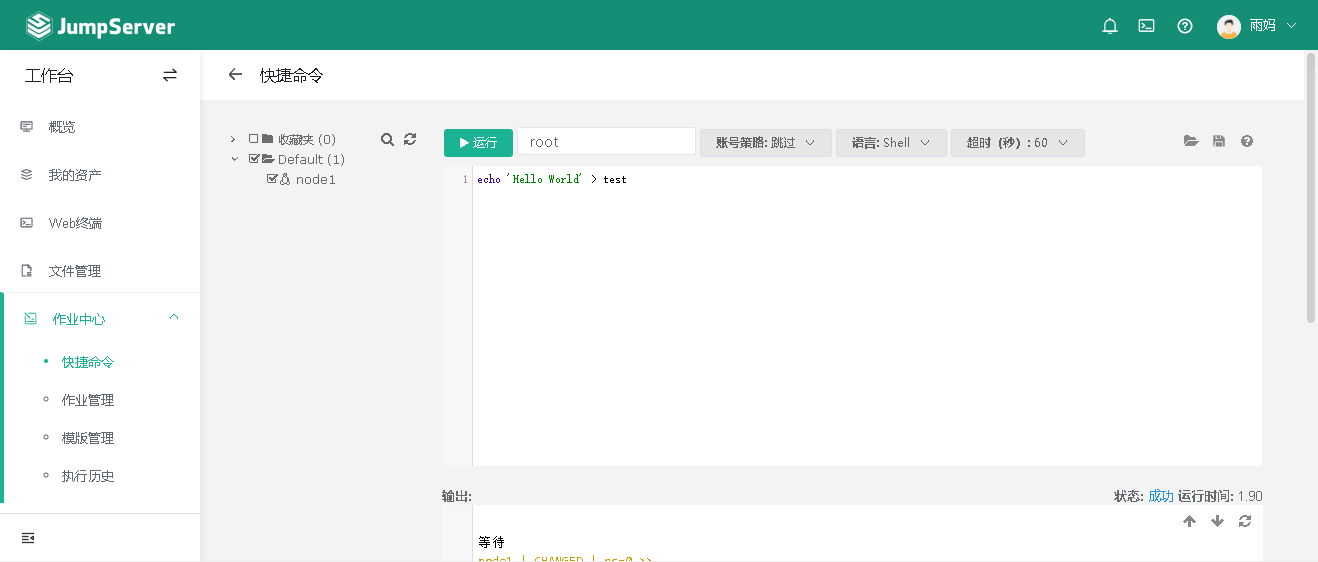
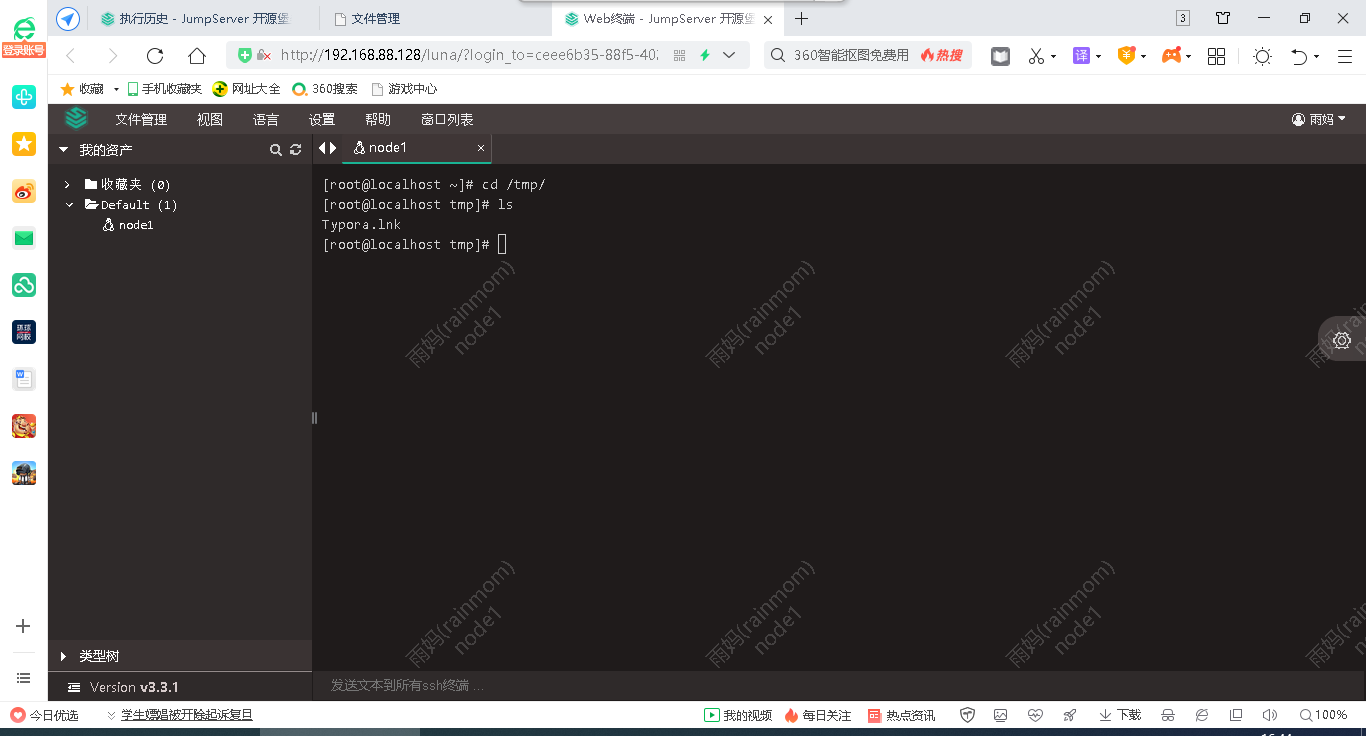
测试快捷命令
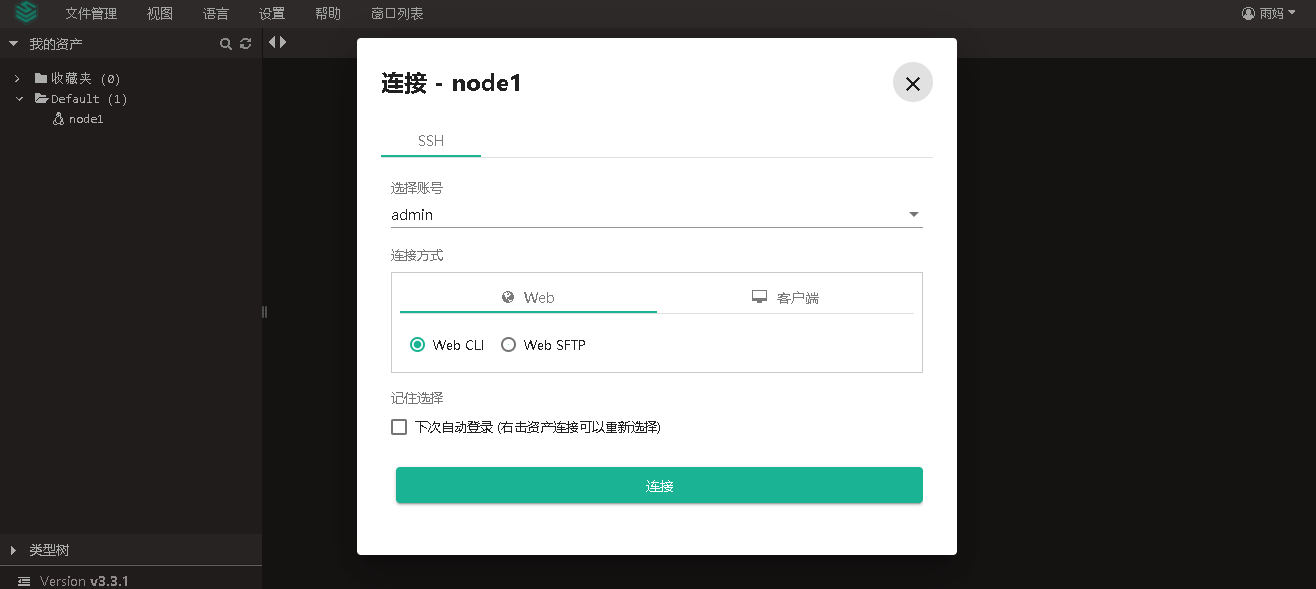
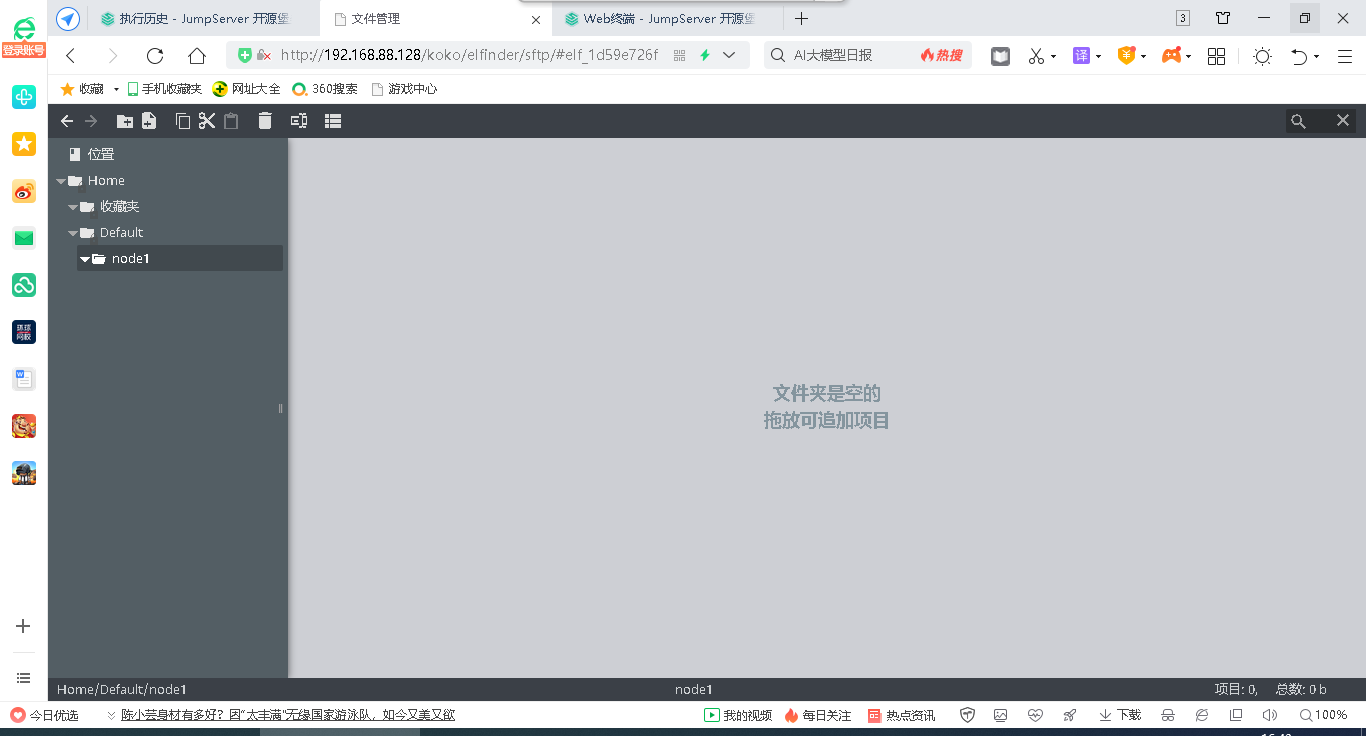
连接web终端
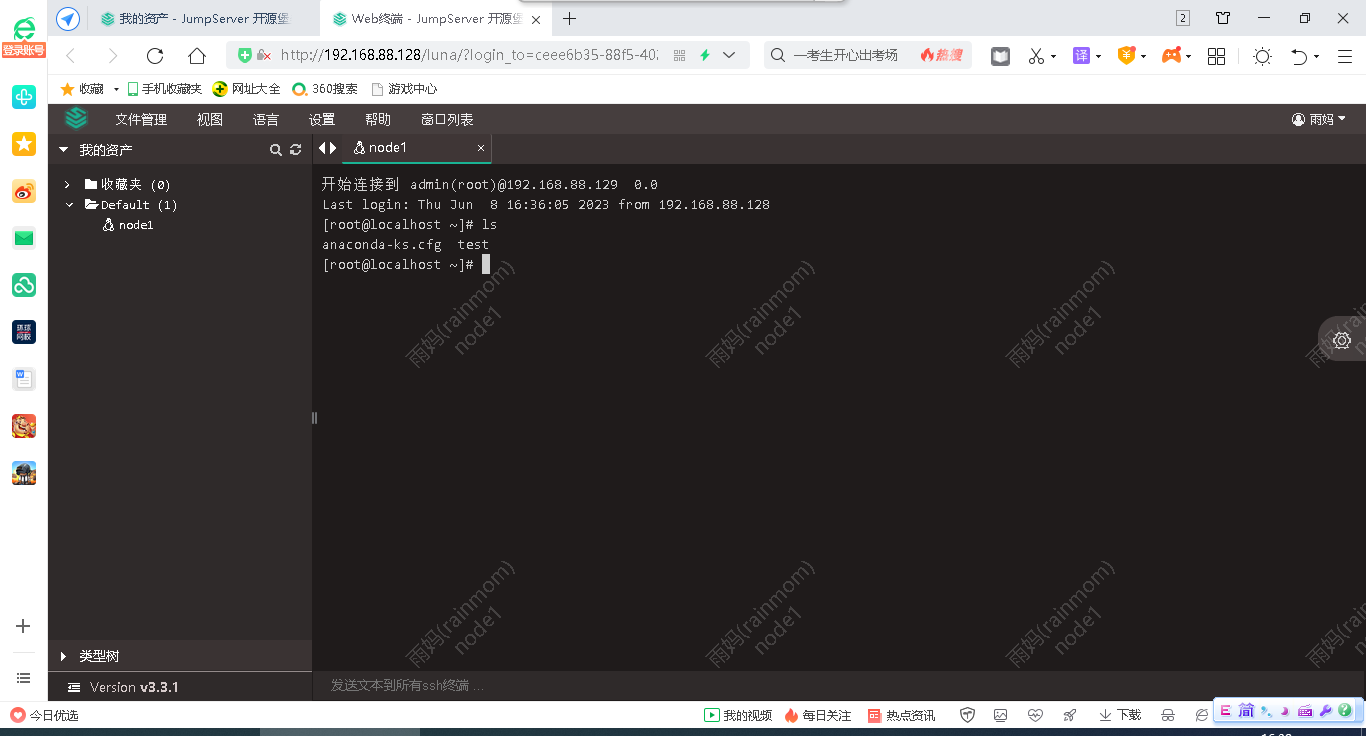
可上传文件
Xshell连接(用户名:admin,格式:ssh admin@192.168.88.128:2222,密码:111111)
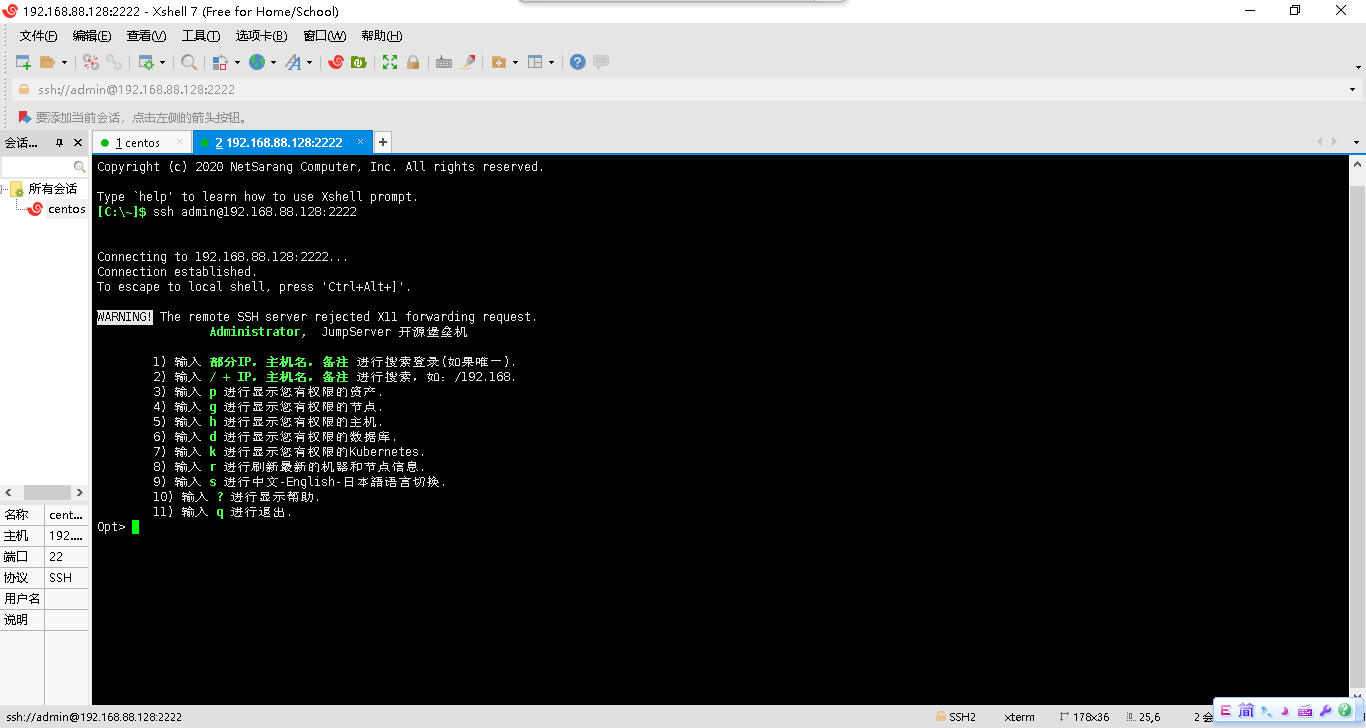
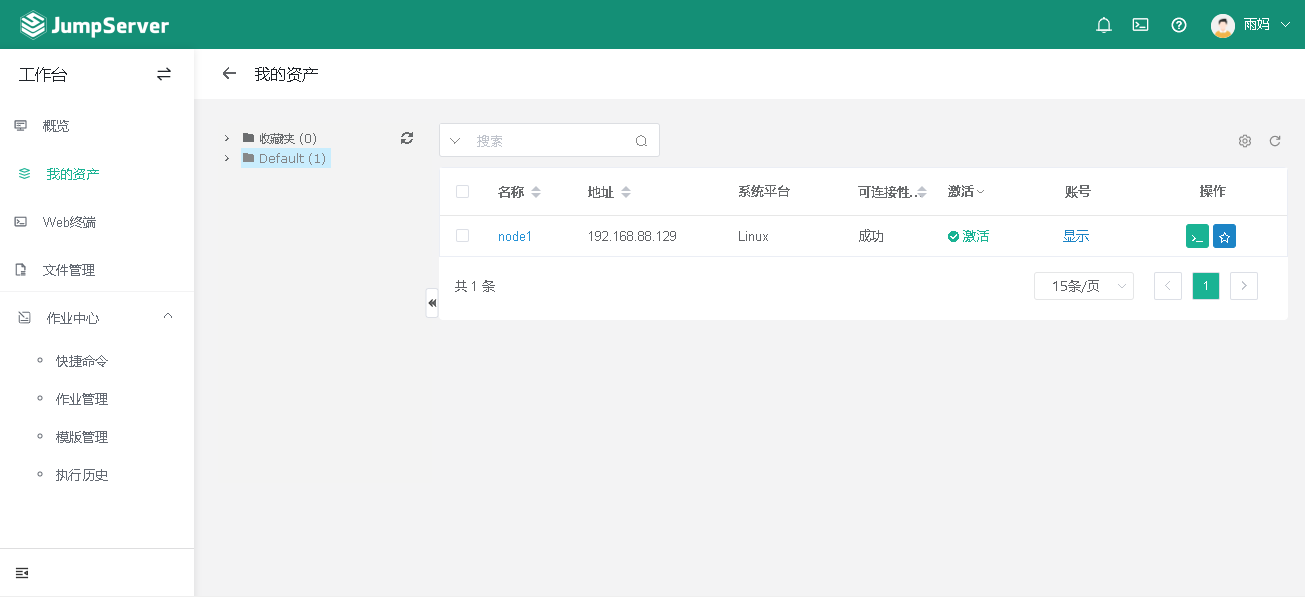
查看资产(未授权的原因,看不到资产)
WARNING! The remote SSH server rejected X11 forwarding request.

		Administrator,  JumpServer 开源堡垒机

	1) 输入 部分IP,主机名,备注 进行搜索登录(如果唯一).

	2) 输入 / + IP,主机名,备注 进行搜索,如:/192.168.

	3) 输入 p 进行显示您有权限的资产.

	4) 输入 g 进行显示您有权限的节点.

	5) 输入 h 进行显示您有权限的主机.

	6) 输入 d 进行显示您有权限的数据库.

	7) 输入 k 进行显示您有权限的Kubernetes.

	8) 输入 r 进行刷新最新的机器和节点信息.

	9) 输入 s 进行中文-English-日本?语言切换.

	10) 输入 ? 进行显示帮助.

	11) 输入 q 进行退出.

Opt> p

没有资产

搜索:

[Host]>
切换用户登录(用户名:rainmom,格式:ssh rainmom@192.168.88.128:2222,密码:Password@123)
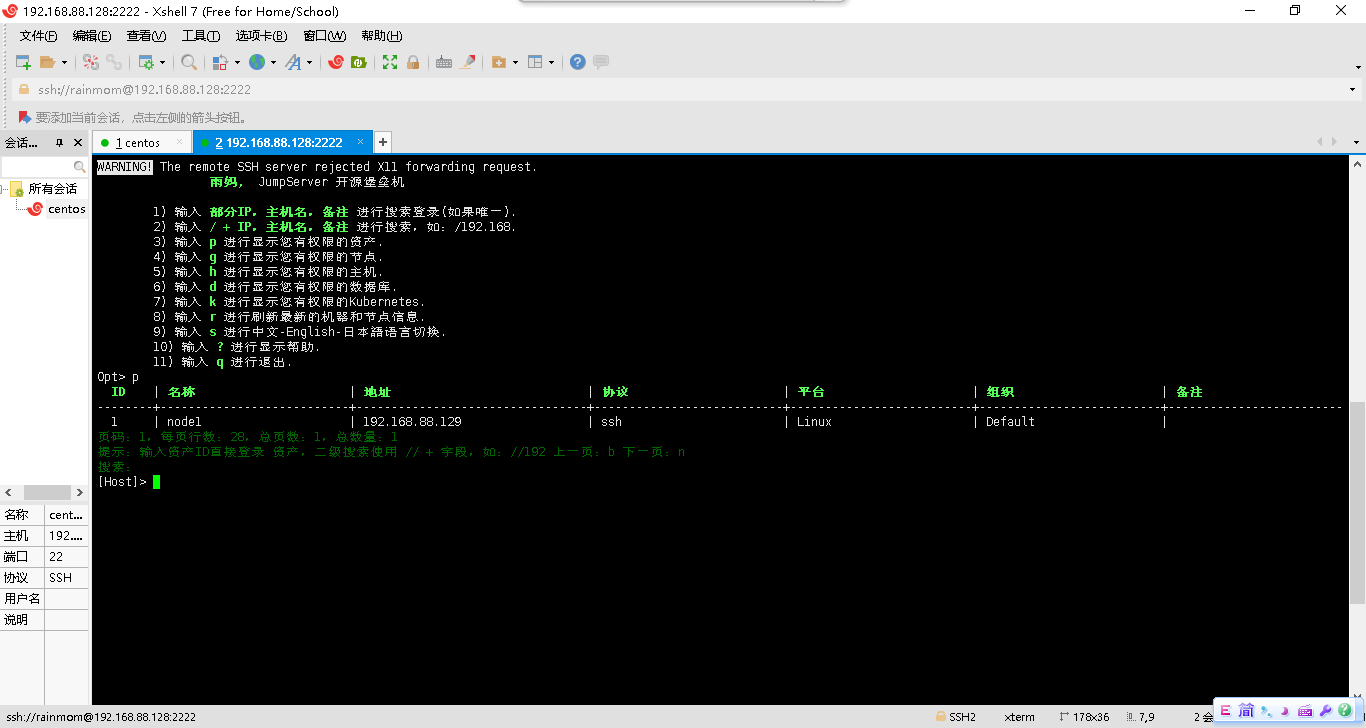
在当前页面上输入ID号,即可登录该虚拟机
  ID    | 名称                      | 地址                            | 协议                      | 平台                     | 组织                     | 备注

--------+---------------------------+---------------------------------+---------------------------+--------------------------+--------------------------+-------------------------

  1     | node1                     | 192.168.88.129                  | ssh                       | Linux                    | Default                  |

页码:1,每页行数:28,总页数:1,总数量:1

提示:输入资产ID直接登录 资产,二级搜索使用 // + 字段,如://192 上一页:b 下一页:n

搜索:

[Host]> 1

复用SSH连接(admin@192.168.88.129)[连接数量: 3]

Last login: Thu Jun  8 16:37:59 2023 from 192.168.88.128

[root@localhost ~]# ls

anaconda-ks.cfg  test

[root@localhost ~]# exit

logout

[Host]>
可添加授权
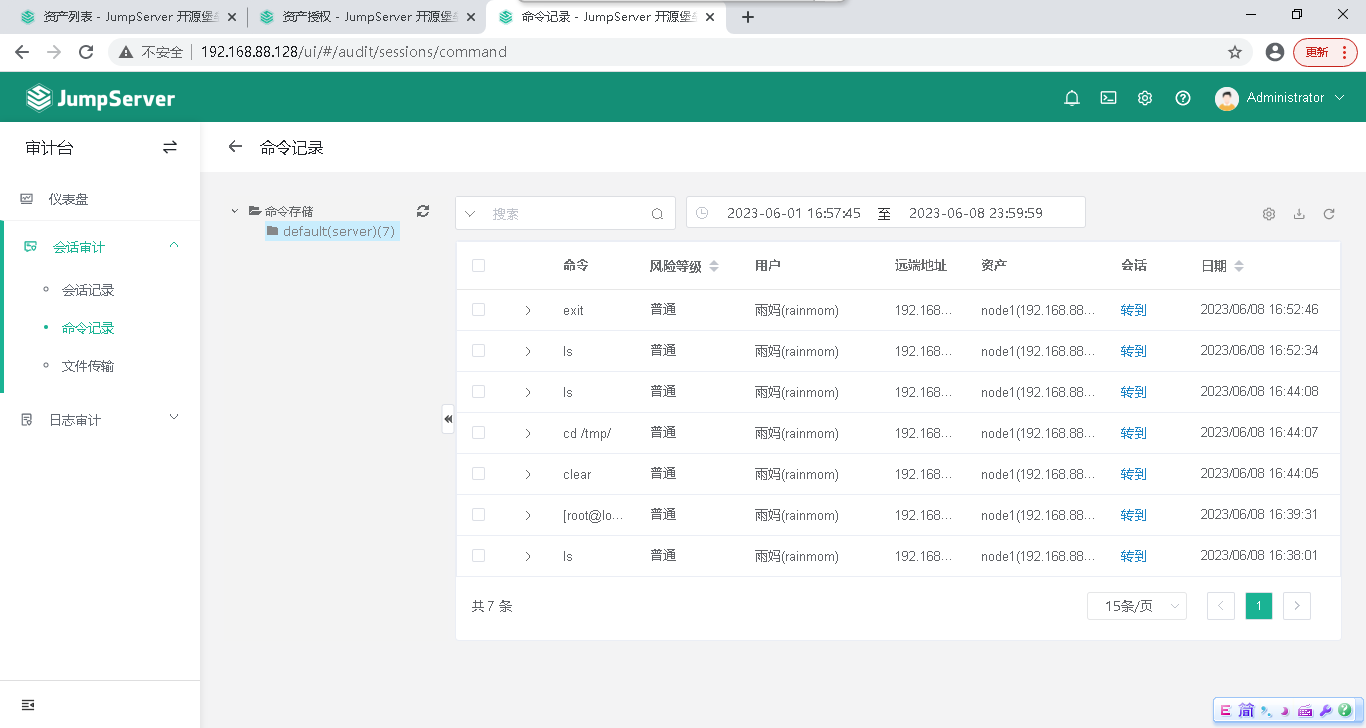
切换审计台,可查看记录
JumpServer安装及应用的更多相关文章
- jumpserver安装详解
环境说明 主机为最小 安装的centos6.9 x86_64. [root@m01 ~]# cat /etc/redhat-release CentOS release 6.9 (Final) [ro ...
- JumpServer 安装配置
环境 系统:Centos 7.4 阿里云ECS,单独绑定弹性公网IP 关闭selinux,防火墙对本机公司IP全开 #CentOS 7 $ setenforce 0 # 临时关闭,重启后失效 #修改字 ...
- jumpserver安装
一. 准备 Python3 和 Python 虚拟环境 1.1 安装依赖包 yum -y install wget sqlite-devel xz gcc automake zlib-devel o ...
- jumpserver安装与部署
1.简介 Jumpserver 是一款由Python编写开源的跳板机(堡垒机)系统,实现了跳板机应有的功能.基于ssh协议来管理,客户端无需安装agent.特点: 完全开源,GPL授权 Pyth ...
- CentOS 7下JumpServer安装及配置
环境 系统 # cat /etc/redhat-release CentOS Linux release 7.4.1708 (Core) # uname -r 3.10.0-693.21.1.el7. ...
- Jumpserver安装过程
Jumpserver 安装过程 可参照此官方文档搭建: http://docs.jumpserver.org/zh/docs/step_by_step.html 其中,需注意处: # docker ...
- jumpserver安装和使用
jumpserver安装 #centos6 centos7都可用yum -y install git python-pip mysql-devel gcc automake autoconf pyth ...
- jumpserver安装及使用教程
我自己是jumpserver的新手,以下两个链接是比较好的教程: 安装教程:http://blog.csdn.net/wanglei_storage/article/details/51001810 ...
- jumpserver安装教程
centos7系统一步一步安装jumpserver 参照官方文档,查找了百度所有的文档,基本上都是按照官方的文档操作的 官方文档点我-> 安装jumpserver需注意: 1:网络环境要好,有的 ...
- jumpserver 安装详解
一,下载软件 下载前安装依赖软件 yum install -y epel-release yum -y install git python-pip my ...
随机推荐
- 搭建私有YUM仓库_及_内网镜像站
搭建私有YUM仓库_及_内网镜像站 搭建私有YUM仓库(自己定制的rpm包)私有yum仓库环境系统版本:centos7.4 IP:192.168.1.47 #最好能上公网 私有yum仓库服务端配置 第 ...
- 系统优化脚本支持Ubuntu和CentOS
系统优化脚本支持Ubuntu和CentOS 经常会部署各种用途的操作系统,但在这些工作中,我们会发现很多工作其实是重复性的劳动,操作的内容也是大同小异,基于这类情况,我们可以把相同的操作做成统一执行的 ...
- pysimplegui之元素简单介绍(元素值得获取修改,key的规范及特殊用法)
重点 1获取元素的值 Input(key='mykey') values['mykey'] 2通过key查找元素 对象window['key'] 3更新元素的值 window['key'](要更新的值 ...
- [Java SE]Java方法的参数传递机制:值传递
1 案例引入:实验源码 [案例结论] 若调用方client想通过修改方法updateMethod(oldObject)对调用方所在的引用对象(非基本数据类型)oldObject的属性值进行修改,则: ...
- MINIO使用
1.作用 官网地址:https://docs.min.io/ 文件存储.文件对象的上传.下载和删除! 2.使用依赖 <dependency> <groupId>io.minio ...
- jdbc-plus是一款基于JdbcTemplate增强工具包, 基于JdbcTemplate已实现分页、多租户等插件,可自定义扩展插件
jdbc-plus简介 jdbc-plus是一款基于JdbcTemplate增强工具包, 基于JdbcTemplate已实现分页.多租户等插件,可自定义扩展插件.项目地址: https://githu ...
- SpringBoot 使用 Sa-Token 完成权限认证
一.设计思路 所谓权限认证,核心逻辑就是判断一个账号是否拥有指定权限: 有,就让你通过. 没有?那么禁止访问! 深入到底层数据中,就是每个账号都会拥有一个权限码集合,框架来校验这个集合中是否包含指定的 ...
- 【介绍】.NET新加特性介绍
简介 当下的.Net新版本引进了几种新特性,包括全局命名空间引用.可空引用类型和顶级语句.这些特性在一定程度上改善了 .NET 平台的开发效率, 对于短小精干的小程序,这些新的特性无疑可以把开发效 ...
- IE盒模型和标准盒模型之间的差别
1.W3C标准盒子模型 w3c盒子模型的范围包括margin.border.padding.content,并且content部分不包含其他部分 2.IE盒子模型 IE盒子模型的范围包括margin. ...
- 解决Godot使用VsCode编写C#代码,智能提示不见了[一问随笔]
问题: 我的项目采用了godot + visual studio code + C#,有天突然换引擎,从Godot4.0.0升级到Godot4.0.2,visual studio code 突然不给代 ...