Rhel7.4系统部署cobbler
cobbler安装
一、系统信息:
[root@openstack ~]# cat /etc/redhat-release
Red Hat Enterprise Linux Server release 7.4 (Maipo)
[root@openstack ~]# uname -r
3.10.0-693.el7.x86_64
[root@openstack ~]# ifconfig ens33 |awk -F "[ :]+" 'NR==2 {print $3}'
192.168.209.7
[root@openstack ~]# systemctl stop firewalld
[root@openstack ~]# systemctl disable firewalld
[root@openstack ~]# systemctl status firewalld
● firewalld.service - firewalld - dynamic firewall daemon
Loaded: loaded (/usr/lib/systemd/system/firewalld.service; disabled; vendor preset: enabled)
Active: inactive (dead)
Docs: man:firewalld(1)
[root@openstack ~]# getenforce
Disabled
二、开始安装cobbler
1、安装依赖包
[root@openstack ~]# yum -y install epel-release
[root@openstack ~]# yum -y install cobbler cobbler-web dhcp tftp-server pykickstart httpd
2、启动相关服务
[root@openstack ~]# systemctl start cobblerd
[root@openstack ~]# systemctl enable cobblerd
[root@openstack ~]# systemctl enable httpd
[root@openstack ~]# systemctl start httpd
3、检查配置是否有问题
[root@openstack ~]# cobbler check
The following are potential configuration items that you may want to fix:
1 : The 'server' field in /etc/cobbler/settings must be set to something other than localhost, or kickstarting features will not work. This should be a resolvable hostname or IP for the boot server as reachable by all machines that will use it.
2 : For PXE to be functional, the 'next_server' field in /etc/cobbler/settings must be set to something other than 127.0.0.1, and should match the IP of the boot server on the PXE network.
3 : SELinux is enabled. Please review the following wiki page for details on ensuring cobbler works correctly in your SELinux environment:
https://github.com/cobbler/cobbler/wiki/Selinux
4 : change 'disable' to 'no' in /etc/xinetd.d/tftp
5 : some network boot-loaders are missing from /var/lib/cobbler/loaders, you may run 'cobbler get-loaders' to download them, or, if you only want to handle x86/x86_64 netbooting, you may ensure that you have installed a *recent* version of the syslinux package installed and can ignore this message entirely. Files in this directory, should you want to support all architectures, should include pxelinux.0, menu.c32, elilo.efi, and yaboot. The 'cobbler get-loaders' command is the easiest way to resolve these requirements.
6 : change 'disable' to 'no' in /etc/xinetd.d/rsync
7 : debmirror package is not installed, it will be required to manage debian deployments and repositories
8 : The default password used by the sample templates for newly installed machines (default_password_crypted in /etc/cobbler/settings) is still set to 'cobbler' and should be changed, try: "openssl passwd -1 -salt 'random-phrase-here' 'your-password-here'" to generate new one
9 : fencing tools were not found, and are required to use the (optional) power management features. install cman or fence-agents to use them
Restart cobblerd and then run 'cobbler sync' to apply changes.
按照提示解决问题:
问题一:
[root@openstack ~]# sed -i 's/^server: 127.0.0.1/server: 192.168.209.7/' /etc/cobbler/settings # 修改server的ip地址为本机ip
问题二:
[root@openstack ~]# sed -i 's/^next_server: 127.0.0.1/next_server: 192.168.209.7/' /etc/cobbler/settings # TFTP Server 的IP地址
问题四:
[root@openstack ~]# vim /etc/xinetd.d/tftp
# default: off
# description: The tftp server serves files using the trivial file transfer \
# protocol. The tftp protocol is often used to boot diskless \
# workstations, download configuration files to network-aware printers, \
# and to start the installation process for some operating systems.
service tftp
{
disable = no
socket_type = dgram
protocol = udp
wait = yes
user = root
server = /usr/sbin/in.tftpd
server_args = -B 1380 -v -s /var/lib/tftpboot
per_source = 11
cps = 100 2
flags = IPv4
}
问题5:
[root@openstack ~]# cobbler get-loaders # 下载缺失的文件
问题6:
[root@openstack ~]# systemctl enable rsyncd
[root@openstack ~]# systemctl start rsyncd
问题8:
[root@tiandong68 ~]# openssl passwd -1 -salt thunder thunder 8
$1$thunder$XsMPVXOj.YfZ3A66jbr5a1
[root@openstack ~]# vim /etc/cobbler/settings
101 default_password_crypted: "$1$123456$wOSEtcyiP2N/IfIl15W6Z0"
问题7和9不用处理,问题三把selinux设置为disable就可以了。
重启cobbler然后再次check
[root@openstack ~]# systemctl restart cobblerd.service
[root@openstack ~]# cobbler check 这两个问题可以暂时忽略
The following are potential configuration items that you may want to fix:
1 : debmirror package is not installed, it will be required to manage debian deployments and repositories
2 : fencing tools were not found, and are required to use the (optional) power management features. install cman or fence-agents to use them
Restart cobblerd and then run 'cobbler sync' to apply changes.
4、配置cobbler dhcp
修改cobbler配置
[root@openstack ~]# vim /etc/cobbler/settings
242 manage_dhcp: 1
修改/etc/cobbler/dhcp.template文件
subnet 192.168.209.0 netmask 255.255.255.0 {
option routers 192.168.209.254 ;
option domain-name-servers 119.29.29.29;
option subnet-mask 255.255.255.0;
range dynamic-bootp 192.168.209.100 192.168.209.254;
default-lease-time 21600;
max-lease-time 43200;
next-server $next_server;
重启cobbler并同步配置,修改完dhcp必须sync同步配置
[root@openstack ~]# systemctl restart cobblerd.service
[root@openstack ~]# cobbler sync
[root@openstack ~]# netstat -lnup|grep dhcp
udp 0 0 0.0.0.0:67 0.0.0.0:* 4665/dhcpd
5、导入镜像:
[root@openstack ~]# mount /dev/sr0 /mnt/
mount: /dev/sr0 写保护,将以只读方式挂载
[root@openstack ~]# cobbler import --path=/mnt --name=Centos-7.4 --arch=x86_64 # cobbler导入镜像
# --path 镜像路径
# --name 为安装源定义一个名字
# --arch 指定安装源是32位、64位、ia64, 目前支持的选项有: x86│x86_64│ia64
# 安装源的唯一标示就是根据name参数来定义,本例导入成功后,安装源的唯一标示就是:CentOS-7.4-x86_64
镜像导入成功后查看:
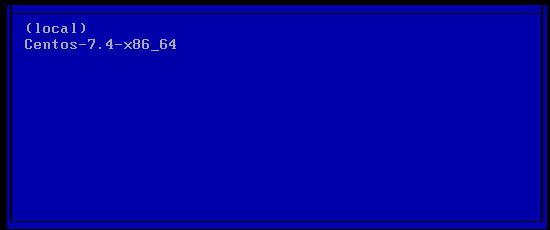
[root@openstack ~]# cobbler list
distros:
Centos-7.4-x86_64
test
profiles:
Centos-7.4-x86_64
test
systems:
repos:
images:
mgmtclasses:
packages:
files:
导入的镜像存储的位置:
[root@openstack ~]# cd /var/www/cobbler/ks_mirror/
[root@openstack ks_mirror]# ll
总用量 0
dr-xr-xr-x 9 root root 288 7月 11 2017 Centos-7.4-x86_64
drwxr-xr-x. 2 root root 100 1月 9 21:11 config
6、导入kickstarts配置文件
[root@openstack ~]# cd /var/lib/cobbler/kickstarts/
[root@openstack kickstarts]# vim Centos-7.4-x86_64.cfg
#platform=x86, AMD64, or Intel EM64T
#version=DEVEL
# Install OS instead of upgrade
install
# Keyboard layouts
keyboard 'us'
# Root password
#rootpw --iscrypted $1$m1pE0DG6$vALBphGGynqvUzfJaWZ6U1
# Use network installation
url --url="$tree"
# System language
lang en_US
# Firewall configuration
firewall --disabled
# System authorization information
auth --useshadow --passalgo=sha512
# Use graphical install
graphical
firstboot --disable
# SELinux configuration
selinux --disabled
# Network information
network --bootproto=dhcp --device=eth0
network --bootproto=dhcp --device=eth1
# Reboot after installation
reboot
# System timezone
timezone Asia/Shanghai
# System bootloader configuration
bootloader --location=mbr
# Clear the Master Boot Record
zerombr
# Partition clearing information
clearpart --all --initlabel
#Disk partitioning information
part /boot --fstype xfs --size 1024 --ondisk sda
#Oracle:part swap --size 16384 --ondisk sda
part swap --size 2048 --ondisk sda
part / --fstype xfs --size 1 --grow --ondisk sda
%packages
@base
@core
@compat-libraries
@debugging
@development
@gnome-desktop
@X Window System
%end
修改默认指定的配置文件为我们编译的
[root@openstack ~]# cobbler profile edit --name Centos-7.4-x86_64 --kickstart=/var/lib/cobbler/kickstarts/Centos7.4-x86_64.cfg # 编辑profile,修改ks文件为我们刚刚上传的Centos7.2-x86_64.cfg
[root@openstack ~]# cobbler profile edit --name Centos-7.4-x86_64 --kopts='net.ifnames=0 biosdevname=0'
# 修改安装系统的内核参数,在CentOS7系统有一个地方变了,就是网卡名变成eno16777736这种形式,但是为了运维标准化,我们需要将它变成我们常用的eth0,因此使用上面的参数。但要注意是CentOS7才需要上面的步骤,CentOS6不需要。
[root@openstack ~]# cobbler profile report --name=Centos-7.4-x86_64
Name : Centos-7.4-x86_64
TFTP Boot Files : {}
Comment :
DHCP Tag : default
Distribution : Centos-7.4-x86_64
Enable gPXE? : 0
Enable PXE Menu? : 1
Fetchable Files : {}
Kernel Options : {'biosdevname': '0', 'net.ifnames': '0'}
Kernel Options (Post Install) : {}
Kickstart : /var/lib/cobbler/kickstarts/Centos-7.4-x86_64.cfg
Kickstart Metadata : {}
Management Classes : []
Management Parameters : <<inherit>>
Name Servers : []
Name Servers Search Path : []
Owners : ['admin']
Parent Profile :
Internal proxy :
Red Hat Management Key : <<inherit>>
Red Hat Management Server : <<inherit>>
Repos : []
Server Override : <<inherit>>
Template Files : {}
Virt Auto Boot : 1
Virt Bridge : xenbr0
Virt CPUs : 1
Virt Disk Driver Type : raw
Virt File Size(GB) : 5
Virt Path :
Virt RAM (MB) : 512
Virt Type : kvm
同步:
[root@openstack ~]# cobbler sync
[root@openstack ~]#systemctl restart rsyncd
[root@openstack ~]#systemctl restart cobblerd
[root@openstack ~]#systemctl restart httpd
新建一个虚拟机:
完成了。
Rhel7.4系统部署cobbler的更多相关文章
- 基于CentOS7系统部署cobbler批量安装系统(week3_day5_part1)-技术流ken
前言 cobbler是一个可以实现批量安装系统的Linux应用程序.它有别于pxe+kickstart,cobbler可以实现同个服务器批量安装不同操作系统版本. 系统环境准备及其下载cobbler ...
- 末学者笔记--Centos7系统部署cobbler批量安装系统
[前言]: cobbler是一个可以实现批量安装系统的Linux应用程序.它有别于pxe+kickstart,cobbler可以实现同个服务器批量安装不同操作系统版本. 系统环境准备及其下载cob ...
- 006-(成功环境记录)基于Centos7系统部署cobbler批量安装系统
1.1 cobbler简介 Cobbler是一个Linux服务器安装的服务,可以通过网络启动(PXE)的方式来快速安装.重装物理服务器和虚拟机,同时还可以管理DHCP,DNS等. Cobbler可以使 ...
- 基于centos7系统部署cobbler
准备环境和下载cobbler 一,系统准备 虚拟机下要添加两个网卡.一个仅主机对内提供cobbler服务,一个桥接用来通外网 系统版本为:CentOS 7.5 内网ip :169.254.1.6 # ...
- 运维自动化之系统部署 cobbler(三)
cobbler 介绍 Cobbler: 快速网络安装linux操作系统的服务,支持众多的Linux发行版:Red Hat.Fedora.CentOS.Debian.Ubuntu和SuSE,也可以支持网 ...
- 基于Centos7系统部署cobbler批量安装系统
前言 cobbler是一个可以实现批量安装系统的Linux应用程序.它有别于pxe+kickstart,cobbler可以实现同个服务器批量安装不同操作系统版本 系统环境的准备及下载cobbler 一 ...
- centos7系统部署cobbler批量安装系统
系统环境: 一.开启两个网卡.一个仅主机模式,一个桥接模式,主机模式对内提供cobbler服务 [root@localhost ~]# ip a 1: lo: <LOOPBACK,UP,LOWE ...
- 部署cobbler服务器
部署cobbler服务器 1.准备环境使用nat或者仅主机模式,不要使用桥接模式,方式获取的IP不是自己的 2. 配置yum源[epel]name=epelenabled=1gpgcheck=0bas ...
- liunx系统部署
Linux系统安装与基本配置 =======================================内容提要:获取Linux 常用发行版的方式DELL/HP/IBM 服务器介绍DELL/HP/ ...
随机推荐
- Oracle设置权限和还原数据库
Oracle还原数据库 ,在最高权限账户上,先将安装好的数据上创建一个账户 -- Create the user create user newsafe identified by newsafe d ...
- scrapy增量爬取
开始接触爬虫的时候还是初学Python的那会,用的还是request.bs4.pandas,再后面接触scrapy做个一两个爬虫,觉得还是框架好,可惜都没有记录都忘记了,现在做推荐系统需要爬取一定的 ...
- 使用webform、websevice来进行ajax请求操作
通过使用webform(asp.net非mvc) .webservice 作为请求接口在前台发送ajax请求:1.前台代码: $.ajax({ type: "POST", //方法 ...
- ELECTRON 打包
安装electron-packager cnpm install electron-packager -g 配置package.json "scripts": { "st ...
- 许愿墙JQ
<!doctype html> <html> <head> <meta charset="utf-8"> <t ...
- wepy 开发小程序, 为什么设置pages路径的时候总是找不到 js 文件?
1,路径先检查仔细了 2,别说话,重新run 3,可能是版本问题,重新搭工程
- SuperMap iClient3D for WebGL 9D怎么将s3m图层的纹理变更精细些
设置S3MTilesLayer.lodRangeScale.默认值是1,设的越小越精细,最小值是0.01.越大越模糊,最大值是100
- DX使用随记--ImageComboBoxEdit
1. 增加按钮: Combo_订单类型.Properties.Items.Clear()Select Case Combo_客户名称.EditValue Case "ABC" Co ...
- Java和操作系统交互(Java 代码是怎么执行)(转)
结合 CPU 理解一行 Java 代码是怎么执行的 根据冯·诺依曼思想,计算机采用二进制作为数制基础,必须包含:运算器.控制器.存储设备,以及输入输出设备,如下图所示. 我们先来分析 CPU 的工作原 ...
- ASE19团队项目alpha阶段model组 scrum11 记录
本次会议于11月15日,19时整在微软北京西二号楼sky garden召开,持续5分钟. 与会人员:Jiyan He, Kun Yan, Lei Chai, Linfeng Qi, Xueqing W ...