
centos7系统部署cobbler批量安装系统
系统环境:
一.开启两个网卡。一个仅主机模式,一个桥接模式,主机模式对内提供cobbler服务

[root@localhost ~]# ip a
1: lo: <LOOPBACK,UP,LOWER_UP> mtu 65536 qdisc noqueue state UNKNOWN group default qlen 1000
link/loopback 00:00:00:00:00:00 brd 00:00:00:00:00:00
inet 127.0.0.1/8 scope host lo
valid_lft forever preferred_lft forever
inet6 ::1/128 scope host
valid_lft forever preferred_lft forever
2: ens33: <BROADCAST,MULTICAST,UP,LOWER_UP> mtu 1500 qdisc pfifo_fast state UP group default qlen 1000
link/ether 00:0c:29:24:81:b8 brd ff:ff:ff:ff:ff:ff
inet 192.168.1.191/24 brd 192.168.1.255 scope global noprefixroute dynamic ens33
valid_lft 6395sec preferred_lft 6395sec
inet6 fe80::d57f:69e1:bdc9:112c/64 scope link noprefixroute
valid_lft forever preferred_lft forever
3: ens37: <BROADCAST,MULTICAST,UP,LOWER_UP> mtu 1500 qdisc pfifo_fast state UP group default qlen 1000
link/ether 00:0c:29:24:81:c2 brd ff:ff:ff:ff:ff:ff
inet 192.168.199.129/24 brd 192.168.199.255 scope global noprefixroute dynamic ens37
valid_lft 1706sec preferred_lft 1706sec
inet6 fe80::2e3a:fb50:b5de:f0d1/64 scope link noprefixroute
valid_lft forever preferred_lft forever
内网IP:192.168.199.129/24
外网IP:192.168.1.191/24
二.关闭安全服务
[root@localhost ~]# systemctl stop firewalld #关闭防火墙
[root@localhost ~]# setenforce 0 #关闭selinux
三.下载cobbler及其所需要的服务
[root@localhost ~]# yum install cobbler httpd dhcp tftp-server xinetd syslinux -y
yum安装cobbler需要使用下面两个源
[epel]
name=epel
enabled=1
gpgcheck=0
baseurl=https://mirrors.aliyun.com/epel/7/x86_64/
[centos]
name=centos base
enabled=1
gpgcheck=0
baseurl=http://mirrors.163.com/centos/7/os/x86_64/
配置相关服务
第一步:配置DHCP服务
[root@localhost ~]# vim /etc/dhcp/dhcpd.conf
subnet 192.168.199.0 netmask 255.255.255.0 {
range 192.168.199.125 192.168.199.129;
default-lease-time 600;
max-lease-time 7200;
filename "pxelinux.0";
}
第二步:配置tftp
[root@localhost ~]# vim /etc/xinetd.d/tftp
# default: off
# description: The tftp server serves files using the trivial file transfer
# protocol. The tftp protocol is often used to boot diskless
# workstations, download configuration files to network-aware printers,
# and to start the installation process for some operating systems.
service tftp
{
socket_type = dgram
protocol = udp
wait = yes
user = root
server = /usr/sbin/in.tftpd
server_args = -s /var/lib/tftpboot
disable = no #yes改为no
per_source = 11
cps = 100 2
flags = IPv4
第三步:启动cobbler
[root@localhost ~]# systemctl restart cobblerd
第四步:启动httpd
[root@localhost ~]# systemctl restart httpd
第五步:检查cobbler配置
[root@localhost ~]# cobbler check
The following are potential configuration items that you may want to fix:
1 : The 'server' field in /etc/cobbler/settings must be set to something other than localhost, or kickstarting features will not work. This should be a resolvable hostname or IP for the boot server as reachable by all machines that will use it.
2 : For PXE to be functional, the 'next_server' field in /etc/cobbler/settings must be set to something other than 127.0.0.1, and should match the IP of the boot server on the PXE network.
3 : Some network boot-loaders are missing from /var/lib/cobbler/loaders, you may run 'cobbler get-loaders' to download them, or, if you only want to handle x86/x86_64 netbooting, you may ensure that you have installed a recent version of the syslinux package installed and can ignore this message entirely. Files in this directory, should you want to support all architectures, should include pxelinux.0, menu.c32, elilo.efi, and yaboot. The 'cobbler get-loaders' command is the easiest way to resolve these requirements.
4 : enable and start rsyncd.service with systemctl
5 : debmirror package is not installed, it will be required to manage debian deployments and repositories
6 : ksvalidator was not found, install pykickstart
7 : The default password used by the sample templates for newly installed machines (default_password_crypted in /etc/cobbler/settings) is still set to 'cobbler' and should be changed, try: "openssl passwd -1 -salt 'random-phrase-here' 'your-password-here'" to generate new one
8 : fencing tools were not found, and are required to use the (optional) power management features. install cman or fence-agents to use them
Restart cobblerd and then run 'cobbler sync' to apply changes.
问题一:cobbler文件默认时127.0.0.1本地回环地址,需要更改为提供cobbler服务的IP地址192.168.199.129 在384行
384 server: 192.168.199.129
问题二:next_server也是默认本地回环地址,需要改为提供cobbler服务的IP地址 192.168.199.129 在272行
272 next_server: 192.168.199.129
问题三:可以忽略
问题四:启动rsync即可
[root@localhost ~]# systemctl restart rsyncd
[root@localhost ~]# systemctl enable rsyncd
Created symlink from /etc/systemd/system/multi-user.target.wants/rsyncd.service to /usr/lib/systemd/system/rsyncd.service.
问题五:可以忽略
问题六:更改密码
[root@localhost ~]# openssl passwd -1 -salt "123" "123123"
$1$123$ai3PKcU9Q7J3tIviFBaqN0
把新生成的加密数据填写进/etc/cobbler/settings
101 default_password_crypted: "$1$123$ai3PKcU9Q7J3tIviFBaqN0."
问题7:可以忽略
解决之后需要同步和重启
[root@localhost ~]# systemctl restart cobblerd
[root@localhost ~]# cobbler sync
再次检查是否已经更新完成
[root@localhost ~]# cobbler check
The following are potential configuration items that you may want to fix:
1 : Some network boot-loaders are missing from /var/lib/cobbler/loaders, you may run 'cobbler get-loaders' to download them, or, if you only want to handle x86/x86_64 netbooting, you may ensure that you have installed a recent version of the syslinux package installed and can ignore this message entirely. Files in this directory, should you want to support all architectures, should include pxelinux.0, menu.c32, elilo.efi, and yaboot. The 'cobbler get-loaders' command is the easiest way to resolve these requirements.
2 : debmirror package is not installed, it will be required to manage debian deployments and repositories
3 : ksvalidator was not found, install pykickstart
4 : fencing tools were not found, and are required to use the (optional) power management features. install cman or fence-agents to use them
Restart cobblerd and then run 'cobbler sync' to apply changes.
已经更改完毕
第六步:挂载光盘并进行数据导入
[root@localhost ~]# mount /dev/cdrom /mnt
mount: /dev/sr0 写保护,将以只读方式挂载
mount: /dev/sr0 已经挂载或 /mnt 忙
/dev/sr0 已经挂载到 /mnt 上
数据导入(需要等候半小时)
查看distro
[root@localhost ~]# cobbler distro list
centos7.5-x86_64
查看profile
[root@localhost ~]# cobbler profile list
centos7.5-x86_64
第七步:准备kicksstart文件
在root目录下找到ks文件,并移动到/var/lib/cobbler/kickstarts/到目录下改名为ks.cfg
[root@localhost ~]# mv anaconda-ks.cfg /var/lib/cobbler/kickstarts/ks.cfg
[root@localhost ~]# vim /var/lib/cobbler/kickstarts/ks.cfg
#version=DEVEL
# System authorization information
auth --enableshadow --passalgo=sha512
# Use CDROM installation media
url --url=http://192.168.199.129/cobbler/ks_mirror/centos7.5/ #这里需要改为repodata所在的http地址
# Use graphical install
graphical
# Run the Setup Agent on first boot
firstboot --enable
ignoredisk --only-use=sda
# Keyboard layouts
keyboard --vckeymap=cn --xlayouts='cn'
# System language
lang zh_CN.UTF-8
# Network information
network --bootproto=dhcp --device=ens33 --onboot=off --ipv6=auto --no-activate
network --hostname=localhost.localdomain
# Root password
rootpw --iscrypted $6$TMd0rYN/SfJ1lCgp$wXdVnqpX/mHK0UgVnHaNJNNS0UIdddW3fJ.61SUO4maZQOvg1c/0eWXT28o0I25rmOOjKs5/3IZVNeYcIA6rL0
# System services
services --enabled="chronyd"
# System timezone
timezone Asia/Shanghai --isUtc
# System bootloader configuration
bootloader --append=" crashkernel=auto" --location=mbr --boot-drive=sda
autopart --type=lvm
# Partition clearing information
clearpart --none --initlabel
%packages
@^minimal
@core
chrony
kexec-tools
需要改为repodata所在的http地址
第八步:自定义profile
[root@localhost ~]# cobbler profile add --distro=centos7.5-x86_64 --name=centos7.5_ken --kickstart=/var/lib/cobbler/kickstarts/ks.cfg
[root@localhost ~]# cobbler sync
第九步:查看profile
[root@localhost ~]# cobbler profile list
centos7.5-x86_64
centos7.5_ken
第十步:删除不包含ks文件的profile
[root@localhost ~]# cobbler profile remove --name=centos7.5-x86_64
[root@localhost ~]# cobbler profile list
centos7.5_ken
cobbler自动安装测试
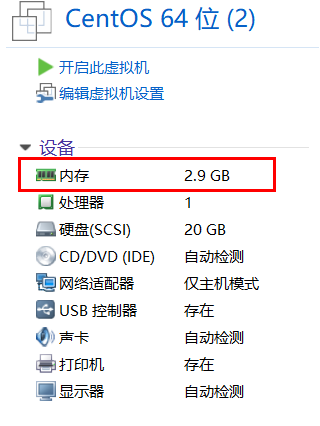
新建一个虚拟机,需要和cobbler服务器所在同一个虚拟网络中即与我们上面设置的cobbler服务器的主机模式。内存需要3个G以上。
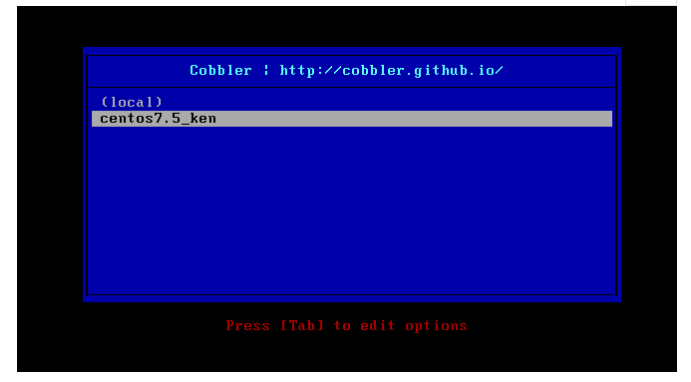
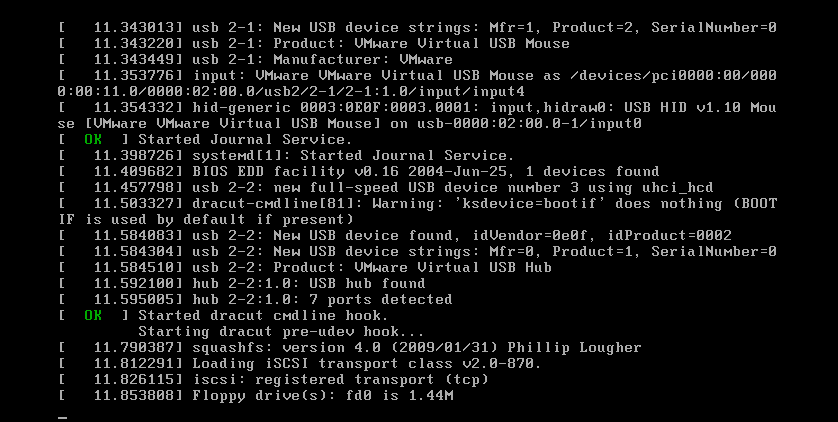
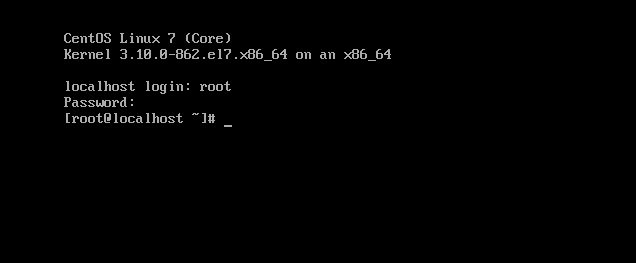
选择我们自定义的包即可自动化安装

centos7系统部署cobbler批量安装系统的更多相关文章
- 末学者笔记--Centos7系统部署cobbler批量安装系统
[前言]: cobbler是一个可以实现批量安装系统的Linux应用程序.它有别于pxe+kickstart,cobbler可以实现同个服务器批量安装不同操作系统版本. 系统环境准备及其下载cob ...
- 基于CentOS7系统部署cobbler批量安装系统(week3_day5_part1)-技术流ken
前言 cobbler是一个可以实现批量安装系统的Linux应用程序.它有别于pxe+kickstart,cobbler可以实现同个服务器批量安装不同操作系统版本. 系统环境准备及其下载cobbler ...
- 基于Centos7系统部署cobbler批量安装系统
前言 cobbler是一个可以实现批量安装系统的Linux应用程序.它有别于pxe+kickstart,cobbler可以实现同个服务器批量安装不同操作系统版本 系统环境的准备及下载cobbler 一 ...
- 006-(成功环境记录)基于Centos7系统部署cobbler批量安装系统
1.1 cobbler简介 Cobbler是一个Linux服务器安装的服务,可以通过网络启动(PXE)的方式来快速安装.重装物理服务器和虚拟机,同时还可以管理DHCP,DNS等. Cobbler可以使 ...
- cobbler批量安装系统
cobbler是一个可以实现批量安装系统的Linux应用程序.它有别于pxe+kickstart,cobbler可以实现同个服务器批量安装不同操作系统版本. 1.系统环境准备及其下载cobbler 1 ...
- cobbler批量安装系统使用详解-技术流ken
前言 cobbler是一个可以实现批量安装系统的Linux应用程序.它有别于pxe+kickstart,cobbler可以实现同个服务器批量安装不同操作系统版本. 系统环境准备及其下载cobbler ...
- cobbler一键批量安装系统
cobbler是一个可以实现批量安装系统的Linux应用程序.它有别于pxe+kickstart,cobbler可以实现同个服务器批量安装不同操作系统版本. 一.系统环境准备及其下载cobbler 1 ...
- 其他综合-Cobbler无人值守安装系统 CentOS 7
Cobbler 无人值守安装系统 CentOS 7 1.实验描述 1.1 概述 作为运维,在公司经常遇到一些机械性重复工作要做,例如:为新机器装系统,一台两台机器装系统,可以用光盘.U盘等介质安装,1 ...
- cobbler自动化安装系统
笔者Q:972581034 交流群:605799367.有任何疑问可与笔者或加群交流 在很久很久以前,使用kickstart实现自动化安装的时候,我一直认为装系统是多么高大上的活,直到cobbler的 ...
随机推荐
- java关键字保留字
Here is a list of keywords in the Java programming language. You cannot use any of the following as ...
- Day 1 下午
POINT 1 贪心 每一步都取当前的最优解的思想:一般来说符合直观思路,需要严格的证明:OI中使用多个错误的贪心策略进行加成有时会有良好的效果 例一给定N个农民,第i个农民有Ai单位的牛奶,单价Pi ...
- Going from u to v or from v to u? POJ - 2762(强连通 有向最长路径)
In order to make their sons brave, Jiajia and Wind take them to a big cave. The cave has n rooms, an ...
- Linux lvs三种模式工作原理
LVS:Linux Virtual Sevser,Linux虚拟服务器,由章文嵩先生成立的有关负载均衡的开源项目.基于Linux内核.优化后并发量可以达到百万级. NAT模式: NAT(Network ...
- 二、Tensorflow的作用域和图
作用域主要用来不用重复定义变量,另外就是用与画图 import tensorflow as tf ''' 可视化 tf.summary.scalar 添加一个标量 tf.summary.audio 添 ...
- 003 win7如何配置adb环境变量
1.首先右击计算机——属性——高级系统设置——环境变量: 2.弹出”环境变量“对话框,单击”新建“一个环境变量. 3.在新建系统变量里,配置变量名:Android 变量值:D:\Users\Admin ...
- linux expect 即exp脚本交互功能【原】
场景 expect命令用于任何自动化互动的过程. send – 发送字符串到进程 expect – 等待来自进程的特定的字符串 spawn – 启动命令 安装 expect一开始100%不存在, 手动 ...
- java 代码
java 里的 pandas tablesaw DataFrame 再有就是 spark 了 java 代码规范 Java8特性详解 lambda表达式 Stream Sonar 规则检测 sprin ...
- .NET尝试访问某方法失败
今天发现了一个错误: xxxx.xxxx尝试访问xxxx.xxxx方法失败. 调试无果,经过分析后得到这是.NET引用的问题.果然有了这个方向后,发现了引用不匹配的问题,问题随之解决. 记录一下.
- Selenium+PhantomJS替代方案
问题描述: python3在使用selenium+PhantomJS动态抓取网页时,出现如下报错信息: UserWarning: Selenium support for PhantomJS has ...