springboot使用rabbitmq-Topic模式,亲自实测能用!!!
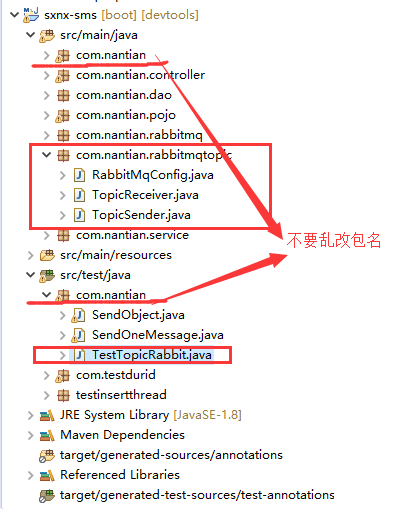
0.项目目录截图
=====================================================================
springboot的版本:
<groupId>org.springframework.boot</groupId>
<artifactId>spring-boot-starter-parent</artifactId>
<version>2.2.0.RELEASE</version>
<relativePath /> <!-- lookup parent from repository -->
==========================================================================================================================================
引入jar包:
<!-- springboot整合rabbitMQ -->
<dependency>
<groupId>org.springframework.boot</groupId>
<artifactId>spring-boot-starter-amqp</artifactId>
</dependency>
========================================================================================================================
使用junit5做测试.
========================================================================================================================
1.application.yml配置文件
#SpringBoot整合RabbitMQ
rabbitmq:
host: localhost
port: 5672
username: guest
password: guest
#connection-timeout: 15000
2.RabbitMqConfig.java
package com.nantian.rabbitmqtopic;
import org.springframework.amqp.core.Binding;
import org.springframework.amqp.core.BindingBuilder;
import org.springframework.amqp.core.Queue;
import org.springframework.amqp.core.TopicExchange;
import org.springframework.beans.factory.annotation.Qualifier;
import org.springframework.context.annotation.Bean;
import org.springframework.context.annotation.Configuration;
/**
* Created by Administrator on 2018/4/10.
* 1. yaml
* 2. RabbitMqConfig
* a 创建queue
* b. 创建交换机TopicExchange
* c. 根据绑定规则将队列绑定到相应的交换机上
* 3. sender
* 4. test
* 5. receiver
*/
@Configuration
public class RabbitMqConfig {
// a 创建queue
@Bean(name = "message") // 指定该参数名是message 见下面Qualifier("message")
public Queue queueMessage(){
return new Queue("topic.message"); // topic.message 是rounting-key,匹配规则
}
@Bean(name = "messages")
public Queue queueMessages(){
return new Queue("topic.messages");
}
// b. 创建交换机TopicExchange
@Bean
public TopicExchange exchange(){
return new TopicExchange("topicExchange");
}
/*
c. 根据绑定规则将队列绑定到相应的交换机上(bindingKey)--Exchange Queues
*/
@Bean
public Binding bindingExchangeMessage(@Qualifier("message") Queue queueMessage,TopicExchange exchange){
return BindingBuilder.bind(queueMessage).to(exchange).with("topic.message");
}
@Bean
/**
* 将队列"messages" 绑定到交换机上,绑定规则是 topic.messages
*
*/
public Binding bindingExchangeMessages(@Qualifier("messages")Queue queueMessages,TopicExchange exchange){
return BindingBuilder.bind(queueMessages).to(exchange).with("topic.#");
}
}
3.发送者:TopicSender.java
package com.nantian.rabbitmqtopic;
import org.springframework.amqp.core.AmqpTemplate;
import org.springframework.beans.factory.annotation.Autowired;
import org.springframework.stereotype.Component;
/**
* Created by Administrator on 2018/4/10.
*/
@Component
public class TopicSender {
@Autowired
private AmqpTemplate amqpTemplate;
/**
* 交换机 rountingkey 发送的内容 发送消息到相应的Exchange
* 向名称为 topicExchange 的交换机 发送满足routingkey规则为 "topic.messages " 的内容为 "我是发送消息的内容" 的消息
*/
public void sendMessage(){
this.amqpTemplate.convertAndSend("topicExchange","topic.messages","我是发送消息的内容! ");
}
/**
* 消息一
*/
public void send1() {
String context = "hi, i am message 1";
System.out.println("Sender : " + context);
this.amqpTemplate.convertAndSend("topicExchange", "topic.message", context);
}
/**
* 消息2
*/
public void send2() {
String context = "hi, i am messages 2";
System.out.println("Sender : " + context);
this.amqpTemplate.convertAndSend("topicExchange", "topic.messages", context);
}
}
4.接受者:TopicReceiver.java
package com.nantian.rabbitmqtopic;
import org.springframework.amqp.rabbit.annotation.RabbitListener;
import org.springframework.stereotype.Component;
/**
* Created by Administrator on 2018/4/10.
*/
@Component
public class TopicReceiver {
@RabbitListener(queues ="topic.message" )
public void receiveMessage1(String str){
System.out.println("赵云1:我是监听topic.message的,仅满足topic.message的过来 , "+str);
}
@RabbitListener(queues ="topic.messages" )
public void receiveMessage2(String str){
System.out.println("关羽2:我是监听topic.# 的,满足 topic.# 的都过来 , "+str);
}
}
5.测试类:TestTopicRabbitMq.java
package com.nantian;
import org.junit.Test;
import org.junit.runner.RunWith;
import org.springframework.beans.factory.annotation.Autowired;
import org.springframework.boot.test.context.SpringBootTest;
import org.springframework.test.context.junit4.SpringRunner;
import com.nantian.rabbitmqtopic.TopicSender;
@RunWith(SpringRunner.class)
@SpringBootTest
public class TestTopicRabbit {
@Autowired
private TopicSender topicSender;
@Test
public void contextLoads() {
topicSender.sendMessage();
}
/**
* 测试消息一
*/
@Test
public void send1() {
topicSender.send1();
}
/**
* 测试消息二
*/
@Test
public void send2() {
topicSender.send2();
}
}
springboot使用rabbitmq-Topic模式,亲自实测能用!!!的更多相关文章
- 干货!基于SpringBoot的RabbitMQ多种模式队列实战
目录 环境准备 安装RabbitMQ 依赖 连接配置 五种队列模式实现 1 点对点的队列 2 工作队列模式Work Queue 3 路由模式Routing 4 发布/订阅模式Publish/Subsc ...
- SpringBoot之RabbitMQ的使用
一 .RabbitMQ的介绍 RabbitMQ是消息中间件的一种,消息中间件即分布式系统中完成消息的发送和接收的基础软件,消息中间件的工作过程可以用生产者消费者模型来表示.即,生产者不断的向消息队列发 ...
- springboot学习笔记-6 springboot整合RabbitMQ
一 RabbitMQ的介绍 RabbitMQ是消息中间件的一种,消息中间件即分布式系统中完成消息的发送和接收的基础软件.这些软件有很多,包括ActiveMQ(apache公司的),RocketMQ(阿 ...
- SpringBoot整合RabbitMQ实现六种工作模式
RabbitMQ主要有六种种工作模式,本文整合SpringBoot分别介绍工作模式的实现. 前提概念 生产者 消息生产者或者发送者,使用P表示: 队列 消息从生产端发送到消费端,一定要通过队列转发,使 ...
- RabbitMQ入门-Topic模式
上篇<RabbitMQ入门-Routing直连模式>我们介绍了可以定向发送消息,并可以根据自定义规则派发消息.看起来,这个Routing模式已经算灵活的了,但是,这还不够,我们还有更加多样 ...
- spring boot整合RabbitMQ(Topic模式)
1.Topic交换器介绍 Topic Exchange 转发消息主要是根据通配符. 在这种交换机下,队列和交换机的绑定会定义一种路由模式,那么,通配符就要在这种路由模式和路由键之间匹配后交换机才能转发 ...
- demo rabbitmq topic(主题模式),fanout(广播模式),轮询分发,确认接收Ack处理
//durable = true 代表持久化 交换机和队列都要为true ,持久代表服务重启,没有处理的消息依然存在 //topic 根据不同的routkey 发送和接收信息 //fanout 广播模 ...
- RabbitMQ广播:topic模式
topic模式跟direct差不多,只是把type改一下就行. direct是把固定的routing_key跟queue绑定,topic是把模糊的routing_key跟queue绑定 原理图: 发布 ...
- SpringBoot集成RabbitMQ
官方说明:http://www.rabbitmq.com/getstarted.html 什么是MQ? MQ全称为Message Queue, 消息队列(MQ)是一种应用程序对应用程序的通信方法.MQ ...
随机推荐
- python 的django项目复制方法
python 的django项目复制方法 django_pyecharts_1修改为django_pyecharts_1_cs1.拷贝项目(确保原有项目是关闭状态下)2.粘贴项目并删除idea文件夹和 ...
- 数据库基础理解学习-Mysql
1. 简介 数据库,现代化的数据存储存储手段,是一种特殊的文件,其中存储着需要的数据. 特点: 持久化存储 读写速度极高 保证数据的有效性 对程序支持性非常好,容易扩展 2. Mysql (1)具有数 ...
- centos7安装oracle11g(根据oracle官方文档安装,解决图形界面安装问题)
一.系统及安装包 操作系统:centos 7.4 oracle版本:oracle 11g r2 二.centos环境配置 安装数据库所需要的软件包 [root@localhost data]# yum ...
- 题解-APIO2019桥梁
problem \(\mathrm {loj-3145}\) 题意概要:给定一张 \(n\) 点 \(m\) 边的无向图,边有边权,共 \(q\) 次操作,每次会将第 \(x\) 条边的权值改为 \( ...
- C++ 去掉字符串的首尾空格和全部空格
#include <iostream>#include <string>using namespace std; //去掉收尾空格string& ClearHeadTa ...
- Python遗传和进化算法框架(一)Geatpy快速入门
https://blog.csdn.net/qq_33353186/article/details/82014986 Geatpy是一个高性能的Python遗传算法库以及开放式进化算法框架,由华南理工 ...
- Eclipse下使用Maven创建项目出现的archetype错误,记,转
记自:http://blog.csdn.net/ZhuboSun/article/details/50099635 [1]出现的错误提示: Unable to create project from ...
- ceph集群部署(基于jewel版)
环境 两个节点:ceph1.ceph2 ceph1: mon.mds.osd.0.osd.1 ceph2: osd.2.osd.3 网络配置: ceph1: 管理网络,eth0,10.0.0.20 存 ...
- [LeetCode] 137. 只出现一次的数字,其余三次 II ☆☆☆
描述 给定一个非空整数数组,除了某个元素只出现一次以外,其余每个元素均出现了三次.找出那个只出现了一次的元素. 说明: 你的算法应该具有线性时间复杂度. 你可以不使用额外空间来实现吗? 示例 1: 输 ...
- dstat 监控工具
dstat 监控工具 Linux 自带的监控工具.界面相当友好,可以替代其他的监控工具. 安装 yum install -y dstat 命令使用 dstat -h # 帮助 dstat -tpcdr ...