吴裕雄--天生自然 pythonTensorFlow图形数据处理:图像预处理完整样例
import numpy as np

import tensorflow as tf

import matplotlib.pyplot as plt

#随机调整图片的色彩,定义两种顺序。

def distort_color(image, color_ordering=0):

    if color_ordering == 0:

        image = tf.image.random_brightness(image, max_delta=32./255.)

        image = tf.image.random_saturation(image, lower=0.5, upper=1.5)

        image = tf.image.random_hue(image, max_delta=0.2)

        image = tf.image.random_contrast(image, lower=0.5, upper=1.5)

    else:

        image = tf.image.random_saturation(image, lower=0.5, upper=1.5)

        image = tf.image.random_brightness(image, max_delta=32./255.)

        image = tf.image.random_contrast(image, lower=0.5, upper=1.5)

        image = tf.image.random_hue(image, max_delta=0.2)

    return tf.clip_by_value(image, 0.0, 1.0)
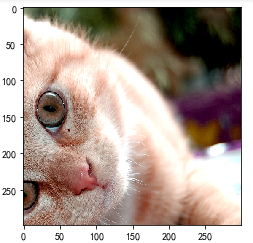
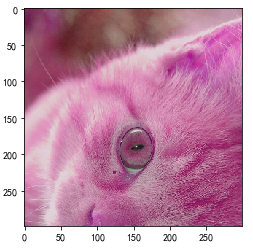
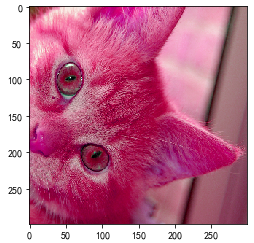
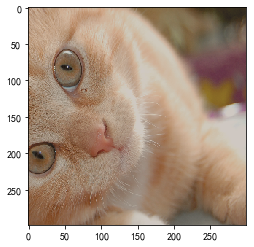
#对图片进行预处理,将图片转化成神经网络的输入层数据。

def preprocess_for_train(image, height, width, bbox):

    # 查看是否存在标注框。

    if bbox is None:

        bbox = tf.constant([0.0, 0.0, 1.0, 1.0], dtype=tf.float32, shape=[1, 1, 4])

    if image.dtype != tf.float32:

        image = tf.image.convert_image_dtype(image, dtype=tf.float32)

    # 随机的截取图片中一个块。

    bbox_begin, bbox_size, _ = tf.image.sample_distorted_bounding_box(tf.shape(image), bounding_boxes=bbox, min_object_covered=0.4)

    bbox_begin, bbox_size, _ = tf.image.sample_distorted_bounding_box(tf.shape(image), bounding_boxes=bbox, min_object_covered=0.4)

    distorted_image = tf.slice(image, bbox_begin, bbox_size)

    # 将随机截取的图片调整为神经网络输入层的大小。

    distorted_image = tf.image.resize_images(distorted_image, [height, width], method=np.random.randint(4))

    distorted_image = tf.image.random_flip_left_right(distorted_image)

    distorted_image = distort_color(distorted_image, np.random.randint(2))

    return distorted_image
#读取图片。
image_raw_data = tf.gfile.FastGFile("F:\\TensorFlowGoogle\\201806-github\\datasets\\cat.jpg", "rb").read()
with tf.Session() as sess:
img_data = tf.image.decode_jpeg(image_raw_data)
boxes = tf.constant([[[0.05, 0.05, 0.9, 0.7], [0.35, 0.47, 0.5, 0.56]]])
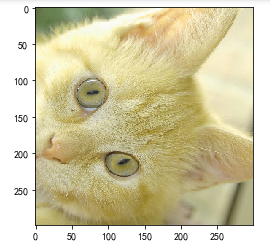
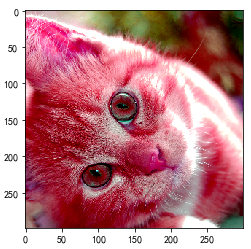
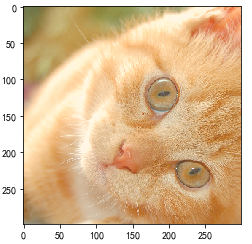
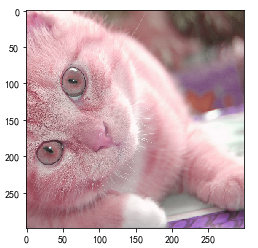
for i in range(9):
result = preprocess_for_train(img_data, 299, 299, boxes)
plt.imshow(result.eval())
plt.show()


吴裕雄--天生自然 pythonTensorFlow图形数据处理:图像预处理完整样例的更多相关文章
- 吴裕雄--天生自然 pythonTensorFlow图形数据处理:数据集高层操作
import tempfile import tensorflow as tf # 1. 列举输入文件. # 输入数据生成的训练和测试数据. train_files = tf.train.match_ ...
- 吴裕雄--天生自然 pythonTensorFlow图形数据处理:将MNIST手写图片数据写入TFRecord文件
import numpy as np import tensorflow as tf from tensorflow.examples.tutorials.mnist import input_dat ...
- 吴裕雄--天生自然 pythonTensorFlow图形数据处理:循环神经网络预测正弦函数
import numpy as np import tensorflow as tf import matplotlib.pyplot as plt # 定义RNN的参数. HIDDEN_SIZE = ...
- 吴裕雄--天生自然 pythonTensorFlow图形数据处理:数据集基本使用方法
import tempfile import tensorflow as tf # 1. 从数组创建数据集. input_data = [1, 2, 3, 5, 8] dataset = tf.dat ...
- 吴裕雄--天生自然 pythonTensorFlow图形数据处理:输入数据处理框架
import tensorflow as tf # 1. 创建文件列表,通过文件列表创建输入文件队列 files = tf.train.match_filenames_once("F:\\o ...
- 吴裕雄--天生自然 pythonTensorFlow图形数据处理:输入文件队列
import tensorflow as tf # 1. 生成文件存储样例数据. def _int64_feature(value): return tf.train.Feature(int64_li ...
- 吴裕雄--天生自然 pythonTensorFlow图形数据处理:多线程队列操作
import tensorflow as tf #1. 定义队列及其操作. queue = tf.FIFOQueue(100,"float") enqueue_op = queue ...
- 吴裕雄--天生自然 pythonTensorFlow图形数据处理:队列操作
import tensorflow as tf #1. 创建队列,并操作里面的元素. q = tf.FIFOQueue(2, "int32") init = q.enqueue_m ...
- 吴裕雄--天生自然 pythonTensorFlow图形数据处理:TensorFlow图像处理函数
import numpy as np import tensorflow as tf import matplotlib.pyplot as plt #读取图片 image_raw_data = tf ...
随机推荐
- 【pwnable.kr】coin1
pwnable从入门到放弃又一发 说是一道pwnable,其实是一道coding... nc pwnable.kr 9007 连接上看看,玩硬币? 老子是来拿flag的,谁来哄孩子来了!!! 算了,f ...
- core_cm4.h(129): error: #35: #error directive: "Compiler generates FPU instructions for a device without an FPU (check __FPU_PRESENT)"
今天使用 systick 的时候,只使用了头文件 core_cm4.h,结果就报错了,原因是 __FPU_PRESENT 没有定义,这个定义其实在 stm32f4xx.h 里面.所以如果要解决这个错误 ...
- 一、VIP课程:互联网工程专题 01-Git基本概念与核心命令掌握
第一课:Git基本概念与核心命令掌握.docx 课程概要: GIT 体系概述 GIT 核心命令使用 GIT 底层原理 一.GIT体系概述 1.使用方式区别 从本地把文件推送远程服务,SVN只需要com ...
- C++中的string详解
标准库类型string表示可变长的字符序列,为了在程序中使用string类型,我们必须包含头文件: #include <string> 声明一个字符串 声明一个字符串有很多种方式,具体如 ...
- 解决vue-cli3不停请求 /sockjs-node/info?t= 问题
使用cli3会遇到一直报错get不到/sockjs-node/info?t= 的问题: 如果你的项目没有用到 sockjs,那么就找到报错的地方,将其注释掉即可. 路径在/node_modules/s ...
- Java 性能优化:面向对象及基础类型使用优化
性能优化是个大筐,很多东西都能往里面装.虽说性能优化的具体方面比较多,但万丈高楼从地起,这里还是从Java最基本的一些入门知识相关的使用优化进行一些做些总结和建议.如何连最基本的API使用都不会,或不 ...
- [极客大挑战 2019]Upload
0x00 知识点 一个常规上传题目,知识点全都来自前几天写的文章: https://www.cnblogs.com/wangtanzhi/p/12243206.html 1:某些情况下绕过后缀名检测: ...
- SSH限制与更改端口、限制ROOT方式登录
ssh中如何配置只允许某个IP以某个账号登录服务器 只要在ssh的配置文件:sshd_config中添加如下一行即可Allowusers username@192.168.1.100上述只允许IP地址 ...
- JSP三大指令(Page指令,include指令,taglib指令)
参考文章: https://www.runoob.com/jsp/jsp-directives.html http://c.biancheng.net/view/1458.html https://b ...
- mybatis中#{}和${}的区别及order by的sql注入问题
mybatis的#{}和${}的区别以及order by注入问题 原文 http://www.cnblogs.com/chyu/p/4389701.html 前言略,直奔主题.. #{}相当于j ...