C#创建windows服务列表
转载自:http://www.cnblogs.com/sorex/archive/2012/05/16/2502001.html
Windows Service这一块并不复杂,但是注意事项太多了,网上资料也很凌乱,偶尔自己写也会丢三落四的。所以本文也就产生了,本文不会写复杂的东西,完全以基础应用的需求来写,所以不会对Windows Service写很深入。
本文介绍了如何用C#创建、安装、启动、监控、卸载简单的Windows Service 的内容步骤和注意事项。
一、创建一个Windows Service
1)创建Windows Service项目

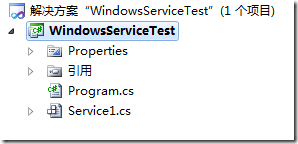
2)对Service重命名
将Service1重命名为你服务名称,这里我们命名为ServiceTest。
二、创建服务安装程序
1)添加安装程序


之后我们可以看到上图,自动为我们创建了ProjectInstaller.cs以及2个安装的组件。
2)修改安装服务名
右键serviceInsraller1,选择属性,将ServiceName的值改为ServiceTest。

3)修改安装权限
右键serviceProcessInsraller1,选择属性,将Account的值改为LocalSystem。

三、写入服务代码
1)打开ServiceTest代码
右键ServiceTest,选择查看代码。
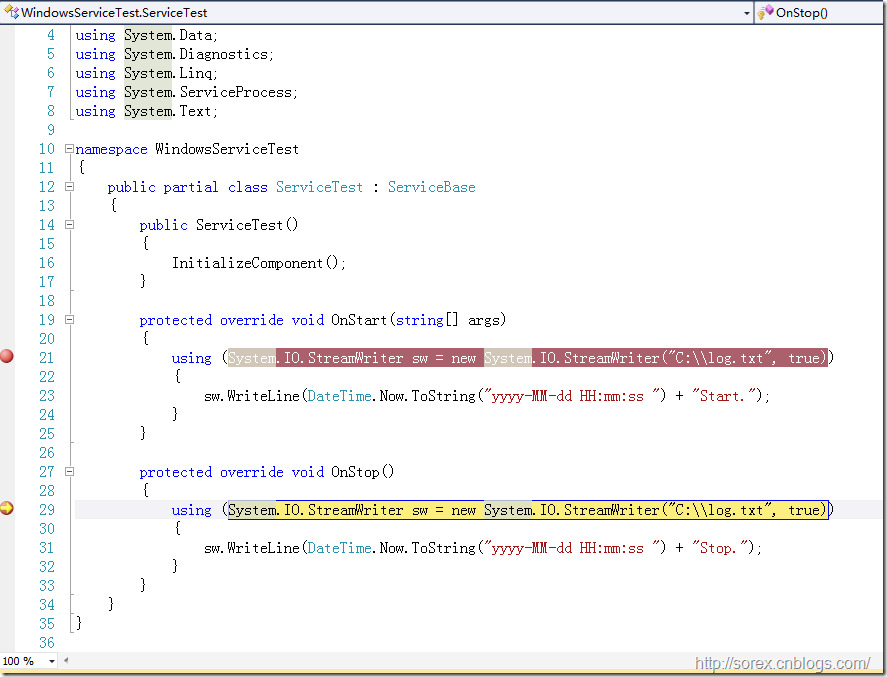
2)写入Service逻辑
添加如下代码:
|
1
2
3
4
5
6
7
8
9
10
11
12
13
14
15
16
17
18
19
20
21
22
23
24
25
26
27
28
29
30
31
32
33
34
35
|
using System;using System.Collections.Generic;using System.ComponentModel;using System.Data;using System.Diagnostics;using System.Linq;using System.ServiceProcess;using System.Text;namespace WindowsServiceTest{ public partial class ServiceTest : ServiceBase { public ServiceTest() { InitializeComponent(); } protected override void OnStart(string[] args) { using (System.IO.StreamWriter sw = new System.IO.StreamWriter("C:\\log.txt", true)) { sw.WriteLine(DateTime.Now.ToString("yyyy-MM-dd HH:mm:ss ") + "Start."); } } protected override void OnStop() { using (System.IO.StreamWriter sw = new System.IO.StreamWriter("C:\\log.txt", true)) { sw.WriteLine(DateTime.Now.ToString("yyyy-MM-dd HH:mm:ss ") + "Stop."); } } }} |
这里我们的逻辑很简单,启动服务的时候写个日志,关闭的时候再写个日志。
四、创建安装脚本
在项目中添加2个文件如下(必须是ANSI或者UTF-8无BOM格式):
1)安装脚本Install.bat
|
1
2
3
|
%SystemRoot%\Microsoft.NET\Framework\v4.0.30319\installutil.exe WindowsServiceTest.exeNet Start ServiceTestsc config ServiceTest start= auto |
2)卸载脚本Uninstall.bat
|
1
|
%SystemRoot%\Microsoft.NET\Framework\v4.0.30319\installutil.exe /u WindowsServiceTest.exe |
3)安装脚本说明
第二行为启动服务。
第三行为设置服务为自动运行。
这2行视服务形式自行选择。
4)脚本调试
如果需要查看脚本运行状况,在脚本最后一行加入pause
五、在C#中对服务进行控制
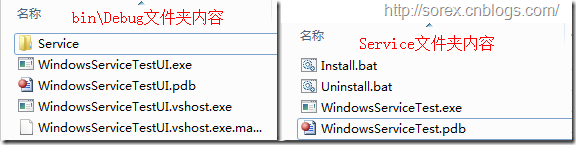
0)配置目录结构
简历一个新WPF项目,叫WindowsServiceTestUI,添加对System.ServiceProcess的引用。
在WindowsServiceTestUI的bin\Debug目录下建立Service目录。
将WindowsServiceTest的生成目录设置为上面创建的Service目录。
生成后目录结构如下图
1)安装
安装时会产生目录问题,所以安装代码如下:
|
1
2
3
4
5
6
7
8
|
string CurrentDirectory = System.Environment.CurrentDirectory;System.Environment.CurrentDirectory = CurrentDirectory + "\\Service";Process process = new Process();process.StartInfo.UseShellExecute = false;process.StartInfo.FileName = "Install.bat";process.StartInfo.CreateNoWindow = true;process.Start();System.Environment.CurrentDirectory = CurrentDirectory; |
2)卸载
卸载时也会产生目录问题,所以卸载代码如下:
|
1
2
3
4
5
6
7
8
|
string CurrentDirectory = System.Environment.CurrentDirectory;System.Environment.CurrentDirectory = CurrentDirectory + "\\Service";Process process = new Process();process.StartInfo.UseShellExecute = false;process.StartInfo.FileName = "Uninstall.bat";process.StartInfo.CreateNoWindow = true;process.Start();System.Environment.CurrentDirectory = CurrentDirectory; |
3)启动
代码如下:
|
1
2
3
4
5
|
using System.ServiceProcess;ServiceController serviceController = new ServiceController("ServiceTest");serviceController.Start(); |
4)停止
|
1
2
3
|
ServiceController serviceController = new ServiceController("ServiceTest");if (serviceController.CanStop) serviceController.Stop(); |
5)暂停/继续
|
1
2
3
4
5
6
7
8
|
ServiceController serviceController = new ServiceController("ServiceTest");if (serviceController.CanPauseAndContinue){ if (serviceController.Status == ServiceControllerStatus.Running) serviceController.Pause(); else if (serviceController.Status == ServiceControllerStatus.Paused) serviceController.Continue();} |
6)检查状态
|
1
2
|
ServiceController serviceController = new ServiceController("ServiceTest");string Status = serviceController.Status.ToString(); |
六、调试Windows Service
1)安装并运行服务
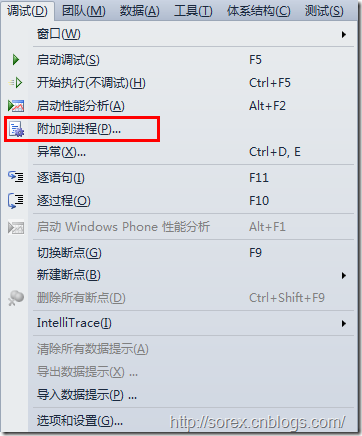
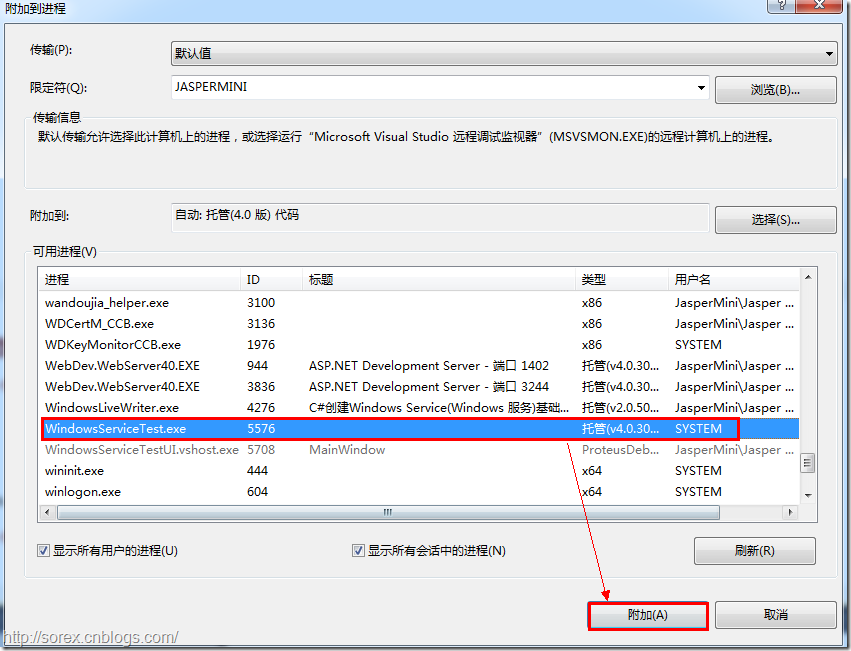
2)附加进程
3)在代码中加入断点进行调试
七、总结
本文对Windows service的上述配置都未做详细解释,但是按上述步骤就可以制作可运行的Windows Service,从而达到了工作的需求。
示例代码请见:https://github.com/sorex/WindowsServiceTest
C#创建windows服务列表的更多相关文章
- C#/.NET基于Topshelf创建Windows服务程序及服务的安装和卸载(极速,简洁)
本文首发于:码友网--一个专注.NET/.NET Core开发的编程爱好者社区. 文章目录 C#/.NET基于Topshelf创建Windows服务的系列文章目录: C#/.NET基于Topshelf ...
- C# — 创建Windows服务
以前从来没有接触过C#,对Windows服务也完全不了解,今天通过使用VS2017创建了一个Windows服务,并进行了安装和卸载,目前也是一知半解的地步,简单的做个笔记记录一下,也算是复习了吧. 第 ...
- 使用 Topshelf 创建 Windows 服务
Ø 前言 C# 创建 Windows 服务的方式有很多种,Topshelf 就是其中一种方式,而且使用起来比较简单.下面使用 Visual Studio Ultimate 2013 演示一下具体的使 ...
- 使用C#创建windows服务续之使用Topshelf优化Windows服务
前言: 之前写了一篇“使用C#创建windows服务”,https://www.cnblogs.com/huangwei1992/p/9693167.html,然后有博友给我推荐了一个开源框架Tops ...
- VS2013创建Windows服务与调试服务
1.创建Windows服务 说明: a)Description 服务描述,直接显示到Windows服务列表中的描述: b)DisplayName 服务显示名称,直接显示到Windows服务列表中的名称 ...
- 用C#创建Windows服务(Windows Services)
用C#创建Windows服务(Windows Services) 学习: 第一步:创建服务框架 创建一个新的 Windows 服务项目,可以从Visual C# 工程中选取 Windows 服务(W ...
- 玩转Windows服务系列——创建Windows服务
创建Windows服务的项目 新建项目->C++语言->ATL->ATL项目->服务(EXE) 这样就创建了一个Windows服务项目. 生成的解决方案包含两个项目:Servi ...
- .Net创建windows服务入门
本文主要记录学习.net 如何创建windows服务. 1.创建一个Windows服务程序 2.新建安装程序 3.修改service文件 代码如下 protected override void On ...
- C# 创建Windows服务
创建windows服务项目 2 右键点击Service1.cs,查看代码, 用于编写操作逻辑代码 3 代码中OnStart用于执行服务事件,一般采用线程方式执行方法,便于隔一段事件执行一回 END ...
随机推荐
- CSS中的a标签几个访问状态记录
a:link {color: #FF0000} /* 未访问的链接 */a:visited {color: #00FF00} /* 已访问的链接 */a:hover {color: #FF0 ...
- 洛谷P2246 SAC#1 - Hello World(升级版)
题目背景 T1答案要mod1000000007(10^9+7),请重新提交,非常抱歉! 一天,智障的pipapi正在看某辣鸡讲义学程序设计. 题目描述 在讲义的某一面,他看见了一篇文章.这篇文章由英文 ...
- 小米手机(HM1SW)高通开发android程序全过程
小米手机(HM1SW)开发android程序全过程 修改历史: 2016年5月9日 -------- 整理文档 a.增加了手机基本信息. b.增加360手机助手连接说明 2016年2月26日 - ...
- Npoi实现Excel绘制功能
使用Npoi操作Excel,是我一直很喜欢的一种方式. 说简单也简单,但是封装好重用性,易用性,也稍稍费了些时间.在这里做个记录,免得以后遗忘. 首先说一下需求,需求有两点 1.新建Excel,并下载 ...
- 第一章,Linux常用命令
20161124 Linux常用命令1.find find /etc/ -size +50k -lsfind /etc/ -size +50k -ls 2> /dev/null查看目录下大于50 ...
- iOS - CALayer相关(CATransform3D)
一.图层的几何 图层的几何简单通俗,图层的所有几何属性(包括矩阵变换),都可以有隐式和显式动画. 图层几何的属性: 1.position是CGPoint值,她指定图层相对于她图层的位置,该值基于父图层 ...
- php 如何造一个简短原始的数据库类用来增加工作效率
class DBDA{ public $host="localhost"; public $uid="root"; public $pwd="123& ...
- css003 选择器:明确设置哪些样式
css003 选择器:明确设置哪些样式 1.每个样式的两个部分:选择器和声明块 1.标签选择器:整体控制 2.类选择器:精确控制(.+字母.数字.连字符或下划线) Css允许的类名为.+字母.数字.连 ...
- 自然语言19_Lemmatisation
QQ:231469242 欢迎喜欢nltk朋友交流 https://en.wikipedia.org/wiki/Lemmatisation Lemmatisation (or lemmatizatio ...
- css让图片作为按钮的背景并且大小合适
最近在做ASP大作业,在做html页面的时候想把一个图片作为按钮的背景,搞了好久终于在csdn上找到了满意的答案: background-size: cover; 只需要这一句就ok了,就是这么简答. ...