GC agent的安装和卸载
一、GC agent安装
下面介绍GC agent的push和pull两种安装方法
1、push(推送)安装GC agent方法
1)、打开EMGC home page:https://even.oracle.com:7799/em/
登录EMGC 密码/账号:sysman/oracle12
Click "Deployments" - >
-> Click Agent Installation "Install Agent" - >
-> Click "Fresh Install" - >
-> Source Shiphome Directory = "Default, from Management Server location."->
-> Version = "11.1.0.1.0" - > "
-> Platform = "Linux x86" - >"
-> Provide Host List = "odd.oracle.com" - >
-> Username = oracle - >
-> Password = **** ->
-> Deselect "Run root.sh" (待完成后手工执行) ->
-> Installation Base Directory = "/u01/app/oracle/middleware" -> 注: 安装时将自动建立此目录
-> Port = 3872 - >
-> Management Server Registration Password = **** -> (本例: oracle12)
-> Confirm Password = **** ->
-> Click "Continue" - >
-> Deselect "I wish to receive security updates via My Oracle Support."->
-> Click "Submit" - >
-> Click "Yes" ->
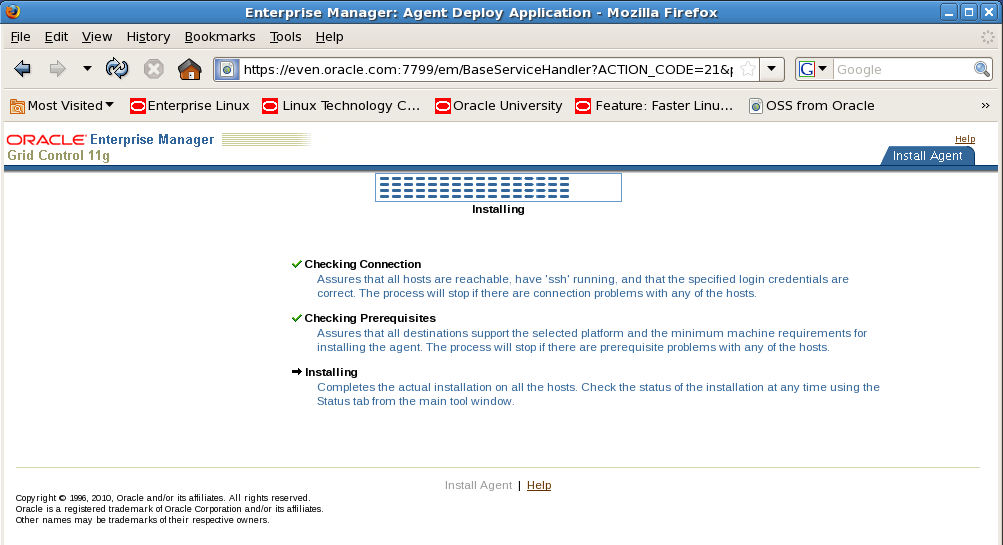
-> wait for installation completed -> Click "Done"
2)、root用户执行以下脚本
/u01/app/oracle/middleware/agent11g/root.sh
3)、agent安装完成之后,可以查看各个target的状态。
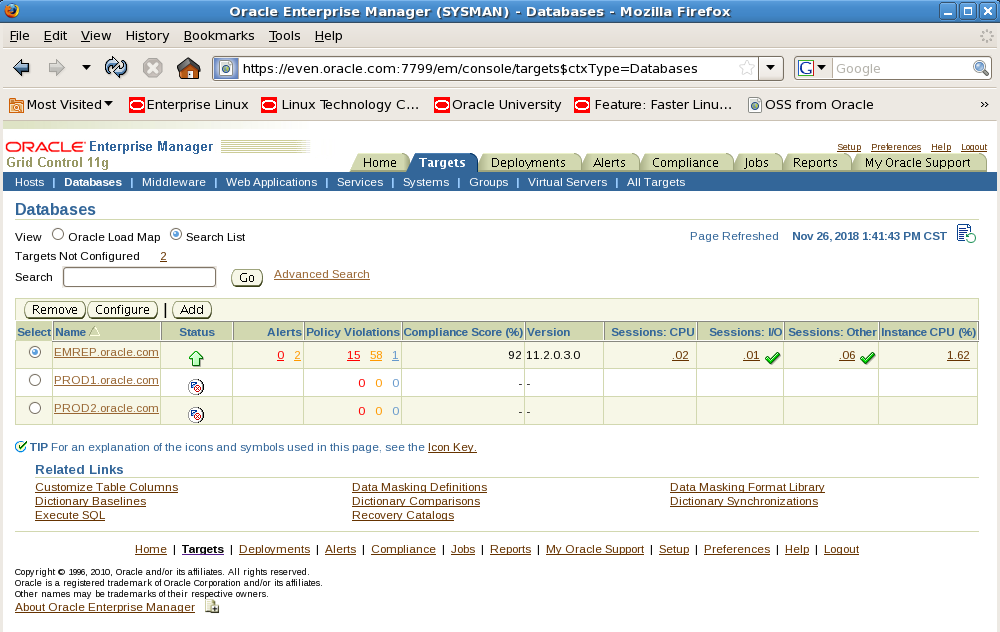
可以看到DB PROD1和PROD2的status显示为未知,这里需要我们手工配置。

2、pull(拉)安装GC agent
$wget --no-check-certificate https://even.oracle.com:7799/agent_download/11.1.0.1.0/linux/agentDownload.linux
给agentDownload.linux文件添加执行权限
chmod 775 agentDownload.linux
安装GC agent,-b指定安装目录,-y表示默认为yes,密码为安装EMGC时设置的密码。
./agentDownload.linux -b /u01/app/oracle/middleware -y
agent安装完成后,查看agent状态
[oracle@odd- stage]$ emctl status agent
Oracle Enterprise Manager 11g Release 1 Grid Control 11.1.0.1.0
Copyright (c) 1996, 2010 Oracle Corporation. All rights reserved.
---------------------------------------------------------------
Agent Version : 11.1.0.1.0
OMS Version : 11.1.0.1.0
Protocol Version : 11.1.0.0.0
Agent Home : /u01/app/oracle/middleware/agent11g
Agent binaries : /u01/app/oracle/middleware/agent11g
Agent Process ID : 1747
Parent Process ID : 1693
Agent URL : https://odd.oracle.com:3872/emd/main/
Repository URL : https://even.oracle.com:4900/em/upload
Started at : 2018-11-26 15:31:52
Started by user : oracle
Last Reload : 2018-11-26 15:31:52
Last successful upload : (none)
Last attempted upload : (none)
Total Megabytes of XML files uploaded so far : 0.00
Number of XML files pending upload : 19
Size of XML files pending upload(MB) : 18.02
Available disk space on upload filesystem : 73.15%
Last successful heartbeat to OMS : 2018-11-26 15:32:00
---------------------------------------------------------------
Agent is Running and Ready
root用户执行脚本:/u01/app/oracle/middleware/agent11g/root.sh
agent安装文成。
二、GC agent卸载
1、停止运行GC agent
[oracle@odd- bin]$ emctl stop agent
Oracle Enterprise Manager 11g Release 1 Grid Control 11.1.0.1.0
Copyright (c) 1996, 2010 Oracle Corporation. All rights reserved.
Stopping agent ... stopped.
[oracle@odd- bin]$ emctl status agent
Oracle Enterprise Manager 11g Release 1 Grid Control 11.1.0.1.0
Copyright (c) 1996, 2010 Oracle Corporation. All rights reserved.
---------------------------------------------------------------
Agent is Not Running
2、在EMGC删掉所有关于client host的target
EMGC home page ---> targets ---> all targets
按以下 Target Type 次序(不按次序将有错误提示), 逐个 remove client 相关的全部 target。
Listener
Database Instance
+ASM, High Availability Service(HAS)
Host
Agent
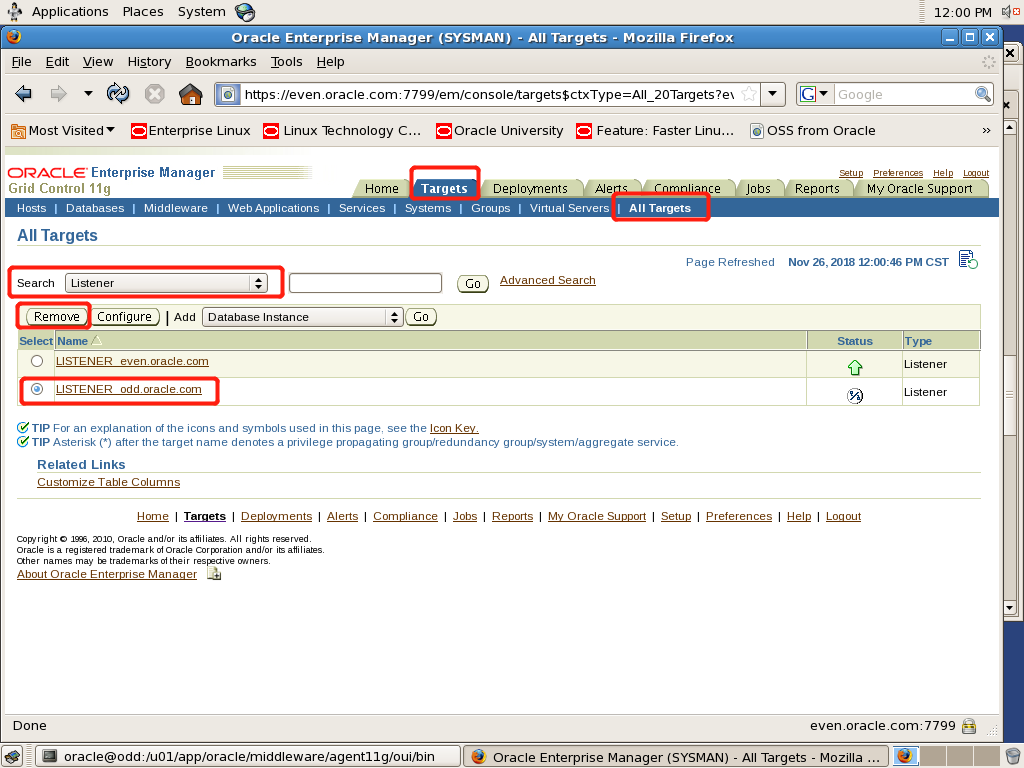
以上为listener target的删除示范,按照这个方法将其余关于client host的target全部删掉。
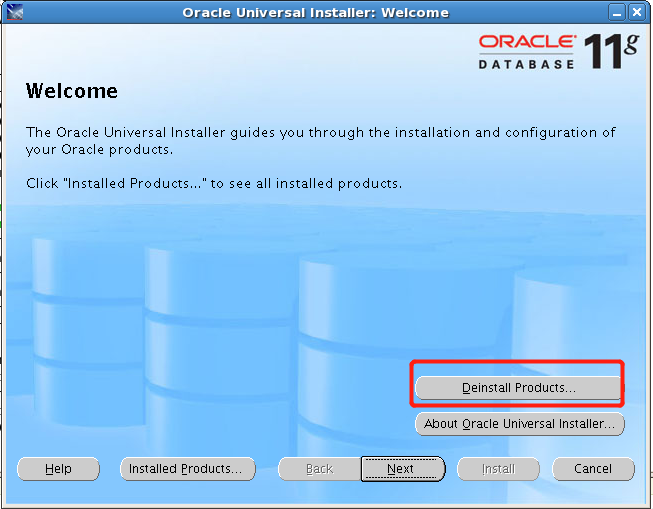
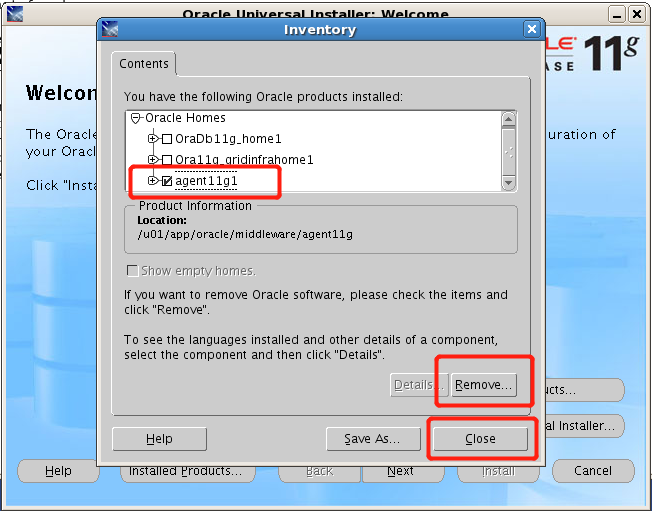
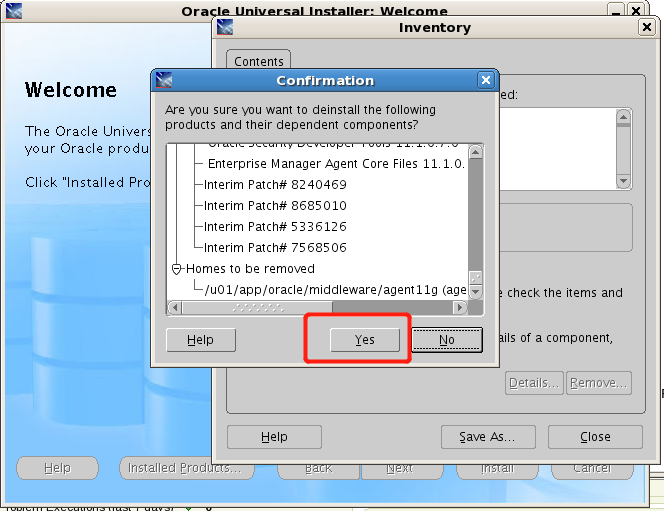
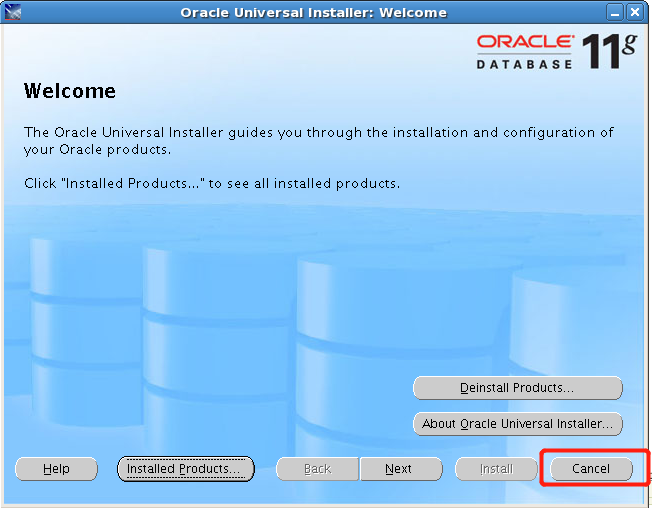
3、运行卸载程序
target全部删掉之后即可运行GC agent的卸载程序
$ /u01/app/oracle/middleware/agent11g/oui/bin/runInstaller

4、删除GC agent环境
#vi /etc/oratab
*:/u01/app/oracle/middleware/agent11g:N
PROD2:/u01/app/oracle/product/11.2.0/dbhome_1:N # line added by Agent
PROD1:/u01/app/oracle/product/11.2.0/dbhome_1:N # line added by Agent
将红色字体的agent相关信息删去。
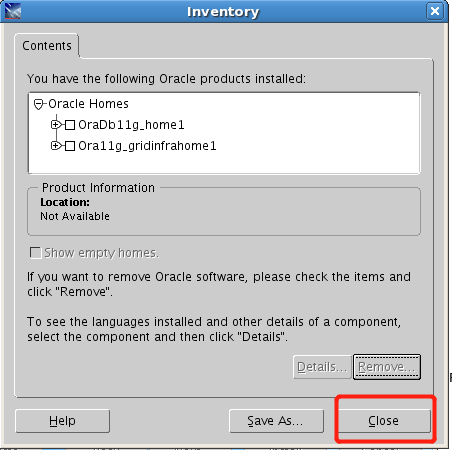
5、删除agent的安装目录
rm -rf $AGENT_HOME
至此agent删除完成。
GC agent的安装和卸载的更多相关文章
- 第四课 Grid Control实验 GC Agent安装(第一台机器部署) 及卸载
3.GC Agent安装(第一台机器部署) 安装Agent 拷贝agent,现在ocm2机器上查找agent.linux 查找文件的方法: find ./ -name agent*linux 把ag ...
- OCM_第五天课程:Section2 —》AGENT 的安装 、GC 的使用
注:本文为原著(其内容来自 腾科教育培训课堂).阅读本文注意事项如下: 1:所有文章的转载请标注本文出处. 2:本文非本人不得用于商业用途.违者将承当相应法律责任. 3:该系列文章目录列表: 一:&l ...
- Oracle9i的详细安装与卸载步骤(有图解)
Oracle9i的安装和卸载详解 本章将以Windows操作系统为例讲述Oracle9i数据库的安装 ...
- C#创建、安装、卸载、调试Windows Service(Windows 服务)的简单教程
前言:Microsoft Windows 服务能够创建在它们自己的 Windows 会话中可长时间运行的可执行应用程序.这些服务可以在计算机启动时自动启动,可以暂停和重新启动而且不显示任何用户界面.这 ...
- 教你一招:解决win10/win8.1系统在安装、卸载软件时出现2502、2503错误代码的问题
经常遇到win10/win8.1系统在安装.卸载软件时出现2502.2503错误代码的问题. 解决办法: 1.打开任务管理器后,切换到“详细信息”选项卡,找到explore.exe这个进程,然后结束进 ...
- Android随笔之——静默安装、卸载
随笔之所以叫随笔,就是太随意了,说起来,之前的闹钟系列随笔还没写完,争取在十月结束之前找时间把它给写了吧.今天要讲的Android APK的静默安装.卸载.网上关于静默卸载的教程有很多,更有说要调用隐 ...
- Zabbix3 agent端安装(二)
1.基础环境准备 安装zabbix的yum源,这里有必要提一点,阿里的yum源已经提供了zabbix3.0 1.1.yum源配置 rpm -ihv http://mirrors.aliyun.com/ ...
- Windows服务安装与卸载
Windows服务安装与卸载,使用到了InstallUtil.exe 安装: c: cd "C:\Windows\Microsoft.NET\Framework\v4.0.30319&quo ...
- Windows服务一:新建Windows服务、安装、卸载服务
Windows 服务(即,以前的 NT 服务)使您能够创建在它们自己的 Windows 会话中可长时间运行的可执行应用程序.这些服务可以在计算机启动时自动启动,可以暂停和重新启动而且不显示任何用户界面 ...
随机推荐
- Nginx实例
一.反向代理 反向代理实例一 1.实现效果 打开浏览器,在浏览器地址栏输入地址www.pluto.com,跳转到 liunx 系统 tomcat 主页面中 2.准备工作 [1].安装tomcat [r ...
- 众所周知,B站并不是个学习网站
立了一个Flag鸽鸽鸽鸽 我喜立Flag,9月份说要做点视频,不知不觉已经鸽了俩月了.中间就零星时间学了一些剪辑方面的知识,工作太忙,视频一直没有实质进展.视频的灵魂其实是脚本,到现在还没写好.我还是 ...
- Math.floor(Math.random() * array.length),splice
1.Math.floor(Math.random() * array.length) 返回长度内的索引 eg: changeLimit () { function getArrayItems(arr, ...
- 【网鼎杯2020朱雀组】Web WriteUp
nmap nmap语法,很简单. 127.0.0.1' -iL /flag -oN vege.txt ' phpweb 打开,抓包,发现可以传递函数和其参数 试了一下很多函数都被过滤了,不能执行系统命 ...
- php 抛出异常
<?php //try里面执行的东西如果不成立,可直接 throw new Exception('异常信息'),那么try里面的程序将会被停止执行,直接执行catch里面的程序 try { if ...
- 在多个浏览器中添加IDM插件
许多朋友下载了IDM(Internet Download Manager)不知如何使用.把包含视频的链接放到软件新建任务,下载下来的的却是网页而不是视频.该软件下载视频的其中一个方法,需安装浏览器插件 ...
- Xcode6在ios7上编译framework报错
错误描述: dyld: Symbol not found: _OBJC_CLASS_$_UIPresentationController Referenced from: /var/mobile/Ap ...
- 分析一个免杀webshell发现的php特性
文章首发于t00ls,嫌文章太啰嗦的可以直接看结论 起源 之前看到别人分享的一个免杀webshell: <?php @$GLOBALS{next} = $GLOBALS[$GLOBALS[fun ...
- 安装了向日葵或TeamViewer导致系统亮度无法调节
1.向日葵 安装向日葵造成无法调节亮度的原因:可能为了使用向日葵的黑屏模式功能,误装了向日葵的驱动.建议不要使用该功能. 关于安装向日葵的用户,请参考以下步骤解决: 请保持电脑处于联网状态,并关闭了向 ...
- maven打包时报No compiler is provided in this environment处理
系统:macOS 开发工具:Idea 问题描述:在idea中执行mvn clean install时报No compiler is provided in this environment. Perh ...