
iOS Programming - Views(视图 - 基本绘制,变换,平移,旋转,反转,倾斜)
1. Views
A view (an object whose class is UIView or a subclass of UIView) knows how to draw itself into a rectangular area of the interface.
Your app has a visible interface thanks to views.
(eg: you can drag an interface widget, such as a UIButton, into a view in the nib editor;
when the app runs, the button appears, and works properly.
You can also manipulate views in powerful ways, in real time. Your code can do some or all of the
view’s drawing of itself)
A view is also a responder (UIView is a subclass of UIResponder).
This means that a view is subject to user interactions, such as taps and swipes.
A view can have subviews;
If a view is removed from the interface, its subviews are removed;
if a view is hidden (made invisible), its subviews are hidden;
if a view is moved, its subviews move with it; and other changes in a view are likewise
shared with its subviews.
A view may come from a nib, or you can create it in code.
On balance, neither approach is to be preferred over the other; it depends on your needs and inclinations and on the
overall architecture of your app.
2. The Window
The top of the view hierarchy is the app’s window.
It is an instance of UIWindow (or your own subclass), which is a UIView subclass.
Your app should have exactly one main window. It is created at launch time and is never destroyed or replaced.
It occupies the entire screen and forms the background, and is the ultimate superview of, all your other visible views.
The window must fill the device’s screen.
This is done by setting the window’s frame to the screen’s bounds as the window is instantiated.
Objective-C:
UIWindow* w = [[UIWindow alloc] initWithFrame:[[UIScreen mainScreen] bounds]];
Swift(iOS8):
let w = UIWindow(frame: UIScreen.mainScreen().bounds)
Swift(iOS9):
// it’s sufficient to instantiate UIWindow with no frame

let w = UIWindow()
You will typically not put any view content manually and directly inside your main window.
Instead, you’ll obtain a view controller and assign it to the main window’s root ViewController property.
This causes the view controller’s main view (its view) to be made the one and only immediate subview of
your main window, which is the main window’s root view.
All other views in your main window will be subviews of the root view. Thus,
the root view is the highest object in the view hierarchy that the user will usually see.
Your app’s interface is not visible until the window, which contains it, is made the app’s
key window. This is done by calling the UIWindow instance method makeKeyAndVisible.
When addSubview: is called, the view is placed last among its superview’s subviews;
thus it is drawn last, meaning that it appears frontmost.
(最后绘制的,出现在最前面)
// it is legal to cycle through it and remove each subview one at a time

for (UIView* v in view.subviews)

    [v removeFromSuperview];
3. Visibility and Opacity(可见性与不透明度)
A view can be made invisible by setting its hidden property to YES, and visible again
by setting it to NO.
A view can be assigned a background color through its backgroundColor property. A
color is a UIColor;
A view whose background color is nil (the default) has a transparent background.
A view can be made partially or completely transparent through its alpha property: 1.0
means opaque, 0.0 means transparent, and a value may be anywhere between them,
inclusive.
This affects subviews: if a superview has an alpha of 0.5, none of its subviews
can have an apparent opacity of more than 0.5, because whatever alpha value they have
will be drawn relative to 0.5.
A view that is completely transparent (or very close to it) is like a view whose hidden is
YES: it is invisible, along with its subviews, and cannot (normally) be touched.
eg:
if a view displays an image and has a background color and its alpha is less than 1, the background color
will seep through the image (背景色将渗入图像).
4. Frame
A view’s frame property, a CGRect, is the position of its rectangle within its superview.
By default, the superview’s coordinate system will have the origin at its top left,
with the x-coordinate growing positively rightward and the y-coordinate growing positively downward.
(等同于Cocos2d-x中的UI坐标系,原点在左上角)
Setting a view’s frame to a different CGRect value repositions the view, or resizes it, or both.
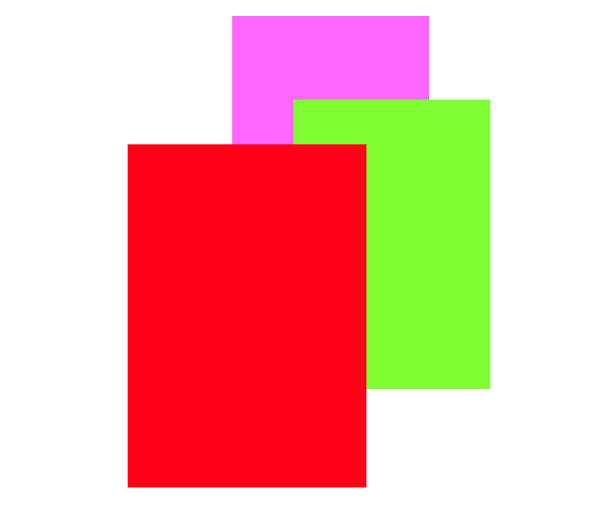
例: 画3个部分重叠的视图
Objective-C:
UIView* v1 = [[UIView alloc] initWithFrame:CGRectMake(, , , )];

v1.backgroundColor = [UIColor colorWithRed: green:. blue: alpha:];

UIView* v2 = [[UIView alloc] initWithFrame:CGRectMake(, , , )];

v2.backgroundColor = [UIColor colorWithRed:. green: blue: alpha:];

UIView* v3 = [[UIView alloc] initWithFrame:CGRectMake(, , , )];

v3.backgroundColor = [UIColor colorWithRed: green: blue: alpha:];

[mainview addSubview: v1];

[v1 addSubview: v2];

[mainview addSubview: v3];
Swift:
let v1 = UIView(frame:CGRectMake(, , , ))

v1.backgroundColor = UIColor(red: , green: 0.4, blue: , alpha: )

let v2 = UIView(frame:CGRectMake(, , , ))

v2.backgroundColor = UIColor(red: 0.5, green: , blue: , alpha: )

let v3 = UIView(frame:CGRectMake(, , , ))

v3.backgroundColor = UIColor(red: , green: , blue: , alpha: )

mainview.addSubview(v1)

v1.addSubview(v2)

mainview.addSubview(v3)
效果:
5. Bounds and Center(边框和中心)
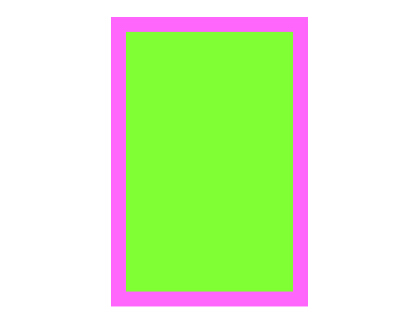
CGRectInset函数,画出视图边框
例1: 画一个带有粗边框的视图
UIView* v1 = [[UIView alloc] initWithFrame:CGRectMake(, , , )];

v1.backgroundColor = [UIColor colorWithRed: green:. blue: alpha:];

UIView* v2 = [[UIView alloc] initWithFrame:CGRectInset(v1.bounds, , )];

v2.backgroundColor = [UIColor colorWithRed:. green: blue: alpha:];

[mainview addSubview: v1];

[v1 addSubview: v2];
效果:
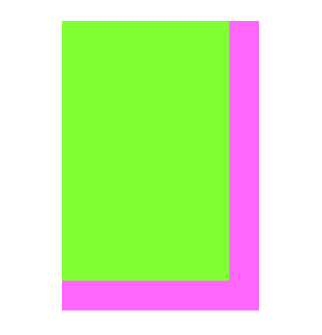
例2: 移动超视图(spuerview)的原点导致子视图(subview)位置发生变化
(本例中子视图向左上移动)
UIView* v1 = [[UIView alloc] initWithFrame:CGRectMake(, , , )];

v1.backgroundColor = [UIColor colorWithRed: green:. blue: alpha:];

UIView* v2 = [[UIView alloc] initWithFrame:CGRectInset(v1.bounds, , )];

v2.backgroundColor = [UIColor colorWithRed:. green: blue: alpha:];

[mainview addSubview: v1]

[v1 addSubview: v2];

CGRect r = v1.bounds;

r.origin.x += ;

r.origin.y += ;

v1.bounds = r;
效果:
6. Transform(变换)
旋转(rotation), 缩放(scaling), 平移(translation)
例1: 视图顺时针旋转45度角
UIView* v1 = [[UIView alloc] initWithFrame:CGRectMake(, , , )];

v1.backgroundColor = [UIColor colorWithRed: green:. blue: alpha:];

UIView* v2 = [[UIView alloc] initWithFrame:CGRectInset(v1.bounds, , )];

v2.backgroundColor = [UIColor colorWithRed:. green: blue: alpha:];

[mainview addSubview: v1];

[v1 addSubview: v2];

v1.transform = CGAffineTransformMakeRotation( * M_PI/180.0);
效果: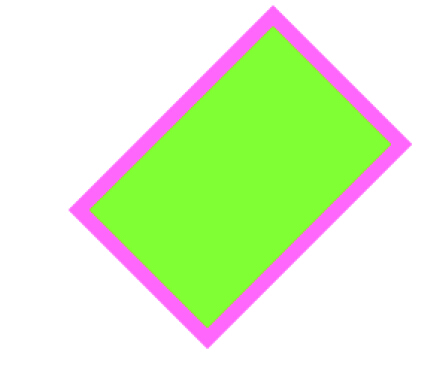
例2: 缩放变换
v1.transform = CGAffineTransformMakeScale(1.8, );
效果: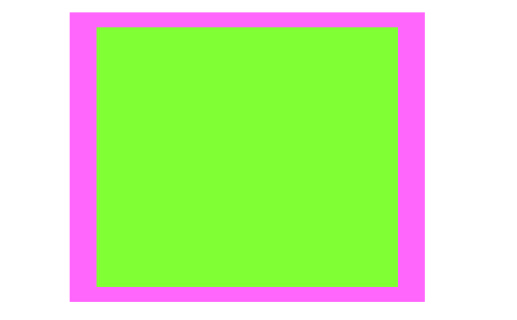
例3: 子视图先平移后旋转
UIView* v1 = [[UIView alloc] initWithFrame:CGRectMake(, , , )];

v1.backgroundColor = [UIColor colorWithRed: green:. blue: alpha:];

UIView* v2 = [[UIView alloc] initWithFrame:v1.bounds];

v2.backgroundColor = [UIColor colorWithRed:. green: blue: alpha:];

[mainview addSubview: v1];

[v1 addSubview: v2];

v2.transform = CGAffineTransformMakeTranslation(, );

v2.transform = CGAffineTransformRotate(v2.transform,  * M_PI/180.0);
效果: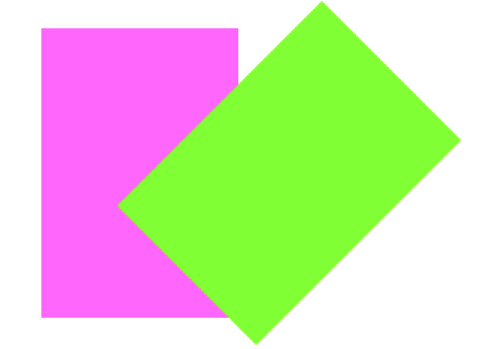
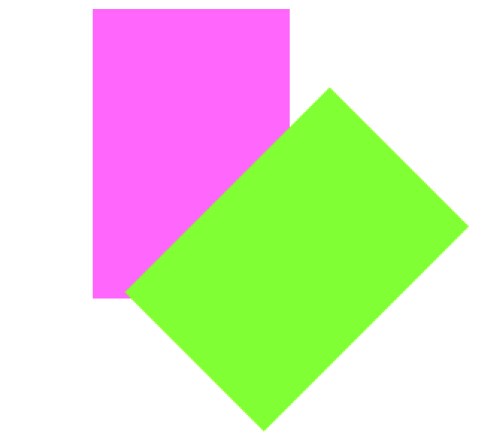
例4: 子视图先旋转后平移
v2.transform = CGAffineTransformMakeRotation( * M_PI/180.0);

v2.transform = CGAffineTransformTranslate(v2.transform, , );
效果:
例5: 旋转平移后再反转(删除旋转)
CGAffineTransformConcat - 合并两个变换动作
CGAffineTransform r = CGAffineTransformMakeRotation( * M_PI/180.0);

CGAffineTransform t = CGAffineTransformMakeTranslation(, );

v2.transform = CGAffineTransformConcat(t,r);

v2.transform =

CGAffineTransformConcat(CGAffineTransformInvert(r), v2.transform);
效果: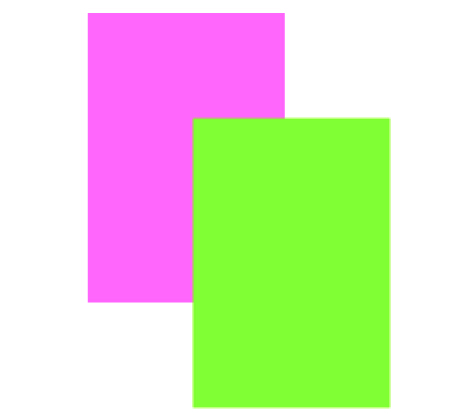
例6: 倾斜
v1.transform = CGAffineTransformMake(, , -0.2, , , );
效果: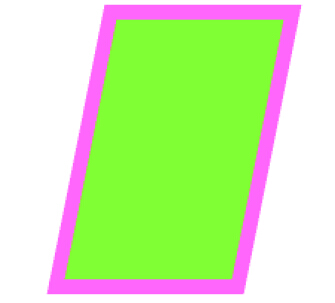
iOS Programming - Views(视图 - 基本绘制,变换,平移,旋转,反转,倾斜)的更多相关文章
- iOS Programming Views :Redrawing and UIScrollView
iOS Programming Views :Redrawing and UIScrollView 1.1 event You are going to see how views are red ...
- iOS Programming View and View Hierarchy 视图和视图等级
iOS Programming View and View Hierarchy 视图和视图等级 1.1(1)File → New → Project.. From the iOS section, ...
- Collection View Programming Guide for iOS---(一)----About iOS Collection Views
Next About iOS Collection Views 关于iOS Collection Views A collection view is a way to present an orde ...
- iOS Programming View Controllers 视图控制器
iOS Programming View Controllers 视图控制器 1.1 A view controller is an instance of a subclass of UIVi ...
- [ios学习笔记之视图、绘制和手势识别]
一 视图 二 绘制 三 手势 00:31 UIGestureRecognizer 抽象类 两步 1添加识别器(控制器或者视图来完成) 2手势识别后要做的事情 UIPanGestureRecognize ...
- Scene视图辅助线绘制
有时候需要在Scene视图中绘制一些辅助线,方便进行一些编辑的工作,可以通过如下类和函数完成: 绘制辅助线,相关类: Gizmos类:用于在Scene视图中绘制调试信息或辅助线,这些辅助线只有在Sce ...
- iOS核心动画高级技巧之图层变换和专用图层(二)
iOS核心动画高级技巧之CALayer(一) iOS核心动画高级技巧之图层变换和专用图层(二)iOS核心动画高级技巧之核心动画(三)iOS核心动画高级技巧之性能(四)iOS核心动画高级技巧之动画总结( ...
- iOS Programming State Restoration 状态存储
iOS Programming State Restoration 状态存储 If iOS ever needs more memory and your application is in the ...
- iOS Programming Introduction to Auto Layout 自动布局
iOS Programming Introduction to Auto Layout 自动布局 A single application that runs natively on both t ...
随机推荐
- 转:windbg调试堆
转:http://www.cnblogs.com/dsky/archive/2013/05/15/3079363.html 简评: 代码中采用malloc/free进行堆申请,实际调用的仍然是Heap ...
- 转:x64与x86的改变
http://tieba.baidu.com/p/1250470248 x64与x86的改变 硬件要求就是64位的CPU.操作系统也必须是64位的,如果在64位的CPU上安装了32位的操作系统,就算编 ...
- 洛谷P4331 [BOI2004] Sequence 数字序列 [左偏树]
题目传送门 数字序列 题目描述 给定一个整数序列 a1,a2,⋅⋅⋅,an ,求出一个递增序列 b1<b2<⋅⋅⋅<bn ,使得序列 ai 和 bi 的各项之差的绝对 ...
- webpack 打包过程及常用插件
前言 要理解webpack 首先明白三个概念:module,chunk,bundles,即输入,中间态,输出. chunk: This webpack-specific term is uesd in ...
- WAR/EAR 概念
In J2EE application, modules are packaged as EAR, JAR and WAR based on their functionality JAR: EJB ...
- Python开发基础-Day13模块2
sys模块 sys模块提供了一系列有关Python运行环境的变量和函数. #重点记忆 sys.argv #命令行参数List,第一个元素是程序本身路径 sys.exit(n) #退出执行的程序未见,正 ...
- C++中的error C2662,const的this指针问题
今天在写C++代码的时候遇到一个错误,涉及到了常量的this指针的问题. 简化后的代码如下: #include <iostream> #include <string> usi ...
- BZOJ 3343:教主的魔法(分块)
[题目链接] http://www.lydsy.com/JudgeOnline/problem.php?id=3343 [题目大意] 给出一个数列,有区间加法操作,询问区间大于等于c的数字个数 [题解 ...
- bzoj 1483: [HNOI2009]梦幻布丁
1483: [HNOI2009]梦幻布丁 Description N个布丁摆成一行,进行M次操作.每次将某个颜色的布丁全部变成另一种颜色的,然后再询问当前一共有多少段颜色.例如颜色分别为1,2,2,1 ...
- hibernate双向ManyToMany映射
工作需要一个双向多对多映射,照着李刚的书做了映射,碰到了一些问题,现就问题及解决方案进行总结归纳. 1.首先奉上最初代码 Person5.java @Entity @Table(name = &quo ...