ELK学习实验003:Elasticsearch 集群安装
前面已经介绍了Elasticsearch这个工具,并对单机安装做了简单介绍,现在使用三台机器做一个elasticsearch集群
一 环境准备
1.1 机器准备

1.2 同步时间
[root@node* ~]# ntpdate ntp1.aliyun.com
Nov :: ntpdate[]: adjust time server 120.25.115.20 offset -0.015719 sec
[root@node1 ~]# crontab -l
* * * * * /usr/sbin/ntpdate ntp1.aliyun.com
1.3 检查其他配置
比如内核,文件连接等参数是否配置完成,三个节点都必须检查
[root@node2 ~]# sysctl -a|grep vm.max_map_count
vm.max_map_count =
[root@node2 ~]# cat /etc/security/limits.conf
* soft  nofile

* hard  nofile

* soft  nproc

* hard  nproc
[root@node2 ~]# cat /etc/security/limits.d/20-nproc.conf
*          soft    nproc

root       soft    nproc     unlimited
根据上篇文章下载并解压elasticsearch软件下面直接进入配置
二 各节点配置
2.1 主要配置文件
[root@node1 ~]# grep -Ev "^$|[#;]" /usr/local/elasticsearch/config/elasticsearch.yml
cluster.name: my-elktest-cluster

node.name: node-

network.host: 0.0.0.0

http.port:

discovery.seed_hosts: ["192.168.132.131","192.168.132.132","192.168.132.133"]

cluster.initial_master_nodes: ["node-1","node-2","node-3"]

http.cors.enabled: true

http.cors.allow-origin: "*"
[root@node2 ~]# grep -Ev "^$|[#;]" /usr/local/elasticsearch/config/elasticsearch.yml
cluster.name: my-elktest-cluster

node.name: node-

network.host: 0.0.0.0

http.port:

discovery.seed_hosts: ["192.168.132.131","192.168.132.132","192.168.132.133"]

cluster.initial_master_nodes: ["node-1","node-2","node-3"]

http.cors.enabled: true

http.cors.allow-origin: "*"
[root@node3 ~]# grep -Ev "^$|[#;]" /usr/local/elasticsearch/config/elasticsearch.yml
cluster.name: my-elktest-cluster

node.name: node-

network.host: 0.0.0.0

http.port:

discovery.seed_hosts: ["192.168.132.131","192.168.132.132","192.168.132.133"]

cluster.initial_master_nodes: ["node-1","node-2","node-3"]

http.cors.enabled: true

http.cors.allow-origin: "*"
[root@node* ~]# vi /etc/hosts
192.168.132.131   node-

192.168.132.132   node-

192.168.132.133   node-
2.2 启动服务
[root@node1 ~]# systemctl restart elasticsearch
[root@node2 ~]# systemctl restart elasticsearch
[root@node3 ~]# systemctl restart elasticsearch
2.3 检查服务状态
[root@node* ~]# systemctl status elasticsearch

三个节点都启动,出现以上状态,说明三个服务已经起来了
2.4 使用elasticsearch-head检查
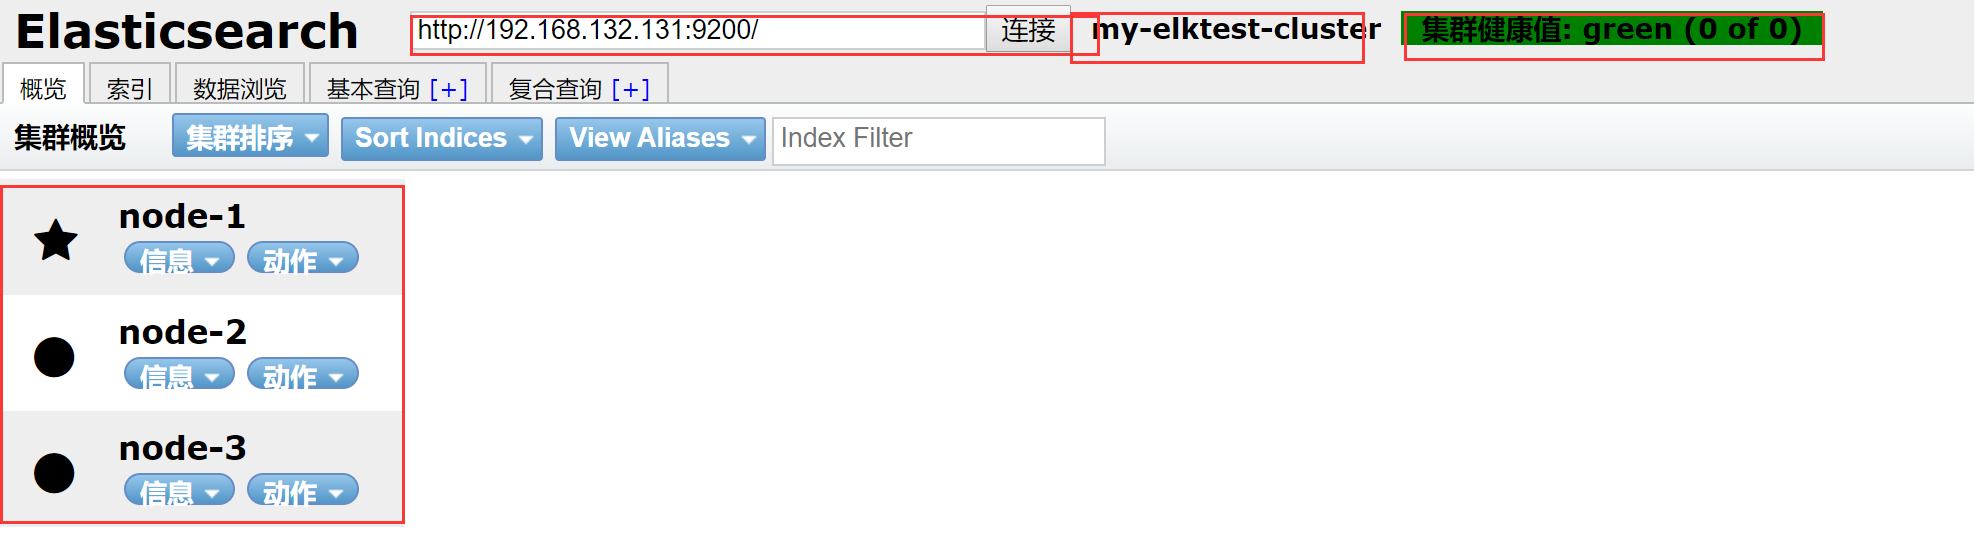
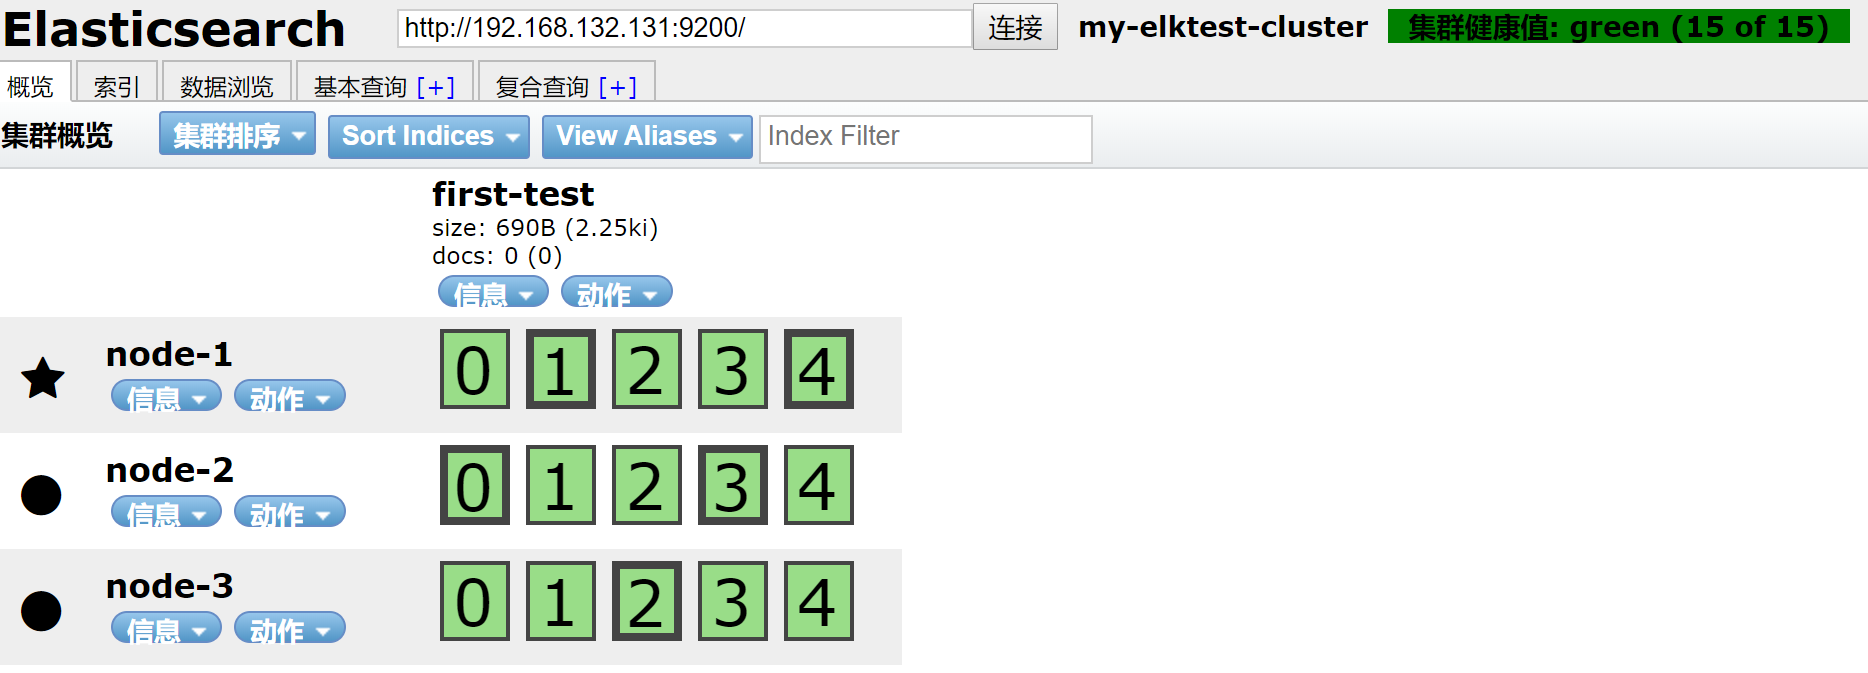
新建一个索引


结果
三 集群简单测试
3.1 测试slave节点
关掉node2节点
[root@node2 ~]# systemctl stop elasticsearch
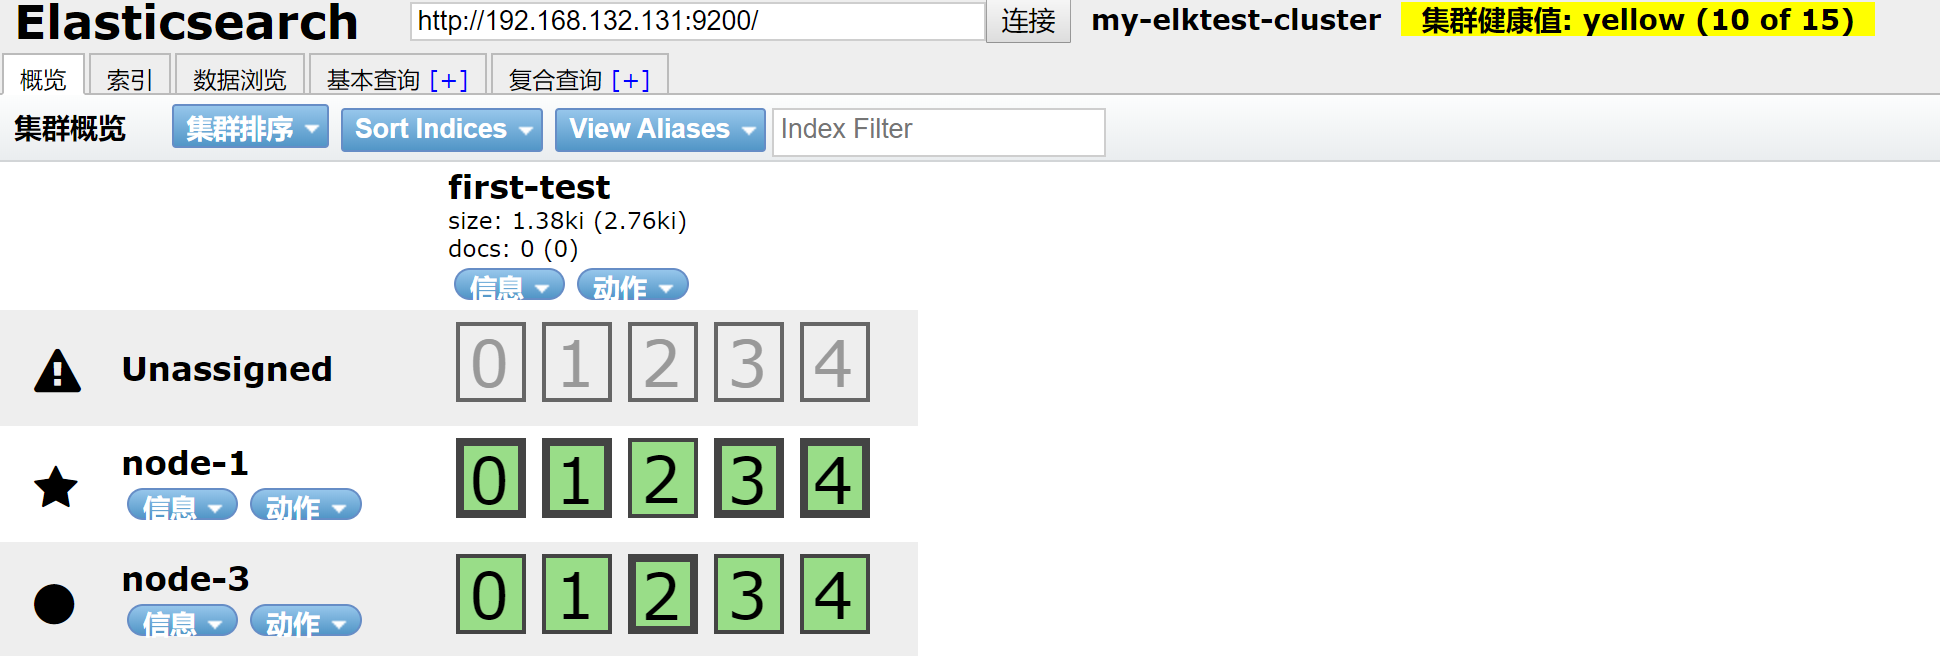
数据还在,开启node2
[root@node2 ~]# systemctl start elasticsearch
观察
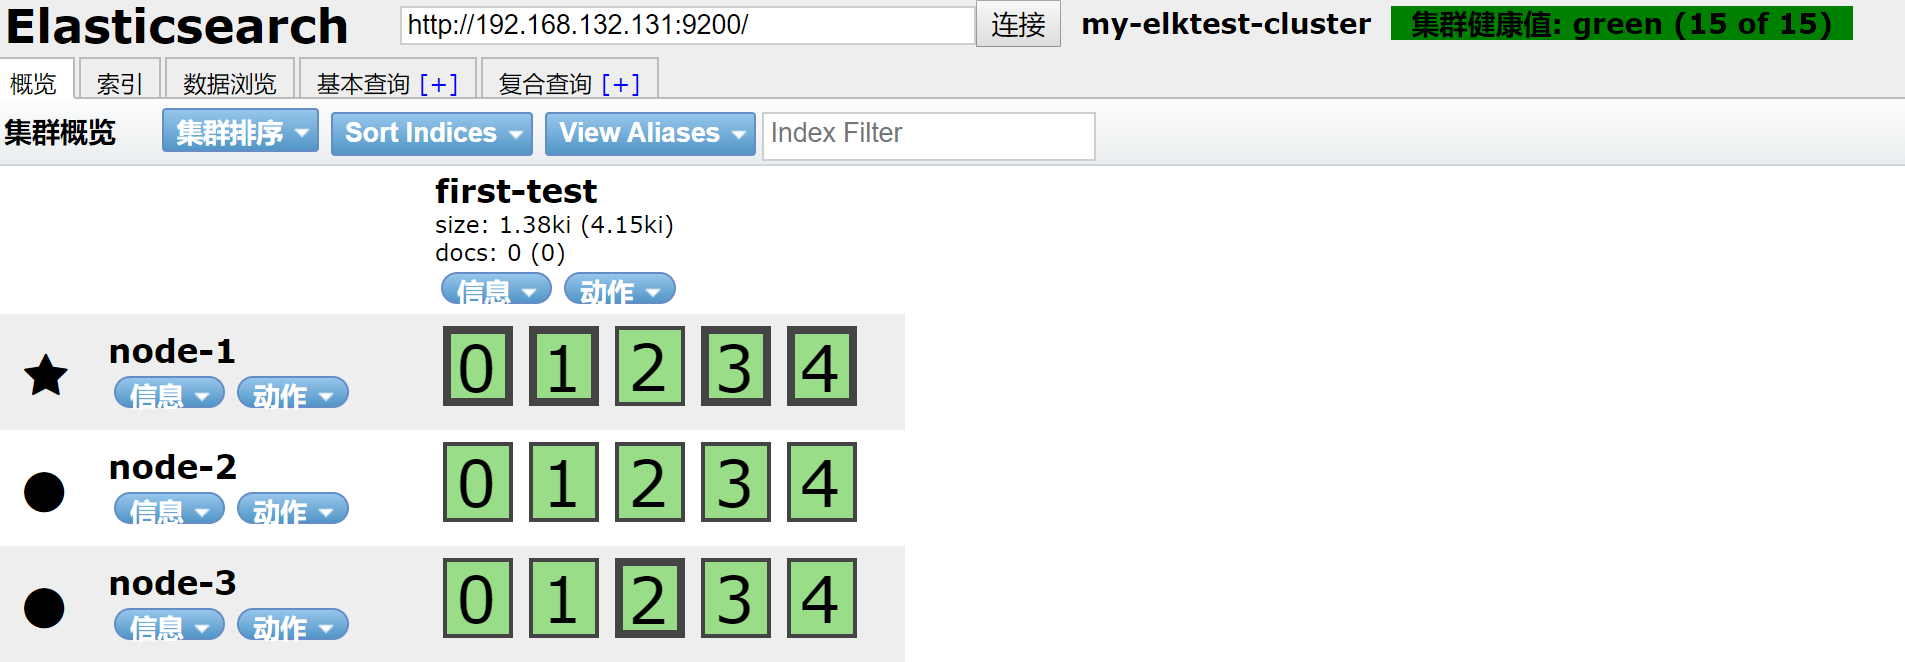
集群回复正常状态
3.2 测试主节点宕机,对集群影响
关闭主节点
五角星代表是主节点,圆点代表从节点
[root@node1 ~]# systemctl stop elasticsearch
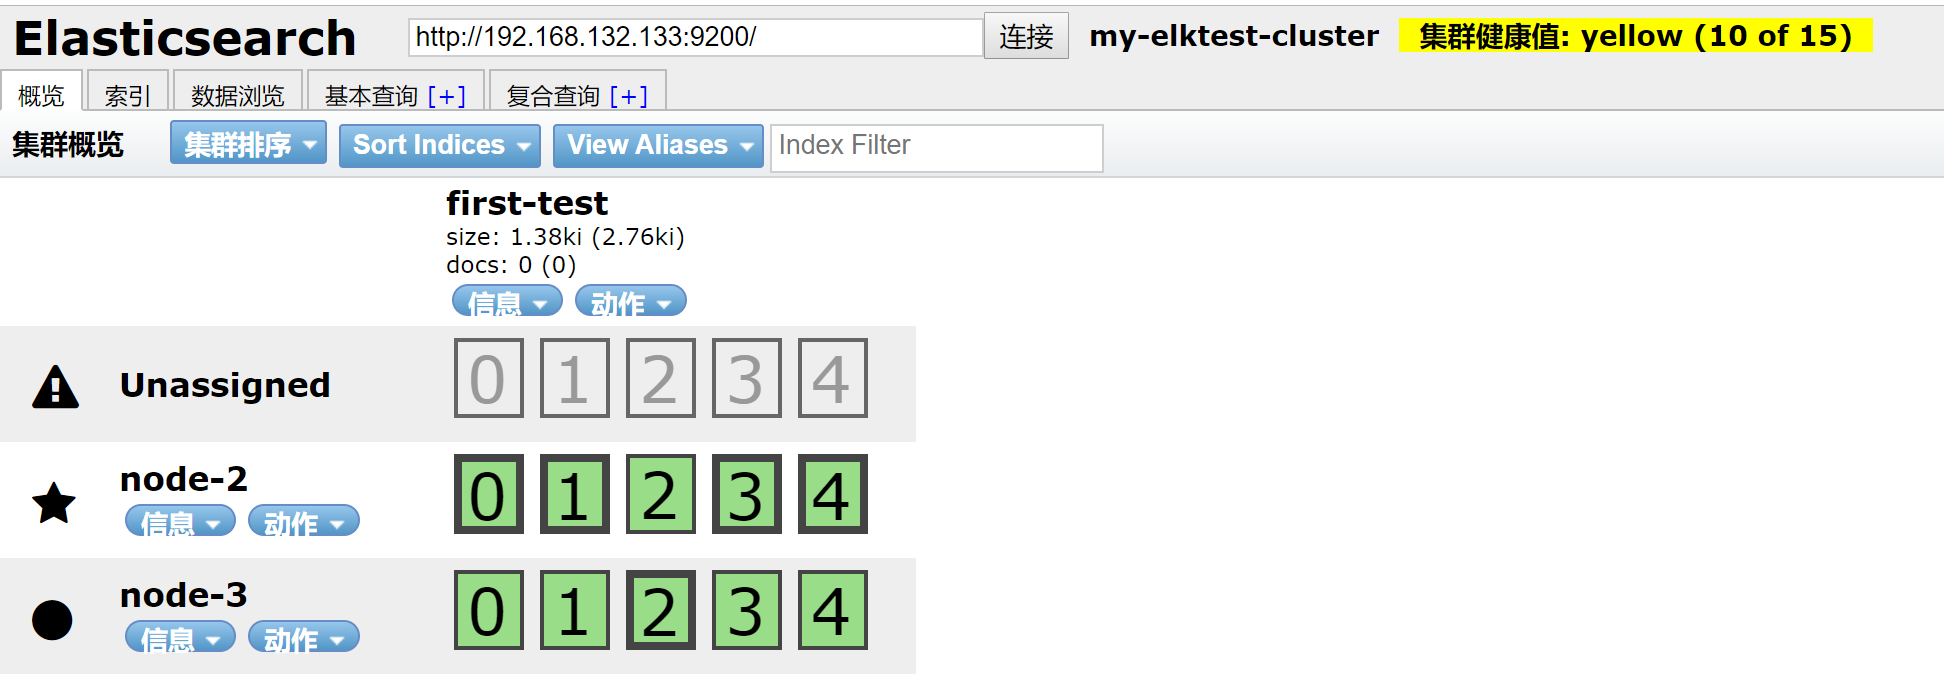
可以看到node-1节点不在,master节点已经转移到node-2上,数据也分不到node-2和node-3上
恢复node-1
[root@node1 ~]# systemctl start elasticsearch
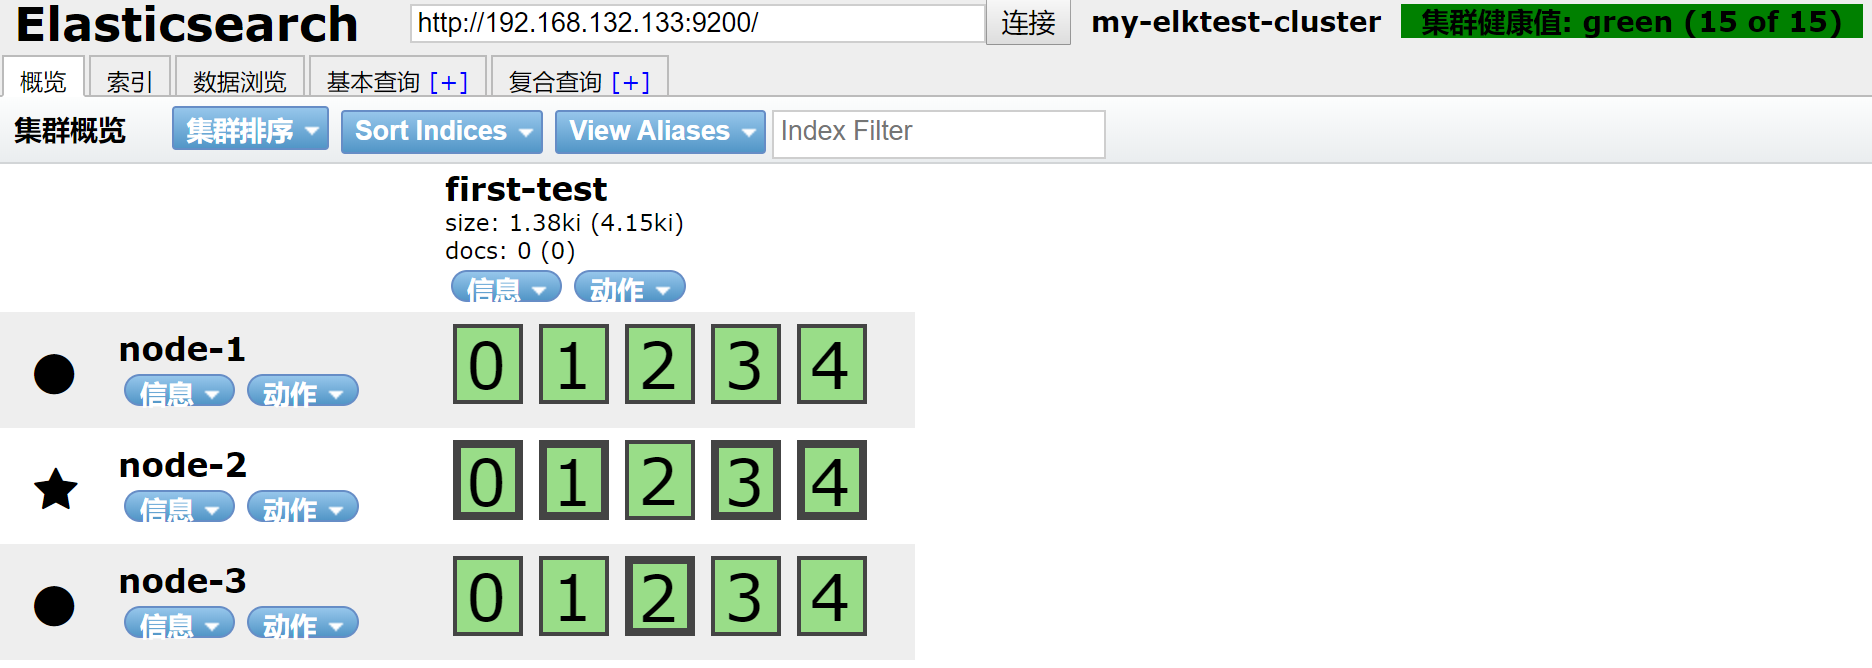
集群回复正常
四 使用curl简单的查看集群信息
4.1 查看master节点
[root@node1 ~]# curl http://192.168.132.131:9200/_cat/master
9qVjdVSvSAGlZ7lpB9O78g 192.168.132.132 192.168.132.132 node-
4.2 查看数据节点
[root@node1 ~]# curl -XGET http://127.0.0.1:9200/_cat/nodes?pretty
192.168.132.133    0.00 0.01 0.05 dilm - node-

192.168.132.131    0.00 0.01 0.05 dilm - node-

192.168.132.132    0.00 0.01 0.05 dilm * node-
4.3 查看集群健康状态
[root@node1 ~]# curl localhost:9200/_cluster/health?pretty
{

  "cluster_name" : "my-elktest-cluster",

  "status" : "green",

  "timed_out" : false,

  "number_of_nodes" : ,

  "number_of_data_nodes" : ,

  "active_primary_shards" : ,

  "active_shards" : ,

  "relocating_shards" : ,

  "initializing_shards" : ,

  "unassigned_shards" : ,

  "delayed_unassigned_shards" : ,

  "number_of_pending_tasks" : ,

  "number_of_in_flight_fetch" : ,

  "task_max_waiting_in_queue_millis" : ,

  "active_shards_percent_as_number" : 100.0

}
4.4其他的查看命令
[root@node1 ~]# curl localhost:9200/_cat
=^.^=

/_cat/allocation

/_cat/shards

/_cat/shards/{index}

/_cat/master

/_cat/nodes

/_cat/tasks

/_cat/indices

/_cat/indices/{index}

/_cat/segments

/_cat/segments/{index}

/_cat/count

/_cat/count/{index}

/_cat/recovery

/_cat/recovery/{index}

/_cat/health

/_cat/pending_tasks

/_cat/aliases

/_cat/aliases/{alias}

/_cat/thread_pool

/_cat/thread_pool/{thread_pools}

/_cat/plugins

/_cat/fielddata

/_cat/fielddata/{fields}

/_cat/nodeattrs

/_cat/repositories

/_cat/snapshots/{repository}

/_cat/templates
实验基本完成,后续在做关于集群的其他实验
ELK学习实验003:Elasticsearch 集群安装的更多相关文章
- 批量搞机(二):分布式ELK平台、Elasticsearch介绍、Elasticsearch集群安装、ES 插件的安装与使用
一.分布式ELK平台 ELK的介绍: ELK 是什么? Sina.饿了么.携程.华为.美团.freewheel.畅捷通 .新浪微博.大讲台.魅族.IBM...... 这些公司都在使用 ELK!ELK! ...
- ELK 性能(4) — 大规模 Elasticsearch 集群性能的最佳实践
ELK 性能(4) - 大规模 Elasticsearch 集群性能的最佳实践 介绍 集群规模 集群数:6 整体集群规模: 300 Elasticsearch 实例 141 物理服务器 4200 CP ...
- Elasticsearch集群安装Version6.2.2
Elasticsearch集群安装, 基于Elasticsearch6.2.2版本, 在Linux上安装Elasticsearch集群. 1.安装规划 IP HostName Service Mast ...
- ELK教程1:ElasticSearch集群的部署ELK
在分布式系统中,应用数量众多,应用调用链复杂,常常使用ELK作为日志收集.分析和展示的组件.本篇文章将讲讲解如何部署ELK,然后讲解如何使用Filebeat采集Spring Boot的日志输出到Log ...
- CentOS下 elasticsearch集群安装
1.进入root目录并下载elasticsearch cd /root wget https://download.elastic.co/elasticsearch/elasticsearch/ela ...
- ElasticSearch集群安装配置
1. 环境说明 Cent OS 7 jdk-8u121-linux-x64.tar.gz elasticsearch-5.2.1.zip 2. 系统环境配置 新建进程用户 修改File Descrip ...
- kafka学习2:kafka集群安装与配置
在前一篇:kafka学习1:kafka安装 中,我们安装了单机版的Kafka,而在实际应用中,不可能是单机版的应用,必定是以集群的方式出现.本篇介绍Kafka集群的安装过程: 一.准备工作 1.开通Z ...
- ElasticSearch 集群安装,简单使用
http://www.elastic.co/guide/en/elasticsearch/reference/current/setup-configuration.html https://gith ...
- elasticsearch集群安装+安全验证+kibana安装
准备环境 启动4个centos容器, 并暴露相对应端口 (我的本机ip为172.16.1.236,以下涉及到的地方需要修改为自己的ip) node_name ip http port transpor ...
随机推荐
- Inventor安装失败怎样卸载重新安装Inventor,解决Inventor安装失败的方法总结
技术帖:Inventor没有按照正确方式卸载,导致Inventor安装失败.楼主也查过网上关于如何解决Inventor安装失败的一些文章,是说删除几个Inventor文件和Inventor软件注册表就 ...
- c#操作sqlite db3数据库
首先添加引用 System.Data.SQLite.dll,引用只用添加这个,但SQLite.Interop.dll文件必须也和它同时放在Debug目录下 然后可用: SQLiteConnection ...
- Java练习 SDUT-1580_闰年
闰年 Time Limit: 1000 ms Memory Limit: 32768 KiB Problem Description 时间过得真快啊,又要过年了,同时,我们的人生也增长了一年的阅历,又 ...
- Linux 网络原理及基础设置
临时配置网络(ip,网关,dns)+永久配置 设置IP和掩码 ifconfig eth0 192.168.2.2 netmask 255.255.255.0 设置网关route add default ...
- Linux 正文处理命令及tar命令 利用vi编辑器创建和编辑正文文件
要点回顾 1) 将用户信息数据库文件和组信息数据库文件纵向合并为一个文件/1.txt(覆盖) cp /etc/passwd . cat ./passwd >1.txt cp /etc/group ...
- Ubuntu 14.04 使用ntfs-config解决开机自动挂载NTFS分区的方法
先安装: sudo apt-get install ntfs-3g ntfs-config 再配置一下: sudo ntfs-config 然后就会弹出来一个对话框,选择你需要挂载的分区,点应用,再选 ...
- php 向数组 首位插入 和 尾部插入
首位插入: <?php$queue = array("orange", "banana");array_unshift($queue, "app ...
- 各种浏览器怎么换ip
https://jingyan.baidu.com/article/e4d08ffdb784050fd2f60ddd.html 方法/步骤 1 用浏览器搜索ip,得到自己当前的ip. 2 用浏览器 ...
- H3C RIP路由表的初始化
- linux oops 消息
大部分 bug 以解引用 NULL 指针或者使用其他不正确指针值来表现自己的. 此类 bug 通 常的输出是一个 oops 消息. 处理器使用的任何地址几乎都是一个虚拟地址, 通过一个复杂的页表结构映 ...