
Android中Style和Theme的使用
Style:
Style是View中一些属性的集合,包括height,padding,font color,background等等,Style单独定义在xml文件中,类似与web页面中css的角色,将设计和内容分开,便于修改和重复使用。
定义Style:
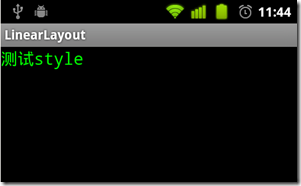
style文件需要保存在res/values目录下,文件名任意,但是必须是xml文件,sytle文件的根标记必须是<resources>。写了一个简单示例,效果如下:
程序目录结构如下图,其中mystyle.xml是自定义的style文件。

main.xml文件代码:
- <?xml version="1.0" encoding="utf-8"?>
- <LinearLayout
- xmlns:android="http://schemas.android.com/apk/res/android"
- android:layout_width="fill_parent"
- android:layout_height="fill_parent">
- <TextView
- style="@style/CodeFont"
- android:text="测试style">
- </TextView>
- </LinearLayout>
<?xml version="1.0" encoding="utf-8"?>
<LinearLayout
xmlns:android="http://schemas.android.com/apk/res/android"
android:layout_width="fill_parent"
android:layout_height="fill_parent">
<TextView
style="@style/CodeFont"
android:text="测试style">
</TextView>
</LinearLayout>
声明style是CodeFont,对应的是style文件中的style name。mystyle.xml文件中定义了style name是CodeFont:
parent属性表示style之间可以继承,同时可以覆盖parent style的一些属性。
- <?xml version="1.0" encoding="utf-8"?>
- <resources>
- <style name="CodeFont" parent="@android:style/TextAppearance.Medium">
- <item name="android:layout_width">fill_parent</item>
- <item name="android:layout_height">wrap_content</item>
- <item name="android:textColor">#00FF00</item>
- <item name="android:typeface">monospace</item>
- </style>
- </resources>
<?xml version="1.0" encoding="utf-8"?>
<resources>
<style name="CodeFont" parent="@android:style/TextAppearance.Medium">
<item name="android:layout_width">fill_parent</item>
<item name="android:layout_height">wrap_content</item>
<item name="android:textColor">#00FF00</item>
<item name="android:typeface">monospace</item>
</style>
</resources>
Style的继承:
style继承有两种方式:
- style的继承可以通过parent属性,用来继承android已经定义好的style,例如:
- <style name="GreenText" parent="@android:style/TextAppearance">
- <item name="android:textColor">#00FF00</item>
- </style>
<style name="GreenText" parent="@android:style/TextAppearance">
<item name="android:textColor">#00FF00</item>
</style>
继承了android中的TextAppearance,同时覆盖了android:textColor属性。
- 如果要继承自定义的style,不需要通过parent属性,只要style的name以需要继承的style的name开始后跟新的style的name,中间用“.”隔开。注意:这种方式只适用与自定义的style继承 。
- <style name="CodeFont.Red">
- <item name="android:textColor">#FF0000</item>
- </style>
<style name="CodeFont.Red">
<item name="android:textColor">#FF0000</item>
</style>
新的style继承了CodeFont,则在修改上边例子中的main.xml为:
- <?xml version="1.0" encoding="utf-8"?>
- <LinearLayout
- xmlns:android="http://schemas.android.com/apk/res/android"
- android:layout_width="fill_parent"
- android:layout_height="fill_parent">
- <TextView
- style="@style/CodeFont.Red"
- android:text="测试style">
- </TextView>
- </LinearLayout>
<?xml version="1.0" encoding="utf-8"?>
<LinearLayout
xmlns:android="http://schemas.android.com/apk/res/android"
android:layout_width="fill_parent"
android:layout_height="fill_parent">
<TextView
style="@style/CodeFont.Red"
android:text="测试style">
</TextView>
</LinearLayout>
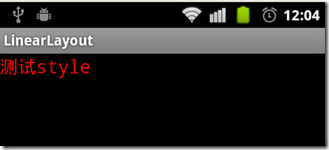
效果如下,字体颜色变为了红色:
style也可以多级继承:
- <style name="CodeFont.Red.Big">
- <item name="android:textSize">30sp</item>
- </style>
<style name="CodeFont.Red.Big">
<item name="android:textSize">30sp</item>
</style>
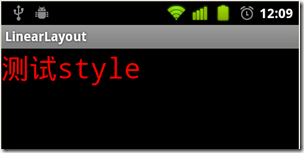
字号变大,效果如下:
sytle的更多属性见android包下的R.attr。需要注意,并不是所有的View都支持定义的style的属性,如果自定义的sytle中包含View不支持的属性,程序会自动忽略它。
Theme:
如果声明一个style作为Theme,需要配置mainfest文件中<activity> 或 <application>的android:theme 属性。
将自定义的style作为application的theme:
修改mystyle.xml为:
- <?xml version="1.0" encoding="utf-8"?>
- <resources>
- <style name="CodeFont">
- <item name="android:textSize">20sp</item>
- <item name="android:typeface">monospace</item>
- </style>
- </resources>
<?xml version="1.0" encoding="utf-8"?>
<resources>
<style name="CodeFont">
<item name="android:textSize">20sp</item>
<item name="android:typeface">monospace</item>
</style>
</resources>
在mainfest 的application中添加 android:theme属性:
- <application android:icon="@drawable/icon"
- android:label="@string/app_name"
- android:theme="@style/CodeFont">
<application android:icon="@drawable/icon"
android:label="@string/app_name"
android:theme="@style/CodeFont">
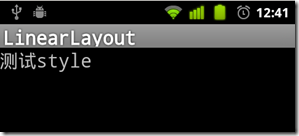
则application中的所有text字体都会改变,效果如下:
在每个<activity>标签中使用android:theme属性:
- <activity android:name=".MainActivity"
- android:label="@string/app_name"
- android:theme="@style/CodeFont">
<activity android:name=".MainActivity"
android:label="@string/app_name"
android:theme="@style/CodeFont">
android:theme还可以配置android中已经存在的theme:
- <activity android:theme="@android:style/Theme.Translucent">
<activity android:theme="@android:style/Theme.Translucent">
如果想调整android已经定义好的theme,则可以通过自定义style来实现,例如:
- <color name="custom_theme_color">#b0b0ff</color>
- <style name="CustomTheme" parent="android:Theme.Light">
- <item name="android:windowBackground">@color/custom_theme_color</item>
- <item name="android:colorBackground">@color/custom_theme_color</item>
- </style>
<color name="custom_theme_color">#b0b0ff</color>
<style name="CustomTheme" parent="android:Theme.Light">
<item name="android:windowBackground">@color/custom_theme_color</item>
<item name="android:colorBackground">@color/custom_theme_color</item>
</style>
效果如下:

关于在<activity>中android的Theme的详细使用见:android Theme使用总结
根据android版本选择主题:
在android新的版本中增加了新的theme,如果想在新版中利用新theme同时又兼容旧版本,可以通过配置两个theme文件实现,例如在res/values目录下配置sytle.xml文件:
- <style name="LightThemeSelector" parent="android:Theme.Light">
- </style>
<style name="LightThemeSelector" parent="android:Theme.Light">
</style>
在res/values-11目录下配置文件style.xml:
- <style name="LightThemeSelector" parent="android:Theme.Holo.Light" mce_bogus="1">
- </style>
<style name="LightThemeSelector" parent="android:Theme.Holo.Light" mce_bogus="1">
</style>
按照文档中说的在res下创建values-11目录,程序报错,需要找时间研究一下,说不定是android的一个bug。
使用Android提供的Style和Theme:
Android平台提供了大量的styles和themes,可以在android包中的R.style下找到,但是Android现在并未提供关于styles和themes的相关文档说明,具体可以参考styles.xml源码 和themes.xml源码 ,扫了一下,描述的很清楚。
Android中Style和Theme的使用的更多相关文章
- Android中style和theme的区别
在学习Xamarin android的过程中,最先开始学习的还是熟练掌握android的六大布局-LinearLayout .RelativeLayout.TableLayout.FrameLayou ...
- Android:Style和Theme
在Web开发中,Html负责内容,CSS负责表现.同样,在Android开发中,可以使用Theme.Style+UI组件的方式实现内容和形式的分离. Style是针对窗体元素级别的,改变指定控件或者L ...
- android的style控制Theme
value-v14就是在API14(4.0)的手机上所使用的Theme(其他版本以此类推) theme的名字叫做AppTheme,后面写有继承自哪个Theme,如下所示 <style name= ...
- Android中的主题Theme
系统自带的Theme: android以及为我们定义好了一些theme,需要是我们直接可以拿来使用. 常用的Theme通常如下: android:theme="@android:style ...
- Android中style的使用
摘自搜搜问问. <item name="#1">#2</item> 1.item 的name属性#1可以为所有系统所带组件的属性,#2为此属性的值如andr ...
- 【转】说说Android中的style和theme
最近在做软件从2.3到4.0的改变的一些工作,其中涉及了一些style和theme相关的东西.上网上查了一些东西,这个一并说说.关于android中style和theme的基本使用,这里就不再赘述了, ...
- Android入门第十六篇之Style与Theme [转]
本文来自http://blog.csdn.net/hellogv/ ,引用必须注明出处! 越来越多互联网企业都在Android平台上部署其客户端,为了提升用户体验,这些客户端都做得布局合理而且美观.. ...
- Android中如何利用attrs和styles定义控件
一直有个问题就是,Android中是如何通过布局文件,就能实现控件效果的不同呢?比如在布局文件中,我设置了一个TextView,给它设置了 textColor,它就能够改变这个TextView的文本的 ...
- android 中theme.xml与style.xml的区别
from://http://liangoogle.iteye.com/blog/1848448 android 中theme.xml与style.xml的区别: 相同点: 两者的定义相同. <r ...
随机推荐
- FreeRTOS随记
任务函数原型: void ATaskFunction(void * pvParameters); 任务不允许从实现函数中返回.如果一个任务不再需要,可以用vTaskDelete()删除; 一个任务函数 ...
- golang入门--一个简单的http client
看完<Go Web 编程>的前两章就可以开始写代码了. import ( "fmt" "io/ioutil" "log" &qu ...
- windows下端口被占用的解决方法
1:打开CMD输入:netstat -ano | findstr "80" 找到PID: 2:查看应用名称:tasklist | findstr "2544" ...
- GNOME Shell叫板Ubuntu Unity:优劣PK
转自GNOME Shell叫板Ubuntu Unity:优劣PK GNOME Shell 对阵 Ubuntu Unity--默认桌面界面的战火一触即发.双方在台上已经对峙了很长时间,现在是时候决定谁会 ...
- magic c c++ unix 注册机 注册码 破解版 下载
说起来都是伤心的事情前段时间,忙于找工作,面试的公司和入职的公司,想想都觉得很奇葩,其中有一家叫什么湖南普天科技有限公司的,他们是从国防科大接项目做的,那天他们叫我去面试,面试完了,说我们这里有个c+ ...
- 协定类型不具有 ServiceContractAttribute 特性
协定类型 ZBMService.QueryHistoryData 不具有 ServiceContractAttribute 特性.若要定义有效协定,指定的类型(协定接口或服务类)必须具有 Servic ...
- [LeetCode#253] Meeting Rooms II
Problem: Given an array of meeting time intervals consisting of start and end times [[s1,e1],[s2,e2] ...
- bzoj1041
基于圆的对称性,我们只需要考虑第一象限的整点即可满足条件的x,y都是整数数学上这类问题我们通常用一个量表示另一个量y^2=(r-x)(r+x) (r-x)(r+x)要是完全平方数令d=gcd(r-x ...
- Node.js权威指南 (11) - 加密与压缩
11.1 加密与解密处理 / 295 11.1.1 crypto模块概述 / 295 11.1.2 散列算法 / 296 11.1.3 HMAC算法 / 297 11.1.4 公钥加密 / 29811 ...
- ☀【SeaJS】SeaJS Grunt构建
如何使用Grunt构建一个中型项目?https://github.com/twinstony/seajs-grunt-build spmjshttp://docs.spmjs.org/doc/inde ...