
Prism for WPF 搭建一个简单的模块化开发框架(六)隐藏菜单、导航
原文:Prism for WPF 搭建一个简单的模块化开发框架(六)隐藏菜单、导航
这个实际上是在聊天之前做的,一起写了,也不分先后了
看一下效果图,上面是模块主导航,左侧是模块内菜单,现在加一下隐藏菜单,让中间部分更大
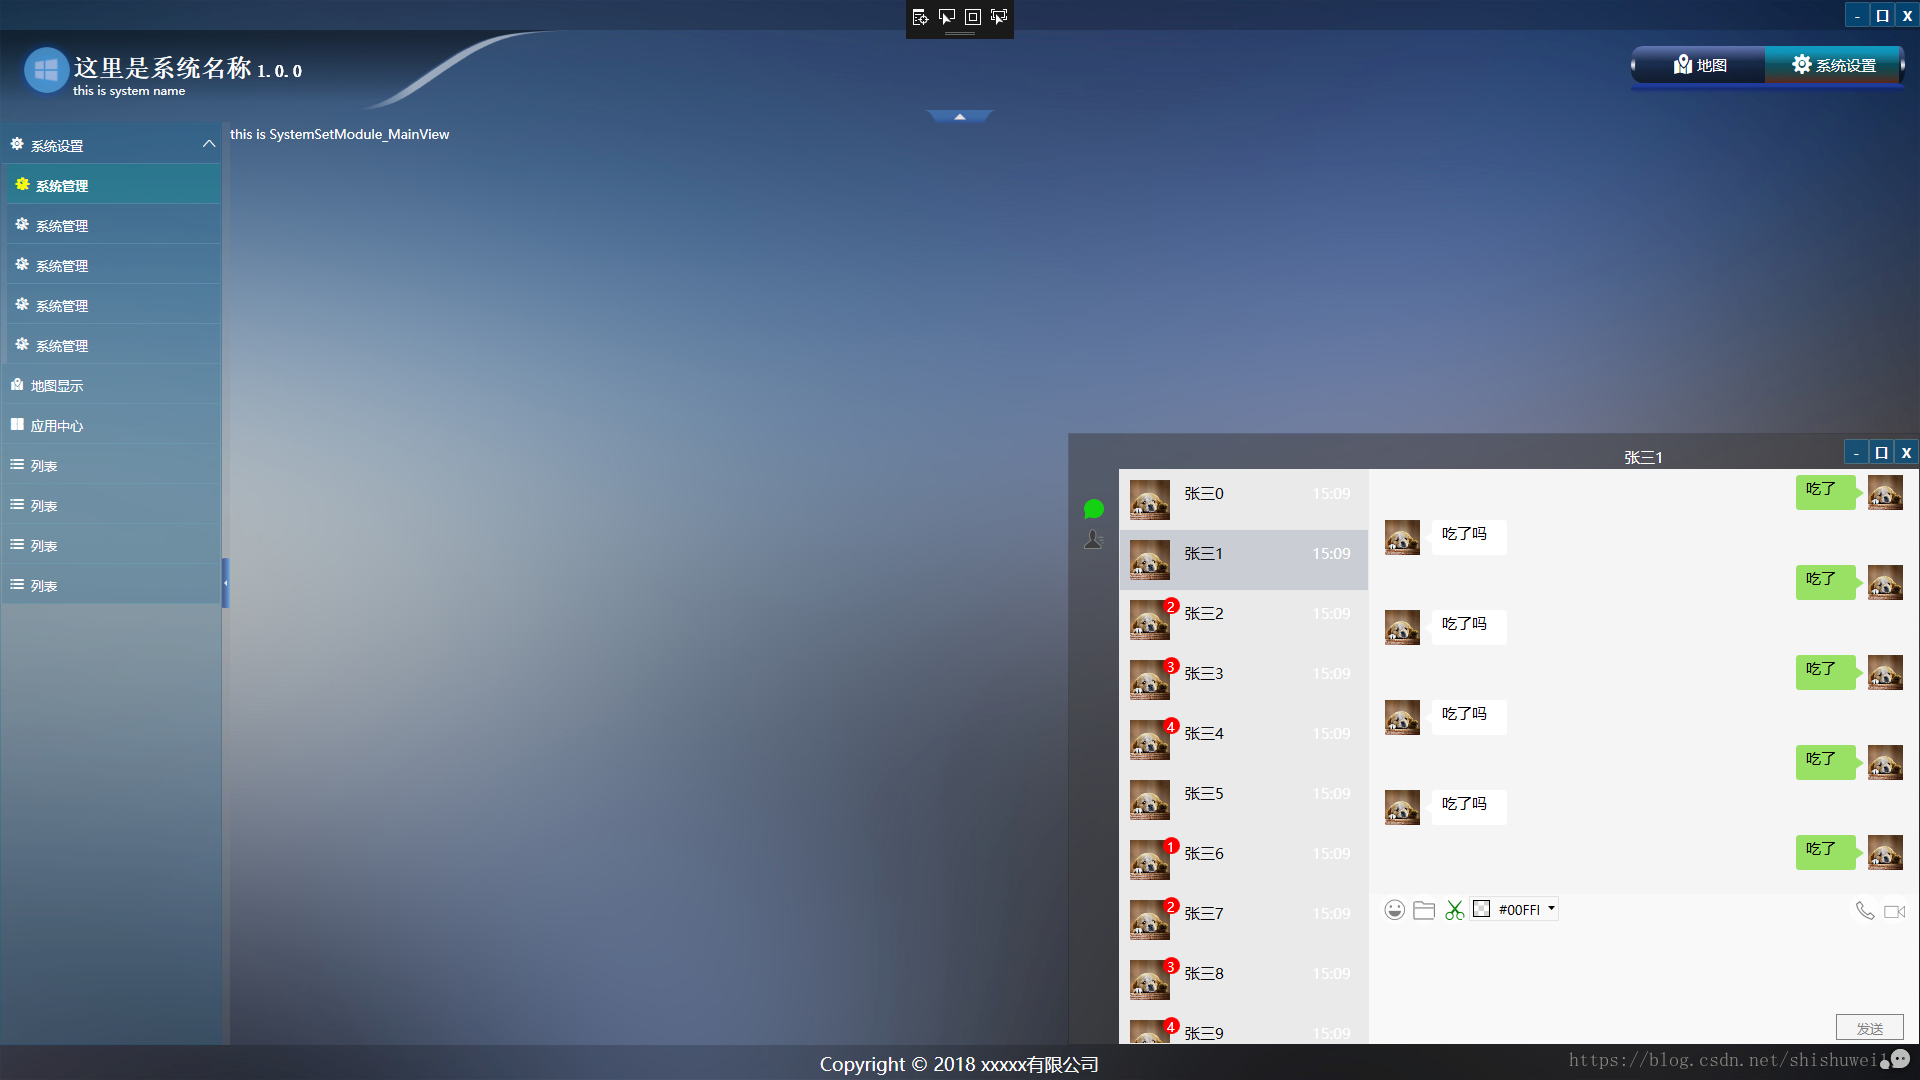
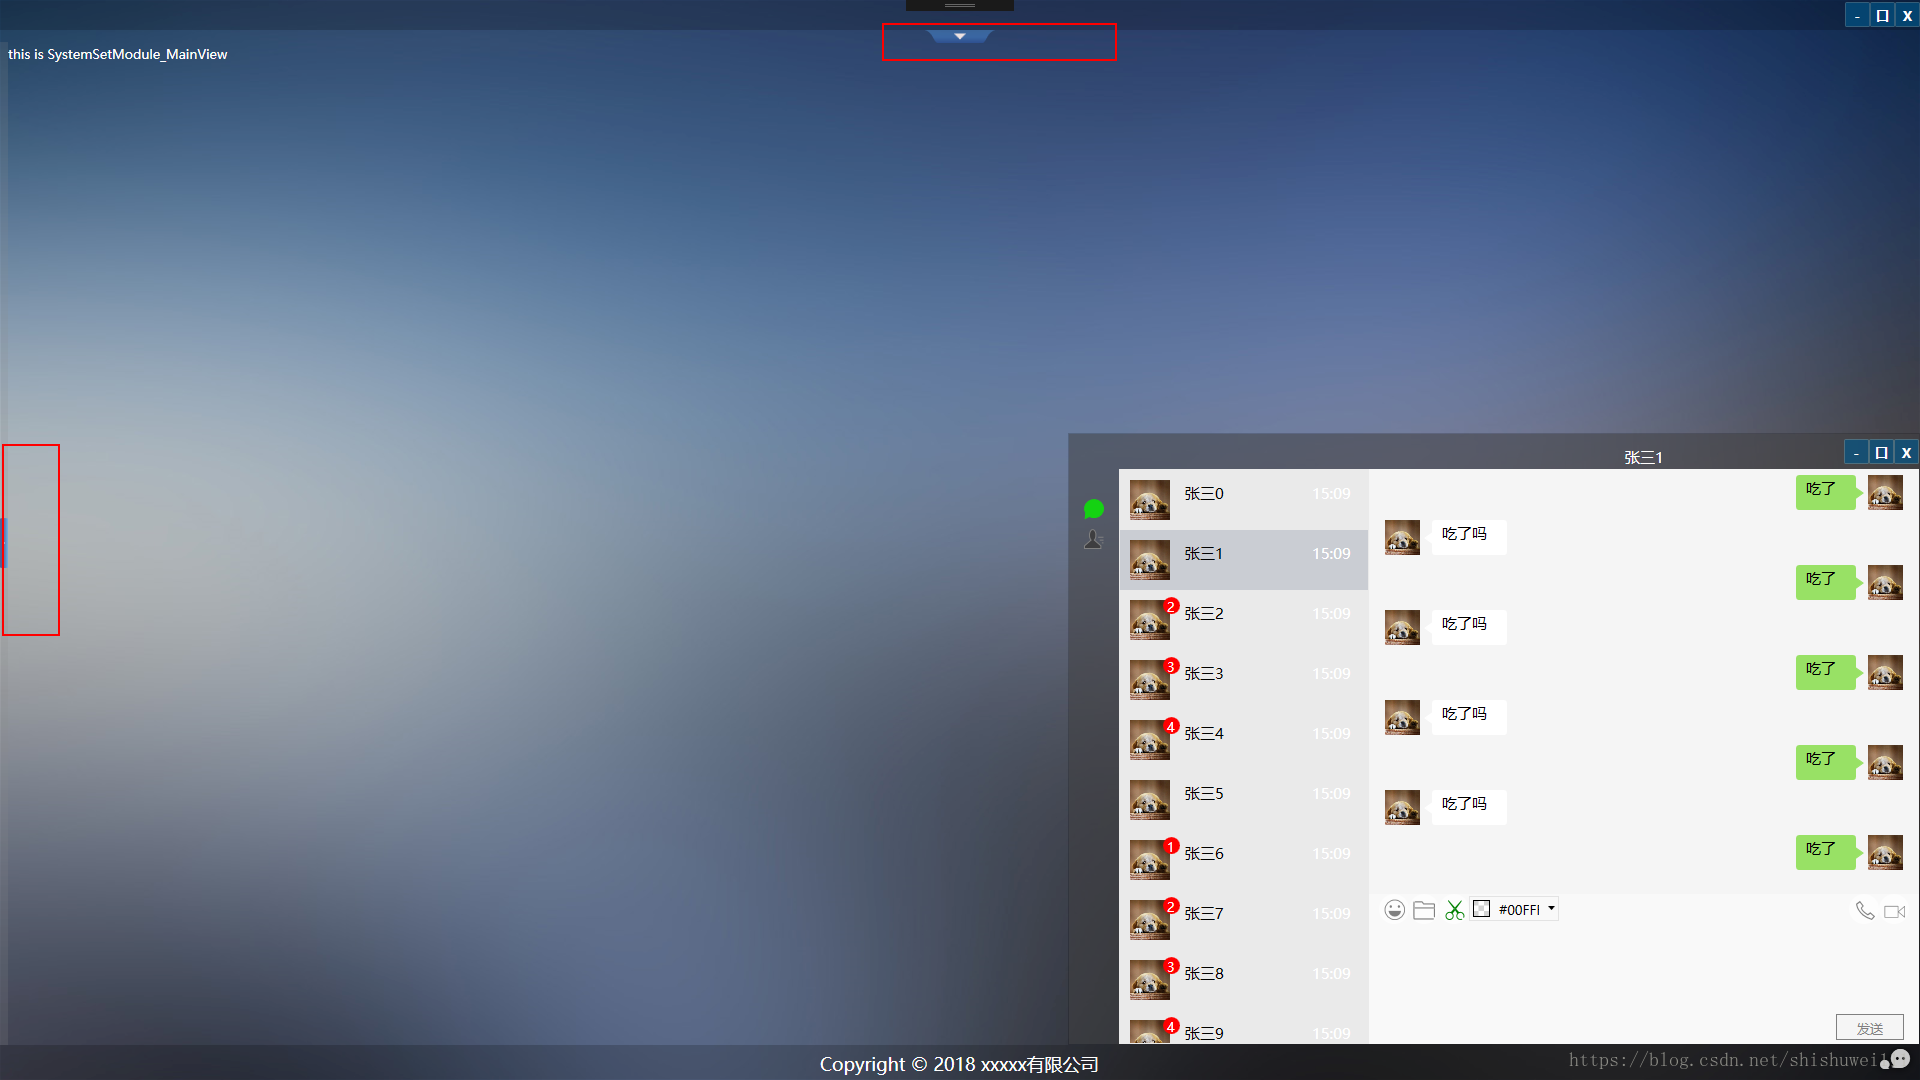
直接上代码吧,上下代码基本上一样就只贴左侧的代码了
既然做这个,少不了用个动画
按钮样式
 <Style x:Key="LeftShowAndHideToggleButtonStyle" TargetType="ToggleButton">

            <Setter Property="Template">

                <Setter.Value>

                    <ControlTemplate TargetType="ToggleButton">

                        <Grid x:Name="grid">

                            <VisualStateManager.VisualStateGroups>

                                <VisualStateGroup x:Name="CheckStates">

                                    <VisualState x:Name="Checked"/>

                                    <VisualState x:Name="Unchecked">

                                        <Storyboard>

                                            <DoubleAnimation Duration="0" To="180" Storyboard.TargetProperty="(UIElement.RenderTransform).(RotateTransform.Angle)" Storyboard.TargetName="Flexible_arrow"/>

                                        </Storyboard>

                                    </VisualState>

                                    <VisualState x:Name="Indeterminate"/>

                                </VisualStateGroup>

                                <VisualStateGroup x:Name="CommonStates">

                                    <VisualState x:Name="Normal"/>

                                    <VisualState x:Name="MouseOver">

                                        <Storyboard>

                                            <ColorAnimation Duration="0" To="#FF25418D" Storyboard.TargetProperty="(Shape.Fill).(GradientBrush.GradientStops)[0].(GradientStop.Color)" Storyboard.TargetName="path"/>

                                            <ColorAnimation Duration="0" To="#FF4179C2" Storyboard.TargetProperty="(Shape.Fill).(GradientBrush.GradientStops)[1].(GradientStop.Color)" Storyboard.TargetName="path"/>

                                            <ColorAnimation Duration="0" To="#FF5EB2F8" Storyboard.TargetProperty="(Shape.Fill).(GradientBrush.GradientStops)[2].(GradientStop.Color)" Storyboard.TargetName="path"/>

                                            <ObjectAnimationUsingKeyFrames Storyboard.TargetProperty="(FrameworkElement.Cursor)" Storyboard.TargetName="grid">

                                                <DiscreteObjectKeyFrame KeyTime="0">

                                                    <DiscreteObjectKeyFrame.Value>

                                                        <Cursor>Hand</Cursor>

                                                    </DiscreteObjectKeyFrame.Value>

                                                </DiscreteObjectKeyFrame>

                                            </ObjectAnimationUsingKeyFrames>

                                        </Storyboard>

                                    </VisualState>

                                    <VisualState x:Name="Pressed"/>

                                    <VisualState x:Name="Disabled"/>

                                </VisualStateGroup>

                            </VisualStateManager.VisualStateGroups>

                            <Path x:Name="path" Stretch="Fill" Data="F1 M 1131.5,311.621L 1131.5,311.621C 1133.15,311.621 1134.5,312.964 1134.5,314.621L 1134.5,504.621C 1134.5,506.278 1133.15,507.621 1131.5,507.621L 1131.5,507.621C 1129.84,507.621 1128.5,506.278 1128.5,504.621L 1128.5,314.621C 1128.5,312.964 1129.84,311.621 1131.5,311.621 Z ">

                                <Path.Fill>

                                    <LinearGradientBrush StartPoint="-2.03455e-005,0.5" EndPoint="1,0.5">

                                        <GradientStop Color="#B325418D" Offset="0.231481"/>

                                        <GradientStop Color="#B34179C2" Offset="0.680556"/>

                                        <GradientStop Color="#B35EB2F8" Offset="1"/>

                                    </LinearGradientBrush>

                                </Path.Fill>

                            </Path>

                            <Path x:Name="Flexible_arrow" Stretch="Fill" Fill="#CDFFFFFF" Data="F1 M 1133.47,408.839L 1130.43,411.621L 1130.43,406.058L 1133.47,408.839 Z " HorizontalAlignment="Center" VerticalAlignment="Center" Width="3" Height="6" RenderTransformOrigin="0.5,0.5">

                                <Path.RenderTransform>

                                    <RotateTransform />

                                </Path.RenderTransform>

                            </Path>

                            <ContentPresenter HorizontalAlignment="{TemplateBinding HorizontalContentAlignment}" VerticalAlignment="{TemplateBinding VerticalContentAlignment}"/>

                        </Grid>

                    </ControlTemplate>

                </Setter.Value>

            </Setter>

        </Style>
布局代码
<Grid x:Name="LayoutRoot">

        <Grid.ColumnDefinitions>

            <ColumnDefinition Width="Auto"/>

            <ColumnDefinition Width="8"/>

        </Grid.ColumnDefinitions>

        <Grid x:Name="treeViewGrid" Width="222">

        <TreeView x:Name="treeView" Style="{StaticResource MenuTreeView}" ItemsSource="{Binding ItemTreeDataList}" HorizontalAlignment="Stretch" Margin="0" VerticalAlignment="Stretch" SelectedItemChanged="treeView_SelectedItemChanged" >

            <TreeView.ItemTemplate>

                <HierarchicalDataTemplate ItemsSource="{Binding Children}">

                    <TextBlock x:Name="treeViewItemTB" Text="{Binding itemName}" Tag="{Binding itemId}"/>

                </HierarchicalDataTemplate>

            </TreeView.ItemTemplate>

        </TreeView>

        </Grid>

        <Grid Grid.Column="1" Margin="0">

            <ToggleButton Style="{StaticResource LeftShowAndHideToggleButtonStyle}" Margin="0,0,0,0" x:Name="menuBtn" Width="8" Height="50" Click="menuBtn_Click">

            </ToggleButton>

        </Grid>

    </Grid>
按钮点击
private void menuBtn_Click(object sender, RoutedEventArgs e)

        {

            if ((sender as ToggleButton).IsChecked.Value)

            {

                Storyboard sbHide = this.Resources["sb_HideRightPart"] as Storyboard;

                if (sbHide != null)

                    sbHide.Begin();

            }

            else

            {

                Storyboard sbHide = this.Resources["sb_ShowRightPart"] as Storyboard;

                if (sbHide != null)

                    sbHide.Begin();

            }

        }
Storyboard 代码
 <Storyboard x:Name="sb_HideRightPart" x:Key="sb_HideRightPart" FillBehavior="HoldEnd">

            <DoubleAnimation Duration="0:0:0.3" To="0" Storyboard.TargetProperty="(UIElement.Opacity)" Storyboard.TargetName="treeViewGrid" d:IsOptimized="True"/>

            <DoubleAnimationUsingKeyFrames Storyboard.TargetProperty="(FrameworkElement.Width)" Storyboard.TargetName="treeViewGrid">

                <EasingDoubleKeyFrame KeyTime="0:0:0.3" Value="222"/>

                <EasingDoubleKeyFrame KeyTime="0:0:0.7" Value="0"/>

            </DoubleAnimationUsingKeyFrames>

        </Storyboard>

        <Storyboard x:Name="sb_ShowRightPart" x:Key="sb_ShowRightPart" FillBehavior="HoldEnd">

            <DoubleAnimationUsingKeyFrames Storyboard.TargetProperty="(FrameworkElement.Width)" Storyboard.TargetName="treeViewGrid">

                <EasingDoubleKeyFrame KeyTime="0" Value="0"/>

                <EasingDoubleKeyFrame KeyTime="0:0:0.4" Value="222"/>

            </DoubleAnimationUsingKeyFrames>

            <DoubleAnimationUsingKeyFrames Storyboard.TargetProperty="(UIElement.Opacity)" Storyboard.TargetName="treeViewGrid">

                <EasingDoubleKeyFrame KeyTime="0" Value="0"/>

                <EasingDoubleKeyFrame KeyTime="0:0:0.4" Value="0"/>

                <EasingDoubleKeyFrame KeyTime="0:0:0.7" Value="1"/>

            </DoubleAnimationUsingKeyFrames>

        </Storyboard>
Prism for WPF 搭建一个简单的模块化开发框架(六)隐藏菜单、导航的更多相关文章
- Prism for WPF 搭建一个简单的模块化开发框架 (一个节点)
原文:Prism for WPF 搭建一个简单的模块化开发框架 (一个节点) 这里我就只贴图不贴代码了,看看这个节点之前的效果 觉得做的好的地方可以范之前的文章看看 有好的建议也可以说说 填充数据 ...
- Prism for WPF 搭建一个简单的模块化开发框架(四)异步调用WCF服务、WCF消息头添加安全验证Token
原文:Prism for WPF 搭建一个简单的模块化开发框架(四)异步调用WCF服务.WCF消息头添加安全验证Token 为什么选择wcf? 因为好像wcf和wpf就是哥俩,,, 为什么选择异步 ...
- Prism for WPF 搭建一个简单的模块化开发框架(五)添加聊天、消息模块
原文:Prism for WPF 搭建一个简单的模块化开发框架(五)添加聊天.消息模块 中秋节假期没事继续搞了搞 做了各聊天的模块,需要继续优化 第一步画页面 页面参考https://github.c ...
- Prism for WPF 搭建一个简单的模块化开发框架(三) 给TreeView加样式做成菜单
原文:Prism for WPF 搭建一个简单的模块化开发框架(三) 给TreeView加样式做成菜单 昨天晚上把TreeView的样式做了一下,今天给TreeView绑了数据,实现了切换页面功能 上 ...
- Prism for WPF 搭建一个简单的模块化开发框架(二)
原文:Prism for WPF 搭建一个简单的模块化开发框架(二) 今天又有时间了,再改改,加了一些控件全局的样式 样式代码 <ResourceDictionary xmlns="h ...
- Prism for WPF 搭建一个简单的模块化开发框架(一)
原文:Prism for WPF 搭建一个简单的模块化开发框架(一) 最近闲来无事又想搞搞WPF..... 做个框架吧,可能又是半途而废....总是坚持不下来 不废话了, 先看一下工程结构 布局大概是 ...
- 用express搭建一个简单的博客系统
转自:https://blog.csdn.net/qq_29721837/article/details/62055603 Express 简介 Express 是一个简洁而灵活的 node.js W ...
- 从零开始搭建一个简单的基于webpack的vue开发环境
原文地址:https://segmentfault.com/a/1190000012789253?utm_source=tag-newest 从零开始搭建一个简单的基于webpack的react开发环 ...
- 用nodejs搭建一个简单的服务器
使用nodejs搭建一个简单的服务器 nodejs优点:性能高(读写文件) 数据操作能力强 官网:www.nodejs.org 验证是否安装成功:cmd命令行中输入node -v 如果显示版本号表示安 ...
随机推荐
- Oracle Update语句
Oracle没有update from语法,可以通过四种写法实现同样的功能: 一.标准update语法(常用.速度可能最慢) 当更新的表示单个或者被更新的字段不需要关联表带过来,此法是最好的选择. u ...
- 028class_part2
1.成员修饰符 2.特殊成员 3.metaclass,类的祖宗 ###成员修饰符###公有和私有 #__author:_nbloser #date:2018/1/19 #私有类.对象成员 ...
- 「C语言」在Windows平台搭建C语言开发环境的多种方式
新接触C语言,如何在Windows下进行C语言开发环境的搭建值得思考并整理. 以下多种开发方式择一即可(DEV C++无须环境准备). 注:本文知识来源于 Windows 平台搭建C语言集成开发环境 ...
- 使用Android Studio和Gradle编译NDK项目之Experimental Plugin User Guide
转载自:http://tools.android.com/tech-docs/new-build-system/gradle-experimental Introduction The new exp ...
- (转)从信息隐藏的一个需求看C++接口与实现的分离
原文地址https://blog.csdn.net/tonywearme/article/details/6926649 让我们从stackoverflow上一个同学的问题来开始.问题的原型是这样的( ...
- Jenkins传参修改jmeter的报告名称和详细报告地址
目前已经可以发送邮件了,我已经配置了Jenkins,但是有几个显示问题,待处理1.报告名称地址, 2详细报告地址没有做跳转 更改后为: 修改url 1.打开样式的jmeter-results-deta ...
- SpringMVC(1)
1.简要说明: Spring为展现层提供的基于MVC设计理念的优秀web框架,目前主流的框架 Spring3.0以后全面超越Struts2,成为最优秀的MVC框架 Spring MVC通过一套MVC注 ...
- halcon 使用elliptic_axis计算规则矩形角度
elliptic_axis算子是用于计算与Region等价椭圆的相关参数的,注意必须使用规则矩形!!!,不规则区域想其他办法比如模板匹配. elliptic_axis (Region, Ra, Rb, ...
- 利用SQL模糊匹配来验证字段是否是日期格式
最近需要验证数据仓库某个字段是否转化成某种日期格式,比如时间戳格式 ‘2016-05-03 23:21:35.0‘, 但是DB2不支持REGEXP_LIKE(匹配)函数,所以需要重新想其他办法. 最后 ...
- jquery实现页面图片轮播
1.创建一个html页面 <!DOCTYPE html><html lang="en"><head> <meta charset=&quo ...