
Cartographer安装
安装过程:
官方安装教程:
https://google-cartographer-ros.readthedocs.io/en/latest/index.html
# Install wstool and rosdep.

sudo apt-get update

sudo apt-get install -y python-wstool python-rosdep ninja-build

# Create a new workspace in 'catkin_ws'.

mkdir catkin_ws

cd catkin_ws

wstool init src

# Merge the cartographer_ros.rosinstall file and fetch code for dependencies.

wstool merge -t src https://raw.githubusercontent.com/googlecartographer/cartographer_ros/master/cartographer_ros.rosinstall

wstool update -t src

//在这一步可能会显示无法下载cere-solver
/*
解决办法手动下载cere-solver 然后放到src中
下载链接:https://ceres-solver.googlesource.com/ceres-solver.git/+/1.13.0
点击页面中的tgz可以下载,下载后解压到src中

# Install proto3.

src/cartographer/scripts/install_proto3.sh

# Install deb dependencies.

# The command 'sudo rosdep init' will print an error if you have already

# executed it since installing ROS. This error can be ignored.

sudo rosdep init

rosdep update

rosdep install --from-paths src --ignore-src --rosdistro=${ROS_DISTRO} -y

//这里要修改ROS_DISTRO为自己的ros版本如kinetic或者indigo

# Build and install.

catkin_make_isolated --install --use-ninja

source install_isolated/setup.bash
下载安装完毕以后,运行数据集。
下载数据集。
# Download the 2D backpack example bag.

wget -P ~/Downloads https://storage.googleapis.com/cartographer-public-data/bags/backpack_2d/cartographer_paper_deutsches_museum.bag

# Launch the 2D backpack demo.

roslaunch cartographer_ros demo_backpack_2d.launch bag_filename:=${HOME}/Downloads/cartographer_paper_deutsches_museum.bag

# Download the 3D backpack example bag.

wget -P ~/Downloads https://storage.googleapis.com/cartographer-public-data/bags/backpack_3d/with_intensities/b3-2016-04-05-14-14-00.bag

# Launch the 3D backpack demo.

roslaunch cartographer_ros demo_backpack_3d.launch bag_filename:=${HOME}/Downloads/b3-2016-04-05-14-14-00.bag
二维数据集运行
结果如下所示: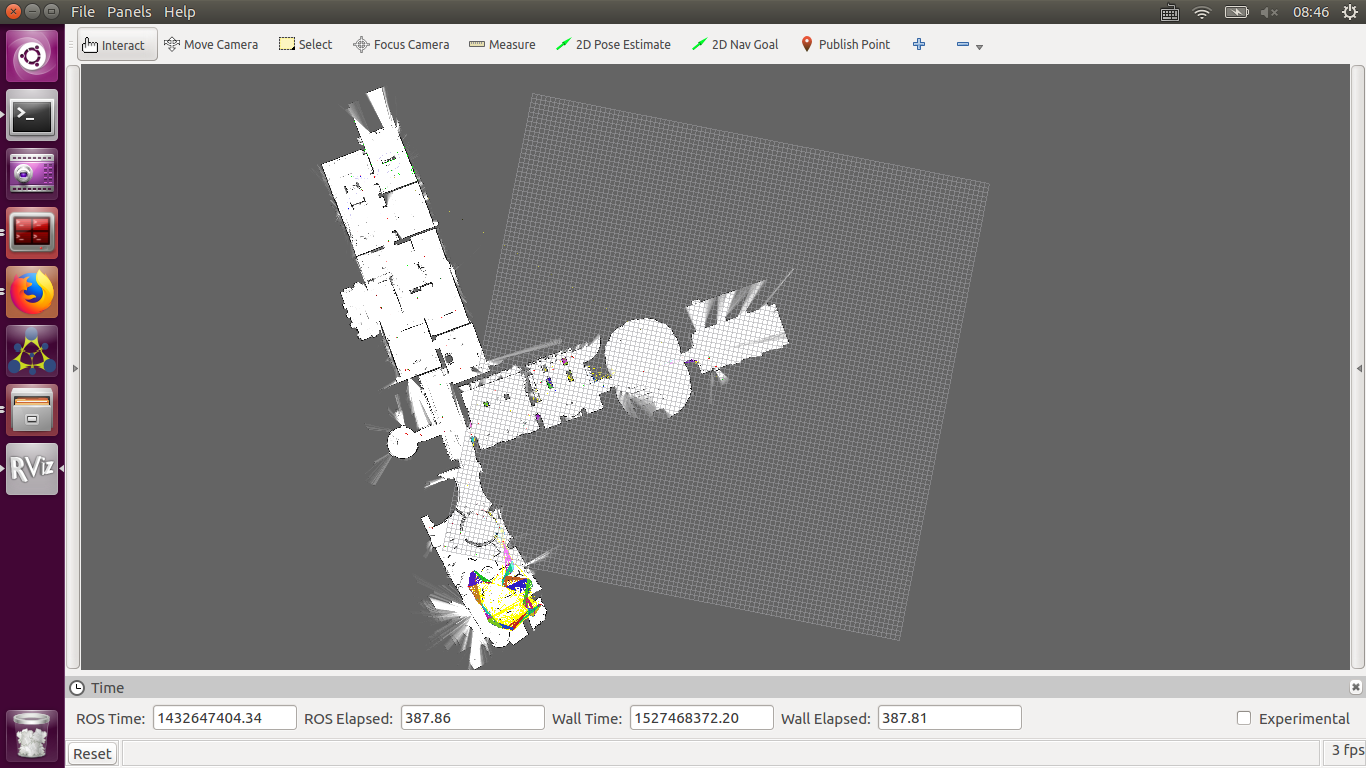
rosbag内容:
 //输入命令

 rostopic list

 //得到数据包内容,并且用rostopic echo /topic_name 来查看各个topic的内容

 /clicked_point

 /clock

 /horizontal_laser_3d//有数据,  frame_id: "horizontal_vlp16_link"

 /imu//有数据,frame_id: "imu_link"

 /initialpose

 /map

 /map_updates

 /move_base/DWAPlannerROS/global_plan

 /move_base/global_costmap/costmap

 /move_base/global_costmap/costmap_updates

 /move_base/global_costmap/footprint

 /move_base/local_costmap/costmap

 /move_base/local_costmap/costmap_updates

 /move_base_simple/goal

 /particlecloud

 /rosout

 /rosout_agg

 /scan

 /tf

 /tf_static

 /velodyne_points//没有数据

 /vertical_laser_3d//有数据,frame_id: "vertical_vlp16_link"
这里有vertical和horizaontal两个laser_3d,如何理解,还有velodyne_points。
利用rostopic查看各个数据信息:
发现
跑3维度数据集效果:

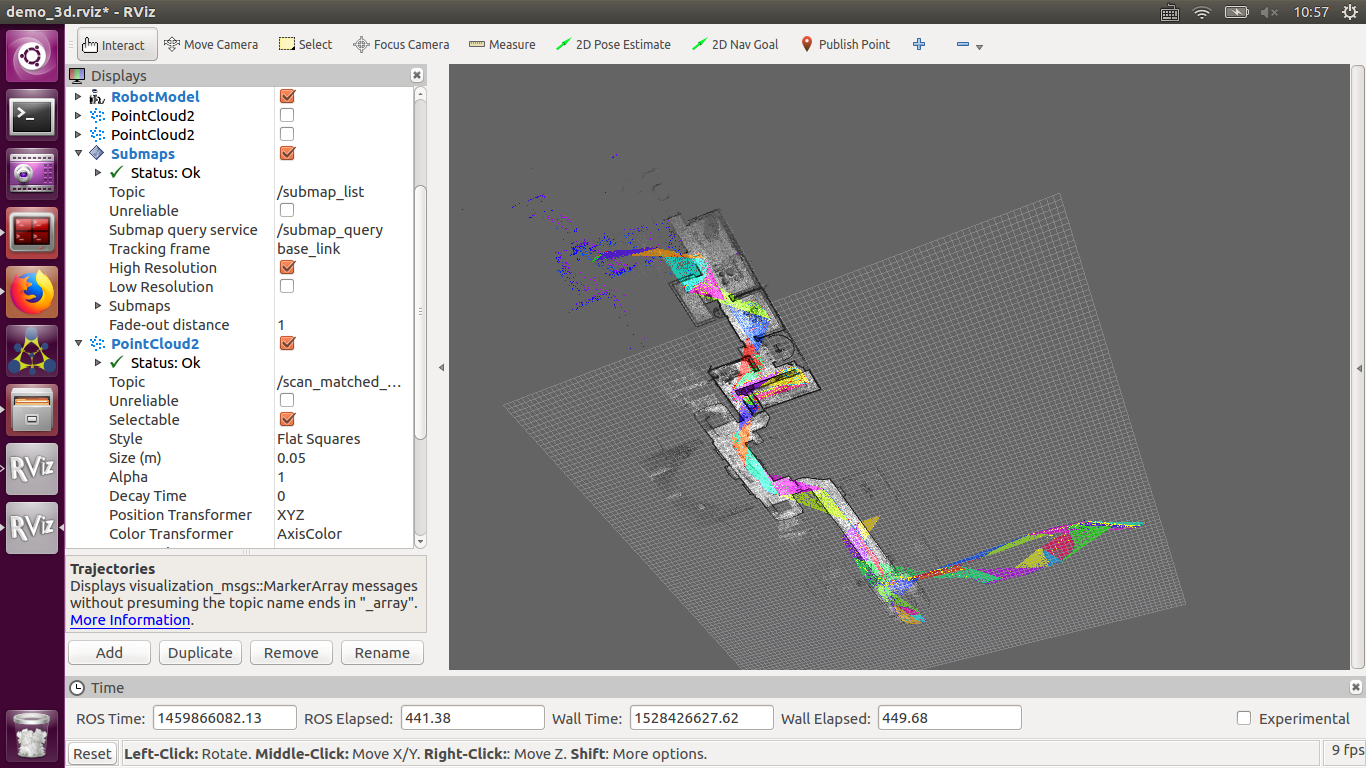
在跑3维数据集的时候,查看rostopic
 rostopic list

 /clicked_point

 /clock

 /constraint_list

 /horizontal_laser_3d

 /imu

 /initialpose

 /joint_states

 /landmark_poses_list

 /map

 /move_base_simple/goal

 /rosout

 /rosout_agg

 /scan_matched_points2

 /submap_list

 /tf

 /tf_static

 /trajectory_node_list

 /vertical_laser_3d
用自己的传感器跑cartographer
由于传感器的rostopic不同,我们需要对cartographer订阅的名称进行修改,需要在launch文件中进行修改,但是修改后发现没有任何作用,这是因为修改后需要重新按照上面的流程进行编译安装,这个可能是因为在安装的时候其实已经把launch文件安装到系统中了,所以我们调用的时候还是调用系统中的launch文件
但是按照网络上的修改版本后可以直接修改,不用走以上的流程
修改好名称接入以后出现问题
Queue(0,imu)exceeds maximum size.
Queue(0,points2_1) exceeds maximum size.
Cartographer安装的更多相关文章
- cartographer 安装
Debian 8 Jessie 一顿操作梦如虎,最后不知道咋装上的. 参考:https://www.jianshu.com/p/9922a51ce38f https://blog.csdn.net/p ...
- cartographer 安装问题
安装主要参考hitcm教程: http://www.cnblogs.com/hitcm/p/5939507.html 这里只说安装过程中遇到的问题, ceres-solver 与 eigen3 版本不 ...
- cartographer安装--Ubuntu14.04--indigo
0.安装所有依赖项 sudo apt-get install -y google-mock libboost-all-dev libeigen3-dev libgflags-dev libgoogl ...
- cartographer 安装修改
装置:VLP16+IMU+单板机 目的:利用传感器数据,实现real time 的建模 结果:失败,但之前的步骤都正常,出问题的地方可能是imu出错. 稍后附上 launch文件,lua文件,urdf ...
- 谷歌Cartographer学习(1)-快速安装测试
谷歌自己提供了安装方法,但是安装比较繁琐,我做了一定的修改,代码放到个人github上,https://github.com/hitcm/. ros下面的安装非常快捷,只需要catkin_make即可 ...
- 谷歌Cartographer学习(1)-快速安装测试(转载)
转载自谷歌Cartographer学习(1)-快速安装测试 代码放到个人github上,https://github.com/hitcm/ 如下,需要安装3个软件包,ceres solver.cart ...
- cartographer 最新版安装测试
在官网的基础上稍加修改,但保证代码都是最新的 我的系统配置: Debian9 strech, ROS lunar 该方法对 ubuntu 系列操作系统以及其他ROS版本同样适用. 1. 安装依赖库 ...
- Ubuntu 14.04 indigo 安装 cartographer 1.0.0
安装依赖(cmake 版本为2.8,我的是自带的)sudo apt-get updatesudo apt-get install -y g++ git google-mock libboost-all ...
- 安装cartographer
# Build and install Cartographer. git clone https://github.com/hitcm/cartographer.git cd cartographe ...
随机推荐
- CentOS 7系统上添加netcdf库
这里提供两种方法来安装 netcdf: 一是 yum 安装,yum 安装时采用的是系统自带的 gfortran 编译器,版本较旧: 二是采用源码来 Makefile 编译安装的方式,它可以下载最新版的 ...
- git(三) 使用github
1.创建仓库 ① 注册github账户,登录后,点击"New respository ". ② 在新页面中,输入项目的名称,勾选'readme.md',点击'create repo ...
- 小程序picker组件中的(普通选择器:mode = selector)
本例代码借鉴官方picker案例: WXML: <picker bindchange="pickChange" value="{{index}}" ran ...
- mybatis源码数据库链接配置
<?xml version="1.0" encoding="UTF-8" ?> <!DOCTYPE configuration ...
- FX-玩列表
list = []while True: meus = ("1.查看","2.添加","3.删除","0.退出") pr ...
- JS 清除DOM 中空白元素节点
HTML中的空白节点会影响整体的HTML的版面排榜 例如: 制作百度首页时,两个input之间的空白节点将本来是要整合在一起的搜索栏硬是把按钮和搜索框分离出现好丑的间隙 这时我们就可以用js清除这个空 ...
- 汉明码(Hamming)编码与纠错原理
一 汉明码的编解码说明 (一)编码 Hamming(12,8) N=12,表示编码后的比特长度 K=8,待编码数据的比特长度 R=N-K=4,校验位的比特长度 D=3 汉明距离:相邻行之间不同比特数据 ...
- zookeeper集群的搭建(个人实践可行)
linux 上面 zookeeper 集群(最少3个节点192.168.204.128.192.168.204.129.192.168.204.130)安装 1.创建文件夹/usr/local/zoo ...
- [c++]关于strcpy函数溢出解决方案
必须包含的头文件:<string.h> 可改写成安全函数strcpy_s 找到[项目属性],点击[C++]里的[预处理器],对[预处理器]进行编辑,在里面加入一段代码:_CRT_SECUR ...
- 原生Ajax--XmlHttpRequest对象和jQuery.ajax()
Ajax主要就是使用 [XmlHttpRequest]对象来完成请求的操作,该对象在主流浏览器中均存在(除早起的IE) 1.XmlHttpRequest对象介绍 XmlHttpRequest对象的主要 ...