
1.3 Quick Start中 Step 6: Setting up a multi-broker cluster官网剖析(博主推荐)
不多说,直接上干货!
一切来源于官网
http://kafka.apache.org/documentation/
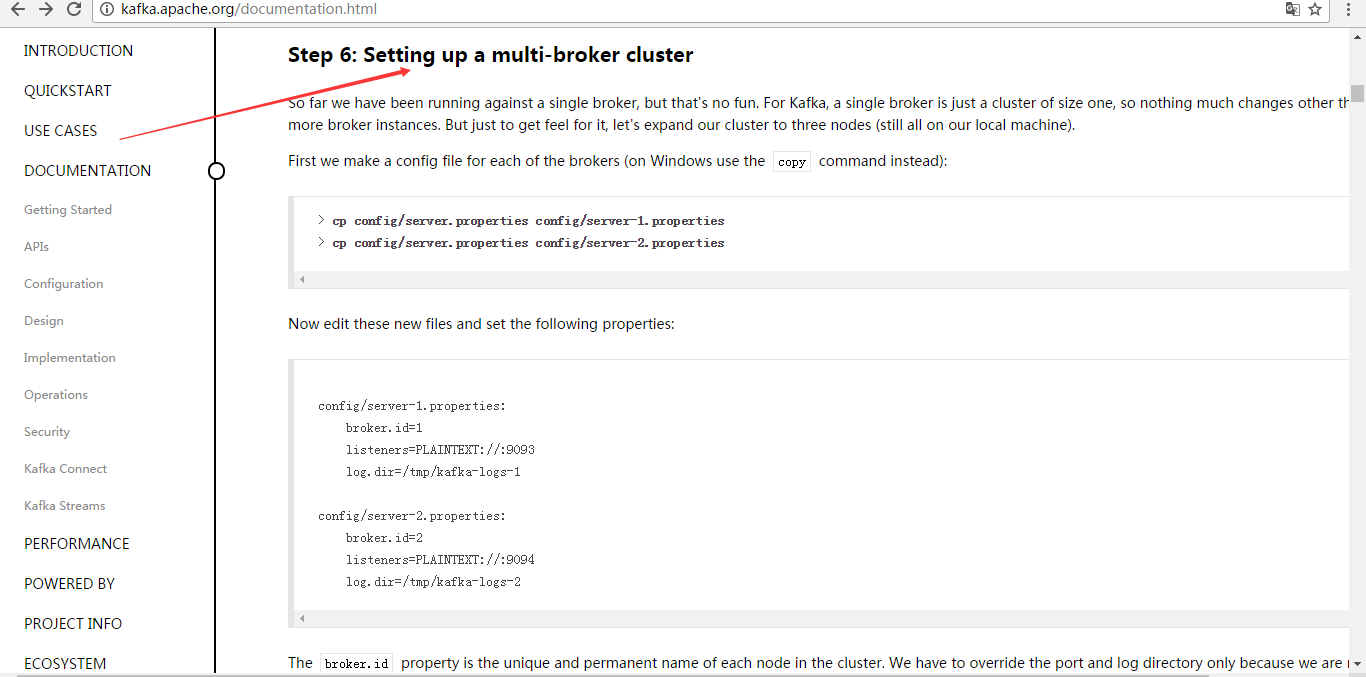
Step 6: Setting up a multi-broker cluster
Step : 设置多个broker集群
So far we have been running against a single broker, but that's no fun. For Kafka, a single broker is just a cluster of size one, so nothing much changes other than starting a few more broker instances. But just to get feel for it, let's expand our cluster to three nodes (still all on our local machine).
到目前,我们只是单一的运行一个broker,,没什么意思。对于Kafka,一个broker仅仅只是一个集群的大小, 所有让我们多设几个broker.
First we make a config file for each of the brokers (on Windows use the copy command instead):
首先为每个broker创建一个配置文件:
> cp config/server.properties   config/server-1.properties

> cp config/server.properties   config/server-2.properties
Now edit these new files and set the following properties:
现在编辑这些新建的文件,设置以下属性:
config/server-1.properties:

    broker.id=1

    listeners=PLAINTEXT://:9093

    log.dir=/tmp/kafka-logs-1

config/server-2.properties:

    broker.id=2

    listeners=PLAINTEXT://:9094

    log.dir=/tmp/kafka-logs-2
The broker.id property is the unique and permanent name of each node in the cluster. We have to override the port and log directory only because we are running these all on the same machine and we want to keep the brokers from all trying to register on the same port or overwrite each other's data.
broker.id是集群中每个节点的唯一且永久的名称,我们修改端口和日志分区是因为我们现在在同一台机器上运行,我们要防止broker在同一端口上注册和覆盖对方的数据。
We already have Zookeeper and our single node started, so we just need to start the two new nodes:
我们已经运行了zookeeper和刚才的一个kafka节点,所有我们只需要再启动2个新的kafka节点。
> bin/kafka-server-start.sh config/server-1.properties &

...

> bin/kafka-server-start.sh config/server-2.properties &

...
Now create a new topic with a replication factor of three:
现在,我们创建一个新topic,把备份设置为:
> bin/kafka-topics.sh --create --zookeeper localhost:2181 --replication-factor 3 --partitions 1 --topic my-replicated-topic
Okay but now that we have a cluster how can we know which broker is doing what? To see that run the "describe topics" command:
好了,现在我们已经有了一个集群了,我们怎么知道每个集群在做什么呢?运行命令“describe topics”
这是查看topic详情
> bin/kafka-topics.sh --describe --zookeeper localhost:2181 --topic my-replicated-topic

Topic:my-replicated-topic	PartitionCount:1	ReplicationFactor:3	Configs:

	Topic: my-replicated-topic	Partition: 0	Leader: 1	Replicas: 1,2,0	Isr: 1,2,0
Here is an explanation of output. The first line gives a summary of all the partitions, each additional line gives information about one partition. Since we have only one partition for this topic there is only one line.
这是一个解释输出,第一行是所有分区的摘要,每一个线提供一个分区信息,因为我们只有一个分区,所有只有一条线。
- "leader" is the node responsible for all reads and writes for the given partition. Each node will be the leader for a randomly selected portion of the partitions.
- "replicas" is the list of nodes that replicate the log for this partition regardless of whether they are the leader or even if they are currently alive.
- "isr" is the set of "in-sync" replicas. This is the subset of the replicas list that is currently alive and caught-up to the leader.
"leader":该节点负责所有指定分区的读和写,每个节点的领导都是随机选择的。

"replicas":备份的节点,无论该节点是否是leader或者目前是否还活着,只是显示。

"isr":备份节点的集合,也就是活着的节点集合。
Note that in my example node 1 is the leader for the only partition of the topic.
We can run the same command on the original topic we created to see where it is:
我们运行这个命令,看看一开始我们创建的那个节点:
> bin/kafka-topics.sh --describe --zookeeper localhost:2181 --topic test

Topic:test	PartitionCount:1	ReplicationFactor:1	Configs:

	Topic: test	Partition: 0	Leader: 0	Replicas: 0	Isr: 0
So there is no surprise there—the original topic has no replicas and is on server 0, the only server in our cluster when we created it.
没有惊喜,刚才创建的topic(主题)没有Replicas,所以是0。
Let's publish a few messages to our new topic:
让我们来发布一些信息在新的topic上:
> bin/kafka-console-producer.sh --broker-list localhost:9092 --topic my-replicated-topic

...

my test message 1

my test message 2

^C
Now let's consume these messages:
现在,消费这些消息。
> bin/kafka-console-consumer.sh --bootstrap-server localhost:9092 --from-beginning --topic my-replicated-topic

...

my test message 1

my test message 2

^C
Now let's test out fault-tolerance. Broker 1 was acting as the leader so let's kill it:
我们要测试集群的容错,kill掉leader,Broker1作为当前的leader,也就是kill掉Broker1。
> ps aux | grep server-1.properties

7564 ttys002    0:15.91 /System/Library/Frameworks/JavaVM.framework/Versions/1.8/Home/bin/java...

> kill -9 7564
On Windows use:(不推荐大家用)
> wmic process get processid,caption,commandline | find "java.exe" | find "server-1.properties"

java.exe    java  -Xmx1G -Xms1G -server -XX:+UseG1GC ... build\libs\kafka_2.10-0.10.2.0.jar"  kafka.Kafka config\server-1.properties    644

> taskkill /pid 644 /f
Leadership has switched to one of the slaves and node 1 is no longer in the in-sync replica set:
备份节点之一成为新的leader,而broker1已经不在同步备份集合里了。
> bin/kafka-topics.sh --describe --zookeeper localhost:2181 --topic my-replicated-topic

Topic:my-replicated-topic	PartitionCount:1	ReplicationFactor:3	Configs:

	Topic: my-replicated-topic	Partition: 0	Leader: 2	Replicas: 1,2,0	Isr: 2,0
But the messages are still available for consumption even though the leader that took the writes originally is down:
但是,消息仍然没丢:
> bin/kafka-console-consumer.sh --bootstrap-server localhost:9092 --from-beginning --topic my-replicated-topic

...

my test message 1

my test message 2

^C
1.3 Quick Start中 Step 6: Setting up a multi-broker cluster官网剖析(博主推荐)的更多相关文章
- 1.3 Quick Start中 Step 8: Use Kafka Streams to process data官网剖析(博主推荐)
不多说,直接上干货! 一切来源于官网 http://kafka.apache.org/documentation/ Step 8: Use Kafka Streams to process data ...
- 1.3 Quick Start中 Step 7: Use Kafka Connect to import/export data官网剖析(博主推荐)
不多说,直接上干货! 一切来源于官网 http://kafka.apache.org/documentation/ Step 7: Use Kafka Connect to import/export ...
- 1.3 Quick Start中 Step 4: Send some messages官网剖析(博主推荐)
不多说,直接上干货! 一切来源于官网 http://kafka.apache.org/documentation/ Step 4: Send some messages Step : 发送消息 Kaf ...
- 1.3 Quick Start中 Step 2: Start the server官网剖析(博主推荐)
不多说,直接上干货! 一切来源于官网 http://kafka.apache.org/documentation/ Step 2: Start the server Step : 启动服务 Kafka ...
- 1.3 Quick Start中 Step 5: Start a consumer官网剖析(博主推荐)
不多说,直接上干货! 一切来源于官网 http://kafka.apache.org/documentation/ Step 5: Start a consumer Step : 消费消息 Kafka ...
- 1.3 Quick Start中 Step 3: Create a topic官网剖析(博主推荐)
不多说,直接上干货! 一切来源于官网 http://kafka.apache.org/documentation/ Step 3: Create a topic Step 3: 创建一个主题(topi ...
- 在Asp.Net中使用Redis【本文摘自智车芯官网】
Redis安装 在安装之前需要获取Redis安装包.在这里我们就不详细介绍安装包的获取了.这里Redis-x64-3.2.100.zip安装包为例通过dos命令取安装.通过dos命令找到安装目录. 在 ...
- MQTT在平台中的应用【本文摘自智车芯官网】
MQTT(Message Queuing Telemetry Transport,消息队列遥测传输)是IBM开发的一个即时通讯协议,有可能成为物联网的重要组成部分.该协议支持所有平台,几乎可以把所有联 ...
- 关于大数据项目创建时所需setting.xml(博主推荐)
我目前,收录经常用的是,这两个版本,这个根据博主我本人的经验之谈,最为稳定和合理的. 注意:我的本地路径是在D:/SoftWare/maven/repository,大家自己改为你们自己的即可. ...
随机推荐
- 洛谷 P1769 淘汰赛制_NOI导刊2010提高(01)
P1769 淘汰赛制_NOI导刊2010提高(01) 题目描述 淘汰赛制是一种极其残酷的比赛制度.2n名选手分别标号1,2,3,…,2^n-1,2^n,他们将要参加n轮的激烈角逐.每一轮中,将所有参加 ...
- Liquibase简介(1)
Liquibase是一个用于跟踪.管理和应用数据库变化的开源的数据库重构工具.它将所有数据库的变化(包括结构和数据)都保存在XML文件中,便于版本控制. Liquibase具备如下特性: * 不依赖于 ...
- vue.js原生组件化开发(二)——父子组件
前言 在了解父子组件之前应先掌握组件开发基础.在实际开发过程中,组件之间可以嵌套,也因此生成父子组件. 父子组件创建流程 1.构建父子组件 1.1 全局注册 (1)构建注册子组件 //构建子组件chi ...
- 紫书 例题 9-11 UVa 1331 (最优三角形剖分)
设置f(i, j)为点i, i + 1 --j所组成的多边形. 那么可以枚举中间点k, 得f(i, j) = min{s(i, j, k), f(i, k), f(k, j) | i < k & ...
- JS数组去重的6种算法实现
1.遍历数组法 最简单的去重方法,实现思路:新建一新数组,遍历传入数组,值不在新数组就加入该新数组中:注意点:判断值是否在数组的方法"indexOf"是ECMAScript5 方法 ...
- 最近学习了一下DeepLearning,发现时NB。
持续关注,有空放个算法到线上的推荐上.
- IOCP模型总结(总结回想)
IOCP旧代码重提.近期一直在玩其它方面的东东.时不时回想一下,收益多多. IOCP(I/O Completion Port,I/O完毕port)是性能最好的一种I/O模型.它是应用程序使用线程池处理 ...
- iOS使用push隐藏子页面底部bottom TabBar
下面两种情况是我在开发过程中遇到的,一种是代码使用pushViewController,还有一种是storyboard直接使用push.之前也查阅了非常多关于隐藏底部tabbar的资料.可是要么使用起 ...
- jQuery对表格进行类样式
<%-- <%@ page language="java" contentType="text/html; charset=utf-8" pageE ...
- vue2留言板
<!DOCTYPE html> <html lang="en"> <head> <meta charset="UTF-8&quo ...