
QQ(iOS)客户端的粘性动画效果
qq的app中要是有新的联系人发消息过来,相应联系人的cell右边会有一个红色的圆圈表示消息条数。如果去触碰那个圆圈,可以发现它竟然会跟着手指的移动而移动。
在一定范围内,手指离开屏幕,会发现红色圆圈会自动弹性的回到原来的位置。而如果超出一定距离,这个圆圈会做一个销毁的动画,从而从view上移除掉。
产品要求公司的App也要有效果,并花了些时间去学习它的实现过程,发现其实原理还是比较简单的。
(由于mac制作gif图片实在过于麻烦,所以效果只能是看看图片。)
Demo的github地址:https://github.com/wzpziyi1/QQ-Goo
这是实现过程中的一些效果图片:
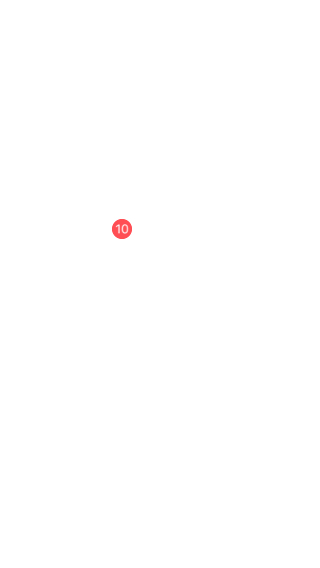
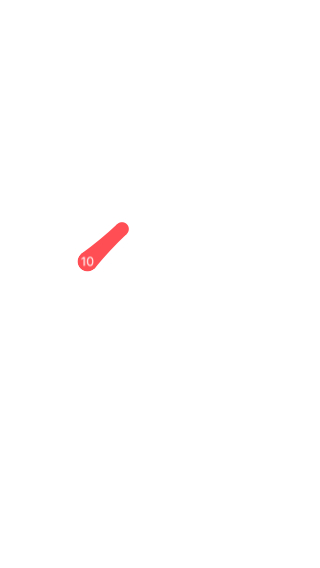
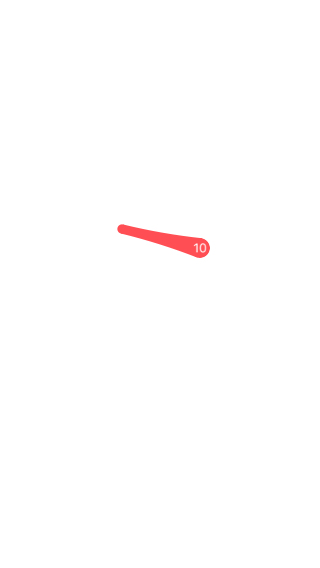
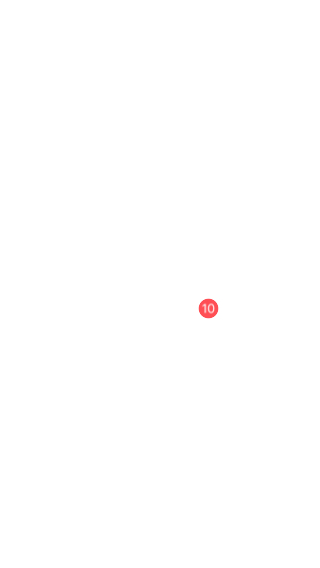
经过分析,可以发现,是两个圆和一个不规则矩形位置、大小的变化。一开始,小的圆圈和大的圆圈的center是相同的,当移动大圆的时候,小圆的半径随着大圆离小圆的距离变远而变小,当大圆距离小圆一定距离时,将小圆隐藏掉,中间的不规则矩形remove掉。
那么,不规则矩形怎么表示呢?可以利用Core Graphics在drawRect方法里面绘制不规则矩形的path,然后利用颜色fill就行。不规则矩形是随着大圆的移动而不断变化的,如果在drawRect方法里面绘制,那么在移动过程中不断调用setNeedsDisplay方法进行重绘。这是种可行的方案,我所用的也大致是这种思路。
不过,我没有在drawRect方法里面绘制,而是利用了CAShapeLayer,将不规则矩形的path绘制在shapeLayer里面,这样在移动大圆的过程中不断更新CAShapeLayer的path即可。
当然,难点并在在这里。而是不规则矩形的各个点的位置。要绘制这个不规则矩形,需要知道六个点的位置: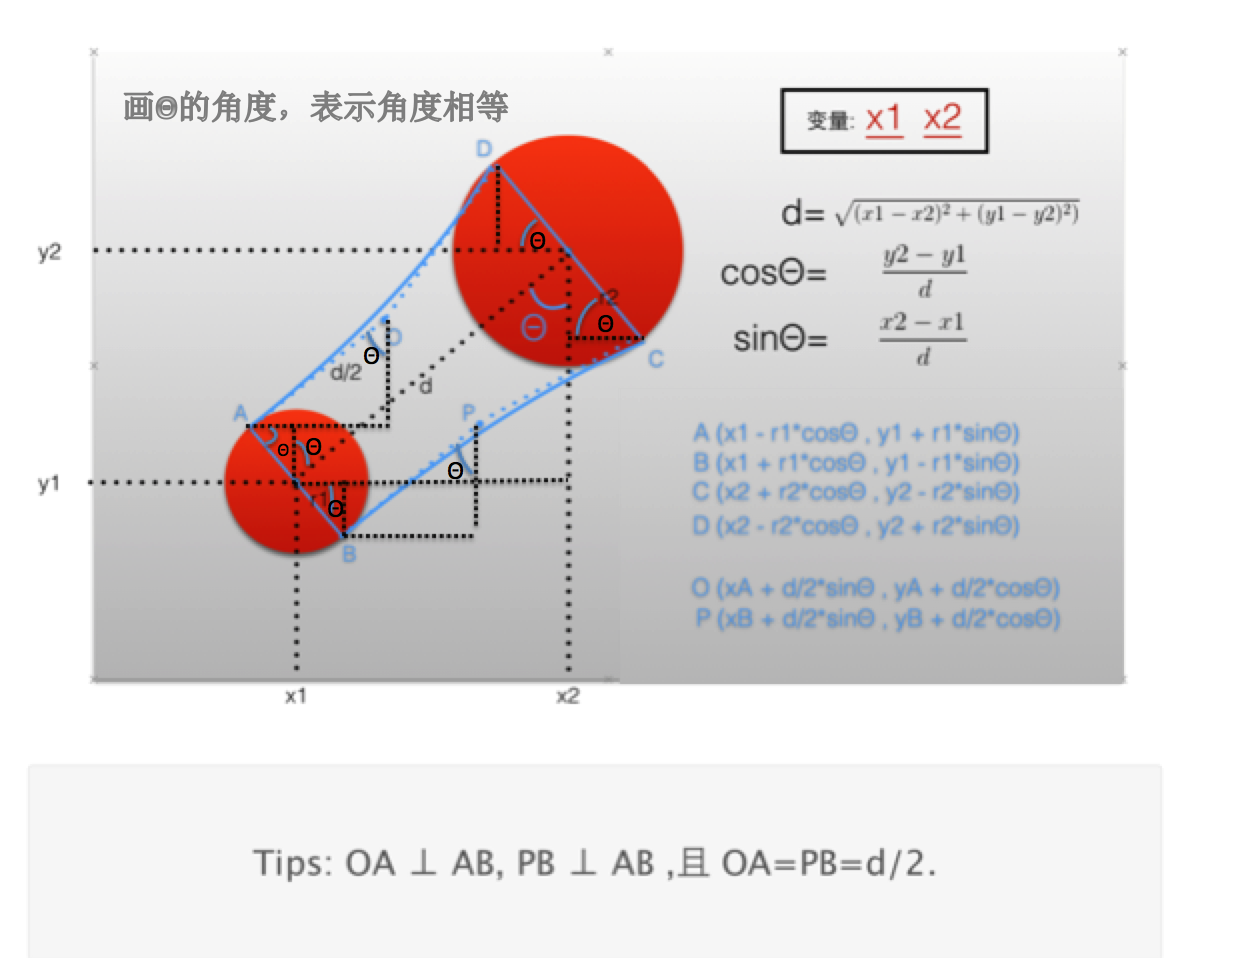
有了这些点的坐标,那么就可以用UIBezierPath来绘制相应的路径,代码如下:
- (UIBezierPath *)pathWithBigCircleView:(UIView *)bigCircleView smallCircleView:(UIView *)smallCircleView

{

    CGPoint smallCircleCenter = smallCircleView.center;

    CGFloat x1 = smallCircleCenter.x;

    CGFloat y1 = smallCircleCenter.y;

    CGFloat r1 = smallCircleView.bounds.size.width / 2;

    CGPoint BigCircleViewCenter = bigCircleView.center;

    CGFloat x2 = BigCircleViewCenter.x;

    CGFloat y2 = BigCircleViewCenter.y;

    CGFloat r2 = bigCircleView.bounds.size.width / 2;

    CGFloat d = [self distanceWithPointA:BigCircleViewCenter pointB:smallCircleCenter];

    //Θ:(xita)

    CGFloat sinθ = (x2 - x1) / d;

    CGFloat cosθ = (y2 - y1) / d;

    CGPoint pointA = CGPointMake(x1 - r1 * cosθ , y1 + r1 * sinθ);

    CGPoint pointB = CGPointMake(x1 + r1 * cosθ , y1 - r1 * sinθ);

    CGPoint pointC = CGPointMake(x2 + r2 * cosθ , y2 - r2 * sinθ);

    CGPoint pointD = CGPointMake(x2 - r2 * cosθ , y2 + r2 * sinθ);

    CGPoint pointO = CGPointMake(pointA.x + d / 2 * sinθ , pointA.y + d / 2 * cosθ);

    CGPoint pointP =  CGPointMake(pointB.x + d / 2 * sinθ , pointB.y + d / 2 * cosθ);

    UIBezierPath *path = [UIBezierPath bezierPath];

    // D

    [path moveToPoint:pointD];

    // DA

    [path addQuadCurveToPoint:pointA controlPoint:pointO];

    // AB

    [path addLineToPoint:pointB];

    // BC

    [path addQuadCurveToPoint:pointC controlPoint:pointP];

    // CD

    [path addLineToPoint:pointD];

    return path;

}
在实现过程中,我是自定义UIButton的,需要注意的是,在监听button的拖动时,最好是给它添加UIPanGestureRecognizer手势,而不要在touchesBegin方法里面去判断它的移动位置,因为Touches系列方法会屏蔽button的点击。
自定义的这个button默认就是大圆,包含一个小圆(UIView)属性,但是这个小圆并不是添加在自定义的这个button(也就是大圆)里面,而是在button的superView上。因为小圆并不需要随着大圆位置的改变而改变位置,相应的,shapeLayer也是添加在button(大圆)的父控件上。
给大圆添加了pan手势,在pan:方法里面随之改变小圆的大小和绘制shapeLayer的path。
当pan手势状态为End的时候,需要判断大圆与小圆的距离有没有超出最大距离,如果超过,那么添加一个gif图片,播放销毁大圆的过程。如果没有被销毁,那么大圆需要复位,相应代码:
#import "ZYGooView.h"

#define kMaxDistance 100

@interface ZYGooView ()

@property (nonatomic, weak) UIView *smallCircleView;

@property (nonatomic, assign) CGFloat smallCircleR;

@property (nonatomic, weak) CAShapeLayer *shapeLayer;

@end

@implementation ZYGooView

- (instancetype)initWithFrame:(CGRect)frame

{

    if (self = [super initWithFrame:frame]) {

        [self commitInit];

    }

    return self;

}

- (void)awakeFromNib

{

    [self commitInit];

}

- (void)commitInit

{

    self.layer.cornerRadius = self.frame.size.width * 0.5;

    self.layer.masksToBounds = YES;

    self.smallCircleR = self.frame.size.width * 0.5;

    self.smallCircleView.bounds = self.bounds;

    self.smallCircleView.center = self.center;

    self.smallCircleView.layer.cornerRadius = self.smallCircleView.frame.size.width * 0.5;

    [self addGesture];

}

#pragma mark ----懒加载方法

- (UIView *)smallCircleView

{

    if (_smallCircleView == nil) {

        UIView *view = [[UIView alloc] init];

        view.backgroundColor = self.backgroundColor;

        [self.superview addSubview:view];

        [self.superview insertSubview:view atIndex:0];

        _smallCircleView = view;

    }

    return _smallCircleView;

}

- (CAShapeLayer *)shapeLayer

{

    if (_shapeLayer == nil) {

        CAShapeLayer *shapeLayer = [CAShapeLayer layer];

        shapeLayer.path = [self pathWithBigCircleView:self smallCircleView:self.smallCircleView].CGPath;

        shapeLayer.fillColor = self.backgroundColor.CGColor;

        [self.superview.layer addSublayer:shapeLayer];

        [self.superview.layer insertSublayer:shapeLayer atIndex:0];

        _shapeLayer = shapeLayer;

    }

    return _shapeLayer;

}

#pragma mark ----其他方法

- (void)addGesture

{

    UIPanGestureRecognizer *recognizer = [[UIPanGestureRecognizer alloc] initWithTarget:self action:@selector(pan:)];

    [self addGestureRecognizer:recognizer];

}

- (void)pan:(UIPanGestureRecognizer *)recognizer

{

    CGPoint point = [recognizer translationInView:self.superview];

    CGPoint center = self.center;

    center.x += point.x;

    center.y += point.y;

    self.center = center;

    //复位

    [recognizer setTranslation:CGPointZero inView:self];

    CGFloat distance = [self distanceWithPointA:self.smallCircleView.center pointB:self.center];

    if (distance == 0) return;

    CGFloat newR = self.smallCircleR - distance / 15.0;

    NSLog(@"%f", newR);

    self.smallCircleView.bounds = CGRectMake(0, 0, newR * 2, newR * 2);

    self.smallCircleView.layer.cornerRadius = newR;

    if (distance > kMaxDistance || newR <= 0) {

        self.smallCircleView.hidden = YES;

        [self.shapeLayer removeFromSuperlayer];

        self.shapeLayer = nil;

    }

    if (distance <= kMaxDistance && self.smallCircleView.hidden == NO) {

        self.shapeLayer.path = [self pathWithBigCircleView:self smallCircleView:self.smallCircleView].CGPath;

    }

    if (recognizer.state == UIGestureRecognizerStateEnded) {

        if (distance <= kMaxDistance) {

            dispatch_after(dispatch_time(DISPATCH_TIME_NOW, (int64_t)(0.03 * NSEC_PER_SEC)), dispatch_get_main_queue(), ^{

                [self.shapeLayer removeFromSuperlayer];

                self.shapeLayer = nil;

            });

            [UIView animateWithDuration:0.4 delay:0 usingSpringWithDamping:0.6 initialSpringVelocity:0 options:UIViewAnimationOptionCurveLinear animations:^{

                self.center = self.smallCircleView.center;

            } completion:^(BOOL finished) {

                self.smallCircleView.hidden = NO;

            }];

        }

        else {

            UIImageView *imageView = [[UIImageView alloc] initWithFrame:self.bounds];

            [self addSubview:imageView];

            NSMutableArray *images = [NSMutableArray array];

            for (int i = 1; i <= 8; i++) {

                NSString *imageName = [NSString stringWithFormat:@"%d", i];

                UIImage *image = [UIImage imageNamed:imageName];

                [images addObject:image];

            }

            imageView.animationImages = images;

            imageView.animationDuration = 0.6;

            imageView.animationRepeatCount = 1;

            [imageView startAnimating];

            dispatch_after(dispatch_time(DISPATCH_TIME_NOW, (int64_t)(0.5 * NSEC_PER_SEC)), dispatch_get_main_queue(), ^{

                [self removeFromSuperview];

            });

        }

    }

}

- (CGFloat)distanceWithPointA:(CGPoint)pointA pointB:(CGPoint)pointB

{

    CGFloat dx = pointB.x - pointA.x;

    CGFloat dy = pointB.y - pointA.y;

    return sqrt(dx * dx + dy * dy);

}

- (UIBezierPath *)pathWithBigCircleView:(UIView *)bigCircleView smallCircleView:(UIView *)smallCircleView

{

    CGPoint smallCircleCenter = smallCircleView.center;

    CGFloat x1 = smallCircleCenter.x;

    CGFloat y1 = smallCircleCenter.y;

    CGFloat r1 = smallCircleView.bounds.size.width / 2;

    CGPoint BigCircleViewCenter = bigCircleView.center;

    CGFloat x2 = BigCircleViewCenter.x;

    CGFloat y2 = BigCircleViewCenter.y;

    CGFloat r2 = bigCircleView.bounds.size.width / 2;

    CGFloat d = [self distanceWithPointA:BigCircleViewCenter pointB:smallCircleCenter];

    //Θ:(xita)

    CGFloat sinθ = (x2 - x1) / d;

    CGFloat cosθ = (y2 - y1) / d;

    CGPoint pointA = CGPointMake(x1 - r1 * cosθ , y1 + r1 * sinθ);

    CGPoint pointB = CGPointMake(x1 + r1 * cosθ , y1 - r1 * sinθ);

    CGPoint pointC = CGPointMake(x2 + r2 * cosθ , y2 - r2 * sinθ);

    CGPoint pointD = CGPointMake(x2 - r2 * cosθ , y2 + r2 * sinθ);

    CGPoint pointO = CGPointMake(pointA.x + d / 2 * sinθ , pointA.y + d / 2 * cosθ);

    CGPoint pointP =  CGPointMake(pointB.x + d / 2 * sinθ , pointB.y + d / 2 * cosθ);

    UIBezierPath *path = [UIBezierPath bezierPath];

    // D

    [path moveToPoint:pointD];

    // DA

    [path addQuadCurveToPoint:pointA controlPoint:pointO];

    // AB

    [path addLineToPoint:pointB];

    // BC

    [path addQuadCurveToPoint:pointC controlPoint:pointP];

    // CD

    [path addLineToPoint:pointD];

    return path;

}

@end
Demo的github地址:https://github.com/wzpziyi1/QQ-Goo
QQ(iOS)客户端的粘性动画效果的更多相关文章
- iOS开发 QQ粘性动画效果
QQ(iOS)客户端的粘性动画效果 时间 2016-02-17 16:50:00 博客园精华区 原文 http://www.cnblogs.com/ziyi--caolu/p/5195615.ht ...
- iOS CAReplicatorLayer 实现脉冲动画效果
iOS CAReplicatorLayer 实现脉冲动画效果 效果图 脉冲数量.速度.半径.透明度.渐变颜色.方向等都可以设置.可以用于地图标注(Annotation).按钮长按动画效果(例如录音按钮 ...
- 轻松实现Android,iOS的一个手势动画效果
先来看效果 这是iOS下的效果,android下完全一致.通过do_GestureView组件和do_Animation组件,deviceone能很容易实现复杂的跨平台纯原生动画效果,这个示例就是通过 ...
- Android仿QQ窗口的抖动的动画效果
就是仿照QQ窗口的抖动效果,在项目的res下创建anim文件夹,再创建两个xml文件:cycle.xml . myanim.xml cycle.xml : <?xml version ...
- iOS开发之吸附动画效果
步骤:1.使用singleviewapplication创建新的项目 2.在.h文件中创建两张图片的实例对象,并与相关的图片进行相连:创建一个UIDynamicAnimator实例对象 3.在.m文件 ...
- iOS tabbar点击动画效果实现
正常情况下,我们点击tabbar都只有一个变色效果,但有时候,如果我们想给它添加一个点击动画,该如何做呢? 先上几个效果图: 1.先放大,再缩小 2.Z轴旋转 3.Y轴位移 ...
- ios开发之--简单动画效果的添加
记录一个简单的动画效果,自己写的,很简单,仅做记录. 附一个demo的下载地址: https://github.com/hgl753951/hglTest.git 代码如下: 1,准备 BOOL _i ...
- ios 自定义加载动画效果
在开发过程中,可能会遇到各种不同的场景需要等待加载成功后才能显示数据.以下是自定义的一个动画加载view效果. 在UIViewController的中加载等到效果,如下 - (void)vi ...
- iOS 圆的放大动画效果
第一步:创建一个View,将这个View添加到当前的控制器 如: CGFloat timeW = self.view.bounds.size.width; timeAnimation * timean ...
随机推荐
- WordPress基础:极简安装教程
1.下载WordPress 2.将解压后的文件夹,放到网站根目录,并重命名为你喜欢的目录如:w, 3.重命名文件wp-config-sample.php 为 wp-config.php,并进行配置 4 ...
- partition-list
Given a linked list and a value x, partition it such that all nodes less than x come before nodes gr ...
- LeetCode Count of Range Sum
原题链接在这里:https://leetcode.com/problems/count-of-range-sum/ 题目: Given an integer array nums, return th ...
- The tag 'DataGridTextColumn' does not exist in XML namespace ....
错误 10 The tag 'DataGridTextColumn' does not exist in XML namespace 'http://schemas.microsoft.com/win ...
- Java 画图
package com.lf.testproxy; import java.awt.Color; import java.awt.Font; import java.awt.Graphics2D; i ...
- transform原点
Safari 4 Firefox3.5 Opera10.5 Chrome Internet Explorer 目前这两个属性得到了除去ie以外各个主流浏览器webkit,firefox,opera的支 ...
- Qt报表控件NCReport教程:报表创建示例
NCReport是 一款10多年时间的老牌报表控件,最初是在2002年时作为qt3的应用程序的一个联合项目,后来就成为了一个独立的GPL项目.现在的NCReport 是一款轻量级.快速.多平台.简单易 ...
- 关于在官网上查看和下载特定版本的webrtc代码
注:这个方法已经不适用了,帖子没删只是留个纪念而已 gclient:如果不知道gclient是什么东西 ... 就别再往下看了. 下载特定版本的代码: #gclient sync --revision ...
- [课程设计]Scrum 2.4 多鱼点餐系统开发进度(下单一览页面修复)
Scrum 2.4 多鱼点餐系统开发进度 (下单一览页面修复) 1.团队名称:重案组 2.团队目标:长期经营,积累客户充分准备,伺机而行 3.团队口号:矢志不渝,追求完美 4.团队选题:餐厅到店点餐 ...
- Web Performance Test: 如果使用Plugin过滤Dependent Request
前言 由于Visual Studio的Web Performance Test是基于XML脚本的,留给用户修改测试行为的自由度并不高.因此,Plugin机制就对于实现很多客户化的配置显得很重要. 问题 ...