Spring整合JAX-WS
Jax-ws在使用上很方便,也很轻量级。重点是他是jvnet(dev.java.net)的项目,是基于java标准的(JSR181)。
不过它与Spring的整合相对麻烦,于此,我将自己的一些研究结果贴出来以供备忘和后来者参考。
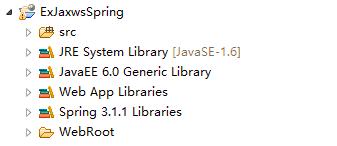
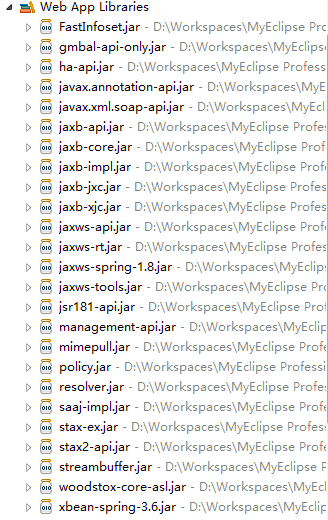
首先我们要有组件支持,包括三部分(我们需要他们的jar包):
Spring就不用说了,如果大家使用MyEclipse的话就直接添加支持。
jax-ws的jar包可以再网站上下载,或者搜索下载“jax-ws 2.2”。
jaxws commons spring的jar包是中间件,这个可能不好下载,如果不适用maven的话可能就只能在网络上搜索下载“jaxws-spring-1.8”(包含不只一个jar包哦)。
然后我们导入jar包并创建web项目。
然后编写一个测试WebService类:
 package org.coderecord.blog;

 import javax.jws.WebMethod;

 import javax.jws.WebService;

 import javax.jws.soap.SOAPBinding;

 import javax.jws.soap.SOAPBinding.Style;

 import org.springframework.stereotype.Service;

 /**

  * 测试服务类<br>

  * Service注解为在使用Spring的packeage-scan功能进行自动装配<br>

  * WebService注解中可以不传递参数<br>

  * SOAPBinding中也可不传递参数,或者按照自己的需求进行更改

  */

 @Service("helloWorldService")

 @WebService(targetNamespace = "org.coderecord.blog")

 @SOAPBinding(style = Style.RPC)

 public class HelloWorldService {

     /* 使用Spring来注入dao或service吧

     @Autowired

     private XXDao xxDao;*/

     /**

      * 接口方法必须加上WebMethod注解

      */

     @WebMethod

     public void sayHello() {

         System.out.println("Hello World!");

     }

 }
HelloWorldService
然后修改applicationContext.xml,加上webservice的绑定,这里面有几个问题,对于wss和ws的schema必须加上:
 <?xml version="1.0" encoding="UTF-8"?>

 <beans xmlns="http://www.springframework.org/schema/beans"

     xmlns:xsi="http://www.w3.org/2001/XMLSchema-instance" xmlns:ws="http://jax-ws.dev.java.net/spring/core"

     xmlns:wss="http://jax-ws.dev.java.net/spring/servlet" xmlns:p="http://www.springframework.org/schema/p"

     xmlns:context="http://www.springframework.org/schema/context"

     xsi:schemaLocation="http://www.springframework.org/schema/beans

     http://www.springframework.org/schema/beans/spring-beans-3.0.xsd

     http://www.springframework.org/schema/context http://www.springframework.org/schema/context/spring-context-3.2.xsd

     http://jax-ws.dev.java.net/spring/core

     http://jax-ws.dev.java.net/spring/core.xsd

     http://jax-ws.dev.java.net/spring/servlet

     http://jax-ws.dev.java.net/spring/servlet.xsd">

     <context:component-scan base-package="org.coderecord.blog">

     </context:component-scan>

     <wss:binding url="/service/hello">

         <wss:service>

             <ws:service bean="#helloWorldService" />

         </wss:service>

     </wss:binding>

 </beans>
applicationContext
最后修改web.xml,修改几个地方:
加上Spring的listener,并配置正确;
加上WSSpringServlet的拦截。
 <?xml version="1.0" encoding="ISO-8859-1"?>

 <web-app xmlns:xsi="http://www.w3.org/2001/XMLSchema-instance" xmlns:web="http://xmlns.jcp.org/xml/ns/javaee" xsi:schemaLocation="http://xmlns.jcp.org/xml/ns/javaee http://java.sun.com/xml/ns/javaee/web-app_2_5.xsd">

   <listener>

     <listener-class>org.springframework.web.context.ContextLoaderListener</listener-class>

   </listener>

   <context-param>

     <param-name>contextConfigLocation</param-name>

     <param-value>classpath:applicationContext.xml</param-value>

   </context-param>

   <!-- Start WebService Config -->

     <servlet>

         <servlet-name>JAXWSServlet</servlet-name>

         <servlet-class>com.sun.xml.ws.transport.http.servlet.WSSpringServlet</servlet-class>

         <load-on-startup>2</load-on-startup>

     </servlet>

     <servlet-mapping>

         <servlet-name>JAXWSServlet</servlet-name>

         <url-pattern>/service/hello</url-pattern>

     </servlet-mapping>

     <!-- End WebService Config -->

 </web-app>
web
最后就启动,搞定。
访问localhost:8080/ExJaxwsSpring/service/hello?wsdl就是接口;访问localhost:8080/ExJaxwsSpring就是你的网站。

于2016-02-22:
有朋友说用新版Spring(Spring4.x)时产生“Caused by: java.lang.IllegalArgumentException: class com.sun.proxy.$Proxy5 has neither @WebSerivce nor @WebServiceProvider annotation”类似错误,这是由于“代理”类生成的子类(为了方便AOP)没有了@WebService注解。如果你不清楚Proxy和AOP,我举个栗子,你继承一个有注解的类,子类会继承父类的注解吗?
那么解决办法是在ws:service节点中加入一个impl属性约定继承的接口。例如
<wss:binding url="/service/hello">

    <wss:service>

        <ws:service bean="#helloWorldService" impl="org.coderecord.blog.HelloWorldService" />

    </wss:service>

</wss:binding>
欢迎您移步我们的交流群,无聊的时候大家一起打发时间:
或者通过QQ与我联系:
(最后编辑时间2016-02-22 10:07:57)
Spring整合JAX-WS的更多相关文章
- CXF和spring整合遇到的问题:No bean named 'cxf' is defined
今天在做ws和spring整合的时候,很不幸的遇到了这个问题,百度了好久,竟然没人遇到这个问题,后来谷歌了一下,都是遇到这个问题的了...在看到一篇文章中提到了cxf.xml,所以我果断的打开这个配置 ...
- Spring整合CXF,发布RSETful 风格WebService(转)
Spring整合CXF,发布RSETful 风格WebService 这篇文章是承接之前CXF整合Spring的这个项目示例的延伸,所以有很大一部分都是一样的.关于发布CXF WebServer和Sp ...
- 13_CXF和Spring整合发布服务
[服务端] 第一步:建立一个Web项目 第二步:填充CXF jar包 第三步:创建接口及服务类 [工程截图(对比之前的WebService_CXF_Server00)] [applicationCon ...
- Spring整合CXF步骤,Spring实现webService,spring整合WebService
Spring整合CXF步骤 Spring实现webService, spring整合WebService >>>>>>>>>>>> ...
- Spring整合CXF,发布RSETful 风格WebService
原文地址:http://www.cnblogs.com/hoojo/archive/2012/07/23/2605219.html 这篇文章是承接之前CXF整合Spring的这个项目示例的延伸,所以有 ...
- 【WebService】WebService之CXF和Spring整合(六)
前面介绍了WebService与CXF的使用,项目中我们经常用到Spring,这里介绍CXF与Spring整合 步骤 1.创建一个Maven Web项目,可以参照:[Maven]Eclipse 使用M ...
- Java WebService 教程系列之 Spring 整合 CXF
Java WebService 教程系列之 Spring 整合 CXF 一.引入 jar 包 <dependency> <groupId>org.apache.cxf</ ...
- 【jersey】 spring 整合jersey 实现RESTful webservice
Jersey是一个RESTFUL请求服务JAVA框架,与常规的JAVA编程使用的struts框架类似,它主要用于处理业务逻辑层.与Struts类似,它同样可以和hibernate,sprin ...
- 30Mybatis_mybatis和spring整合-原始dao开发
这篇文章很重要, 第一步:我们讲一下整合的思路: 我们以前要用Mybatis是需要sqlMapConfig.xml(这个配置文件需要配置dataource,以及mapper.xml文件.)sqlMap ...
- Spring整合WebSocket
WebSocket,干什么用的?我们有了HTTP,为什么还要用WebSocket?很多同学都会有这样的疑问.我们先来看一个场景,大家的手机里都有微信,在微信中,只要有新的消息,这个联系人的前面就会有一 ...
随机推荐
- 转:C# DataGridView控件清空数据出错解决方法
C# DataGridView控件绑定数据后清空数据在清除DataGridview的数据时: 1.DataSource为NULL(DataGridView.DataSource= null;)这样会将 ...
- [计算机图形学] OpenGL读取obj文件并显示其3D效果
读取三维网格模型(Wavefront OBJ文件) 无法向立方体:cube.obj 有法向兔子模型:bunny.obj 有法向有纹理八字模型:Eight.obj OBJ文件的格式可参考:http: ...
- Firefox SVG getBBox方法返回'NS_ERROR_FAILURE'错误分析
在SVG中,我们无法给Text元素设置Width和Height属性,因此无法直接获取Text元素的高和宽.如果想要给Text元素添加背景色,最简单的办法就是在Text元素的下面添加Rect,然后给Re ...
- paip.提升性能----数据库连接池以及线程池以及对象池
paip.提升性能----数据库连接池以及线程池以及对象池 目录:数据库连接池c3po,线程池ExecutorService:Jakartacommons-pool对象池 作者Attilax 艾龙, ...
- iOS图片加载速度极限优化—FastImageCache解析
FastImageCache是Path团队开发的一个开源库,用于提升图片的加载和渲染速度,让基于图片的列表滑动 优化点 iOS从磁盘加载一张图片,使用UIImageVIew显示在屏幕上,需要经过以下步 ...
- iOS-UIViewController视图控制器跳转界面的几种常用方法
一.最普通的视图控制器UIViewContoller 一个普通的视图控制器一般只有模态跳转的功能(ipad我不了解除外,这里只说iPhone),这个方法是所有视图控制器对象都可以用的,而实现这种功能, ...
- 每天一个linux命令(4):mkdir命令
linux mkdir 命令用来创建指定的名称的目录,要求创建目录的用户在当前目录中具有写权限,并且指定的目录名不能是当前目录中已有的目录. 1.命令格式: mkdir [选项] 目录... 2.命令 ...
- wicket基本控件使用笔记
Label new Label(“message”,”message content”); MutLineLabel new MutlineLabel(“message”, ...
- android: SQLite查询数据
掌握了查询数据的方法之后,你也就将数据库的 CRUD 操 作全部学完了.不过千万不要因此而放松,因为查询数据也是在 CRUD 中最复杂的一种 操作. 我们都知道 SQL 的全称是 Structured ...
- windows地址转发
netsh interface portproxy add v4tov4 listenport=8080 connectaddress=192.168.8.108 connectport=8080 把 ...