
Jedis连接 HelloWorld实现
建一个Maven项目,
pom里加下jedis依赖,
<dependency>

    <groupId>redis.clients</groupId>

    <artifactId>jedis</artifactId>

    <version>2.9.</version>

</dependency>
 package com.java56.redis;

 import redis.clients.jedis.Jedis;

 /**

  * 测试类

  * @author user

  *

  */

 public class JedisTest {

     public static void main(String[] args) {

         Jedis jedis=new Jedis("192.168.1.107",); // 创建客户端 设置IP和端口

         jedis.set("name", "java56教程网"); // 设置值

         String value=jedis.get("name"); // 获取值

         System.out.println(value);

         jedis.close(); // 释放连接资源

     }

 }
测试代码,
运行 报错了
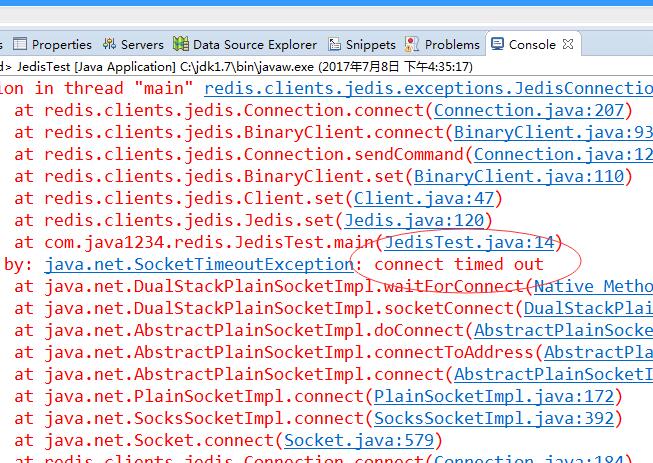
连接超时,
我们配置下防火墙 开一个6379端口权限
firewall-cmd --zone=public --add-port=6379/tcp --permanent
firewall-cmd --reload
继续运行 还是报错 连接超时 错误;
我们配置下 redis配置文件
[root@localhost redis]# vi /usr/local/redis/redis.conf
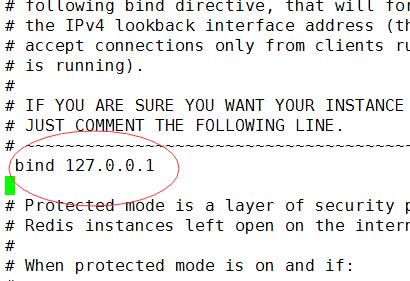
这里绑定了本机,我们把这个备注掉;
# bind 127.0.0.1
配置完后
[root@localhost redis]# ./bin/redis-cli shutdown
[root@localhost redis]# ./bin/redis-server ./redis.conf
要重启下redis服务;
继续运行 又报错了
Exception in thread "main" redis.clients.jedis.exceptions.JedisDataException: DENIED Redis is running in protected mode because protected mode is enabled, no bind address was specified, no authentication password is requested to clients. In this mode connections are only accepted from the loopback interface. If you want to connect from external computers to Redis you may adopt one of the following solutions: 1) Just disable protected mode sending the command 'CONFIG SET protected-mode no' from the loopback interface by connecting to Redis from the same host the server is running, however MAKE SURE Redis is not publicly accessible from internet if you do so. Use CONFIG REWRITE to make this change permanent. 2) Alternatively you can just disable the protected mode by editing the Redis configuration file, and setting the protected mode option to 'no', and then restarting the server. 3) If you started the server manually just for testing, restart it with the '--protected-mode no' option. 4) Setup a bind address or an authentication password. NOTE: You only need to do one of the above things in order for the server to start accepting connections from the outside.
at redis.clients.jedis.Protocol.processError(Protocol.java:127)
at redis.clients.jedis.Protocol.process(Protocol.java:161)
at redis.clients.jedis.Protocol.read(Protocol.java:215)
at redis.clients.jedis.Connection.readProtocolWithCheckingBroken(Connection.java:340)
at redis.clients.jedis.Connection.getStatusCodeReply(Connection.java:239)
at redis.clients.jedis.Jedis.set(Jedis.java:121)
at com.java1234.redis.JedisTest.main(JedisTest.java:14)
这个是因为远程连接redis redis自我保护 拒绝访问;
有两种方法 解决
第一种 直接去掉自我保护功能(不推荐)
[root@localhost redis]# vi /usr/local/redis/redis.conf
进入配置
找到 protected-mode yes
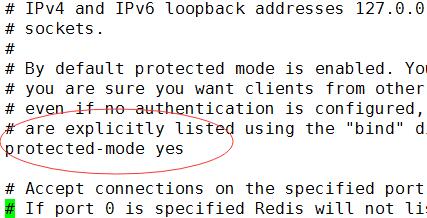
改成 no即可
编辑后 重启redis服务,然后运行 ,结果出来了
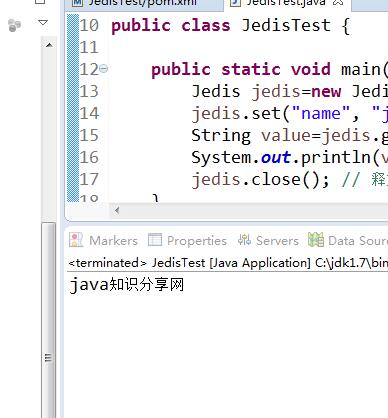
第二种 设置redis连接密码
进入客户端
[root@localhost redis]# ./bin/redis-cli
127.0.0.1:6379> config set requirepass 123456
设置密码 123456
127.0.0.1:6379> quit
[root@localhost redis]# ./bin/redis-cli
127.0.0.1:6379> auth 123456
OK
说明设置成功
 package com.java56.redis;

 import redis.clients.jedis.Jedis;

 /**

  * 测试类

  * @author user

  *

  */

 public class JedisTest {

     public static void main(String[] args) {

         Jedis jedis=new Jedis("192.168.1.107",); // 创建客户端 设置IP和端口

         jedis.auth(""); // 设置密码

         jedis.set("name", "java知识分享网"); // 设置值

         String value=jedis.get("name"); // 获取值

         System.out.println(value);

         jedis.close(); // 释放连接资源

     }

 }
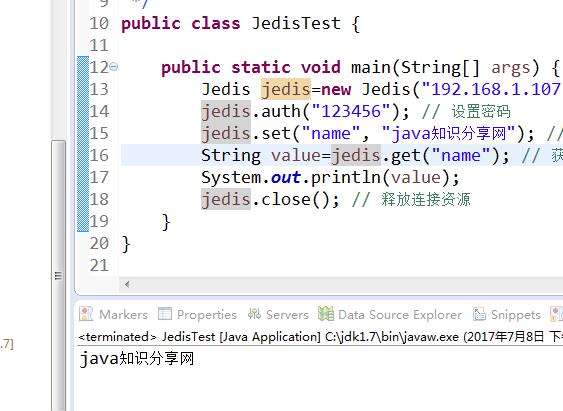
这样就OK了
Jedis连接 HelloWorld实现的更多相关文章
- Jedis与Jedis连接池
1.Jedis简介 实际开发中,我们需要用Redis的连接工具连接Redis然后操作Redis, 对于主流语言,Redis都提供了对应的客户端: https://redis.io/clients 2. ...
- 用Jedis连接Redis
jedis中的方法名,和Redis的命令几乎一样 1.jar包,作为测试只需要一个jar 2.代码 package com; import java.util.HashMap; import java ...
- redis linux 安装及jedis连接测试
一.安装配置 1:下载redis下载地址 http://code.google.com/p/redis/downloads/list推荐下载redis-1.2.6.tar.gz,之前这个版本同事已经有 ...
- redis客户端jedis连接和spring结合
摘自传智博客课程 <beans xmlns="http://www.springframework.org/schema/beans" xmlns:xsi="htt ...
- Jedis连接
Jedis连接 到场api中的jedis.我们能够发现,jedis类提供了4个构造方法.都可用于连接: watermark/2/text/aHR0cDovL2Jsb2cuY3Nkbi5uZXQvc29 ...
- Redis 学习笔记3:Jedis 连接虚拟机下的Redis 服务
Jedis 是 Redis 官方首选的 Java 客户端开发包. 虚拟机的IP地址是192.168.8.88. Jedis代码是放在windows上的,启动虚拟机上的Redis服务之后,用Jedis连 ...
- Redis安装以及Java客户端jedis连接不上相关问题解决
安装步骤 1.由于Redis是由C 语言编写的 所以虚拟机编译需要C的编译环境 用命令 yum install gcc-c++ 2.用SFTP上传Redis安装包并解压 3.进入Redis源码目录 b ...
- Spring-Data-Redis 下实现jedis连接断开后自动重连
原先使用jedis的时候,处理手段是在从连接池获取连接时捕获JedisConnectionException异常,在异常处理部分重新获取连接,但是spring data redis似乎不会,如下所示: ...
- Java与redis交互、Jedis连接池JedisPool
Java与redis交互比较常用的是Jedis. 先导入jar包: commons-pool2-2.3.jar jedis-2.7.0.jar 基本使用: public class RedisTest ...
随机推荐
- Atitit 数据库排除某一列 字段 显示
Atitit 数据库排除某一列 字段 显示 GROUP_CONCAT 行列转换 mysql利用group_concat()合并多行数据到一行_Mysql_脚本之家 sELECT GROUP_CO ...
- node出现 Error: listen EACCES 0.0.0.0:8080错误
Error: listen EACCES 0.0.0.0:8080 at Object._errnoException (util.js:1022:11) at _exceptionWithHostP ...
- mybatis-plus快速入门使用
目前正在维护的公司的一个项目是一个ssm架构的java项目,dao层的接口有大量数据库查询的方法,一个条件变化就要对应一个方法,再加上一些通用的curd方法,对应一张表的dao层方法有时候多达近20个 ...
- 【规范】前端编码规范——jquery 规范
使用单引号 不推荐 $("div").html("<img src='1.jpg'>"); 推荐 $('div').html('<img sr ...
- mysqldump定时备份数据库
mysql服务器ip:192.168.0.10 备份服务器ip:192.168.0.11 数据库名称:db_product 思路:在mysql服务器A上创建一个用户分配权限专门用于数据库备份,A服务器 ...
- NaviSoft31.源码开发完成
NaviSoft是作者一人开发完成,从之前的1.0版本,到现在的3.1版本.历经2年时间,开发完成 下面是NaviSoft的源码结构 加QQ群了解更多信息
- 【分享】Vue 资源典藏(UI组件、开发框架、服务端、辅助工具、应用实例、Demo示例)
Vue 资源典藏,包括:UI组件 开发框架 服务端 辅助工具 应用实例 Demo示例 element ★11612 - 饿了么出品的Vue2的web UI工具套件 Vux ★7503 - 基于Vue和 ...
- Ubuntu下安装open-falcon-v0.2.1
在Ubuntu下安装open-falcon和Centos下安装的方法有点区别,因为Ubuntu使用的包管理器是apt-get,而Centos下使用的是Yum,建议不要再Ubuntu下使用yum 建议自 ...
- SpringMVC工作原理 : HandlerMapping和HandlerAdapter
一.HandlerMapping 作用是根据当前请求的找到对应的 Handler,并将 Handler(执行程序)与一堆 HandlerInterceptor(拦截器)封装到 HandlerExecu ...
- 利用Python半自动化生成Nessus报告
0x01 前言 Nessus是一个功能强大而又易于使用的远程安全扫描器,Nessus对个人用户是免费的,只需要在官方网站上填邮箱,立马就能收到注册号了,对应商业用户是收费的.当然,个人用户是有16个I ...