
【深度学习 论文篇 03-2】Pytorch搭建SSD模型踩坑集锦
论文地址:https://arxiv.org/abs/1512.02325
源码地址:http://github.com/amdegroot/ssd.pytorch
环境1:torch1.9.0+CPU
环境2:torch1.8.1+cu102、torchvision0.9.1+cu102
1. StopIteration。Batch_size设置32,训练至60次报错,训练中断;Batch_size改成8训练至240次报错。

报错原因及解决方法:train.py第165行:
# 修改之前

images, targets = next(batch_iterator)

# 修改之后

try:

    images, targets = next(batch_iterator)

except:

    batch_iterator = iter(data_loader)

    images, targets = next(batch_iterator)
2. UserWarning: volatile was removed and now has no effect. Use 'with torch.no_grad():' instead.
报错原因及解决方法:Pytorch版本问题,ssd.py第34行:
# 修改之前

self.priors = Variable(self.priorbox.forward(), volatile=True)

# 修改之后

with torch.no_grad():

    self.priors = torch.autograd.Variable(self.priorbox.forward())
3. UserWarning: nn.init.xavier_uniform is now deprecated in favor of nn.init.xavier_uniform_.

报错原因及解决方法:nn.init.xavier_uniform是以前版本,改成nn.init.xavier_uniform_即可
4. VisibleDeprecationWarning: Creating an ndarray from ragged nested sequences (which is a list-or-tuple of lists-or-tuples-or ndarrays with different lengths or shapes) is deprecated. If you meant to do this, you must specify 'dtype=object' when creating the ndarray.

报错原因及解决方法:版本问题,augmentation.py第238行mode = random.choice(self.sample_options)报错,改为mode = np.array(self.sample_options, dtype=object),但并没卵用。。。由于是Warning,懒得再管了
5. AssertionError: Must define a window to update
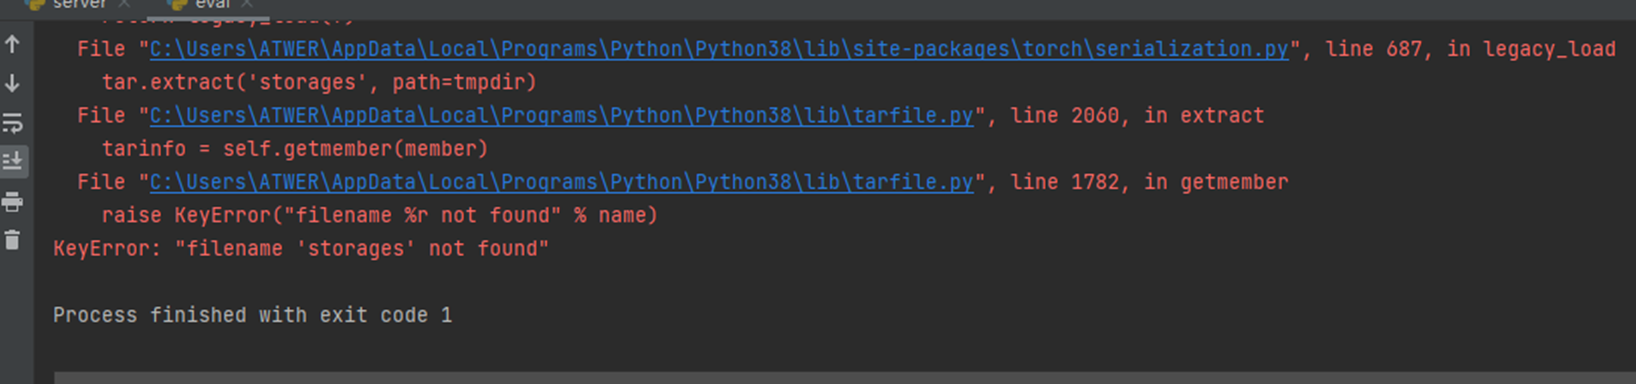
报错原因及解决方法:打开vidsom窗口更新时报错(train.py 153行)
# 报错代码(153行)

update_vis_plot(epoch, loc_loss, conf_loss, epoch_plot, None, 'append', epoch_size)
将将158行epoch+=1放在报错代码之前即可解决问题

6. KeyError: "filename 'storages' not found"。运行验证脚本eval.py和测试脚本test.py报的错
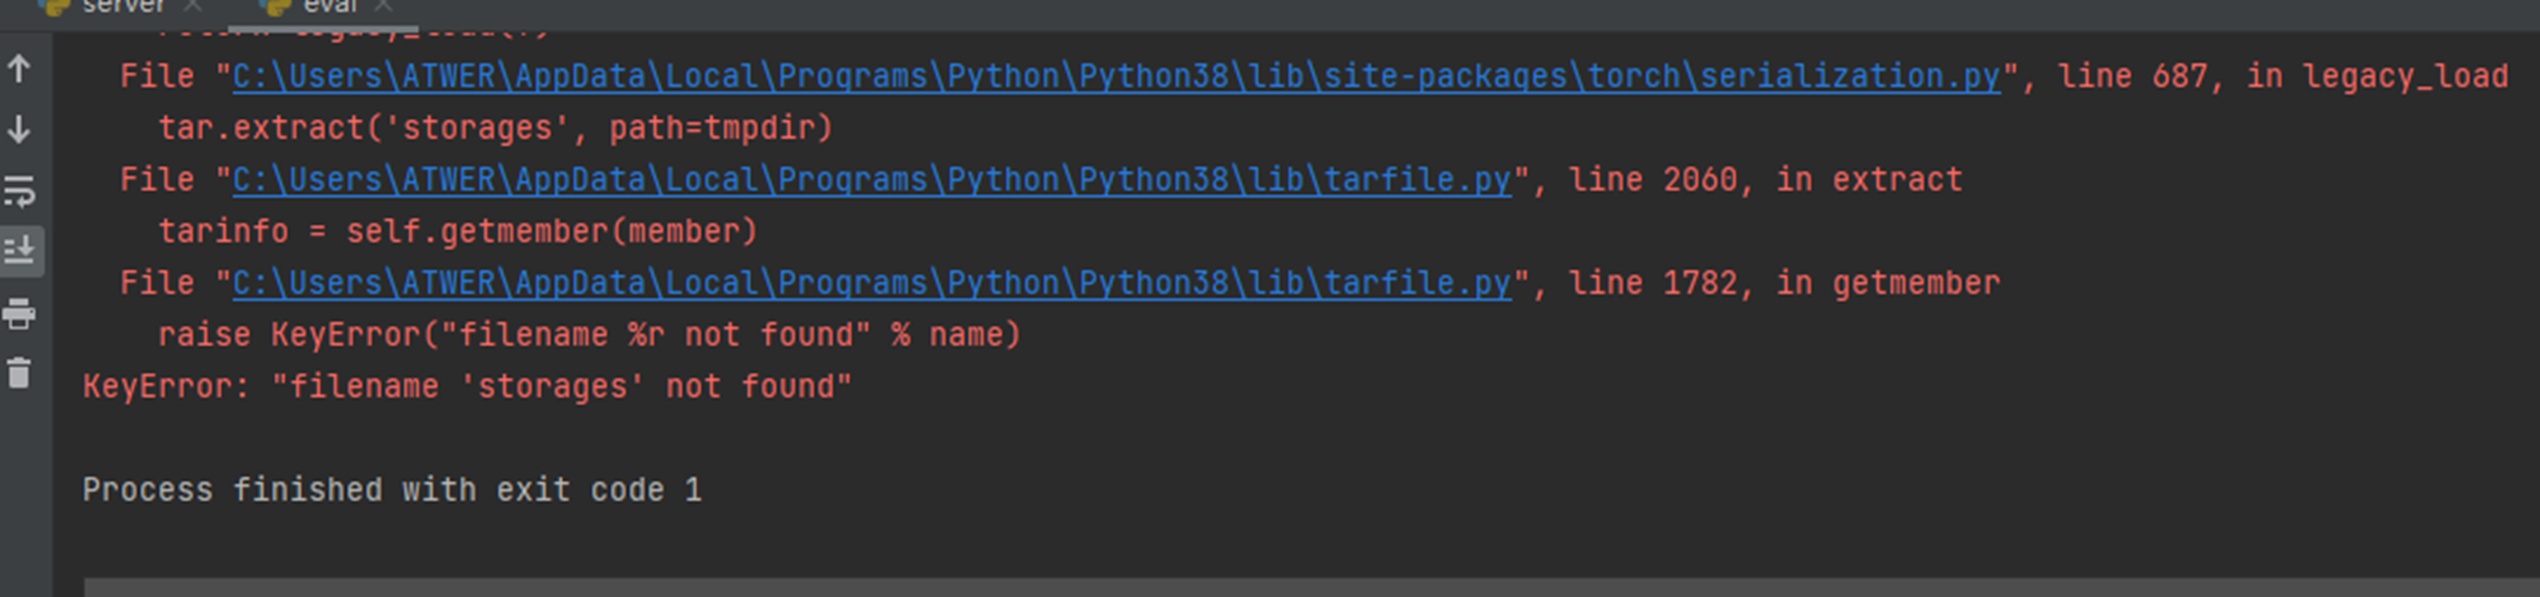
报错原因及解决方法:加载的.pth模型文件损坏
7. UserWarning: size_average and reduce args will be deprecated, please use reduction='sum' instead.

报错原因及解决方法:版本问题,新版本损失函数的参数中,size_average和reduce已经被弃用,设置reduction即可。_reduction.py第90行修改如下:
# 修改之前(90行)

loss_l = F.smooth_ll_loss(loc_p, loc_t, size_average=False)


# 修改之后

loss_l = F.smooth_ll_loss(loc_p, loc_t, reduction=’sum’)
8. RuntimeError: Attempting to deserialize object on a CUDA device but torch.cuda.is_available() is False. If you are running on a CPU-only machine, please use torch.load with map_location=torch.device('cpu') to map your storages to the CPU.

报错原因及解决方法:eval.py第425行,如果在cpu上运行则需要指定cpu模式
# 修改之前

net.load_state_dict(torch.load(args.trained_model))

# 修改之后

net.load_state_dict(torch.load(args.trained_model, map_location='cpu'))
9. RuntimeError: Legacy autograd function with non-static forward method is deprecated. Please use new-style autograd function with static forward method.
出现在eval.py和train.py ★★★★★★

(Example: https://pytorch.org/docs/stable/autograd.html#torch.autograd.Function)
报错原因:在pytorch1.3及以后的版本需要规定forward方法为静态方法,所以在pytorch1.3以上的版本执行出错。
官方建议:在自定义的autorgrad.Function中的forward,backward前加上@staticmethod
解决方法:
方法一:pytorch回退版本至1.3以前
方法二:根据官方建议,在ssd.py中forward前加@staticmethod,结果报出另一个错误

紧接着,将eval.py第385行 detections = net(x).data 改为 detections = net.apply(x).data,执行时又报如下错误
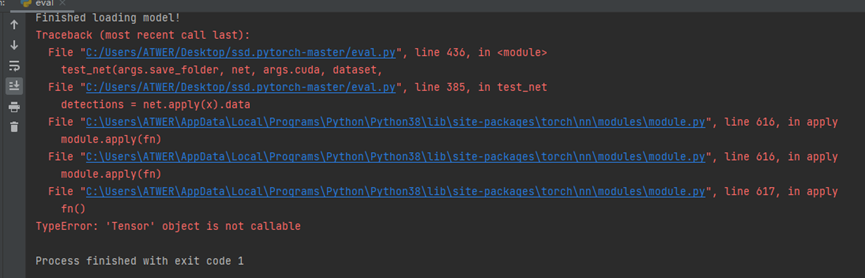
再然后,在ssd.py第100行加forward(或apply)
output=self.detect.forward(loc.view(loc.size(0), -1, 4),

                           self.softmax(conf.view(conf.size(0), -1, self.num_classes)),

                           self.priors.type(type(x.data)))
还是报和上边同样的错误,直接弃疗。。。
在该项目issues里看到:
It has a class named 'Detect' which is inheriting torch.autograd.Function but it implements the forward method in an old deprecated way, so you need to restructure it i.e. you need to define the forward method with @staticmethod decorator and use .apply to call it from your SSD class.
Also, as you are going to use decorator, you need to ensure that the forward method doesn't use any Detect class constructor variables.
也就是在forward定义前边加@statemethod,然后调用的时候用.apply。staticmethod意味着Function不再能使用类内的方法和属性,去掉init()用别的方法代替
最终解决方案(方法三):
detection.py改为如下,即将init()并入到forward函数中:
def forward(self, num_classes, bkg_label, top_k, conf_thresh,

            nms_thresh, loc_data, conf_data, prior_data)
然后在ssd.py中调用的时候改为:
# 修改之前(46行)

# if phase == 'test':

#    self.softmax = nn.Softmax(dim=-1)

#    self.detect = Detect(num_classes, 0, 200, 0.01, 0.45)

# 修改之后

if phase == 'test':

    self.softmax = nn.Softmax()

    self.detect = Detect()

# 修改之前(99行)

# if self.phase == "test":

#     output = self.detect(

#        loc.view(loc.size(0), -1, 4),                   # loc preds

#        self.softmax(conf.view(conf.size(0), -1,

#                     self.num_classes)),                # conf preds

#        self.priors.type(type(x.data))                  # default boxes

#     )

# 修改之后

if self.phase == "test":

    output = self.detect.apply(2, 0, 200, 0.01, 0.45,

                               loc.view(loc.size(0), -1, 4),    # loc preds

                               self.softmax(conf.view(-1, 2)),  # conf preds

                               self.priors.type(type(x.data))   # default boxes

                               )
注意:方式三中,ssd.py的Forward方法前边不能加@staticmethod,否则会报和方法二中相同的错。detection.py的Forward方法前加不加@staticmethod都没影响。
10. cv2.error: OpenCV(4.5.5) :-1: error: (-5:Bad argument) in function 'rectangle'
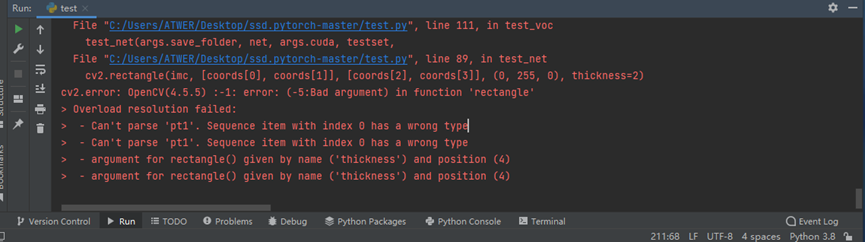
报错原因及解决方法:opencv版本过高,不兼容,改装4.1.2.30问题解决
总结:遇到报错别急着求助,一定要仔细阅读报错信息,先自己分析下为什么报错,一般对代码比较熟悉的话都是能找到原因的。实在解决不了再百度或Google,另外可以多多参考源码的Issues。
参考资料:
1、https://blog.csdn.net/qq_39506912/article/details/116926504(主要参考这篇博客)
2、http://github.com/amdegroot/ssd.pytorch/issues/234
【深度学习 论文篇 03-2】Pytorch搭建SSD模型踩坑集锦的更多相关文章
- 【深度学习 论文篇 02-1 】YOLOv1论文精读
原论文链接:https://gitee.com/shaoxuxu/DeepLearning_PaperNotes/blob/master/YOLOv1.pdf 笔记版论文链接:https://gite ...
- 【深度学习 论文篇 01-1 】AlexNet论文翻译
前言:本文是我对照原论文逐字逐句翻译而来,英文水平有限,不影响阅读即可.翻译论文的确能很大程度加深我们对文章的理解,但太过耗时,不建议采用.我翻译的另一个目的就是想重拾英文,所以就硬着头皮啃了.本文只 ...
- (zhuan) 126 篇殿堂级深度学习论文分类整理 从入门到应用
126 篇殿堂级深度学习论文分类整理 从入门到应用 | 干货 雷锋网 作者: 三川 2017-03-02 18:40:00 查看源网址 阅读数:66 如果你有非常大的决心从事深度学习,又不想在这一行打 ...
- 10K+,深度学习论文、代码最全汇总!
我们大部分人是如何查询和搜集深度学习相关论文的?绝大多数情况是根据关键字在谷歌.百度搜索.想寻找相关论文的复现代码又会去 GitHub 上搜索关键词.浪费了很多时间不说,论文.代码通常也不够完整.怎么 ...
- 深度学习实战篇-基于RNN的中文分词探索
深度学习实战篇-基于RNN的中文分词探索 近年来,深度学习在人工智能的多个领域取得了显著成绩.微软使用的152层深度神经网络在ImageNet的比赛上斩获多项第一,同时在图像识别中超过了人类的识别水平 ...
- 深度学习论文笔记:Fast R-CNN
知识点 mAP:detection quality. Abstract 本文提出一种基于快速区域的卷积网络方法(快速R-CNN)用于对象检测. 快速R-CNN采用多项创新技术来提高训练和测试速度,同时 ...
- 常用深度学习框——Caffe/ TensorFlow / Keras/ PyTorch/MXNet
常用深度学习框--Caffe/ TensorFlow / Keras/ PyTorch/MXNet 一.概述 近几年来,深度学习的研究和应用的热潮持续高涨,各种开源深度学习框架层出不穷,包括Tenso ...
- 深度学习与CV教程(13) | 目标检测 (SSD,YOLO系列)
作者:韩信子@ShowMeAI 教程地址:http://www.showmeai.tech/tutorials/37 本文地址:http://www.showmeai.tech/article-det ...
- 深度学习论文TOP10,2019一季度研究进展大盘点
9012年已经悄悄过去了1/3. 过去的100多天里,在深度学习领域,每天都有大量的新论文产生.所以深度学习研究在2019年开了怎样一个头呢? Open Data Science对第一季度的深度学习研 ...
随机推荐
- Oracle数据常用的备份与恢复?
Oracle的备份与恢复有三种标准的模式,大致分为两大类,备份恢复(物理上的)以及导入导出(逻辑上的),而备份恢复又可以根据数据库的工作模式分为非归档模式(Nonarchivelog-style)和归 ...
- BeanFactory – BeanFactory 实现举例?
Bean 工厂是工厂模式的一个实现,提供了控制反转功能,用来把应用的配置和依赖从正真的应用代码中分离. 最常用的BeanFactory 实现是XmlBeanFactory 类.
- Java 中你怎样唤醒一个阻塞的线程?
在 Java 发展史上曾经使用 suspend().resume()方法对于线程进行阻塞唤醒,但 随之出现很多问题,比较典型的还是死锁问题. 解决方案可以使用以对象为目标的阻塞,即利用 Object ...
- spring-boot-learning-MongoDB
NoSQL可以极大提高互联网系统的性能,但是它有一些致命的缺陷,其中最为严重的就是计算功能卡分有限,例如,在一个10 万数据量的List 中,我只需要满足特定条件的元素在Red is 中,使用集合或者 ...
- runnable 和 callable 有什么区别
callable 有返回值,并允许抛出异常 runnable 没有返回值,不会抛出异常
- 学习openldap02
III (二十二)OpenLDAP 目录服务: 目录是一类为了浏览和搜索数据而设计的特殊的数据库,目录服务是按照树状形式存储信息,目录包含基于属性的描述性信息,并且支持高级的过滤功能,如microso ...
- JVM的基础知识
一.JVM的基础知识 1.JVM内存结构: 1.JVM堆内存结构: 2.JVM内存分配: 3.Java的堆机构和垃圾回收: 4.Jvm堆内存配置参数: 5.JVM新生代概念和配置: 6.JVM老生代概 ...
- 一道关于压缩包的ctf题目(包括暴力破解,明文攻击,伪加密)
关于题目附件 链接:https://pan.baidu.com/s/1PRshlizSndkgxkslnqJrHA 提取码:p76e zip三连击 下载附件得到题目 手机号码一般是11位,那么我们设置 ...
- PCB模块化布局系列之时钟电路设计(晶振、晶体)
一.晶体在一个电路系统中, 时钟是必不可少的一部分.如人的心脏的作用,如果电路系统的时钟出错了,系统就会发生紊乱,因此在PCB 中设计,一个好的时钟电路是非常必要的.我们常用的时钟电路有:晶体.晶振. ...
- 为什么总有target=_blank?
源于Browsing Context 的概念,不仅有_blank,还有_parent, _top, _self等. 先留个坑.见示例.