Pytorch学习笔记(二)---- 神经网络搭建
记录如何用Pytorch搭建LeNet-5,大体步骤包括:网络的搭建->前向传播->定义Loss和Optimizer->训练
# -*- coding: utf-8 -*-

# All codes and comments from <<深度学习框架Pytorch入门与实践>>

# Code url : https://github.com/zhouzhoujack/pytorch-book

# lesson_2 : Neural network of PT(Pytorch)

# torch.nn是专门为神经网络设计的模块化接口,nn构建于 Autograd之上,可用来定义和运行神经网络

# 定义网络时,需要继承nn.Module,并实现它的forward方法,把网络中具有可学习参数的层放在构造函数__init__中

# 下面是LeNet-5网络结构

import torch as t

import torch.nn as nn

import torch.optim as optim

import torch.nn.functional as F

class Net(nn.Module):

    def __init__(self):

        # nn.Module子类的函数必须在构造函数中执行父类的构造函数

        # 下式等价于nn.Module.__init__(self)

        super(Net, self).__init__()

        self.conv1 = nn.Conv2d(1, 6, 5)             # 卷积层'1'表示输入图片为单通道, '6'表示输出通道数,'5'表示卷积核为5*5

        self.conv2 = nn.Conv2d(6, 16, 5)

        self.fc1 = nn.Linear(in_features=16 * 5 * 5, out_features=120, bias=True)       # 全连接层,y = x*transposition(A) + b

        self.fc2 = nn.Linear(120, 84)

        self.fc3 = nn.Linear(84, 10)

    def forward(self, x):

        x = F.max_pool2d(input=F.relu(self.conv1(x)), kernel_size=(2, 2))        # 卷积 -> 激活 -> 池化

        x = F.max_pool2d(F.relu(self.conv2(x)), 2)

        # view函数只能由于contiguous的张量上,就是在内存中连续存储的张量,当tensor之前调用了transpose,

        # permute函数就会是tensor内存中变得不再连续,就不能调用view函数。

        # tensor.view() = np.reshape()

        x = x.view(x.size()[0], -1)

        x = F.relu(self.fc1(x))

        x = F.relu(self.fc2(x))

        x = self.fc3(x)

        return x

"""

Net(

  (conv1): Conv2d(1, 6, kernel_size=(5, 5), stride=(1, 1))

  (conv2): Conv2d(6, 16, kernel_size=(5, 5), stride=(1, 1))

  (fc1): Linear(in_features=400, out_features=120, bias=True)

  (fc2): Linear(in_features=120, out_features=84, bias=True)

  (fc3): Linear(in_features=84, out_features=10, bias=True)

)

"""

net = Net()

# 网络的可学习参数通过net.parameters()返回,net.named_parameters可同时返回可学习的参数及名称

"""

conv1.weight : torch.Size([6, 1, 5, 5])

conv1.bias : torch.Size([6])

conv2.weight : torch.Size([16, 6, 5, 5])

conv2.bias : torch.Size([16])

fc1.weight : torch.Size([120, 400])

fc1.bias : torch.Size([120])

fc2.weight : torch.Size([84, 120])

fc2.bias : torch.Size([84])

fc3.weight : torch.Size([10, 84])

fc3.bias : torch.Size([10])

"""

# parameters infomation of network

# params = list(net.parameters())

# for name,parameters in net.named_parameters():

#     print(name,':',parameters.size())

if __name__ == '__main__':

    """

    计算图如下:

    input -> conv2d -> relu -> maxpool2d -> conv2d -> relu -> maxpool2d

          -> view -> linear -> relu -> linear -> relu -> linear

          -> MSELoss

          -> loss

    """

    input = t.randn(1, 1, 32, 32)

    output = net(input)

    # >>torch.arange(1., 4.)

    # >>1 2 3 [torch.FloatTensor of size 3]

    # if missing . , the type of torch will change to int

    target = t.arange(0., 10.).view(1, 10)

    criterion = nn.MSELoss()

    loss = criterion(output, target)

    print(loss)

    # 运行.backward,观察调用之前和调用之后的grad

    net.zero_grad()  # 把net中所有可学习参数的梯度清零

    print('反向传播之前 conv1.bias的梯度')

    print(net.conv1.bias.grad)

    loss.backward()

    print('反向传播之后 conv1.bias的梯度')

    print(net.conv1.bias.grad)

    # Optimizer

    # torch.optim中实现了深度学习中绝大多数的优化方法,例如RMSProp、Adam、SGD等

    # 在反向传播计算完所有参数的梯度后,还需要使用优化方法来更新网络的权重和参数,例如随机梯度下降法(SGD)的更新策略如下:

    # weight = weight - learning_rate * gradient

    optimizer = optim.SGD(net.parameters(), lr=0.01)

    # 在训练过程中

    # 先梯度清零(与net.zero_grad()效果一样)

    optimizer.zero_grad()

    # 计算损失

    output = net(input)

    loss = criterion(output, target)

    # 反向传播

    loss.backward()

    # 更新参数

    optimizer.step()
nn.Conv2d()详解
torch.nn.Conv2d(in_channels, 	# input channels

                out_channels, 	# output channels

                kernel_size, 	# conv kernel size

                stride=1,

                padding=0, 		# add the number of zeros per dimension

                dilation=1,

                groups=1,

                bias=True		# default=True

               )
其中Conv2d 的输入 input 尺寸为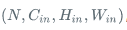
,输出 output 尺寸为

Feature Map 大小计算
Size of Feature Map = (W - F + 2P)/S + 1
W : 输入图像尺寸宽度
F : 卷积核宽度
P:边界填充0数量
S:滑动步长
例如:
输入(227,227,3)
卷积层 kernel_size = 11
stride = 4
padding = 0
n(卷积核数量) = 96
输出 (55,55,96)
(227 - 11 + 0) /4 +1 = 55
参考资料
nn.Conv2d()详解:https://www.aiuai.cn/aifarm618.html
Pytorch学习笔记(二)---- 神经网络搭建的更多相关文章
- 莫烦pytorch学习笔记(二)——variable
.简介 torch.autograd.Variable是Autograd的核心类,它封装了Tensor,并整合了反向传播的相关实现 Variable和tensor的区别和联系 Variable是篮子, ...
- 莫烦 - Pytorch学习笔记 [ 二 ] CNN ( 1 )
CNN原理和结构 观点提出 关于照片的三种观点引出了CNN的作用. 局部性:某一特征只出现在一张image的局部位置中. 相同性: 同一特征重复出现.例如鸟的羽毛. 不变性:subsampling下图 ...
- Mybatis-Plus 实战完整学习笔记(二)------环境搭建
第二章 使用实例 1.搭建测试数据库 -- 创建库 CREATE DATABASE mp; -- 使用库 USE mp; -- 创建表 CREATE TABLE tbl_employee( ...
- kvm虚拟化学习笔记(二)之linux kvm虚拟机安装
KVM虚拟化学习笔记系列文章列表----------------------------------------kvm虚拟化学习笔记(一)之kvm虚拟化环境安装http://koumm.blog.51 ...
- ZooKeeper学习笔记二:API基本使用
Grey ZooKeeper学习笔记二:API基本使用 准备工作 搭建一个zk集群,参考ZooKeeper学习笔记一:集群搭建. 确保项目可以访问集群的每个节点 新建一个基于jdk1.8的maven项 ...
- WPF的Binding学习笔记(二)
原文: http://www.cnblogs.com/pasoraku/archive/2012/10/25/2738428.htmlWPF的Binding学习笔记(二) 上次学了点点Binding的 ...
- AJax 学习笔记二(onreadystatechange的作用)
AJax 学习笔记二(onreadystatechange的作用) 当发送一个请求后,客户端无法确定什么时候会完成这个请求,所以需要用事件机制来捕获请求的状态XMLHttpRequest对象提供了on ...
- [Firefly引擎][学习笔记二][已完结]卡牌游戏开发模型的设计
源地址:http://bbs.9miao.com/thread-44603-1-1.html 在此补充一下Socket的验证机制:socket登陆验证.会采用session会话超时的机制做心跳接口验证 ...
- JMX学习笔记(二)-Notification
Notification通知,也可理解为消息,有通知,必然有发送通知的广播,JMX这里采用了一种订阅的方式,类似于观察者模式,注册一个观察者到广播里,当有通知时,广播通过调用观察者,逐一通知. 这里写 ...
- Docker学习笔记之一,搭建一个JAVA Tomcat运行环境
Docker学习笔记之一,搭建一个JAVA Tomcat运行环境 前言 Docker旨在提供一种应用程序的自动化部署解决方案,在 Linux 系统上迅速创建一个容器(轻量级虚拟机)并部署和运行应用程序 ...
随机推荐
- DotNetCore 3.0 助力 WPF 开发
DotNetCore Is AnyWhere. 前言 Visual Studio 2019 已经正式发布了,DotNetCore 3.0 的正式版也指日可待.在之前的版本中,作为一名基于微软生态的传统 ...
- ASP.NET Core 2.1 : 十五.图解路由(2.1 or earler)
本文通过一张图来看一下路由的配置以及请求处理的机制.(ASP.NET Core 系列目录) 一.概述 路由主要有两个主要功能: 将请求的URL与已定义的路由进行匹配,找到该URL对应的处理程序并传入该 ...
- SSZipArchive的使用详解和遇到的问题
https://blog.csdn.net/zhengang007/article/details/51019479 2016年03月30日 版权声明:本文为博主原创文章,转载请注明作者和原文链接. ...
- Servlet 易错点和注意点
目录 @WebServlet("/")与@WebServlet("/*")的区别 @WebServlet("/")与@WebServlet( ...
- css居中flex
css利用flex实现居中(子元素可以不必管宽高):
- 数组中的reduce 函数理解
第一次见到reduce 是在js 的高级程序设计中,它的意思是把一个数组减少为一个数,举的例子是数组中元素的求和.它接受一个函数作为参数,函数又有两个参数,一个是prev, 前一个值,一个是next, ...
- Nginx Http 过滤模块
L69 执行顺序在content阶段后 log阶段前调用的 也就是处理完用户业务后 准备记录处理日志之前 我们可以到nginx http_model.c里查看 数组 执行顺序从下至上顺序执行 copy ...
- cv2.matchTemplate()函数的应用,匹配图片后画出矩形
import cv2 as cv import numpy as np """ matchTemplate(): 参数image:待搜索的图像(大图) 参数temple: ...
- IAR使用跳转功能时不正常的情况
@2019-04-12 [小记] [使用环境]IAR-Arm8.30.1 [验证] 均为实测 1. 出现如下图这种情况应该是工程所在路径太深导致 2. 如果不弹出上图警告,但还是不跳转应该是工程编译信 ...
- python学习day16 模块(汇总)
模块(总) 对于range py2,与py3的区别: py2:range() 在内存中立即把所有的值都创建,xrange() 不会再内存中立即创建,而是在循环时边环边创建. py3:range() 不 ...