DotNetOpenAuth实践之WCF资源服务器配置
系列目录:
DotNetOpenAuth实践系列(源码在这里)
上一篇我们写了一个OAuth2的认证服务器,我们也获取到access_token,那么这个token怎么使用呢,我们现在就来揭开
一般获取access_token用处就是访问接口资源,不然也用不到怎么大费周章的还要获取个token再去访问资源
而接口有几类:
WCF服务接口,WebApi,还有自己用如ashx,aspx写的接口提供给前端调用的接口
其中WCF接口DotNetOpenAuth.Sample例子中已经做了
这些接口公开对外就需要一个认证的过程才能访问(当然内部或者内网使用的也不用这么麻烦,毕竟认证也是影响性能的)
废话不多说,我们下面开始搭建资源服务器
首先,搭建WCF服务接口的资源认证
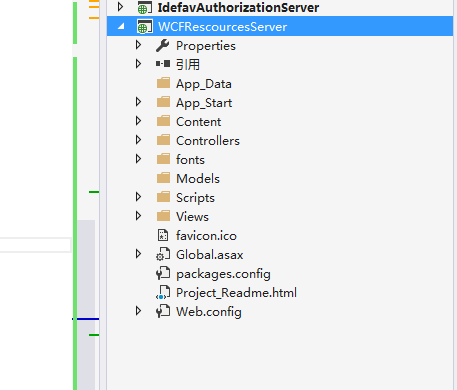
一、创建WCF资源服务器项目
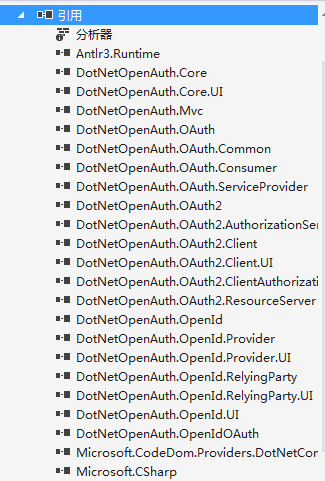
2、添加DotNetOpenAuth到项目中
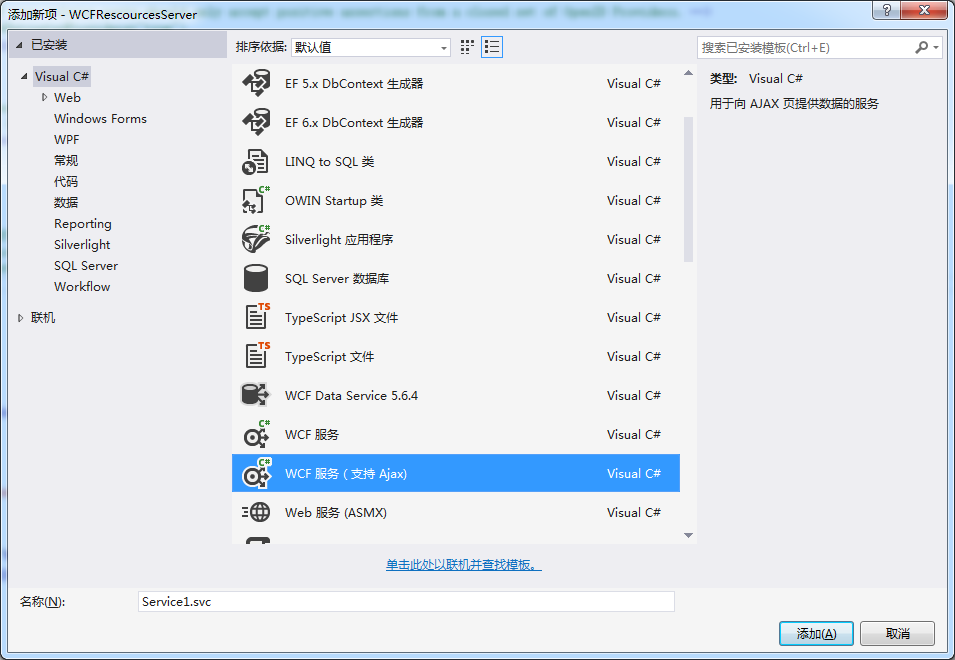
3、添加WCF服务,为了方便,我们添加支持ajax的wcf服务
4、重写ServiceAuthorizationManager
 using System;

 using System.Collections.Generic;

 using System.IdentityModel.Policy;

 using System.Linq;

 using System.Net.Http;

 using System.Security.Cryptography;

 using System.Security.Principal;

 using System.ServiceModel;

 using System.ServiceModel.Channels;

 using System.ServiceModel.Security;

 using System.ServiceModel.Web;

 using System.Threading;

 using System.Threading.Tasks;

 using System.Web;

 using DotNetOpenAuth.Messaging;

 using DotNetOpenAuth.OAuth2;

 using ProtocolException = System.ServiceModel.ProtocolException;

 namespace WCFRescourcesServer.Code

 {

     public class IdefavAuthorizationManager : ServiceAuthorizationManager

     {

         public IdefavAuthorizationManager()

         {

         }

         protected override bool CheckAccessCore(OperationContext operationContext)

         {

             if (!base.CheckAccessCore(operationContext))

             {

                 return false;

             }

             var httpDetails = operationContext.RequestContext.RequestMessage.Properties[HttpRequestMessageProperty.Name] as HttpRequestMessageProperty;

             var requestUri = operationContext.RequestContext.RequestMessage.Properties.Via;

             return Task.Run(async delegate

             {

                 ProtocolFaultResponseException exception = null;

                 try

                 {

                     var principal = await VerifyOAuth2Async(

                         httpDetails,

                         requestUri,

                         operationContext.IncomingMessageHeaders.Action ?? operationContext.IncomingMessageHeaders.To.AbsolutePath);

                     if (principal != null)

                     {

                         var policy = new OAuthPrincipalAuthorizationPolicy(principal);

                         var policies = new List<IAuthorizationPolicy> { policy };

                         var securityContext = new ServiceSecurityContext(policies.AsReadOnly());

                         if (operationContext.IncomingMessageProperties.Security != null)

                         {

                             operationContext.IncomingMessageProperties.Security.ServiceSecurityContext = securityContext;

                         }

                         else

                         {

                             operationContext.IncomingMessageProperties.Security = new SecurityMessageProperty

                             {

                                 ServiceSecurityContext = securityContext,

                             };

                         }

                         securityContext.AuthorizationContext.Properties["Identities"] = new List<IIdentity> { principal.Identity, };

                         return true;

                     }

                     else

                     {

                         return false;

                     }

                 }

                 catch (ProtocolFaultResponseException ex)

                 {

                     exception = ex;

                 }

                 catch (ProtocolException ex)

                 {

                 }

                 if (exception != null)

                 {

                     // Return the appropriate unauthorized response to the client.

                     var outgoingResponse = await exception.CreateErrorResponseAsync(CancellationToken.None);

                     if (WebOperationContext.Current != null)

                         this.Respond(WebOperationContext.Current.OutgoingResponse, outgoingResponse);

                 }

                 return false;

             }).GetAwaiter().GetResult();

         }

         private static async Task<IPrincipal> VerifyOAuth2Async(HttpRequestMessageProperty httpDetails, Uri requestUri, params string[] requiredScopes)

         {

             var resourceServer = new ResourceServer(new StandardAccessTokenAnalyzer((RSACryptoServiceProvider)Common.Configuration.SigningCertificate.PublicKey.Key, (RSACryptoServiceProvider)Common.Configuration.EncryptionCertificate.PrivateKey));

             return await resourceServer.GetPrincipalAsync(httpDetails, requestUri, requiredScopes: requiredScopes);

         }

         private void Respond(OutgoingWebResponseContext responseContext, HttpResponseMessage responseMessage)

         {

             responseContext.StatusCode = responseMessage.StatusCode;

             responseContext.SuppressEntityBody = true;

             foreach (var header in responseMessage.Headers)

             {

                 responseContext.Headers[header.Key] = header.Value.First();

             }

         }

     }

 }
5、实现OAuthPrincipalAuthorizationPolicy接口
 namespace OAuthResourceServer.Code {

     using System;

     using System.Collections.Generic;

     using System.IdentityModel.Claims;

     using System.IdentityModel.Policy;

     using System.Linq;

     using System.Security.Principal;

     using System.Web;

     public class OAuthPrincipalAuthorizationPolicy : IAuthorizationPolicy {

         private readonly Guid uniqueId = Guid.NewGuid();

         private readonly IPrincipal principal;

         /// <summary>

         /// Initializes a new instance of the <see cref="OAuthPrincipalAuthorizationPolicy"/> class.

         /// </summary>

         /// <param name="principal">The principal.</param>

         public OAuthPrincipalAuthorizationPolicy(IPrincipal principal) {

             this.principal = principal;

         }

         #region IAuthorizationComponent Members

         /// <summary>

         /// Gets a unique ID for this instance.

         /// </summary>

         public string Id {

             get { return this.uniqueId.ToString(); }

         }

         #endregion

         #region IAuthorizationPolicy Members

         public ClaimSet Issuer {

             get { return ClaimSet.System; }

         }

         public bool Evaluate(EvaluationContext evaluationContext, ref object state) {

             evaluationContext.AddClaimSet(this, new DefaultClaimSet(Claim.CreateNameClaim(this.principal.Identity.Name)));

             evaluationContext.Properties["Principal"] = this.principal;

             return true;

         }

         #endregion

     }

 }
6、配置WCF
<system.serviceModel>

    <bindings>

      <wsHttpBinding>

        <binding name="WSHttpBinding_OpenApi" closeTimeout="00:01:00" openTimeout="00:01:00" receiveTimeout="00:10:00" sendTimeout="00:01:00" bypassProxyOnLocal="false" transactionFlow="false" hostNameComparisonMode="StrongWildcard" maxBufferPoolSize="" maxReceivedMessageSize="" messageEncoding="Text" textEncoding="utf-8" useDefaultWebProxy="true" allowCookies="false">

          <readerQuotas maxDepth="" maxStringContentLength="" maxArrayLength="" maxBytesPerRead="" maxNameTableCharCount="" />

          <reliableSession ordered="true" inactivityTimeout="00:10:00" enabled="false" />

          <security mode="Message">

            <transport clientCredentialType="Windows" proxyCredentialType="None" realm="" />

            <message clientCredentialType="Windows" negotiateServiceCredential="true" algorithmSuite="Default" />

          </security>

        </binding>

      </wsHttpBinding>

    </bindings>

    <behaviors>

      <endpointBehaviors>

        <behavior name="WCFRescourcesServer.OpenApiAspNetAjaxBehavior">

          <enableWebScript />

        </behavior>

        <behavior name="WCFRescourcesServer.Services1Behavior">

        </behavior>

      </endpointBehaviors>

      <serviceBehaviors>

        <behavior name="myS">

          <serviceMetadata httpGetEnabled="true" httpsGetEnabled="true" />

          <serviceDebug includeExceptionDetailInFaults="false" />

          <serviceAuthorization serviceAuthorizationManagerType="WCFRescourcesServer.Code.IdefavAuthorizationManager, WCFRescourcesServer" principalPermissionMode="Custom" />

        </behavior>

      </serviceBehaviors>

    </behaviors>

    <serviceHostingEnvironment aspNetCompatibilityEnabled="true" multipleSiteBindingsEnabled="true" />

    <services>

      <service name="WCFRescourcesServer.Service1" behaviorConfiguration="myS">

        <endpoint address="" behaviorConfiguration="WCFRescourcesServer.Services1Behavior" binding="wsHttpBinding" contract="WCFRescourcesServer.IService1" />

      </service>

    </services>

  </system.serviceModel>
下面这段是关键的一句,配置WCF访问验证
<serviceAuthorization serviceAuthorizationManagerType="WCFRescourcesServer.Code.IdefavAuthorizationManager, WCFRescourcesServer" principalPermissionMode="Custom"/>
二、创建WCFClient访问WCF服务
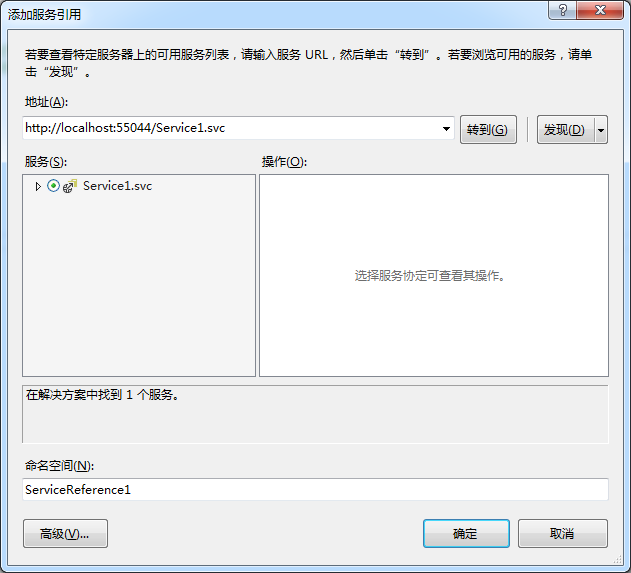
创建一个IdefavOAuth2Client的Asp.net项目然后添加服务器引用
访问WCF代码如下:
 protected async void Button1_Click(object sender, EventArgs e)

         {

             var authServer = new AuthorizationServerDescription()

             {

                 TokenEndpoint = new Uri("http://localhost:53022/OAuth/token "),

                 ProtocolVersion = ProtocolVersion.V20

             };

             //var wcf= new UserAgentClient(authServer, "idefav", "1");

             WebServerClient Client= new WebServerClient(authServer, "idefav", "");

             var code =await Client.GetClientAccessTokenAsync(new string[] { "http://localhost:55044/IService1/DoWork" });

             string token = code.AccessToken;

             Service1Reference.Service1Client service1Client=new Service1Client();

             var httpRequest = (HttpWebRequest)WebRequest.Create(service1Client.Endpoint.Address.Uri);

             ClientBase.AuthorizeRequest(httpRequest,token);

             var httpDetails = new HttpRequestMessageProperty();

             httpDetails.Headers[HttpRequestHeader.Authorization] = httpRequest.Headers[HttpRequestHeader.Authorization];

             using (var scope = new OperationContextScope(service1Client.InnerChannel))

             {

                 if (OperationContext.Current.OutgoingMessageProperties.ContainsKey(HttpRequestMessageProperty.Name))

                 {

                     OperationContext.Current.OutgoingMessageProperties[HttpRequestMessageProperty.Name] = httpDetails;

                 }

                 else

                 {

                     OperationContext.Current.OutgoingMessageProperties.Add(HttpRequestMessageProperty.Name, httpDetails);

                 }

                 Button1.Text= service1Client.DoWork();

             }

         }
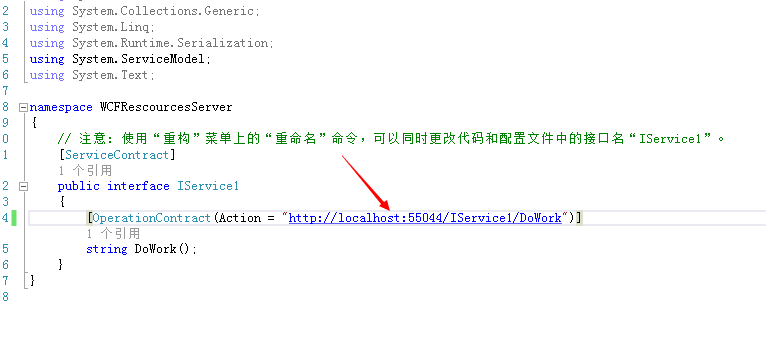
注意:
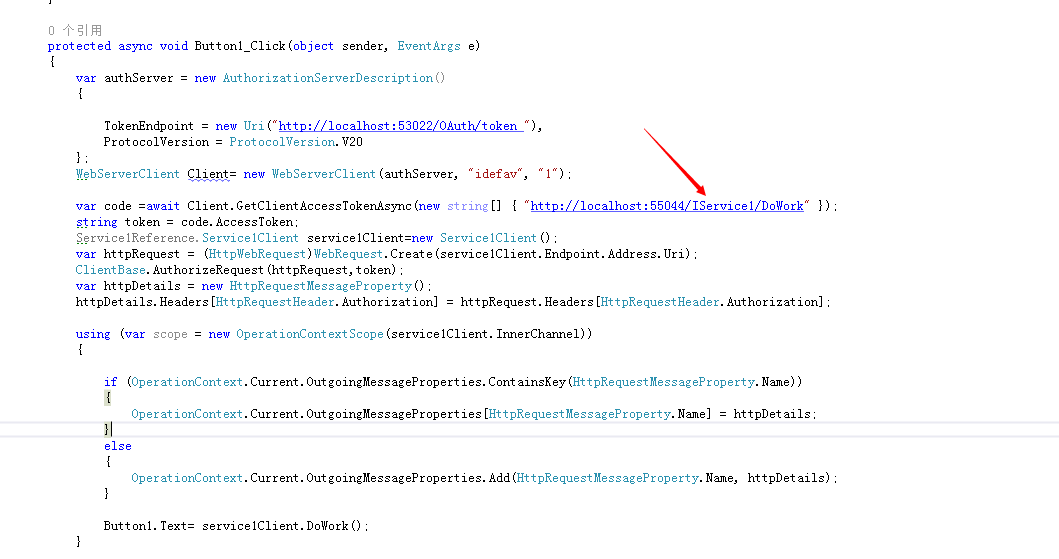
标示的地方是可以从服务引用生成的代码上面看的到

当然这个Scope可以在WCF中配置
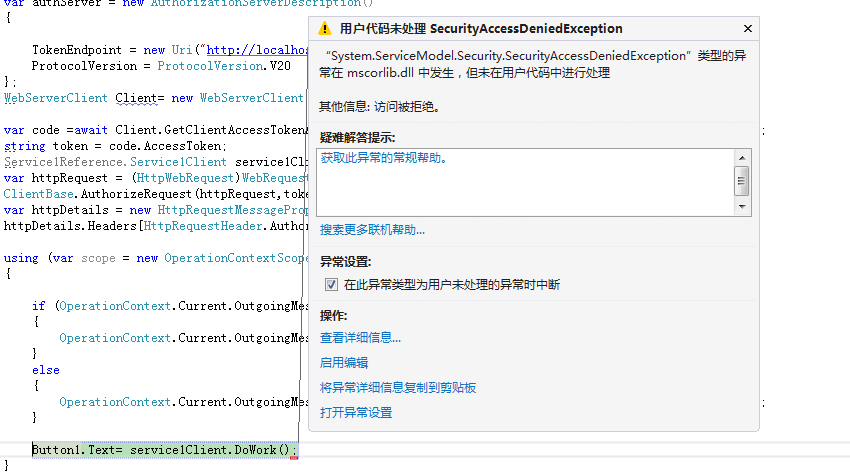
如果这里客户端和资源服务器不一致也会拒绝访问
我们来测试一下,把端口改成55045然后运行项目
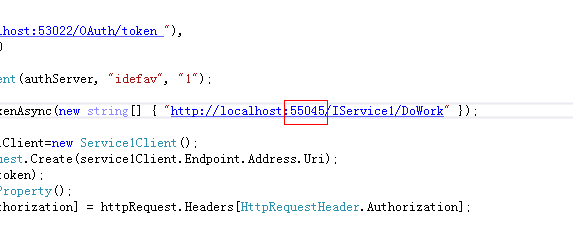
结果:
最后,还有个注意点
DotNetOpenAuth v5.0.0-alpha3 从Nuget上面安装的有Bug,需要去github下载源代码然后编译成dll替换掉Nuget的dll

我已经编译好了一份,百度网盘:
链接:http://pan.baidu.com/s/1jGlMZye 密码:hw2o
这里的是WCF资源服务器以及客户端访问
下篇将会讲WebAPI形式的资源服务器
DotNetOpenAuth实践之WCF资源服务器配置的更多相关文章
- DotNetOpenAuth实践之Webform资源服务器配置
系列目录: DotNetOpenAuth实践系列(源码在这里) 上篇我们讲到WebApi资源服务器配置,这篇我们说一下Webform下的ashx,aspx做的接口如何使用OAuth2认证 一.环境搭建 ...
- DotNetOpenAuth实践之WebApi资源服务器
系列目录: DotNetOpenAuth实践系列(源码在这里) 上篇我们讲到WCF服务作为资源服务器接口提供数据服务,那么这篇我们介绍WebApi作为资源服务器,下面开始: 一.环境搭建 1.新建We ...
- DotNetOpenAuth实践系列
写在前面 本人在研究DotNetOpenAuth的过程中,遇到很多问题,很多坑,花费了很多时间才调通这玩意,现在毫无保留的分享出来,希望博友们可以轻松的上手DotNetOpenAuth,减少爬坑时间. ...
- DotNetOpenAuth实践
DotNetOpenAuth实践之搭建验证服务器 DotNetOpenAuth是OAuth2的.net版本,利用DotNetOpenAuth我们可以轻松的搭建OAuth2验证服务器,不废话,下面我们来 ...
- DotNetOpenAuth实践之搭建验证服务器
系列目录: DotNetOpenAuth实践系列(源码在这里) DotNetOpenAuth是OAuth2的.net版本,利用DotNetOpenAuth我们可以轻松的搭建OAuth2验证服务器,不废 ...
- DotNetOpenAuth实践之Windows签名制作
系列目录: DotNetOpenAuth实践系列(源码在这里) 在上篇中我们搭建了一个简单的认证服务器,里面使用到了Windows签名证书,这一篇则是教大家如何制作Windows签名证书,下面进入正题 ...
- [WCF实践]1.WCF使用net.tcp寄宿到IIS中
一.IIS部分 环境:Windows Server 2008 R2 1.安装WAS,如下图所示: 2.网站net.tcp协议绑定,如下图所示: 3.网站启用net.tcp,如下图所示: 二 ...
- 学习nginx从入门到实践(五) 场景实践之静态资源web服务
一.静态资源web服务 1.1 静态资源 静态资源定义:非服务器动态生成的文件. 1.2 静态资源服务场景-CDN 1.3 文件读取配置 1.3.1 sendfile 配置语法: syntax: se ...
- Kubernetes实践技巧:资源预留
ubernetes 的节点可以按照节点的资源容量进行调度,默认情况下 Pod 能够使用节点全部可用容量.这样就会造成一个问题,因为节点自己通常运行了不少驱动 OS 和 Kubernetes 的系统守护 ...
随机推荐
- PID控制算法的C语言实现九
(1)微分先行PID控制算法 微分先行PID控制的特点是只对输出量yout(k)进行微分,而对给定值rin(k)不进行微分.这样,在改变给定值时,输出不会改变,而被控量的变化通常是比较缓和的.这种输出 ...
- php 三元运算符简洁用法
<?php header('Content-type:text;charset=utf8'); $a = 'aaaa'; $b = $a ?:'; $c = $a ? $a : '; //这个和 ...
- 前端PHP入门-010-内部函数
内部函数,是指在函数内部又声明了一个函数. 注意事项: 内部函数名,不能是已存在的函数名 假设在函数a里面定义了一个内部函数,不能调用两次函数a. <?php function foo() { ...
- 前端PHP入门-009-匿名函数
想想JavaScript当中是否有这个概念? 所谓匿名,就是没有名字. 匿名函数,也就是没有函数名的函数. 匿名函数的第一种用法,直接把赋数赋值给变量,调用变量即为调用函数. 匿名函数的写法比较灵活. ...
- Tensorflow在CIFAR-10构建CNN
使用Tensorflow在CIFAR-10二进制数据集上构建CNN 觉得有用的话,欢迎一起讨论相互学习~Follow Me 参考文献 Tensorflow机器学习实战指南 利用Tensorflow读取 ...
- thinkphp 5 where 组合条件map数组or
if($inviterId>0) { $arr = Db::table("tablename")-> where("pid=$inviterId") ...
- maven 依赖、聚合和继承 (转)
Maven 插件和仓库 Maven 本质上是一个插件框架,它的核心并不执行任何具体的构建任务,仅仅定义了抽象的生命周期,所有这些任务都交给插件来完成的.每个插件都能完成至少一个任务,每个任务即是一个功 ...
- 对拍 bat
:loop maker.exe std.exe my.exe fc std.out my.out goto loop pause
- Flexbox兼容性
.flex-container{ display: -webkit-box; /* Chrome 4+, Safari 3.1, iOS Safari 3.2+ */ display: -moz-bo ...
- ⑤ 设计模式的艺术-05.原型(Prototype)模式
场景 思考一下:克隆技术是怎么样的过程? 克隆羊多利大家还记得吗? javascript语言中的,继承怎么实现?那里面也有prototype,大家还记得吗? 原型模式 通过new产生一个对象需要非常繁 ...