
如何在pyqt中实现亚克力磨砂效果的QLabel
前言
Windows10 在 UWP 应用中支持亚克力画刷,可以在部件的底部绘制亚克力效果的背景图。下面我们使用 QLabel 来模拟这个磨砂过程。
实现方法
MSDN 文档中介绍了亚克力材料的配方,包括:高斯模糊、亮度混合、色调混合和噪声纹理。
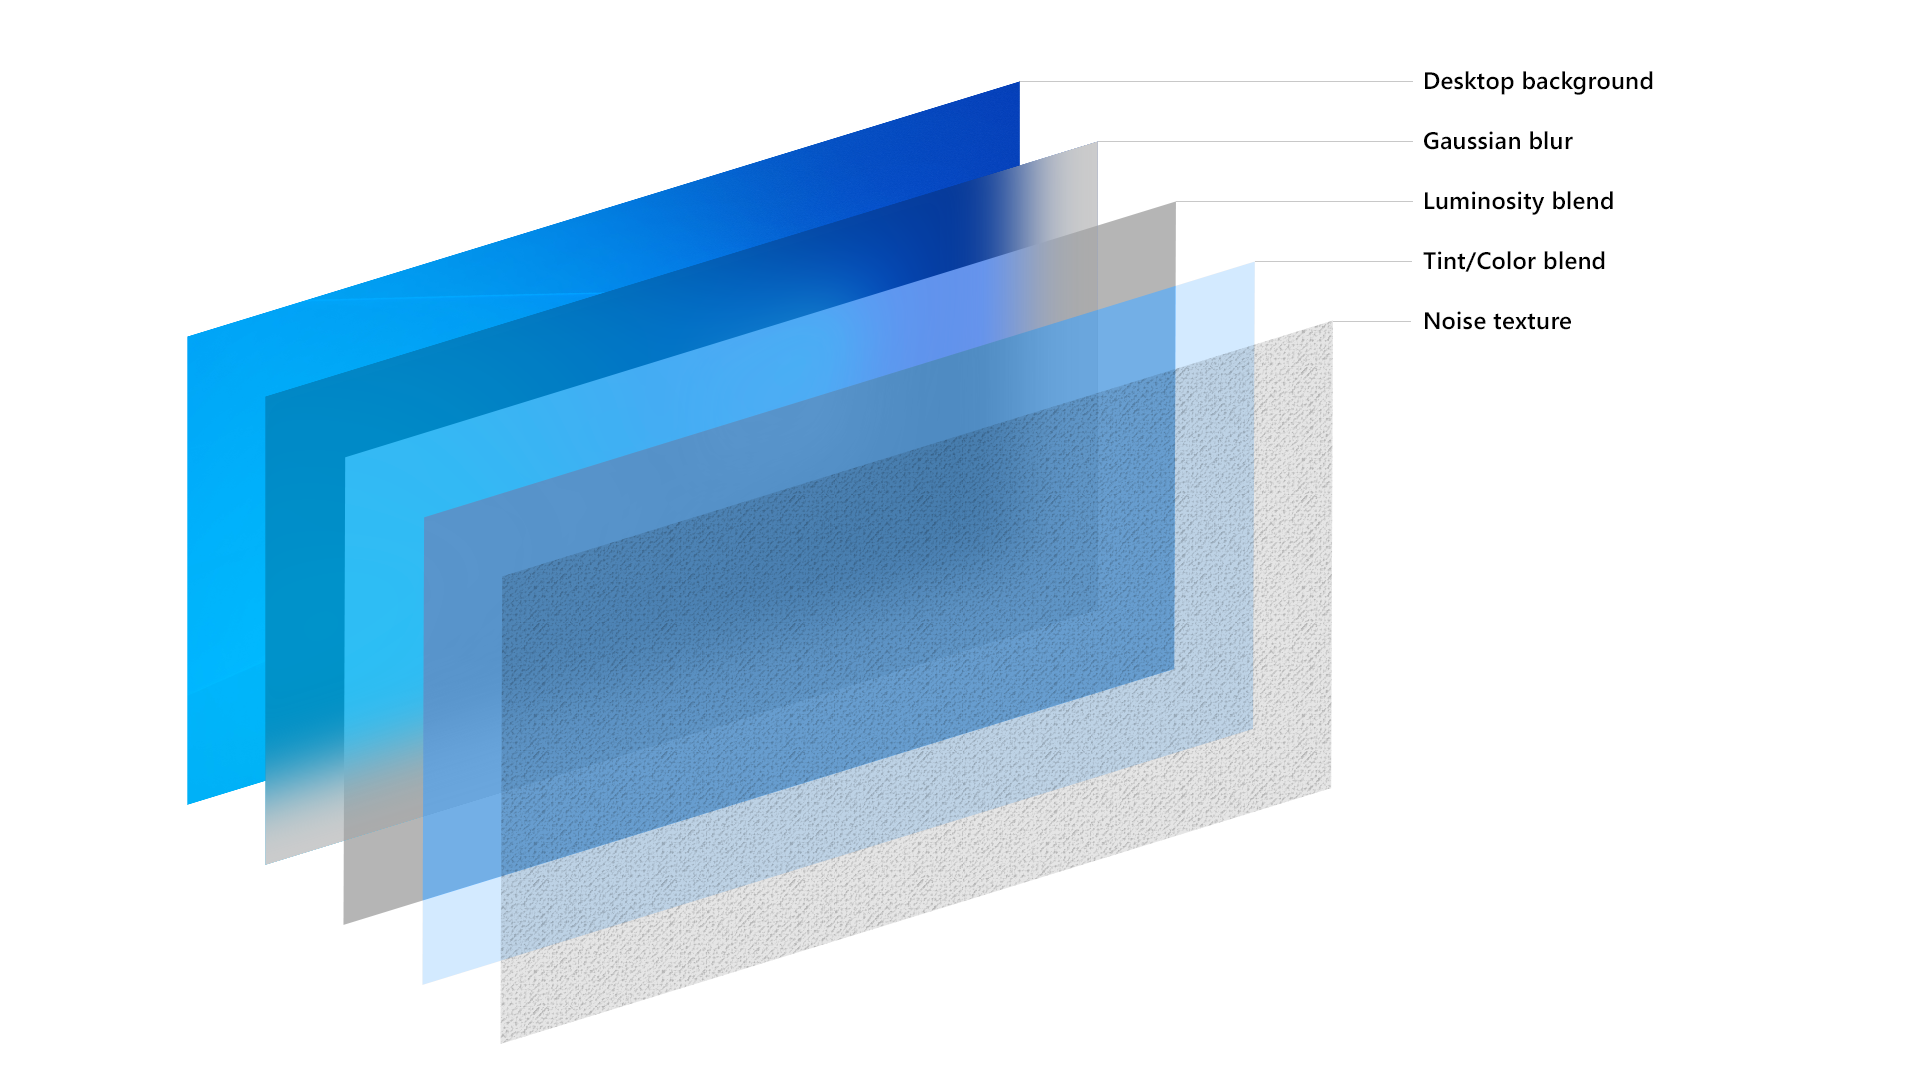
高斯模糊
我们先来实现高斯模糊的效果,使用 scipy 可以很轻松的实现这个过程:
# coding:utf-8

import numpy as np

from PIL import Image

from PyQt5.QtGui import QPixmap

from scipy.ndimage.filters import gaussian_filter

def gaussianBlur(imagePath: str, blurRadius=18, brightFactor=1, blurPicSize: tuple = None) -> np.ndarray:

    """ 对图片进行高斯模糊处理

    Parameters

    ----------

    imagePath: str

        图片路径

    blurRadius: int

        模糊半径

    brightFactor:float

        亮度缩放因子

    blurPicSize: tuple

        高斯模糊前将图片缩放到指定大小,可以加快模糊速度

    Returns

    -------

    image: `~np.ndarray` of shape `(w, h, c)`

        高斯模糊后的图像

    """

    if not imagePath.startswith(':'):

        image = Image.open(imagePath)

    else:

        image = Image.fromqpixmap(QPixmap(imagePath))

    if blurPicSize:

        # 调整图片尺寸,减小计算量,还能增加额外的模糊

        w, h = image.size

        ratio = min(blurPicSize[0] / w, blurPicSize[1] / h)

        w_, h_ = w * ratio, h * ratio

        if w_ < w:

            image = image.resize((int(w_), int(h_)), Image.ANTIALIAS)

    image = np.array(image)

    # 处理图像是灰度图的情况

    if len(image.shape) == 2:

        image = np.stack([image, image, image], axis=-1)

    # 对每一个颜色通道分别磨砂

    for i in range(3):

        image[:, :, i] = gaussian_filter(

            image[:, :, i], blurRadius) * brightFactor

    return image
亚克力纹理
接下来在 QLabel 上面绘制出亮度混合、色调混合和噪声纹理,一般色调混合使用的颜色是图像的主题色,可以用 colorthief 库提取,这里就不赘述了:
class AcrylicTextureLabel(QLabel):

    """ 亚克力纹理标签 """

    def __init__(self, tintColor: QColor, luminosityColor: QColor, noiseOpacity=0.03, parent=None):

        """

        Parameters

        ----------

        tintColor: QColor

            RGB 主色调

        luminosityColor: QColor

            亮度层颜色

        noiseOpacity: float

            噪声层透明度

        parent:

            父级窗口

        """

        super().__init__(parent=parent)

        self.tintColor = QColor(tintColor)

        self.luminosityColor = QColor(luminosityColor)

        self.noiseOpacity = noiseOpacity

        self.noiseImage = QImage('resource/noise.png')

        self.setAttribute(Qt.WA_TranslucentBackground)

    def setTintColor(self, color: QColor):

        """ 设置主色调 """

        self.tintColor = color

        self.update()

    def paintEvent(self, e):

        """ 绘制亚克力纹理 """

        acrylicTexture = QImage(64, 64, QImage.Format_ARGB32_Premultiplied)

        # 绘制亮度层

        acrylicTexture.fill(self.luminosityColor)

        # 绘制主色调

        painter = QPainter(acrylicTexture)

        painter.fillRect(acrylicTexture.rect(), self.tintColor)

        # 绘制噪声

        painter.setOpacity(self.noiseOpacity)

        painter.drawImage(acrylicTexture.rect(), self.noiseImage)

        acrylicBrush = QBrush(acrylicTexture)

        painter = QPainter(self)

        painter.fillRect(self.rect(), acrylicBrush)
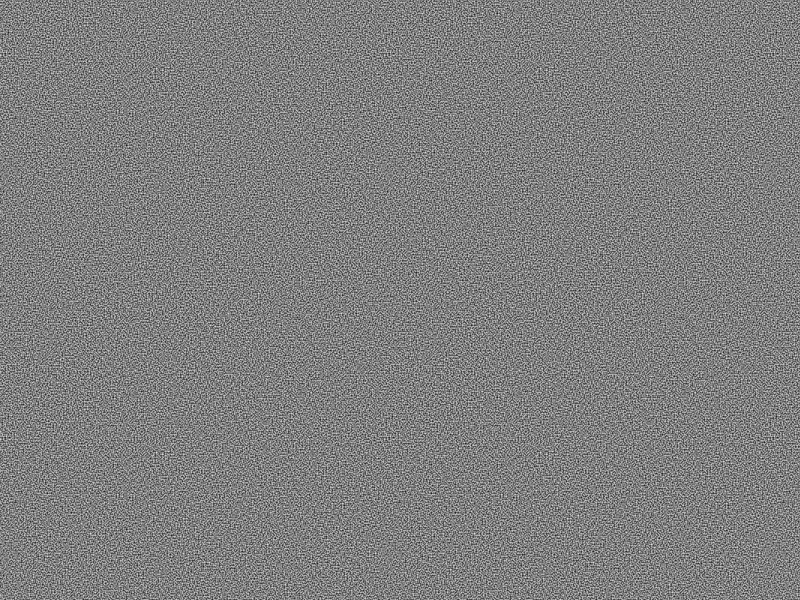
用到的噪声图像如下图所示:
亚克力标签
最后在 QLabel 上叠加磨砂图像和亚克力纹理,可以通过 Image.toqpixmap() 将 Image 转换为 QPixmap:
class AcrylicLabel(QLabel):

    """ 亚克力标签 """

    def __init__(self, blurRadius: int, tintColor: QColor, luminosityColor=QColor(255, 255, 255, 0),

                 maxBlurSize: tuple = None, parent=None):

        """

        Parameters

        ----------

        blurRadius: int

            磨砂半径

        tintColor: QColor

            主色调

        luminosityColor: QColor

            亮度层颜色

        maxBlurSize: tuple

            最大磨砂尺寸,越小磨砂速度越快

        parent:

            父级窗口

        """

        super().__init__(parent=parent)

        self.imagePath = ''

        self.blurPixmap = QPixmap()

        self.blurRadius = blurRadius

        self.maxBlurSize = maxBlurSize

        self.acrylicTextureLabel = AcrylicTextureLabel(

            tintColor, luminosityColor, parent=self)

    def setImage(self, imagePath: str):

        """ 设置图片 """

        if imagePath == self.imagePath:

            return

        self.imagePath = imagePath

        image = Image.fromarray(gaussianBlur(

            imagePath, self.blurRadius, 0.85, self.maxBlurSize))

        self.blurPixmap = image.toqpixmap()  # type:QPixmap

        self.setPixmap(self.blurPixmap)

        self.adjustSize()

    def setTintColor(self, color: QColor):

        """ 设置主色调 """

        self.acrylicTextureLabel.setTintColor(color)

    def resizeEvent(self, e):

        super().resizeEvent(e)

        self.acrylicTextureLabel.resize(self.size())

        self.setPixmap(self.blurPixmap.scaled(

            self.size(), Qt.KeepAspectRatioByExpanding, Qt.SmoothTransformation))
测试
下面是测试用的埃罗芒阿老师:

代码如下:
# coding:utf-8

import sys

from PyQt5.QtGui import QColor

from PyQt5.QtWidgets import QApplication

from acrylic import AcrylicLabel

app = QApplication(sys.argv)

w = AcrylicLabel(20, QColor(105, 114, 168, 102))

w.setImage('resource/ClariS_ヒトリゴト (アニメ盤).jpg')

w.show()

app.exec_()
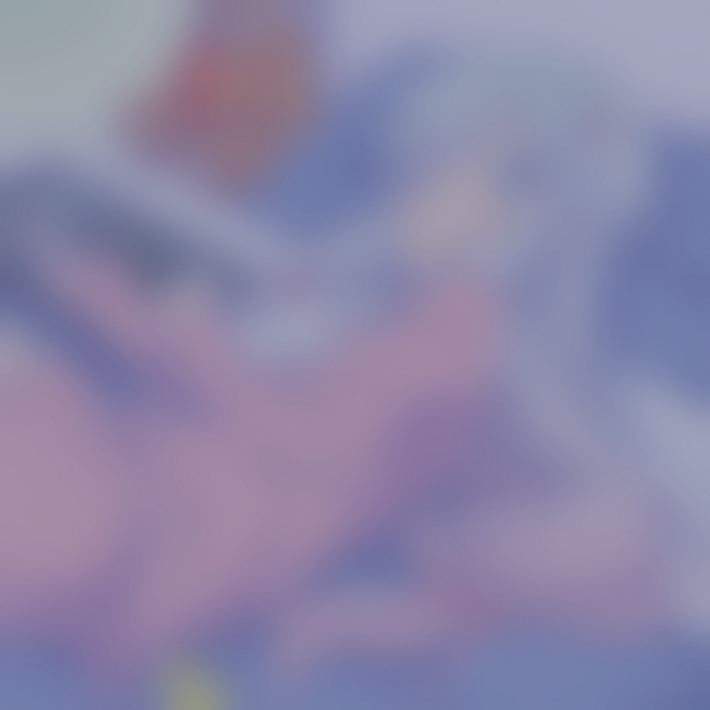
结果如下:
如何在pyqt中实现亚克力磨砂效果的QLabel的更多相关文章
- 如何在pyqt中实现窗口磨砂效果
磨砂效果的实现思路 这两周一直在思考怎么在pyqt上实现窗口磨砂效果,网上搜了一圈,全都是 C++ 的实现方法.正好今天查python的官方文档的时候看到了 ctypes 里面的 HWND,想想倒不如 ...
- 如何在pyqt中实现win10亚克力效果
亚克力效果的实现思路 上一篇博客<如何在pyqt中实现窗口磨砂效果> 中实现了win7中的Aero效果,但是和win10的亚克力效果相比,Aero还是差了点内味.所以今天早上又在网上搜了一 ...
- 如何在pyqt中通过调用 SetWindowCompositionAttribute 实现Win10亚克力效果
亚克力效果 在<如何在pyqt中实现窗口磨砂效果>和<如何在pyqt中实现win10亚克力效果>中,我们调用C++ dll来实现窗口效果,这种方法要求电脑上必须装有MSVC.V ...
- 如何在pyqt中自定义无边框窗口
前言 之前写过很多关于无边框窗口并给窗口添加特效的博客,按照时间线罗列如下: 如何在pyqt中实现窗口磨砂效果 如何在pyqt中实现win10亚克力效果 如何在pyqt中通过调用SetWindowCo ...
- 如何在pyqt中实现带动画的动态QMenu
弹出菜单的视觉效果 QLineEdit 原生的菜单弹出效果十分生硬,而且样式很丑.所以照着Groove中单行输入框弹出菜单的样式和动画效果写了一个可以实现动态变化Item的弹出菜单,根据剪贴板的内容是 ...
- 如何在pyqt中在实现无边框窗口的同时保留Windows窗口动画效果(一)
无边框窗体的实现思路 在pyqt中只要 self.setWindowFlags(Qt.FramelessWindowHint) 就可以实现边框的去除,但是没了标题栏也意味着窗口大小无法改变.窗口无法拖 ...
- 如何在pyqt中给无边框窗口添加DWM环绕阴影
前言 在之前的博客<如何在pyqt中通过调用SetWindowCompositionAttribute实现Win10亚克力效果>中,我们实现了窗口的亚克力效果,同时也用SetWindowC ...
- 如何在 pyqt 中捕获并处理 Alt+F4 快捷键
前言 如果在 Windows 系统的任意一个窗口中按下 Alt+F4,默认行为是关闭窗口(或者最小化到托盘).对于使用了亚克力效果的窗口,使用 Alt+F4 最小化到托盘,再次弹出窗口的时候可能出现亚 ...
- 如何在pyqt中使用 QGraphicsView 实现图片查看器
前言 在 PyQt 中可以使用很多方式实现照片查看器,最朴素的做法就是重写 QWidget 的 paintEvent().mouseMoveEvent 等事件,但是如果要在图像上多添加一些形状,那么在 ...
随机推荐
- codevs 1300:文件排版(DP)
题目描述 写电子邮件是有趣的,但不幸的是经常写不好看,主要是因为所有的行不一样长,你的上司想要发排版精美的电子邮件,你的任务是为他编写一个电子邮件排版程序. 完成这个任务最简单的办法是在太短的行中的单 ...
- CSS实现鼠标移入时图片的放大效果以及缓慢过渡
transform:scale()可以实现按比例放大或者缩小功能. transition可以设置动画执行的时间,实现缓慢或者快速的执行动画,效果图如下: 源码: <!DOCTYPE html&g ...
- [android]打印C++的输出信息在安卓logcat上调试
#include <android/log.h> //宏定义全局函数:C++打印log到android-debug模式下帮助调试(勿删) //调用方式:slogd("test n ...
- HTML5 纯CSS3实现div按照顺序出入效果
效果: 源代码: <!DOCTYPE html> <html> <head> <meta charset="UTF-8"> < ...
- 【白话科普】10s 从零看懂 H5
最近大家有没有发现,很多微信公众号的动态内容变多了?我们常常可以看到,公众号内容中有很多动态图片甚至动画,还可以通过手指滑动切换页面,或者有一些小的点击互动. 这种看起来有点高级的小作品,其实是都是& ...
- linux 之 nginx安装步骤
配置规划 用户 lzh 用户目录 /lzh 下载 进入官网下载nginx http://nginx.org/download/ 安装 解压 cd /lzh/app tar -zxvf nginx-1 ...
- Flask_generate_password_hash的加盐哈希加密算法与check_password_hash的校验
密码加密简介 密码存储的主要形式: 明文存储:肉眼就可以识别,没有任何安全性. 加密存储:通过一定的变换形式,使得密码原文不易被识别. 密码加密的几类方式: 明文转码加密算法:BASE64, 7BIT ...
- Nginx 加载conf.d (内文件***.conf)
include /usr/local/nginx/conf/conf.d/*.conf;
- HTTP 408 问题 - Koa body parser
环境描述: 1.nodejs 作为 api 服务器,转发请求给 nginx 2.用 curl 测试,返回 408 找了很久没有找到原因,发现了一篇文章: https://lujunda.cn/2016 ...
- Hadoop学习-块、网络拓扑、副本策略、机架感知
原文链接:https://www.toutiao.com/i6627682068203586062/ 一.我们先看一个大数据的实例 进到官网 我们进入到里面有个"网站统计" 我们查 ...