学习zabbix(五)
前言
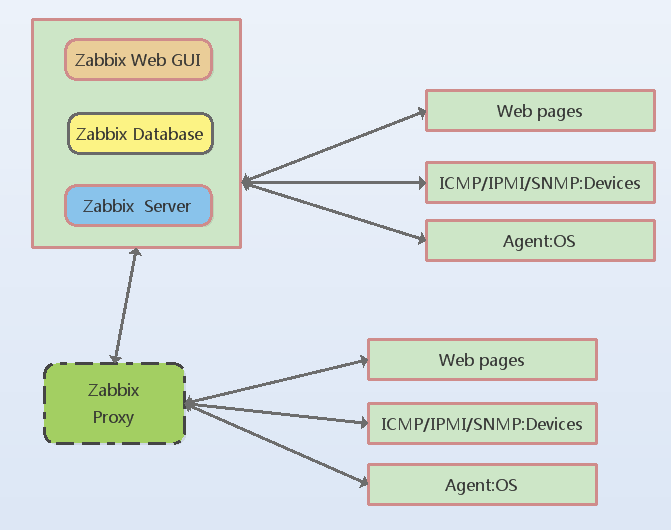
zabbix是一个基于WEB界面的提供分布式系统监视以及网络监视功能的企业级的开源解决方案。
zabbix组件主要分两个: zabbix-server和zabbix-agent。支持的监控协议有ICMP,IPMI,SNMP,HTTP以及zabbix协议(zabbix协议是最常使用的协议用来监控各被监控端)。
收集的数据存放在数据库中,数据库支持mysql,oracle等等。
第三个组件:zabbix web gui这个接口提供web页面来监控和管理各被监控端。
第四个组件:zabbix proxy(实现分布式监控专用组件非必要组件,被监控服务器超过一千以上可以使用此组件。)
本次实验逻辑架构如下
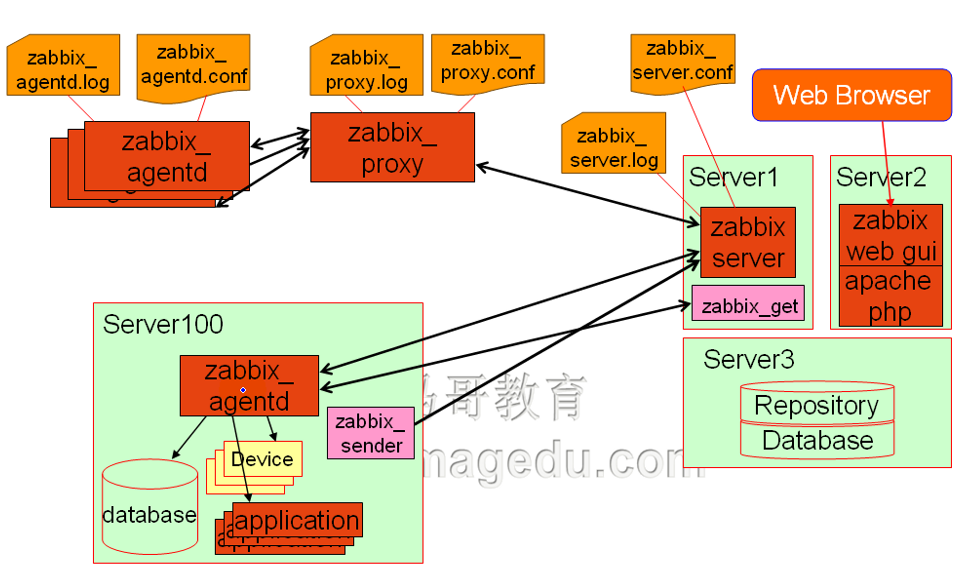
相关组件介绍
zabbix_get进程去客户端收集数据,
zabbix_agentd进程通过监听在一个套接字上接收
zabbix_get的请求,通过zabbix_sender将
数据收集发送给服务器端,数据保存在zabbix数据库中,
zabbix_get这种方法主要用于测试,通过写脚本或远程执行命令的方式。
zabbix server自己自动会周期性的去被监控端收集数据,收集哪些数据在服务器端事先定义。
zabbix server ,zabbix database,zabbix web gui 可以部署在一台服务器上,为了提升性能可以放在不同主机上。
zabbix一些常用术语
host(主机):要监控的网络设备,可由IP或DNS名称指定
host group(主机组):主机的逻辑容器,可以包含主机和模板,但同一个组内的主机和模板不能互相链接;主机组通常在给用户或用户组指派监控权限时使用(大致了解下就可以了)。
item(监控项):这个从名字上可以理解,具体要监控哪些指标由它定义。
trigger(触发器):就是超过了定义的合理范围,这家伙就会报警。
event(事件):这都是触发器产生的。
action(动作):对事件如何应对,比如要执行哪些操作。
escalation(报警升级):如果在定义的5分钟没反应,从warning级别升到high级别,就是要提醒别人要尽快处理。
media(媒介):发送报警的手段和通道,如Email。
remote command(远程命令):预定义的命令,可在被监控主机处于某个特定条件下时自动执行。
template(模板):用于快速定义被监控主机的预设条目集合,通常包含了item、trigger、graph、screen、application以及low-level discovery rule;模板可以直接链接至单个主机。(这个概念不理解不过没关系的,只要具体会怎么操作就可以了)
application(应用):一组item的集合。
以上术语的关系可以用下图表示(大致明白就行):
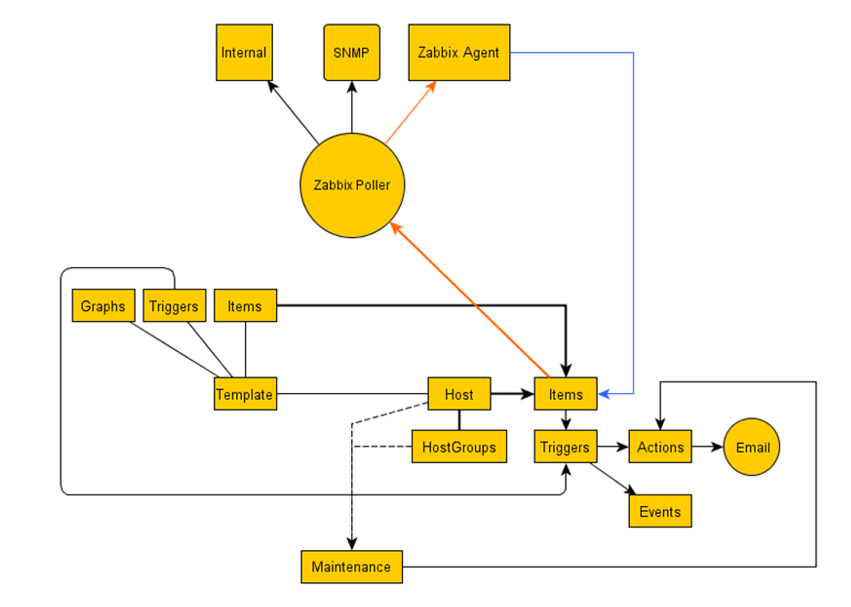
上图中的poller这个进程就是去各客户端获取数据的。
zabbix产生的数据主要由四部分组成:
配置数据(忽略)
历史数据:50bytes
历史趋势数据: 128bytes
事件数据:130bytes
历史数据:采样生成的数据
历史趋势数据:每小时的最大值、最小值、平均值、统计
通过对以上数据的计算,可以得出我们需要一个多大的zabbix数据库,来定制磁盘硬件。
具体算法:
假设有60000个监控项,那每秒中处理的数据就有60000/60=1000条
历史数据大小=天数X每秒钟处理的数据量X24X3600X50Bytes
趋势数据:
每一个趋势128Bytes,
大小=天数X监控项X24X128Bytes
事件数据:
每个占据130Bytes
大小:天数X86400X130(假设每秒中产生一个事件)
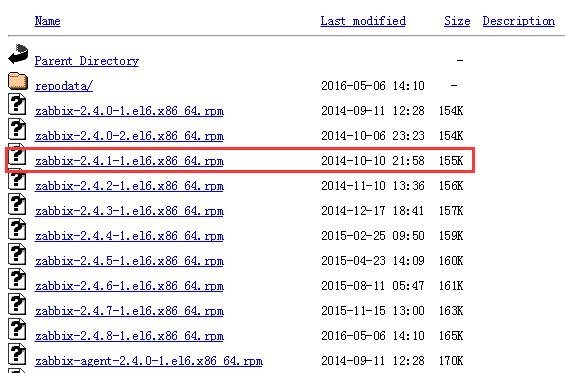
本次实验的zabbix软件版本
装下面这个版本,红框内选中的
http://repo.zabbix.com/zabbix/2.4/rhel/6/x86_64/
实验所需机器3台,系统环境如下
3台机器,一台做zabbix-server,一台作为zabbix-agent,一台作为zabbix-proxy
|
1
2
3
4
5
|
[root@linux-node1 ~]# uname -rm2.6.32-504.el6.x86_64 x86_64[root@linux-node1 ~]# cat /etc/redhat-release CentOS release 6.6 (Final)[root@linux-node1 ~]# |
安装zabbix相关包
复制链接地址,下载wget
noarch表明与处理器无关,src是源码包需要编译
执行如下命令,在Zabbix Server和Zabbix Agent上
|
1
2
3
4
|
mkdir /tools -pcd /tools/wget http://repo.zabbix.com/zabbix/2.4/rhel/6/x86_64/zabbix-release-2.4-1.el6.noarch.rpmrpm -ivh zabbix-release-2.4-1.el6.noarch.rpm |
查看这个包安装了哪些
|
1
2
3
4
5
6
|
[root@linux-node1 tools]# rpm -ql zabbix-release/etc/pki/rpm-gpg/RPM-GPG-KEY-ZABBIX/etc/yum.repos.d/zabbix.repo/usr/share/doc/zabbix-release-2.4/usr/share/doc/zabbix-release-2.4/GPL[root@linux-node1 tools]# |
它创建了一个zabbix.repo文件
|
1
2
3
4
5
6
7
8
9
10
11
12
13
14
15
|
[root@linux-node1 tools]# cat /etc/yum.repos.d/zabbix.repo[zabbix]name=Zabbix Official Repository - $basearchbaseurl=http://repo.zabbix.com/zabbix/2.4/rhel/6/$basearch/enabled=1gpgcheck=1gpgkey=file:///etc/pki/rpm-gpg/RPM-GPG-KEY-ZABBIX[zabbix-non-supported]name=Zabbix Official Repository non-supported - $basearch baseurl=http://repo.zabbix.com/non-supported/rhel/6/$basearch/enabled=1gpgkey=file:///etc/pki/rpm-gpg/RPM-GPG-KEY-ZABBIXgpgcheck=1[root@linux-node1 tools]# |
Zabbix Server服务器安装如下包
|
1
2
3
4
5
6
7
8
9
10
11
12
|
[root@linux-node1 tools]# yum install zabbix zabbix-server zabbix-web zabbix-server-mysql zabbix-web-mysql zabbix-agent -yLoaded plugins: fastestmirror, refresh-packagekit, securitySetting up Install ProcessLoading mirror speeds from cached hostfilePackage zabbix-2.4.8-1.el6.x86_64 already installed and latest versionPackage zabbix-server-2.4.8-1.el6.x86_64 already installed and latest versionPackage zabbix-web-2.4.8-1.el6.noarch already installed and latest versionPackage zabbix-server-mysql-2.4.8-1.el6.x86_64 already installed and latest versionPackage zabbix-web-mysql-2.4.8-1.el6.noarch already installed and latest versionPackage zabbix-agent-2.4.8-1.el6.x86_64 already installed and latest versionNothing to do[root@linux-node1 tools]# |
由于Zabbix Server把数据存到mysql里,因此还需要安装mysql相关包
|
1
2
3
4
5
6
7
8
|
[root@linux-node1 tools]# yum install -y mysql-server mysqlLoaded plugins: fastestmirror, refresh-packagekit, securitySetting up Install ProcessLoading mirror speeds from cached hostfilePackage mysql-server-5.1.73-8.el6_8.x86_64 already installed and latest versionPackage mysql-5.1.73-8.el6_8.x86_64 already installed and latest versionNothing to do[root@linux-node1 tools]# |
启动mysqld
|
1
2
3
|
[root@linux-node1 tools]# /etc/init.d/mysqld startStarting mysqld: [ OK ][root@linux-node1 tools]# |
复制配置文件替换默认的
|
1
2
3
|
[root@linux-node1 tools]# cp /usr/share/mysql/my-medium.cnf /etc/my.cnf cp: overwrite `/etc/my.cnf'? y[root@linux-node1 tools]# |
在[mysqld]模块最后加入字符集的相关参数
|
1
2
3
|
character-set-server = utf8init-connect = 'SET NAMES utf8'collation-server = utf8_general_ci |
加入之后如下
|
1
2
3
4
5
6
7
8
9
10
11
12
13
14
15
|
[mysqld]port = 3306socket = /var/lib/mysql/mysql.sockskip-lockingkey_buffer_size = 16Mmax_allowed_packet = 1Mtable_open_cache = 64sort_buffer_size = 512Knet_buffer_length = 8Kread_buffer_size = 256Kread_rnd_buffer_size = 512Kmyisam_sort_buffer_size = 8Mcharacter-set-server = utf8init-connect = 'SET NAMES utf8'collation-server = utf8_general_ci |
重启mysql
|
1
2
3
4
|
[root@linux-node1 tools]# /etc/init.d/mysqld restartStopping mysqld: [ OK ]Starting mysqld: [ OK ][root@linux-node1 tools]# |
登录mysql查看
|
1
2
3
4
5
6
7
8
9
10
11
12
13
14
15
16
17
18
19
20
21
22
23
24
|
[root@linux-node1 tools]# mysqlWelcome to the MySQL monitor. Commands end with ; or \g.Your MySQL connection id is 3Server version: 5.1.73-log Source distributionCopyright (c) 2000, 2013, Oracle and/or its affiliates. All rights reserved.Oracle is a registered trademark of Oracle Corporation and/or itsaffiliates. Other names may be trademarks of their respectiveowners.Type 'help;' or '\h' for help. Type '\c' to clear the current input statement.mysql> show databases;+--------------------+| Database |+--------------------+| information_schema || mysql || test |+--------------------+3 rows in set (0.00 sec)mysql> |
官网有关于Zabbix建库相关脚本
|
1
2
3
4
5
6
7
8
9
|
MySQLshell> mysql -uroot -p<password>mysql> create database zabbix character set utf8 collate utf8_bin;mysql> grant all privileges on zabbix.* to zabbix@localhost identified by '<password>';mysql> quit;shell> mysql -uzabbix -p<password> zabbix < database/mysql/schema.sql# stop here if you are creating database for Zabbix proxyshell> mysql -uzabbix -p<password> zabbix < database/mysql/images.sqlshell> mysql -uzabbix -p<password> zabbix < database/mysql/data.sql |
建库和授权用户操作如下
|
1
2
3
4
5
6
7
8
9
|
mysql> create database zabbix character set utf8 collate utf8_bin;Query OK, 1 row affected (0.00 sec)mysql> grant all privileges on zabbix.* to zabbix@localhost identified by 'zabbix';Query OK, 0 rows affected (0.00 sec)mysql> exitBye[root@linux-node1 tools]# |
导入脚本操作如下
|
1
2
3
4
5
6
7
8
9
|
[root@linux-node1 tools]# cd /usr/share/doc/zabbix-server-mysql-2.4.8/create/data.sql images.sql schema.sql [root@linux-node1 tools]# cd /usr/share/doc/zabbix-server-mysql-2.4.8/create/[root@linux-node1 create]# lsdata.sql images.sql schema.sql[root@linux-node1 create]# mysql -uzabbix -pzabbix zabbix <schema.sql [root@linux-node1 create]# mysql -uzabbix -pzabbix zabbix <images.sql [root@linux-node1 create]# mysql -uzabbix -pzabbix zabbix <data.sql [root@linux-node1 create]# |
检查
|
1
2
3
4
5
6
7
8
9
10
11
12
13
14
15
16
17
18
19
20
21
22
23
24
25
26
27
28
29
30
31
32
33
34
35
36
37
38
39
40
41
42
43
44
45
46
47
48
49
50
51
52
53
54
55
56
57
58
59
60
61
62
63
64
65
66
67
68
69
70
71
72
73
74
75
76
77
78
79
80
81
82
83
84
85
86
87
88
89
90
91
92
93
94
95
96
97
98
99
100
101
102
103
104
105
106
107
108
109
110
|
[root@linux-node1 create]# mysql -uzabbix -pzabbix -e 'use zabbix;show tables;'+-----------------------+| Tables_in_zabbix |+-----------------------+| acknowledges || actions || alerts || application_template || applications || auditlog || auditlog_details || autoreg_host || conditions || config || dbversion || dchecks || dhosts || drules || dservices || escalations || events || expressions || functions || globalmacro || globalvars || graph_discovery || graph_theme || graphs || graphs_items || group_discovery || group_prototype || groups || history || history_log || history_str || history_text || history_uint || host_discovery || host_inventory || hostmacro || hosts || hosts_groups || hosts_templates || housekeeper || httpstep || httpstepitem || httptest || httptestitem || icon_map || icon_mapping || ids || images || interface || interface_discovery || item_condition || item_discovery || items || items_applications || maintenances || maintenances_groups || maintenances_hosts || maintenances_windows || mappings || media || media_type || opcommand || opcommand_grp || opcommand_hst || opconditions || operations || opgroup || opmessage || opmessage_grp || opmessage_usr || optemplate || profiles || proxy_autoreg_host || proxy_dhistory || proxy_history || regexps || rights || screens || screens_items || scripts || service_alarms || services || services_links || services_times || sessions || slides || slideshows || sysmap_element_url || sysmap_url || sysmaps || sysmaps_elements || sysmaps_link_triggers || sysmaps_links || timeperiods || trends || trends_uint || trigger_depends || trigger_discovery || triggers || user_history || users || users_groups || usrgrp || valuemaps |+-----------------------+[root@linux-node1 create]# |
配置文件修改
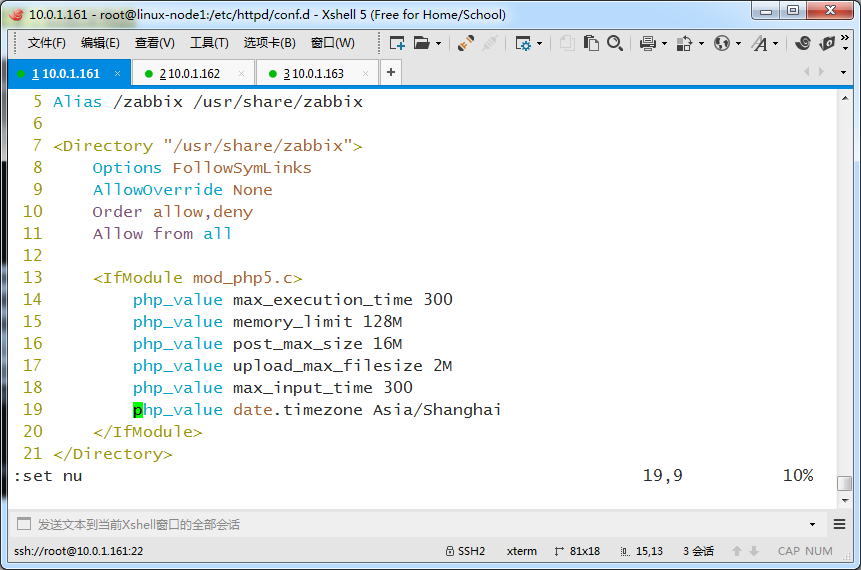
修改apache相关配置
zabbix Server默认用的apache,安装Zabbix Server时,它自动帮我们装好了apache
修改apache配置文件里zabbix.conf文件的时区,并取消注释。这里可以vim修改,也可以采用sed替换
|
1
2
3
4
5
6
7
8
9
|
[root@linux-node1 conf.d]# cd /etc/httpd/conf.d/[root@linux-node1 conf.d]# lsmod_dnssd.conf php.conf README welcome.conf zabbix.conf[root@linux-node1 conf.d]# grep -n timezone zabbix.conf 19: # php_value date.timezone Europe/Riga[root@linux-node1 conf.d]# vim zabbix.conf [root@linux-node1 conf.d]# grep -n timezone zabbix.conf 19: php_value date.timezone Asia/Shanghai[root@linux-node1 conf.d]# |
查看下相关配置
|
1
2
3
4
5
6
7
8
9
10
11
|
[root@linux-node1 conf.d]# head -10 zabbix.conf ## Zabbix monitoring system php web frontend#Alias /zabbix /usr/share/zabbix<Directory "/usr/share/zabbix"> Options FollowSymLinks AllowOverride None Order allow,deny |
看看都有哪些东西
到这个目录下ls一下,看到都是php代码。zabbix前端都是php写的
它的server端是c和c++写的
|
1
2
3
4
5
6
7
8
9
10
11
12
13
14
15
16
17
18
19
20
21
22
23
24
25
26
27
28
29
30
|
[root@linux-node1 conf.d]# cd /usr/share/zabbix/[root@linux-node1 zabbix]# lsacknow.php chart.php index.php report5.phpactionconf.php charts.php items.php report6.phpadm.gui.php conf js robots.txtadm.housekeeper.php conf.import.php jsLoader.php screenconf.phpadm.iconmapping.php dashboard.php jsrpc.php screenedit.phpadm.images.php dashconf.php latest.php screens.phpadm.macros.php discoveryconf.php locale scripts_exec.phpadm.other.php discovery.php maintenance.php scripts.phpadm.regexps.php disc_prototypes.php map.php search.phpadm.triggerdisplayoptions.php events.php maps.php services.phpadm.triggerseverities.php fonts media_types.php setup.phpadm.valuemapping.php graphs.php overview.php slideconf.phpadm.workingtime.php history.php popup_bitem.php slides.phpapi_jsonrpc.php host_discovery.php popup_httpstep.php srv_status.phpapplications.php hostgroups.php popup_media.php stylesaudio hostinventoriesoverview.php popup_period.php sysmap.phpauditacts.php hostinventories.php popup.php sysmaps.phpauditlogs.php host_prototypes.php popup_right.php templates.phpauthentication.php host_screen.php popup_trexpr.php tr_comments.phpbrowserwarning.php hosts.php popup_usrgrp.php tr_events.phpchart2.php httpconf.php profile.php trigger_prototypes.phpchart3.php httpdetails.php proxies.php triggers.phpchart4.php httpmon.php queue.php tr_logform.phpchart5.php image.php report1.php tr_status.phpchart6.php images report2.php tr_testexpr.phpchart7.php imgstore.php report3.php usergrps.phpchart_bar.php include report4.php users.php[root@linux-node1 zabbix]# |
|
1
2
3
|
[root@linux-node1 conf.d]# /etc/init.d/httpd startStarting httpd: [ OK ][root@linux-node1 conf.d]# |
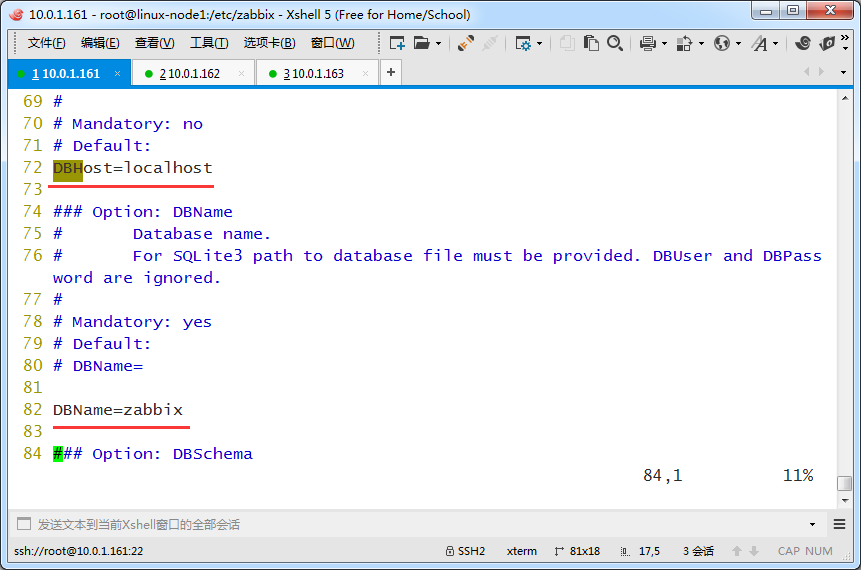
修改Zabbix Server默认配置文件
因为zabbix存mysql数据,所以要改下server端的配置文件,server端和mysql打交道
|
1
2
3
4
|
[root@linux-node1 conf.d]# cd /etc/zabbix/[root@linux-node1 zabbix]# lsweb zabbix_agentd.conf zabbix_agentd.d zabbix_server.conf[root@linux-node1 zabbix]# vim zabbix_server.conf |
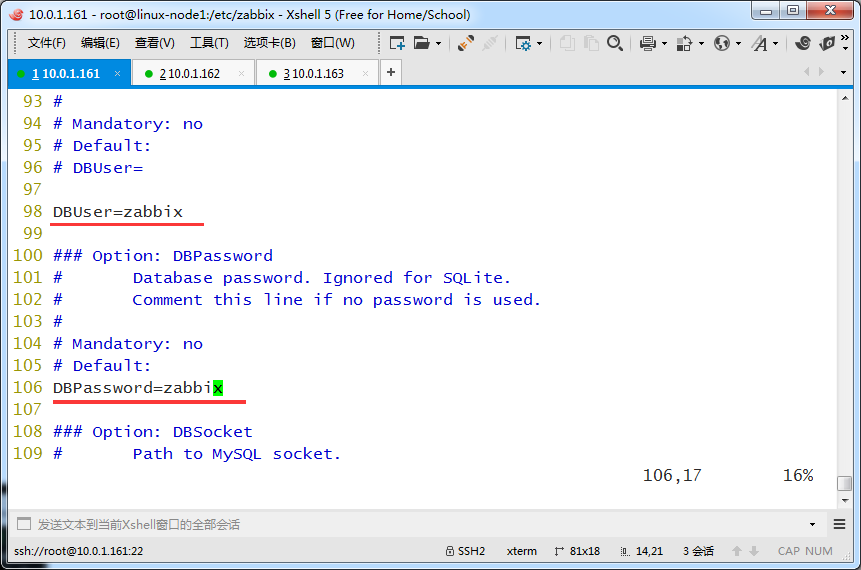
修改DBHost 和DBName
用户名和密码
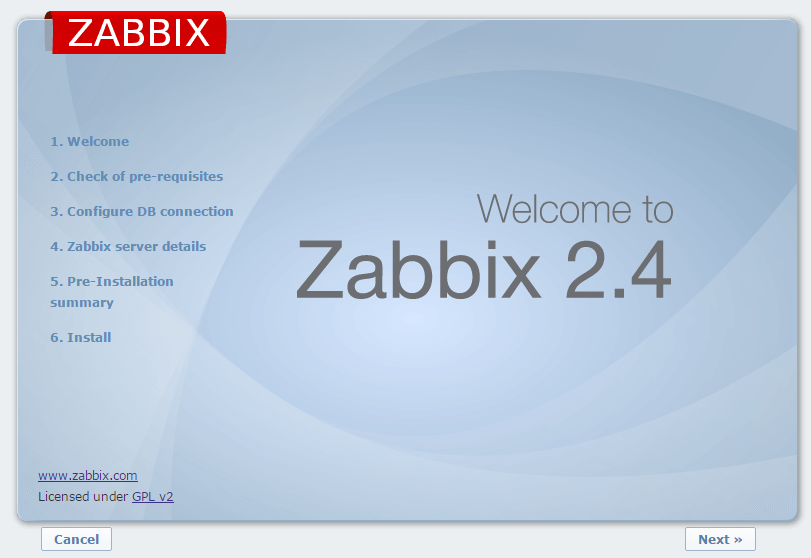
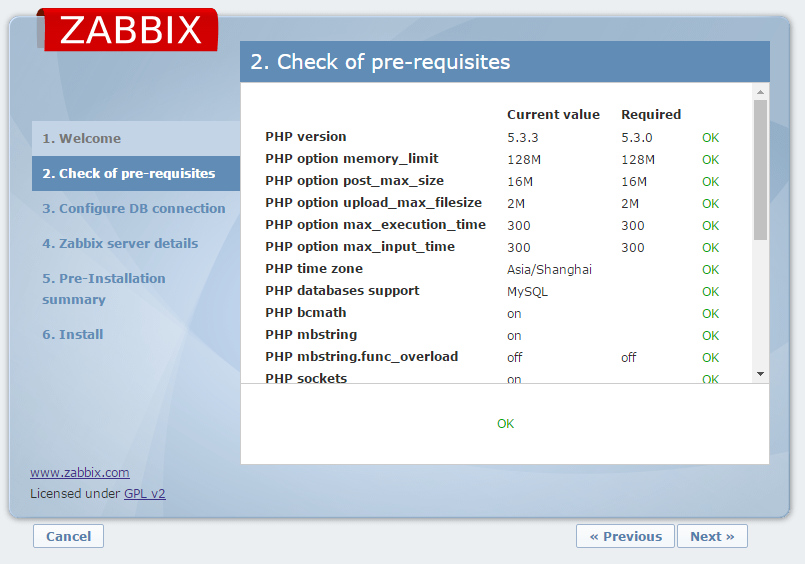
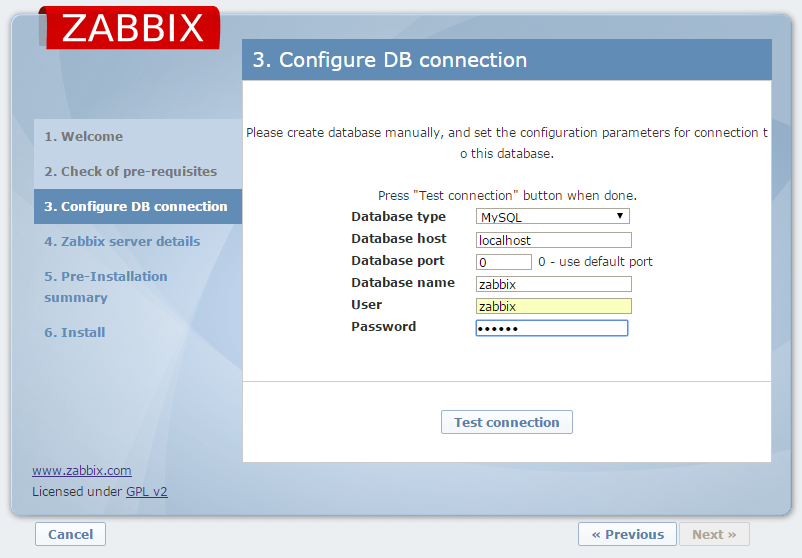
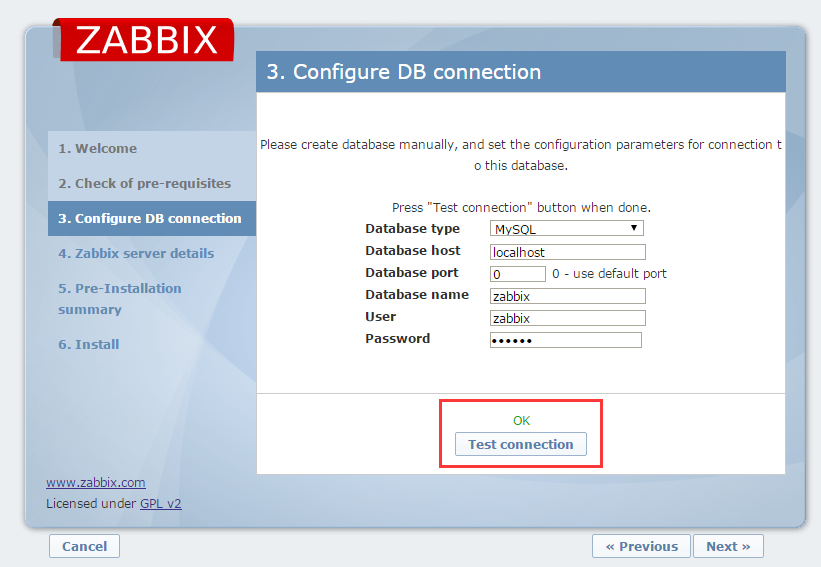
通过浏览器安装配置zabbix-server
浏览器里输入如下链接
http://10.0.1.161/zabbix
看到如下界面进行安装
给它起个名字zabbix,这是是可选的。默认端口就是10051

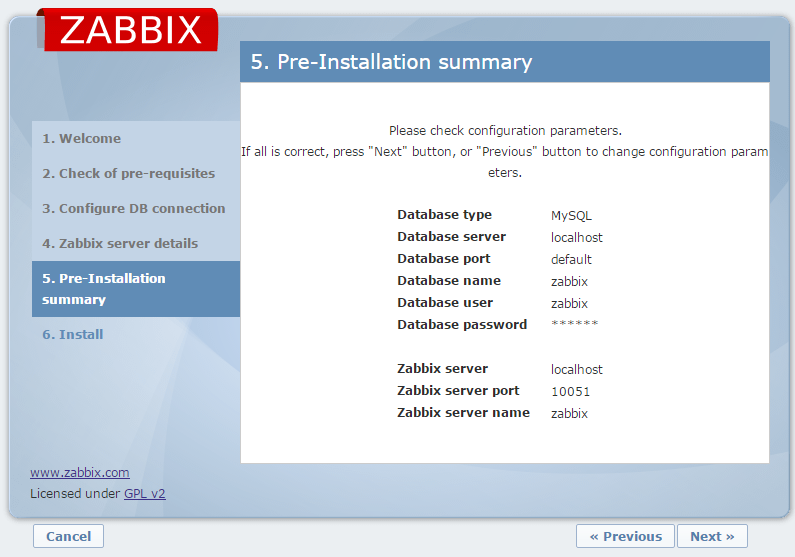
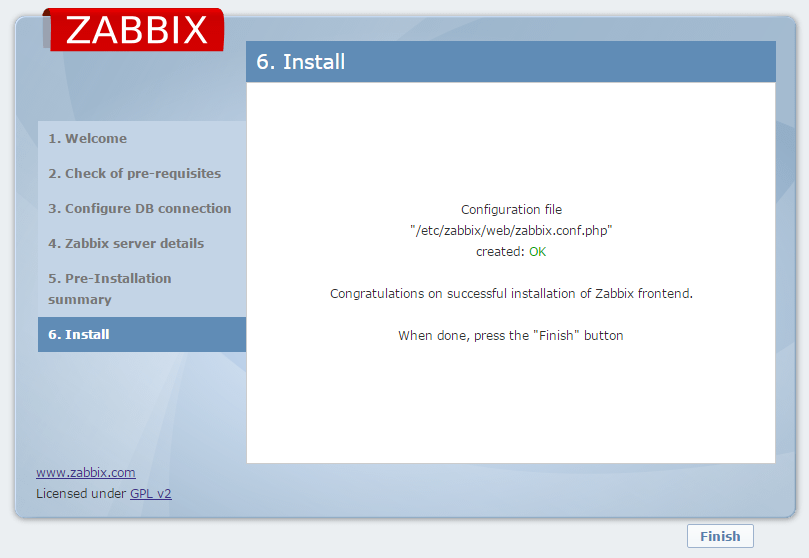
点击Finish自动跳转到了登录界面

默认的用户名是Admin,密码是zabbix

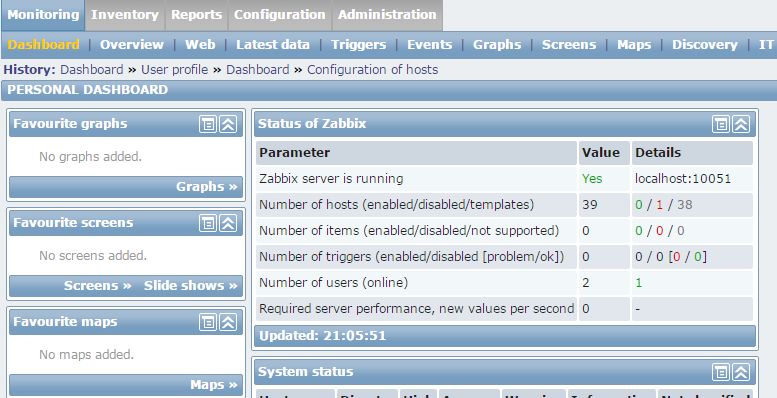
登录成功,第一件事就是改密码
zabbix server 还没运行,上面提示说明这个前端页面不仅仅访问数据库,还访问zabbix server
|
1
2
3
|
[root@linux-node1 zabbix]# /etc/init.d/zabbix-server startStarting Zabbix server: [ OK ][root@linux-node1 zabbix]# |
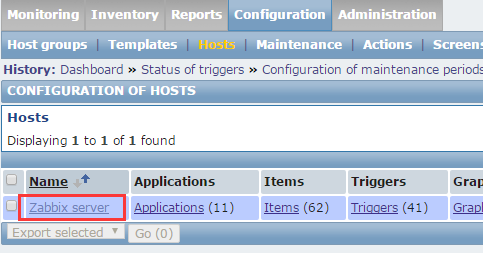
Zabbix Server本身也要监控自己
接下来运行一个agent端,先修改agent配置文件
vim /etc/zabbix/zabbix_agentd.conf
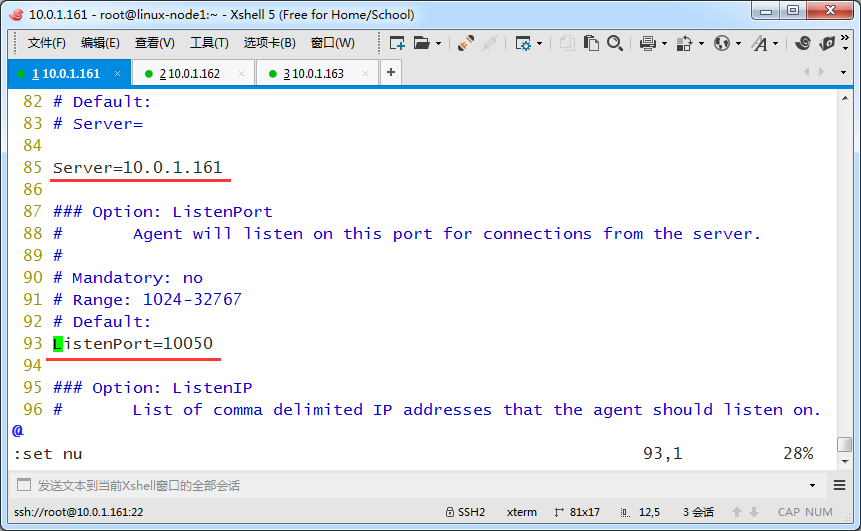
启动agent
|
1
2
3
4
|
[root@linux-node1 ~]# vim /etc/zabbix/zabbix_agentd.conf [root@linux-node1 ~]# /etc/init.d/zabbix-agent startStarting Zabbix agent: [ OK ][root@linux-node1 ~]# |
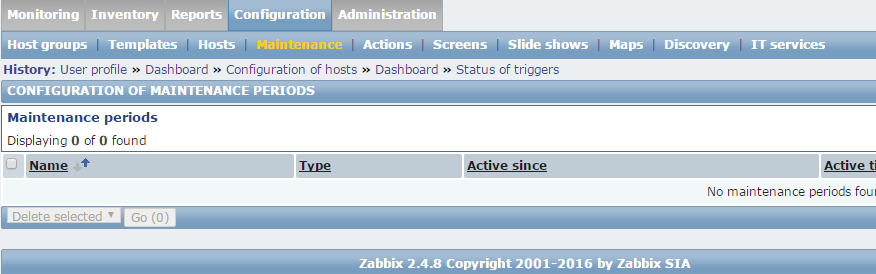
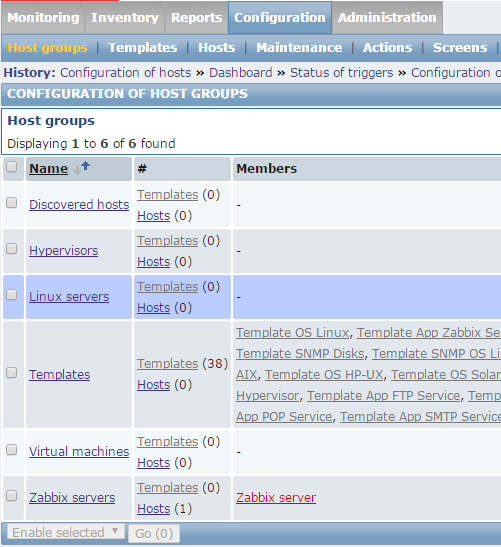
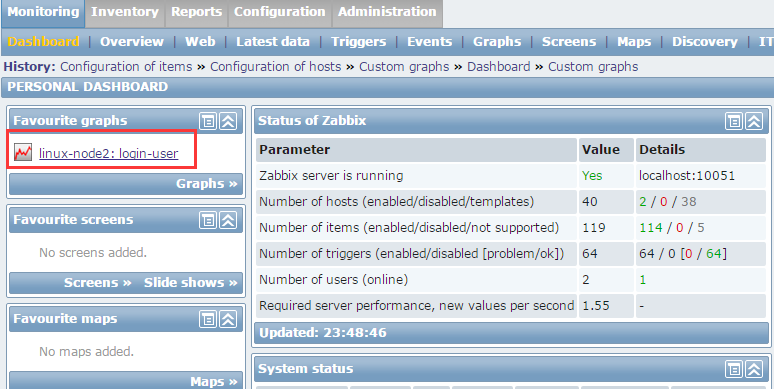
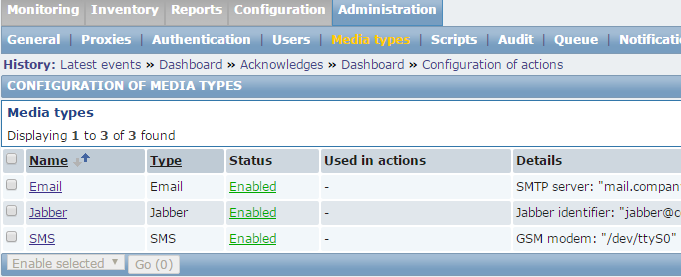
zabbix的web界面介绍
一些仪表盘解释
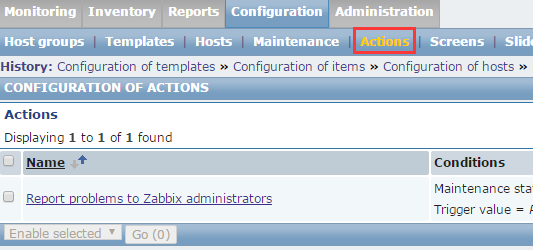
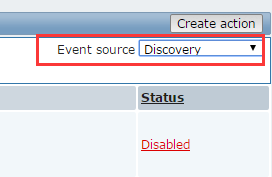
Actions 是故障了要通知,怎么通知呢,在这里配置
比如配置发短信,发邮件,还能配置让它执行命令,比如reboot
screens是一些图片效果
slide shows是幻灯片,比如你有3个大屏,但是只有一个屏幕,你可以让它来回切换
Maps 你可以做一个架构图
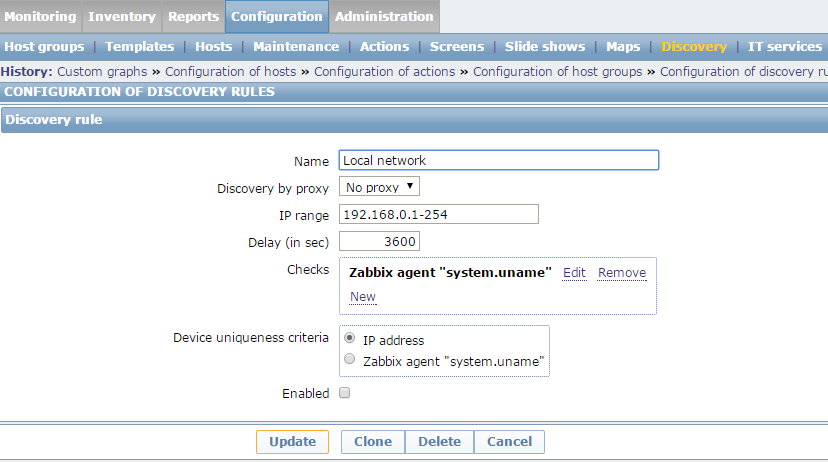
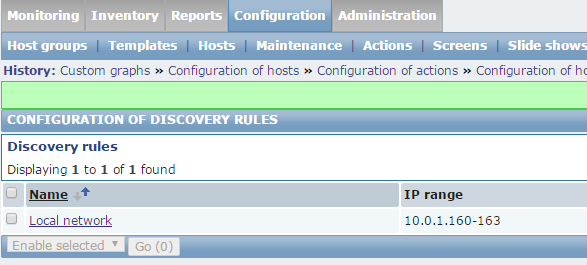
Discovery 和自动化部署有关,
IT services :sla(SLA:Service-Level Agreement的缩写,意思是服务等级协议),比如我保证网站可用率 99%。(管理体系相关)你今年的sla达标了么等

|
1
2
3
4
5
6
|
[root@linux-node1 ~]# netstat -lntp |grep 100tcp 0 0 0.0.0.0:10050 0.0.0.0:* LISTEN 5846/zabbix_agentd tcp 0 0 0.0.0.0:10051 0.0.0.0:* LISTEN 5692/zabbix_server tcp 0 0 :::10050 :::* LISTEN 5846/zabbix_agentd tcp 0 0 :::10051 :::* LISTEN 5692/zabbix_server [root@linux-node1 ~]# |
也可以使用lsof命令查看
|
1
2
3
4
5
6
7
8
9
10
11
12
13
14
15
|
[root@linux-node1 ~]# lsof -i:10050COMMAND PID USER FD TYPE DEVICE SIZE/OFF NODE NAMEzabbix_ag 5846 zabbix 4u IPv4 24785 0t0 TCP *:zabbix-agent (LISTEN)zabbix_ag 5846 zabbix 5u IPv6 24786 0t0 TCP *:zabbix-agent (LISTEN)zabbix_ag 5848 zabbix 4u IPv4 24785 0t0 TCP *:zabbix-agent (LISTEN)zabbix_ag 5848 zabbix 5u IPv6 24786 0t0 TCP *:zabbix-agent (LISTEN)zabbix_ag 5849 zabbix 4u IPv4 24785 0t0 TCP *:zabbix-agent (LISTEN)zabbix_ag 5849 zabbix 5u IPv6 24786 0t0 TCP *:zabbix-agent (LISTEN)zabbix_ag 5850 zabbix 4u IPv4 24785 0t0 TCP *:zabbix-agent (LISTEN)zabbix_ag 5850 zabbix 5u IPv6 24786 0t0 TCP *:zabbix-agent (LISTEN)zabbix_ag 5851 zabbix 4u IPv4 24785 0t0 TCP *:zabbix-agent (LISTEN)zabbix_ag 5851 zabbix 5u IPv6 24786 0t0 TCP *:zabbix-agent (LISTEN)zabbix_ag 5852 zabbix 4u IPv4 24785 0t0 TCP *:zabbix-agent (LISTEN)zabbix_ag 5852 zabbix 5u IPv6 24786 0t0 TCP *:zabbix-agent (LISTEN)[root@linux-node1 ~]# lsof -i:10051 |
JMX 监控jvm的
IPMI监控硬件的。监控IPMI性能比较差,经常获取不到数据
监控项多了可能会慢,比如监控一项。温度,就不用监控风扇了。风扇不转了温度肯定上来了
Proxy:表示zabbix支持分布式的。
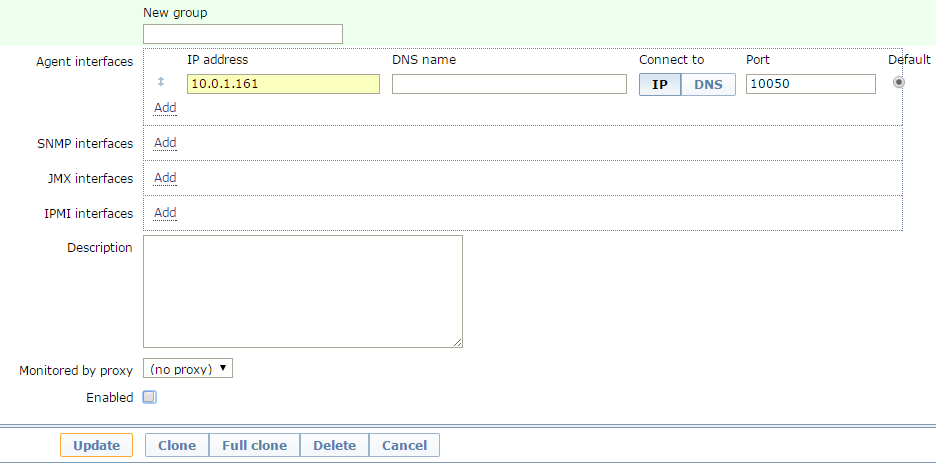
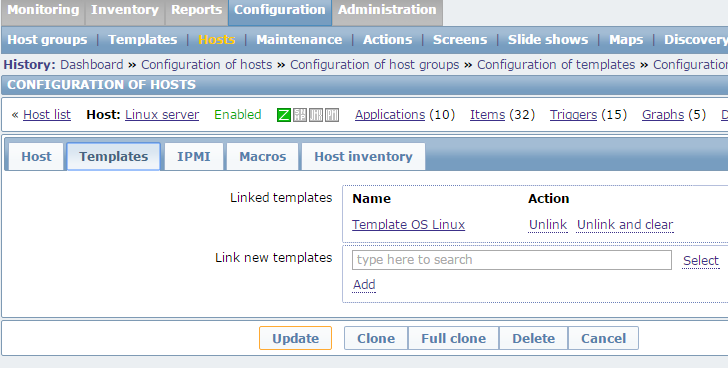
enabled勾选的话,表示打开监控。监控Zabbix Server,也可以不勾选,返回界面之后点击Enable
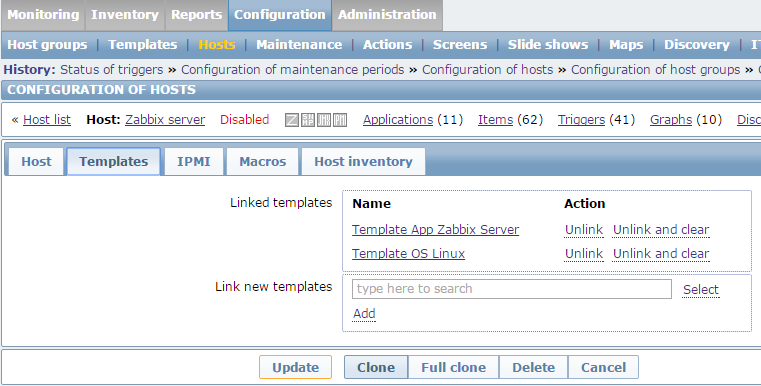
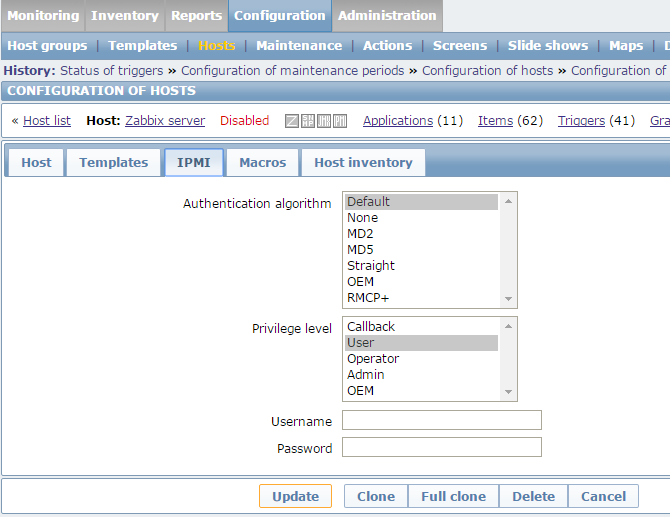
宏
它在做snmp监控的时候用,简单来说,就是给一个变量设置一个值

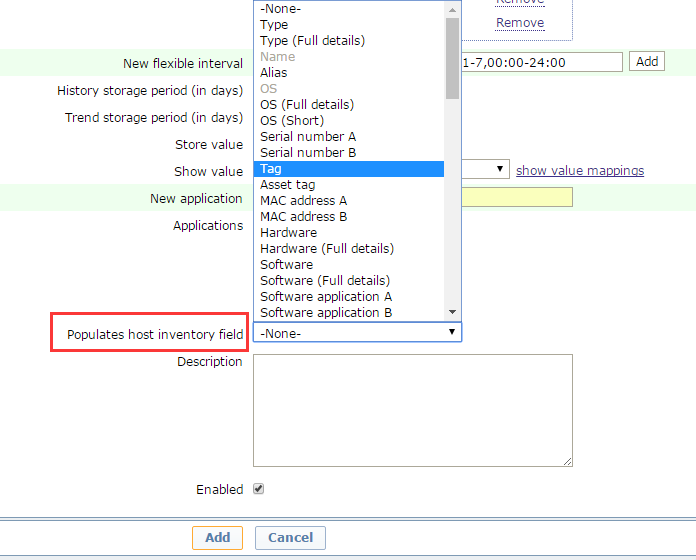
主机资产,zabbix提供了一个资产管理的功能,默认是关闭状态,可以选manual手动填,也可以选
Automatic自动,在创建items的时候,可以把得到的值映射到资产里面,这个功能比较鸡肋,比如下面网卡只有两个,我服务器要是4个网卡呢
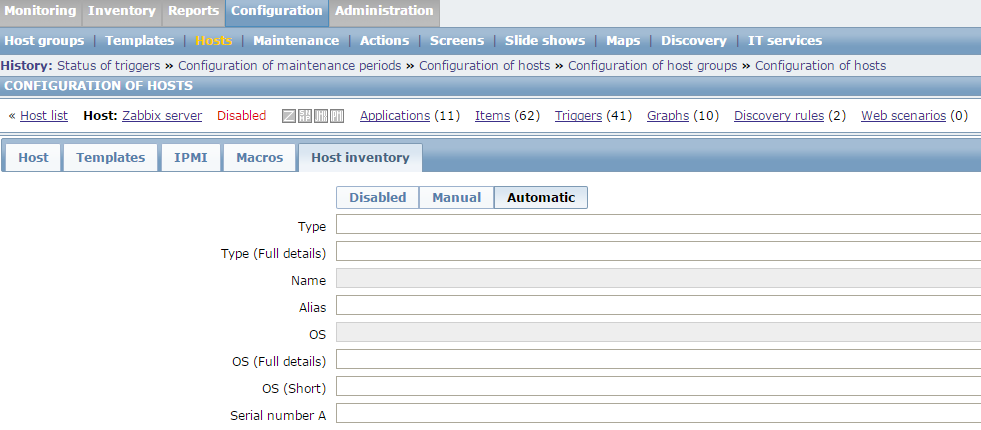

点击就启用了


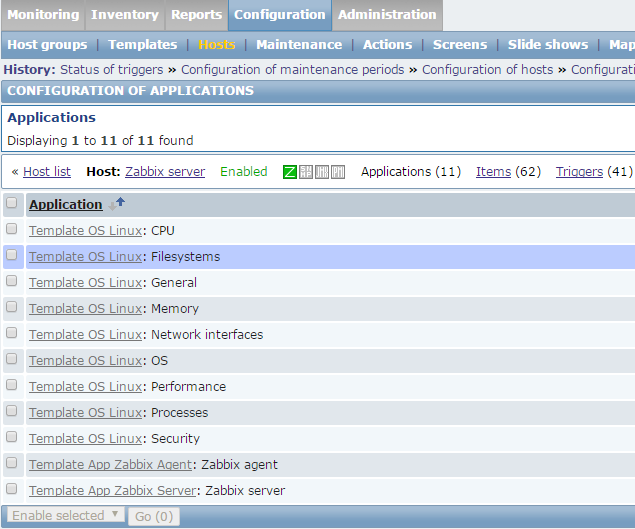
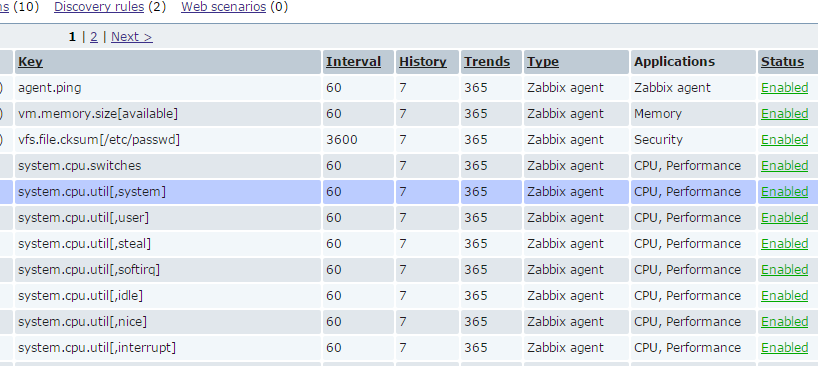
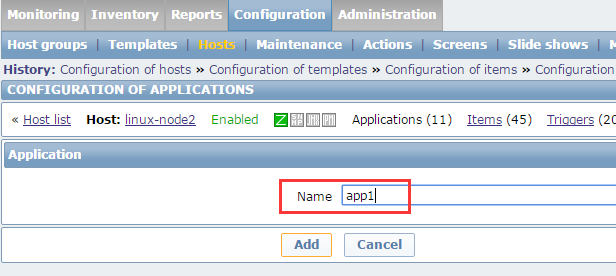
application和item以及graph介绍
application类似items监控项的监控组,就是组的概念
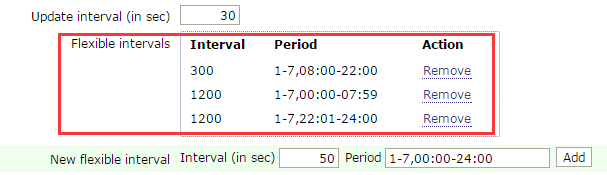
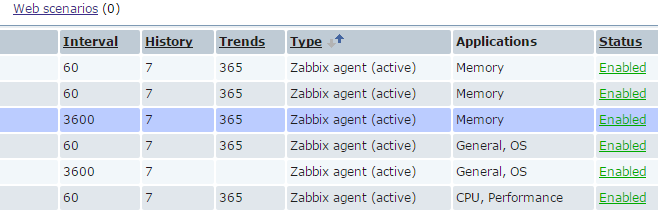
监控间隔。60秒
历史保留的天数7天
趋势图保留的天数,365天
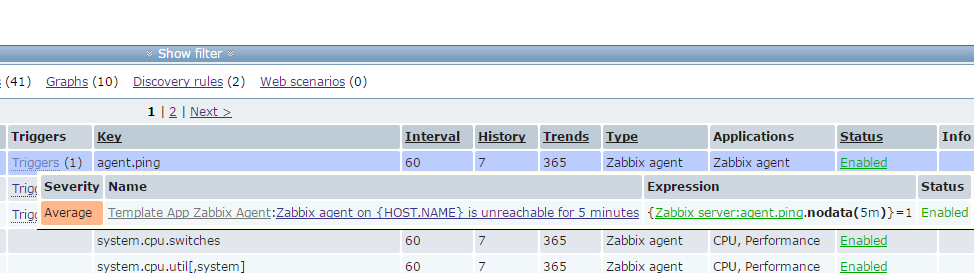
点一下enabled就把这一项关闭了,关闭后就不监控这一项了
如果有个东西老报警。你就可以把它关闭了
鼠标放触发器上,看到条件表达式,每五分钟,超过300 什么值就报警

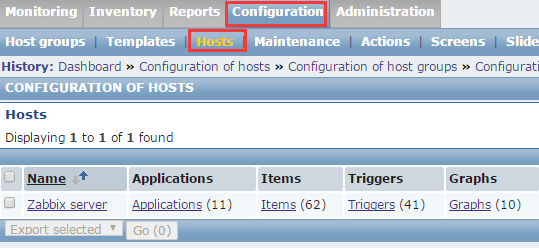
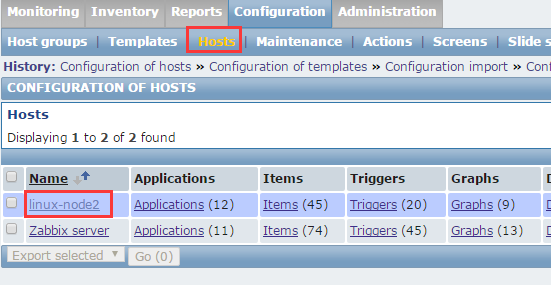
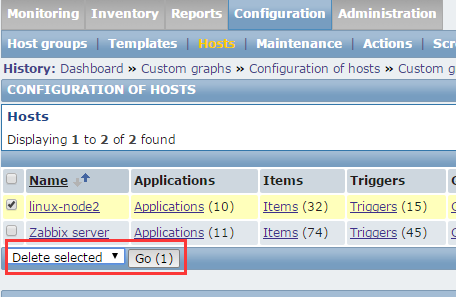
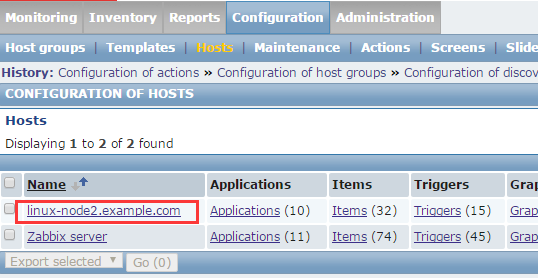
添加node2到监控里
在linux-node2上装zabbix客户端
|
1
2
3
4
5
|
mkdir /tools -pcd /tools/wget http://repo.zabbix.com/zabbix/2.4/rhel/6/x86_64/zabbix-release-2.4-1.el6.noarch.rpmrpm -ivh zabbix-release-2.4-1.el6.noarch.rpmyum install zabbix-agent -y |
自定义监控和图表
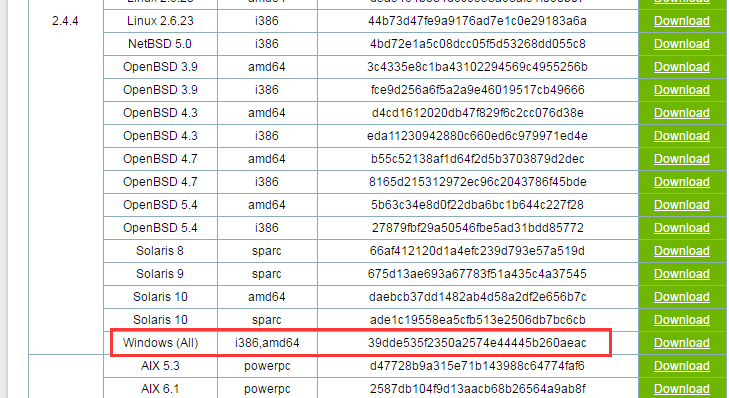
zabbix服务端是不支持windows的,只有客户端支持windows
下面地址可以下载windows客户端监控。
它是个exe文件,配置个zabbix.conf文件
它有2个参数需要注意下
http://www.zabbix.com/download2
修改linux-node2的Zabbix agent配置文件
vim /etc/zabbix/zabbix_agentd.conf
启动agent
|
1
2
3
|
[root@linux-node2 tools]# /etc/init.d/zabbix-agent startStarting Zabbix agent: [ OK ][root@linux-node2 tools]# |
另外让它开机启动,可以选择加入rc.local
|
1
2
|
[root@linux-node2 ~]# echo "/etc/init.d/zabbix-agent start" >>/etc/rc.local [root@linux-node2 ~]# |
如下
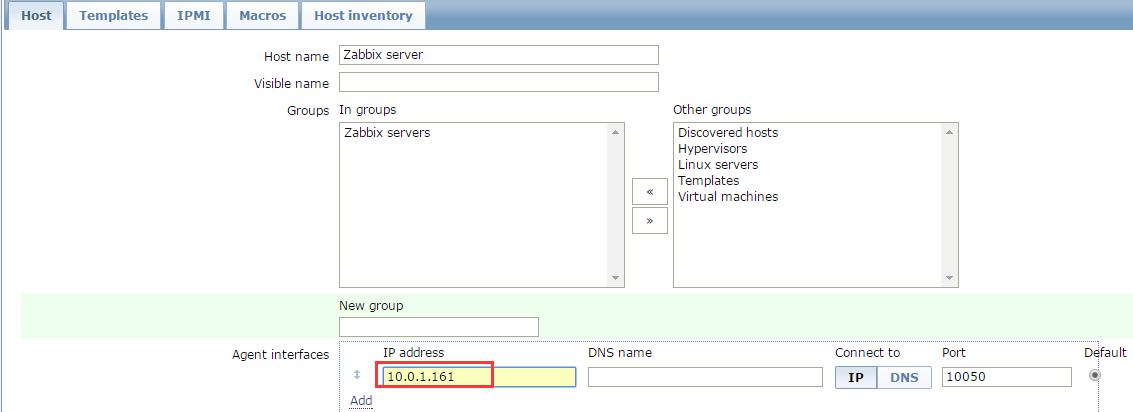
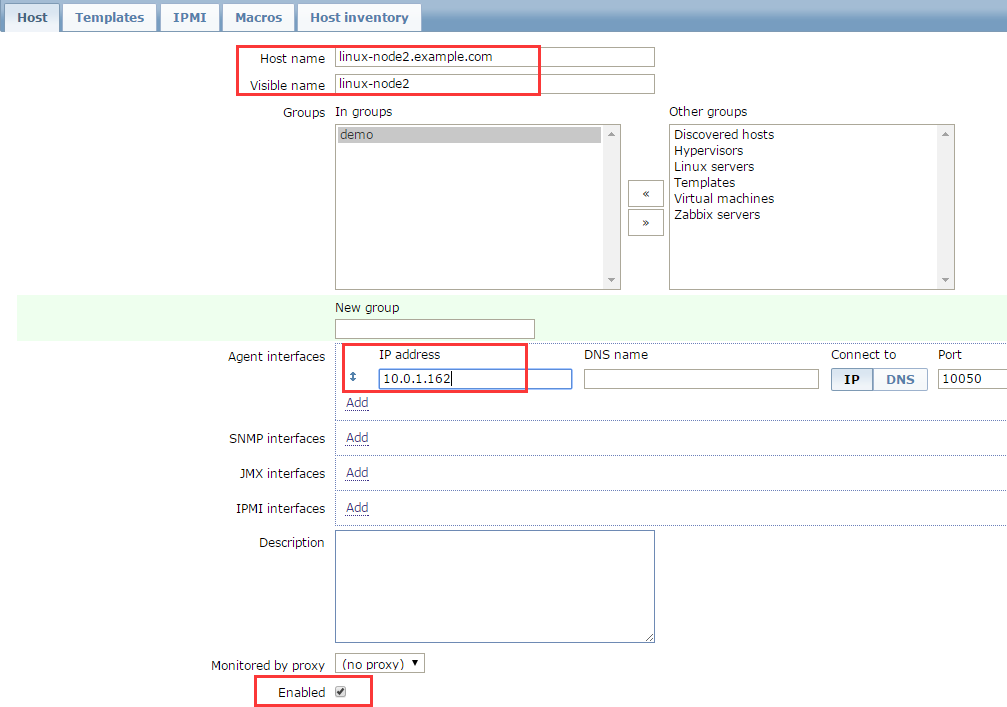
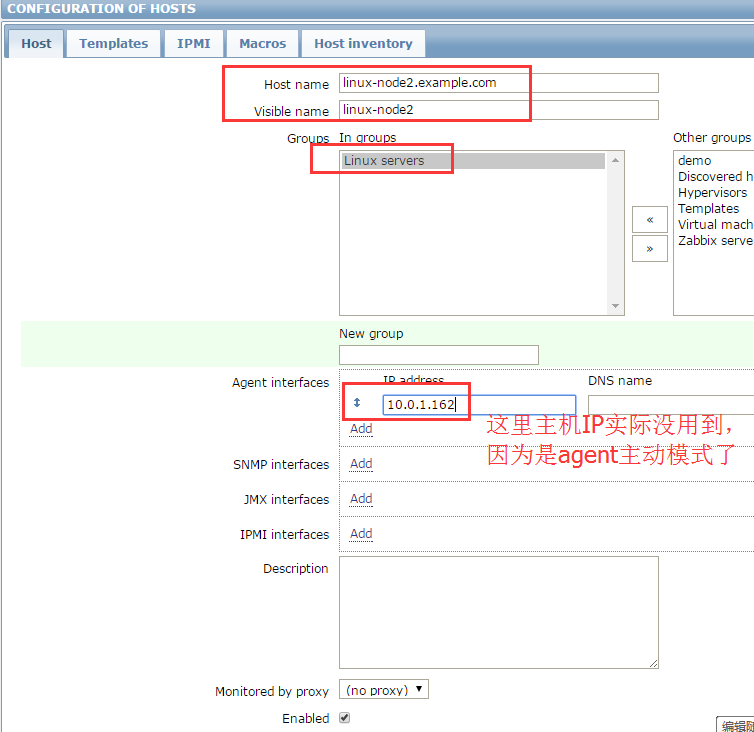
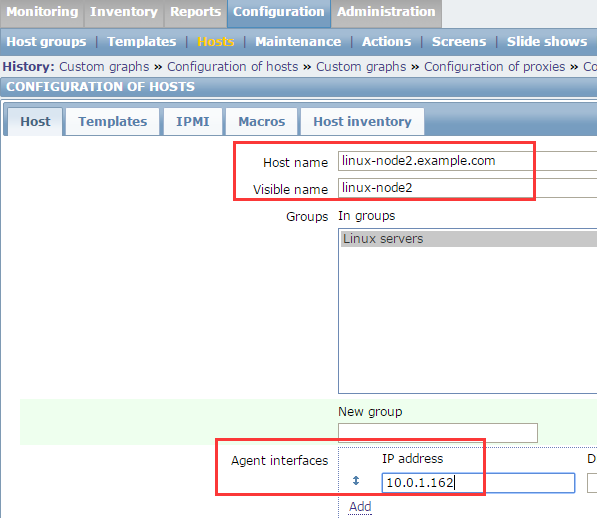
host-name这里必须写正确的,显示的名称可以随便写,但是建议规范点
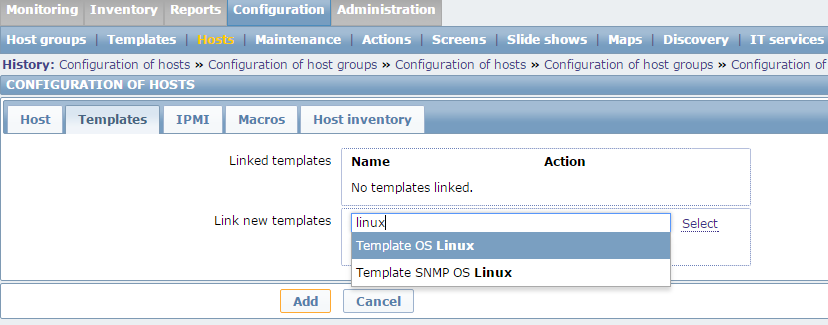
选择模板
模板里带有好多监控项,触发器,图形。因为模板太多了。上百个,就搞成搜索的了
搜索linux
上面的是基于agent监控的,下面是基于snmp监控的,就不用装agent了
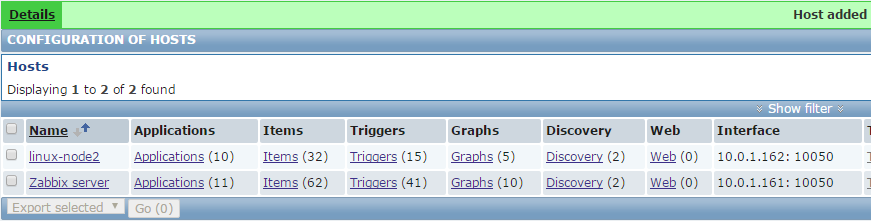

等一会变绿色了

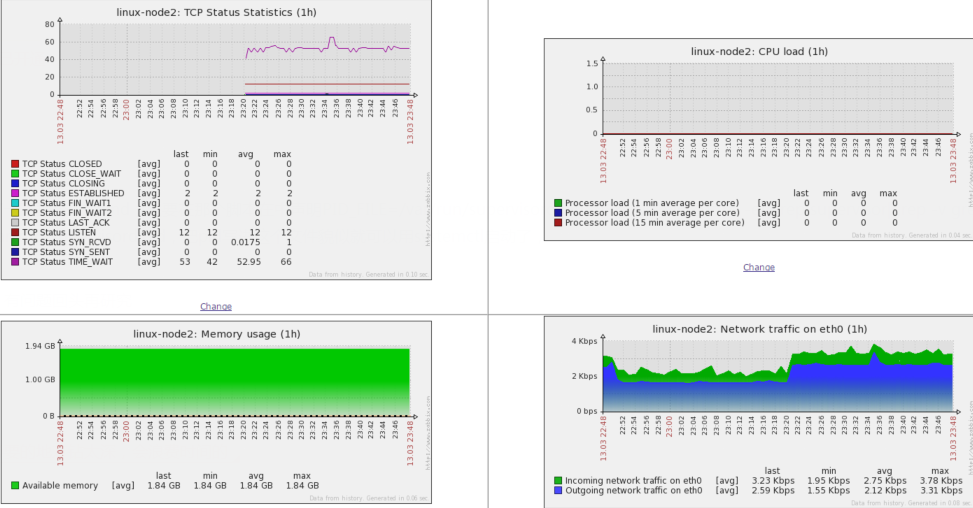
在监控里查看主机是否有数据了

选择主机
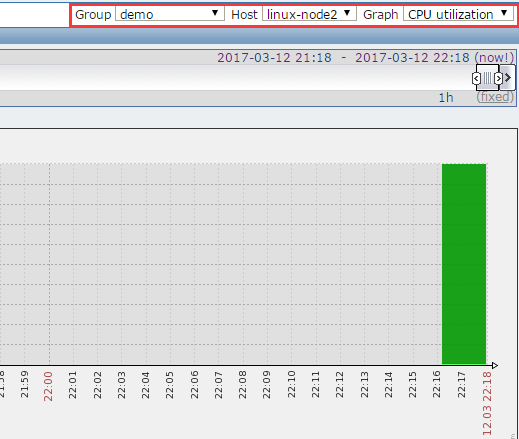
通过拖动这里也可以改变时间范围,查看历史数据
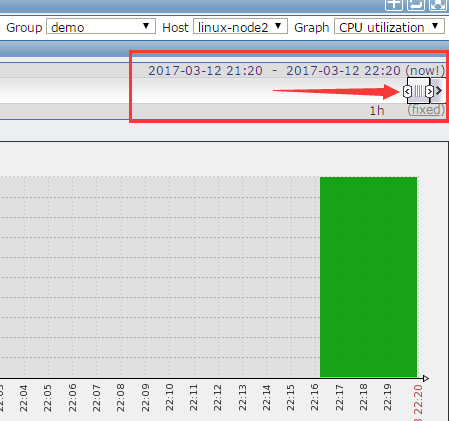
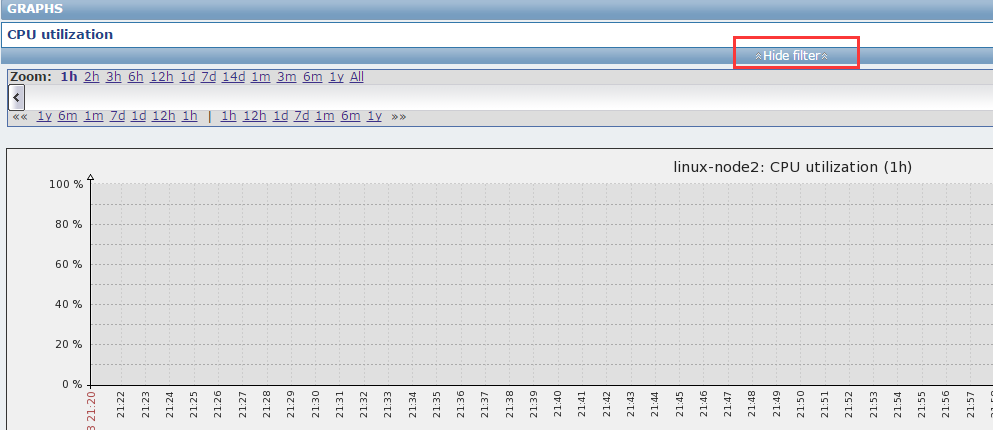
点击这里可以隐藏下面的Zoom时间栏
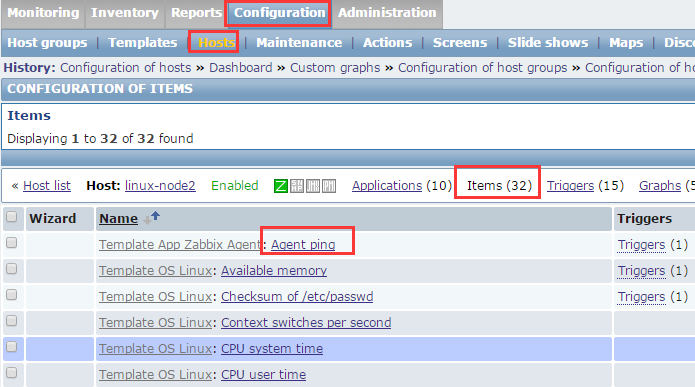
这个agent ping 不是icmp的ping,而是通过agent ping的。agent发个请求看它返回不返回


自定义监控项并加入到监控页面上
以上都是模板带的监控项,如何自定义一个监控项呢
自定义监控项有2个步骤
1、改配置文件,在里面写上自定义的监控项
2、web页面加上

获取命令如下
|
1
2
3
4
5
|
[root@linux-node2 ~]# uptime 06:29:23 up 22 min, 1 user, load average: 0.00, 0.00, 0.00[root@linux-node2 ~]# uptime | awk -F ' ' '{print $5}'1[root@linux-node2 ~]# |
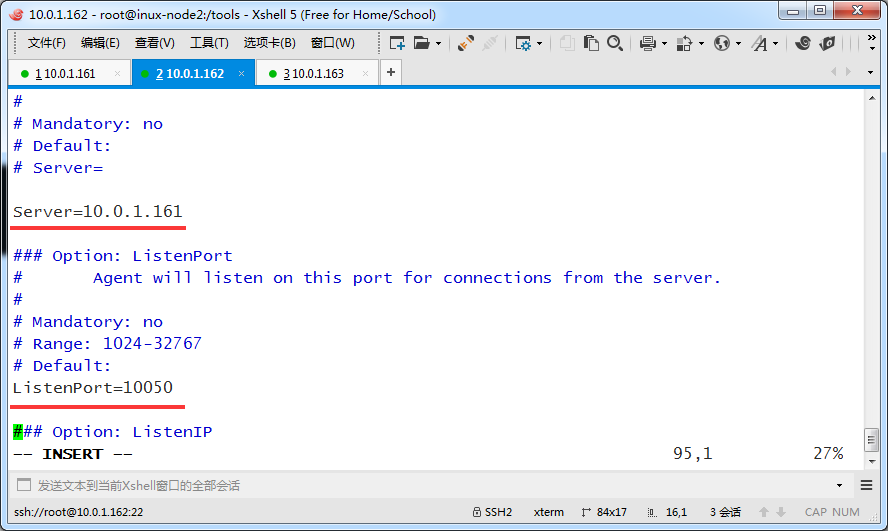
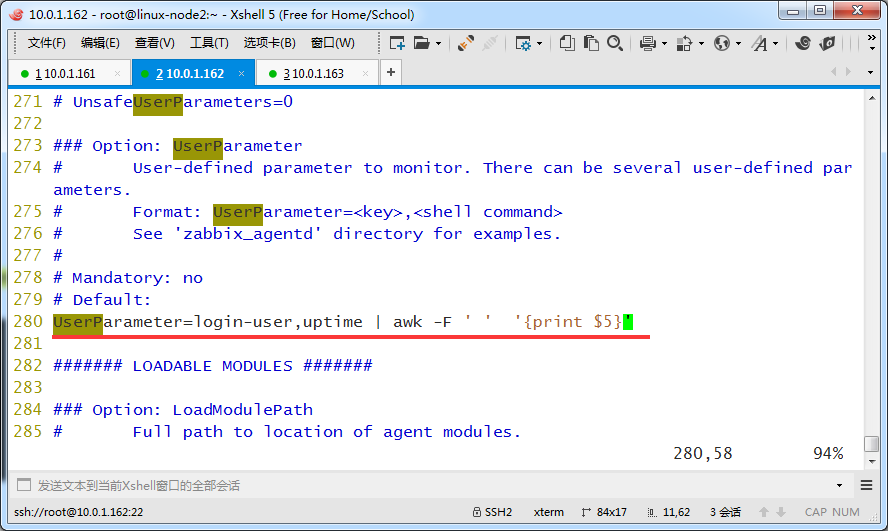
修改linux-node2的配置文件
vim /etc/zabbix/zabbix_agentd.conf
修改下面地方
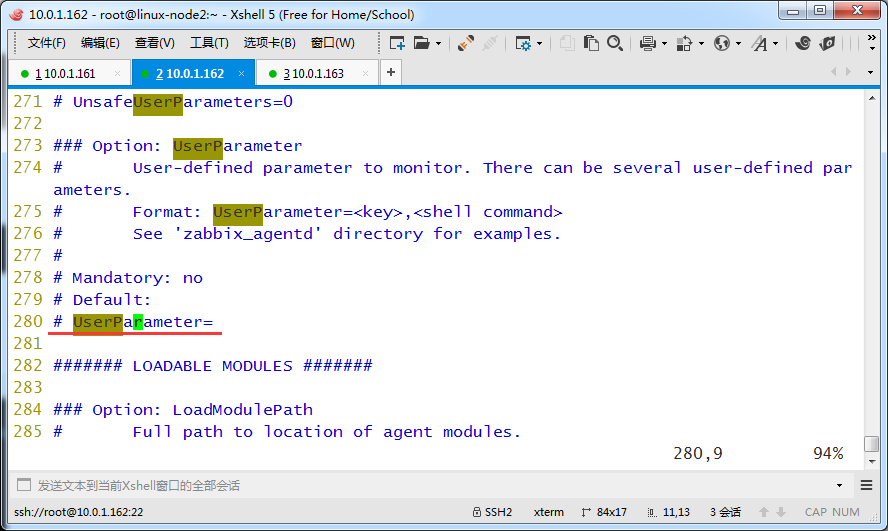
逗号隔开
保证这个key在整个系统是唯一的,command可以换成脚本
另外这个用户自定义的参数返回值最大是512KB,不能超过这个
UserParameter=login-user,uptime |awk -F ' ' '{print $4}'
这里注意下,下面截图是错的,应该是$4
保存,重启
|
1
2
3
4
5
|
[root@linux-node2 ~]# vim /etc/zabbix/zabbix_agentd.conf [root@linux-node2 ~]# /etc/init.d/zabbix-agent restartShutting down Zabbix agent: [ OK ]Starting Zabbix agent: [ OK ][root@linux-node2 ~]# |
服务端测试下能否获取这个客户端自定义的值
zabbix-get命令。之前没装,补上
|
1
2
3
|
[root@linux-node1 ~]# zabbix_get-bash: zabbix-get: command not found[root@linux-node1 ~]# yum install zabbix-get -y |
查看帮助用法
|
1
2
3
4
5
6
7
8
9
10
11
12
13
14
15
16
17
18
19
|
[root@linux-node1 ~]# zabbix_getusage: zabbix_get [-hV] -s <host name or IP> [-p <port>] [-I <IP address>] -k <key>[root@linux-node1 ~]# zabbix_get --helpZabbix get v2.4.8 (revision 59539) (20 April 2016)usage: zabbix_get [-hV] -s <host name or IP> [-p <port>] [-I <IP address>] -k <key>Options: -s --host <host name or IP> Specify host name or IP address of a host -p --port <port number> Specify port number of agent running on the host. Default is 10050 -I --source-address <IP address> Specify source IP address -k --key <key of metric> Specify key of item to retrieve value for -h --help Display help information -V --version Display version numberExample: zabbix_get -s 127.0.0.1 -p 10050 -k "system.cpu.load[all,avg1]"[root@linux-node1 ~]# |
获取方式如下
|
1
2
3
|
[root@linux-node1 ~]# zabbix_get -s 10.0.1.162 -k login-user1[root@linux-node1 ~]# |
客户端克隆一个会话,服务端继续取值,这就是一个自定义的key,当然你里面写什么都可以
|
1
2
3
|
[root@linux-node1 ~]# zabbix_get -s 10.0.1.162 -k login-user2[root@linux-node1 ~]# |
get命令获取成功,才能加。准备加到web上
点击进去
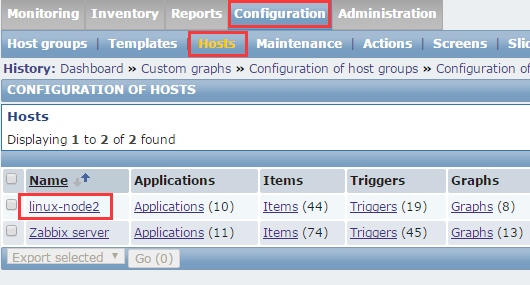
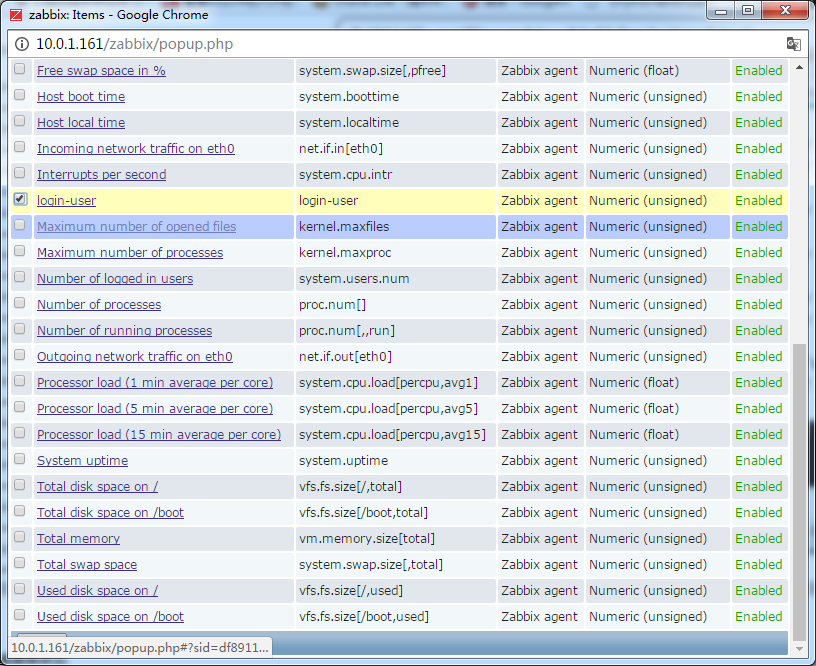
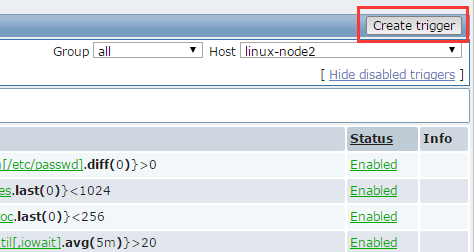
点击Items,显示如下
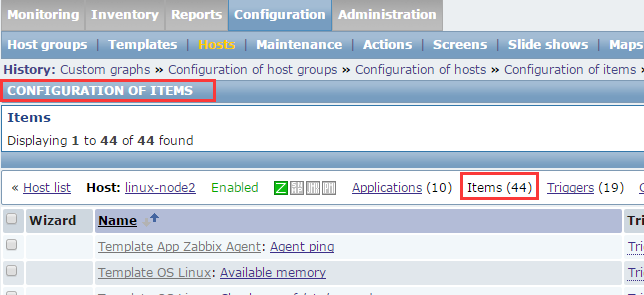
点击右上角的Create item
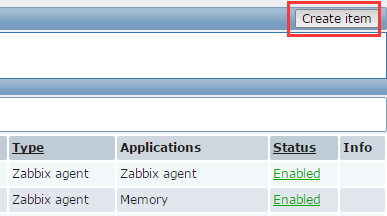
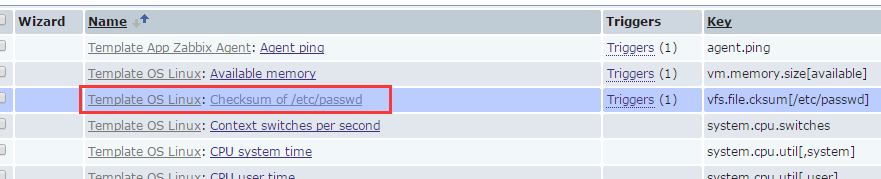
name可以和key不一样,但是key必须是之前设置的,右边select是选择系统自带的key
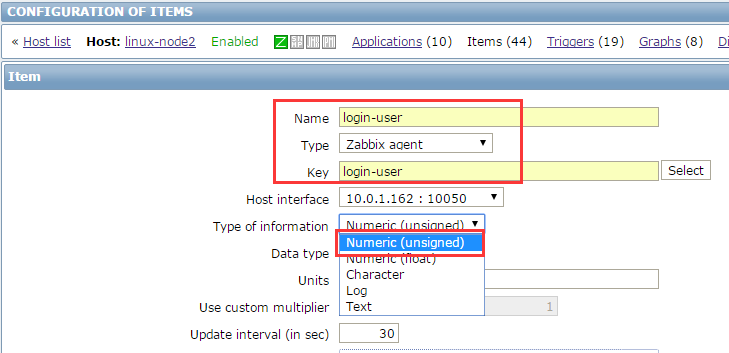
Data type 中decimal是10进制的意思
units 是单位的意思。zabbix默认会把1000换算成1k的

如果勾选这里,上面的数会乘以文本框里的东西
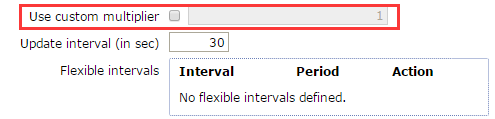
不太重要的key建议设置5分钟,太频繁没什么用,反而引起zabbix性能下降

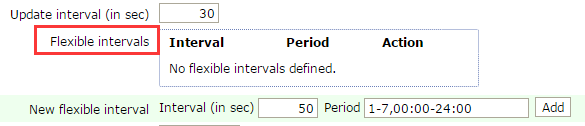
下面设置了就以下面为准


描述的东西能写最好写
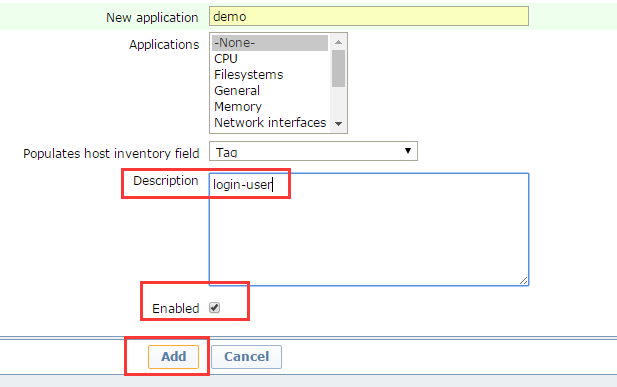

点击Add

有数据了
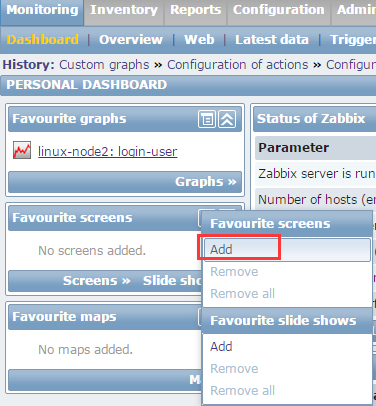
点击+ 可以加入到收藏里,然后在仪表盘查看

##########################################################################################


这里看到主机资产有数据了,这里的数据,就是来自下面的关联
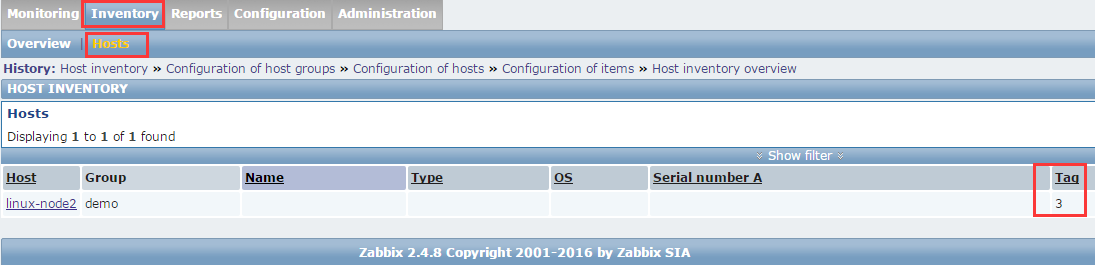
上面的数据就是设置login-user时候设置的关联


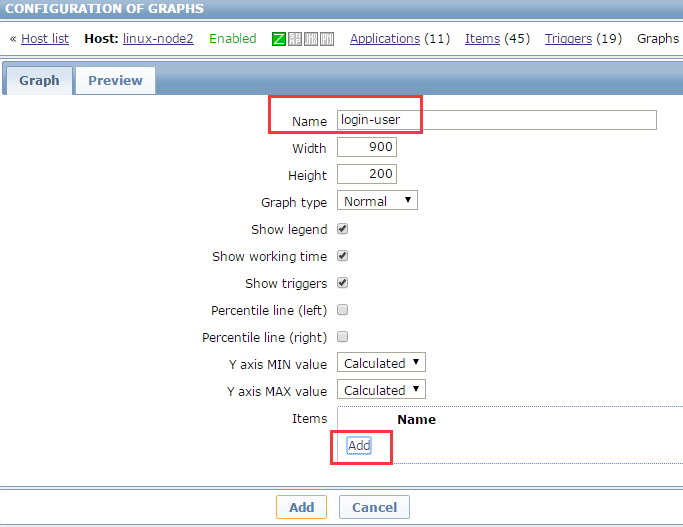
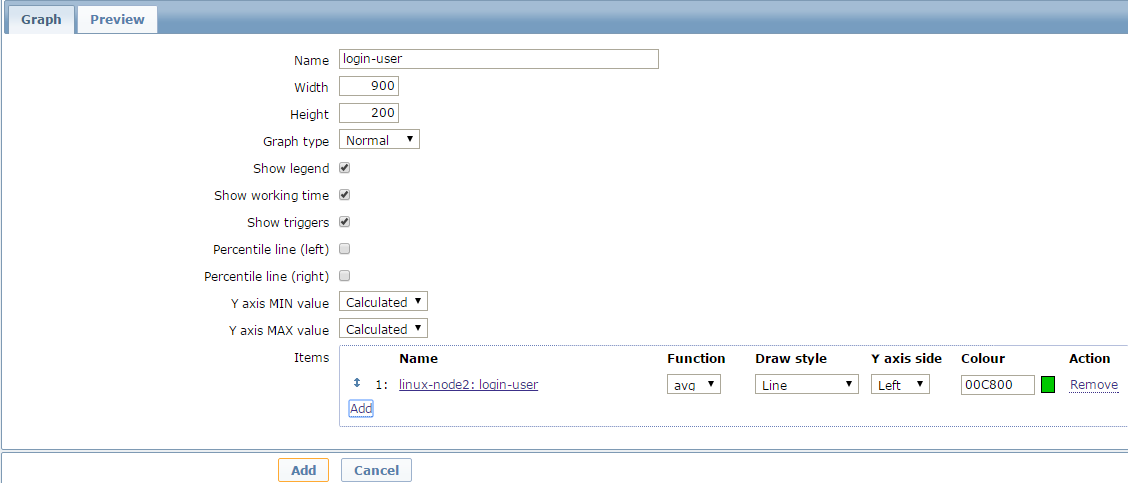
起个名字,添加个表达式


查看另一个页面 --依赖
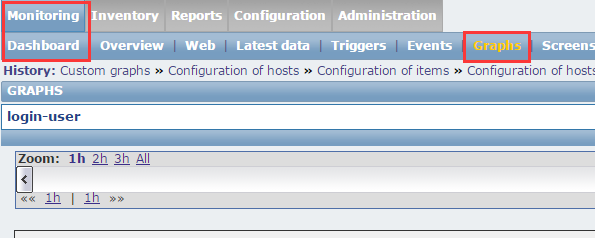
如果某件事发生了,就别报这个警了。比如如果主机down了就别报警了。先不加这个依赖


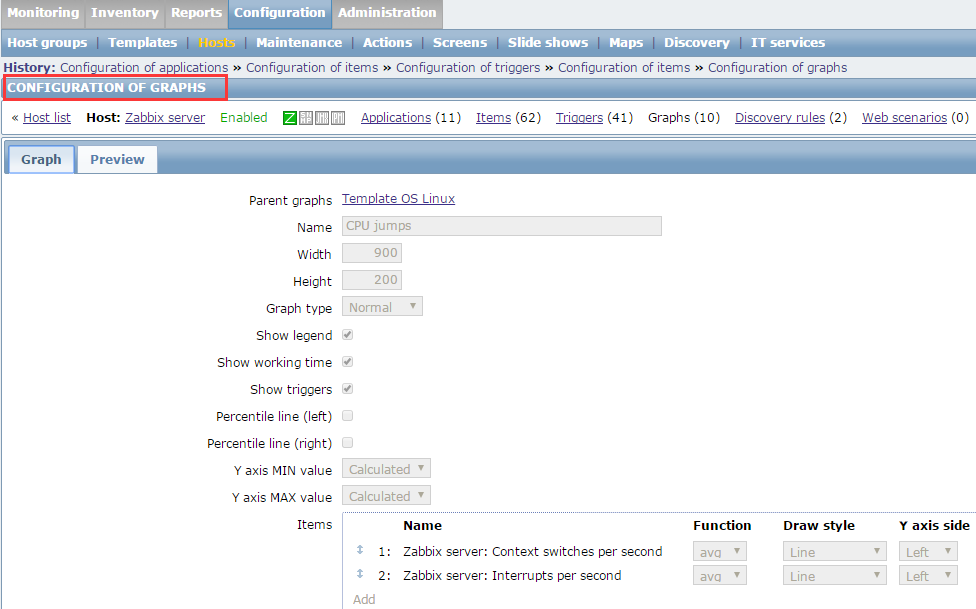
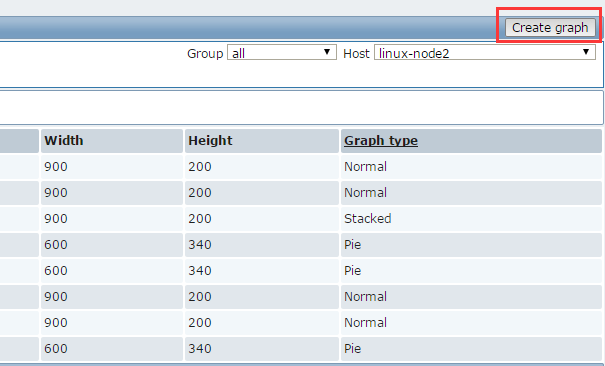
图形里也能看到


如果是发短信报警,要把上面的message改的短一些,改成70个字符以内
国内英文单词按字母算,汉字按个数算
精简下,最下面是恢复的时候再发个短信,把下面粘贴下放下面即可,生产环境是这么玩的


你可以写个脚本发邮件,发短信等,或者echo hehe,一般使用脚本是主流
AlertScriptsPath=/usr/lib/zabbix/alertscripts
这里配置了报警脚本的路径
把你写的脚本放这里就好了,这样它就能找到了

进入如下目录写一个脚本,内容如下。
这个zabbix脚本要接收3个参数
$1,$2,$3
$1是邮件地址
$2 邮件主题
$3 邮件内容
|
1
2
3
4
5
|
[root@linux-node1 alertscripts]# pwd/usr/lib/zabbix/alertscripts[root@linux-node1 alertscripts]# cat Send_Mail.sh echo $1 $2 $3 >>/tmp/test.log[root@linux-node1 alertscripts]# |
加上课执行权限
|
1
|
[root@linux-node1 alertscripts]# chmod +x Send_Mail.sh |
网页这里就可以这么写了


我的选择如下

Add之后


|
1
2
3
4
|
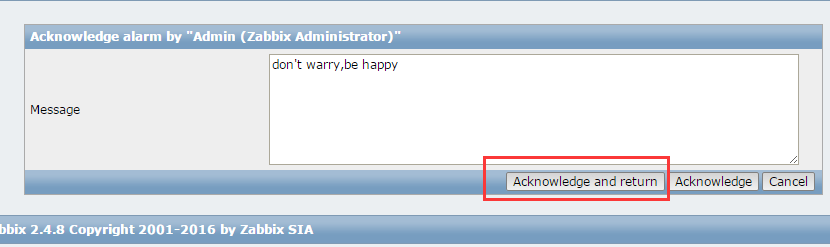
[root@linux-node1 alertscripts]# tail -f /tmp/test.log 525031638@qq.com PROBLEM linux-node2:login-user): 3^C[root@linux-node1 alertscripts]# |
仪表盘里也能看到它自动执行了action

|
1
2
3
4
5
6
7
8
9
10
11
12
13
14
15
16
17
18
19
20
21
22
23
24
25
26
27
28
29
30
31
32
33
34
35
|
[root@linux-node1 alertscripts]# pwd/usr/lib/zabbix/alertscripts[root@linux-node1 alertscripts]# lltotal 8-rwxr-xr-x 1 root root 714 Mar 13 20:16 pymail.py-rwxr-xr-x. 1 root root 30 Nov 29 23:20 Send_Mail.sh[root@linux-node1 alertscripts]# cat pymail.py #!/usr/bin/python#coding: utf-8 import smtplib import sysfrom email.mime.text import MIMEText from email.header import Header from email.Utils import COMMASPACE receiver = sys.argv[1]subject = sys.argv[2]mailbody = sys.argv[3]smtpserver = 'smtp.exmail.qq.com' username = 'test1@xxxxxx.com' password = '123456' sender = username msg = MIMEText(mailbody,'html','utf-8')#中文需参数‘utf-8’,单字节字符不需要 msg['Subject'] = Header(subject, 'utf-8') msg['From'] = usernamemsg['To'] = receiver smtp = smtplib.SMTP() smtp.connect(smtpserver) smtp.login(username, password) smtp.starttls()smtp.sendmail(msg['From'], msg['To'], msg.as_string()) smtp.quit() [root@linux-node1 alertscripts]# |


解决告警之后又收到了恢复正常的邮件

看到邮件内容多了括号和空格,把下面多余的空格和括号删除即可


qq邮件可以绑定微信。对于使用微信的用户可以及时看到告警

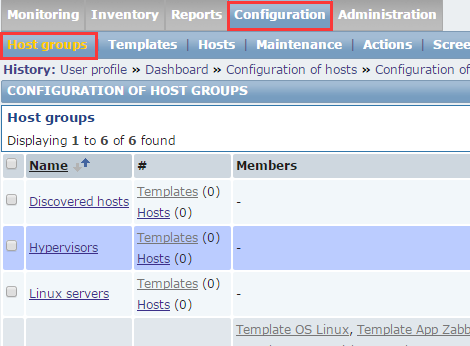
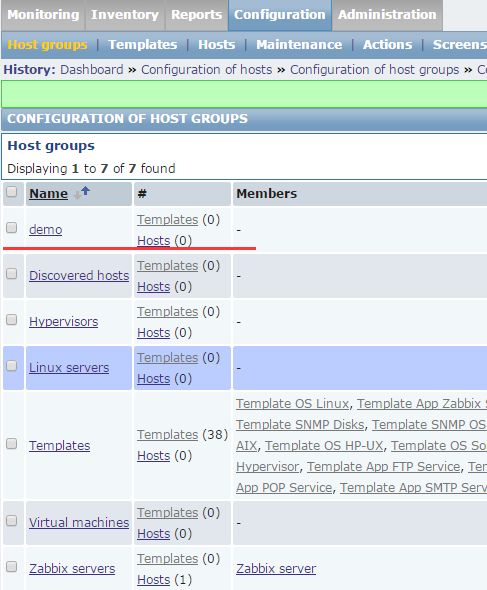
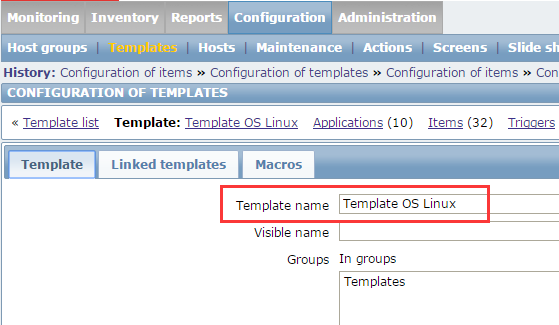
查看linux自带的模板


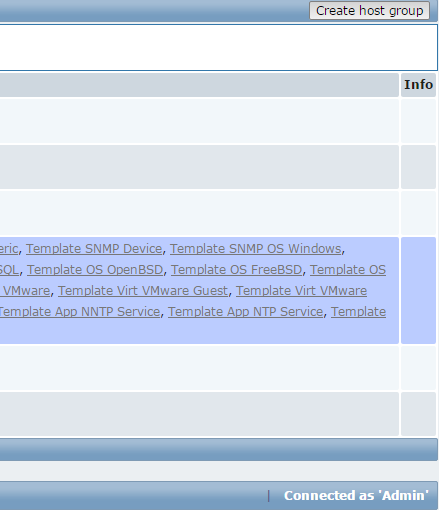
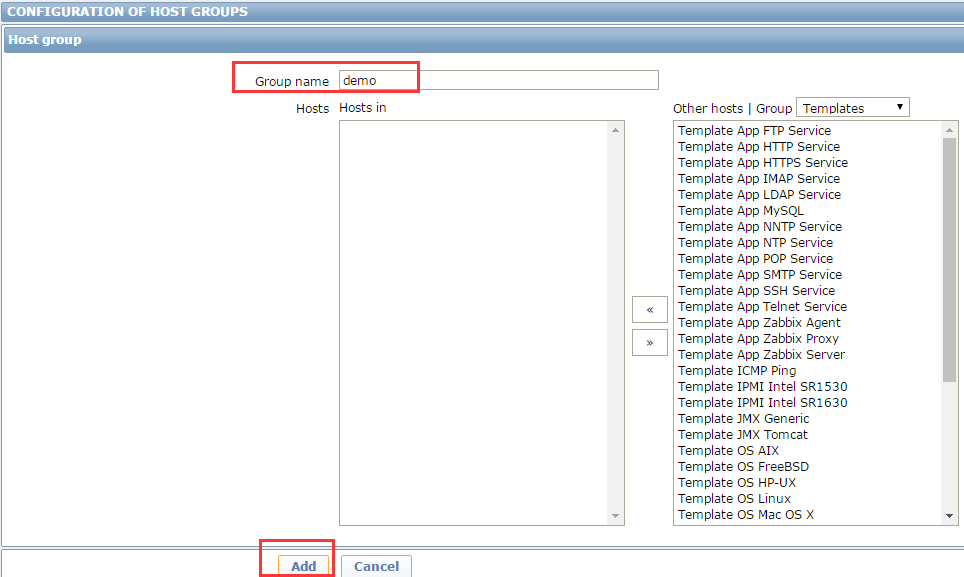
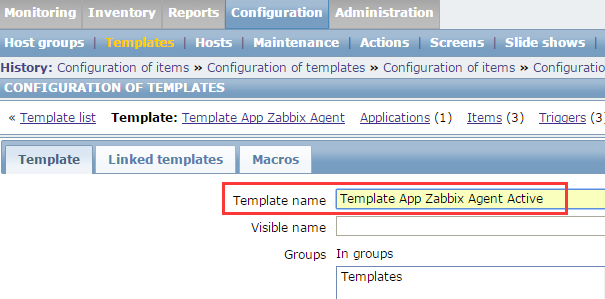
创建自定义模板

给此模板命名为demo,同时把linux-node2加入到此模板里


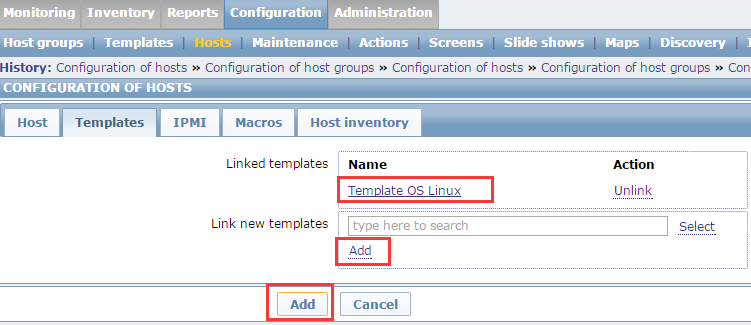
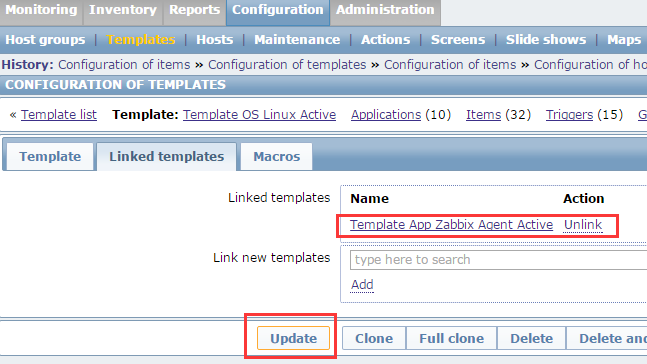
link给一个模板

点击Update

点击Update之后,提示模板不能被通过此模板再去link给其它模板(这里不是很明白,有时间再研究下)


最后demo模板结果如下

你可以把这个模板链接到任何一台机器上,这样模板里有的监控项,那个机器就有了
其实你自定义的监控项可以从配置文件里取出来,放下面目录下,然后在客户端主配置文件里include进去
|
1
2
3
4
|
[root@linux-node2 zabbix_agentd.d]# cd /etc/zabbix/zabbix_agentd.d/[root@linux-node2 zabbix_agentd.d]# lsuserparameter_mysql.conf[root@linux-node2 zabbix_agentd.d]# |
这个agent.conf自带include选项
生产环境都建议这么干。尽量不要修改原来的配置文件。更专业一点


|
1
2
3
4
5
6
7
|
[root@linux-node2 alertscripts]# cd /etc/zabbix/[root@linux-node2 zabbix]# lsweb zabbix_agentd.conf zabbix_agentd.d zabbix_server.conf[root@linux-node2 zabbix]# mkdir shells[root@linux-node2 zabbix]# cd shells/[root@linux-node2 shells]# pwd/etc/zabbix/shells |
把脚本上传上去
|
1
2
3
4
5
6
7
8
9
|
[root@linux-node2 shells]# rz -Erz waiting to receive.[root@linux-node2 shells]# [root@linux-node2 shells]# lszabbix_linux_plugin.sh[root@linux-node2 shells]# chmod +x zabbix_linux_plugin.sh [root@linux-node2 shells]# ./zabbix_linux_plugin.sh Usage: ./zabbix_linux_plugin.sh {tcp_status key|memcached_status key|redis_status key|nginx_status key}[root@linux-node2 shells]# |

因此,运行此脚本需要给它2个参数
|
1
2
3
4
5
|
[root@linux-node2 shells]# ./zabbix_linux_plugin.sh tcp_status LISTEN14[root@linux-node2 shells]# ./zabbix_linux_plugin.sh tcp_status TIME-WAIT52[root@linux-node2 shells]# |
在下面目录下,创建一个文件,存放自定义的key和value,而value通过此脚本获取
key这里是linux_status[*] ,表示它支持列表
|
1
2
3
4
5
6
7
|
[root@linux-node2 zabbix_agentd.d]# pwd/etc/zabbix/zabbix_agentd.d[root@linux-node2 zabbix_agentd.d]# lsuserparameter_mysql.conf zabbix-linux-plugin.conf[root@linux-node2 zabbix_agentd.d]# cat zabbix-linux-plugin.conf UserParameter=linux_status[*],/etc/zabbix/shells/zabbix_linux_plugin.sh "$1" "$2" "$3"[root@linux-node2 zabbix_agentd.d]# |
重启linux-node2的Zabbix agent
|
1
2
3
4
|
[root@linux-node2 zabbix_agentd.d]# /etc/init.d/zabbix-agent restartShutting down Zabbix agent: [ OK ]Starting Zabbix agent: [ OK ][root@linux-node2 zabbix_agentd.d]# cd |
server端通过zabbix_get获取数据没问题
|
1
2
3
|
[root@linux-node1 zabbix]# zabbix_get -s 10.0.1.162 -k linux_status[tcp_status,ESTAB]2[root@linux-node1 zabbix]# |
注意,zabbix监控的时候,是使用的zabbix用户
|
1
2
3
|
[root@linux-node2 ~]# ll /tmp/netstat.tmp -rw-rw-r-- 1 zabbix zabbix 31 Mar 13 22:09 /tmp/netstat.tmp[root@linux-node2 ~]# |
接下来你要做的是,创建一种模板,tcp有11个状态,你要创建11个key
然后做个图,这里有别人做好的
配置--模板--导入

选择电脑上的模板文件


add

可以批量更改


本来是300的,都变成了30秒

##############################################################################
下面就是自动注册
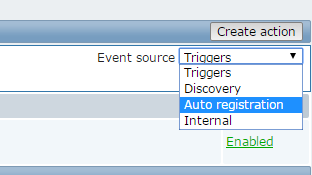
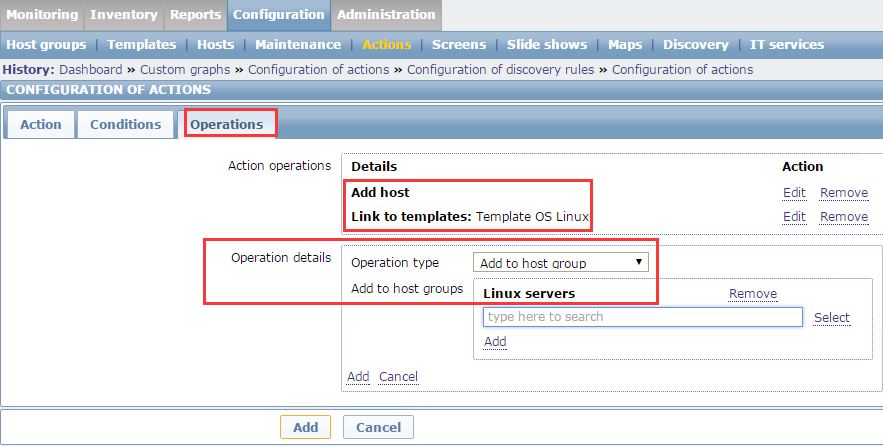
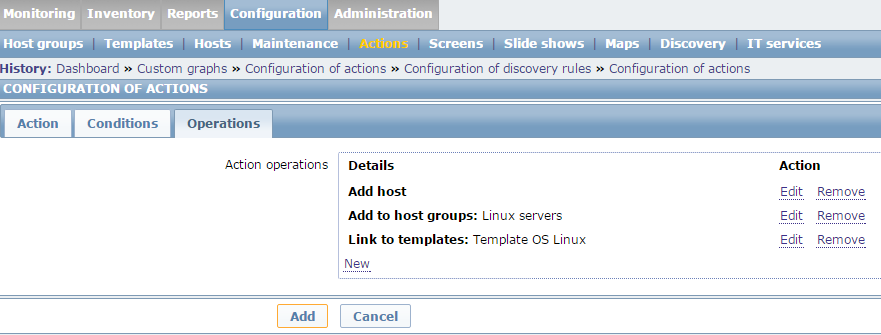
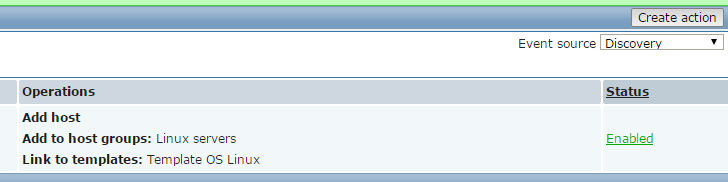
在operations这里找到Add host


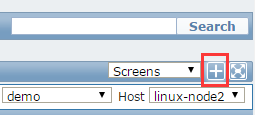
创建1个2行2列的screen。


加入进来了

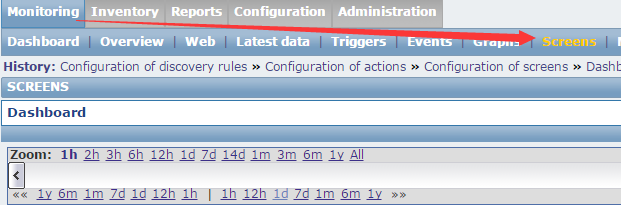
从Monitor--Screens里也可以加
zabbix监控主动模式
默认情况下zabbix是运行在被动模式,这个主动和被动是针对zabbix-agent来说的
agent默认监听一个端口,10050,server会定期主动过来要数据。server端主动的发命令,告诉agent。取哪些数据
如果1万台机器,zabbix同时要发10000个请求到agent,问他们数据。这么弄肯定有问题
zabbix agent也支持主动模式,主动给服务器发消息,这时候用于分布式比较好了

全部克隆


点击进去
点击Full clone

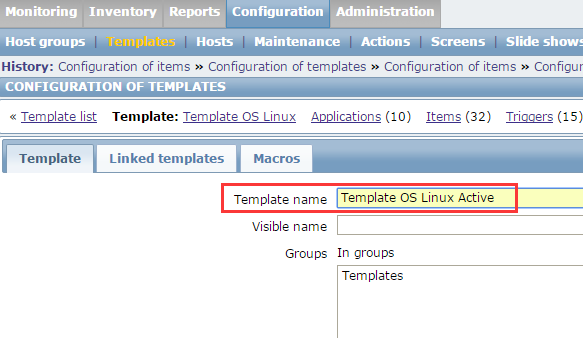
把克隆出来的改成如下名字,多了个Active用来区分,然后点击Add


改成如下
以上更改仅仅是添加了新的模板,items这里并没改掉
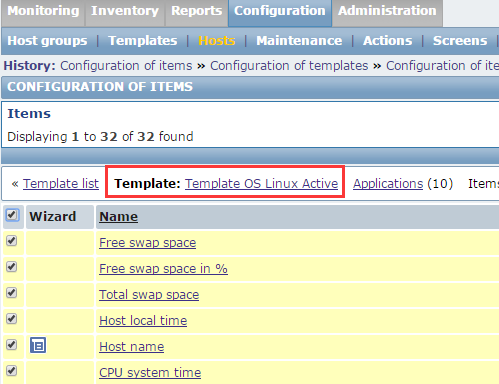
批量修改
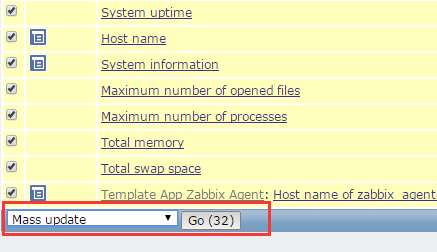
下面这里改成Active的
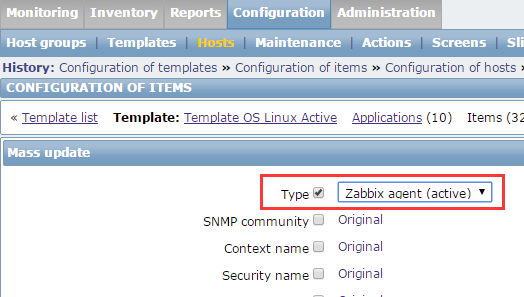
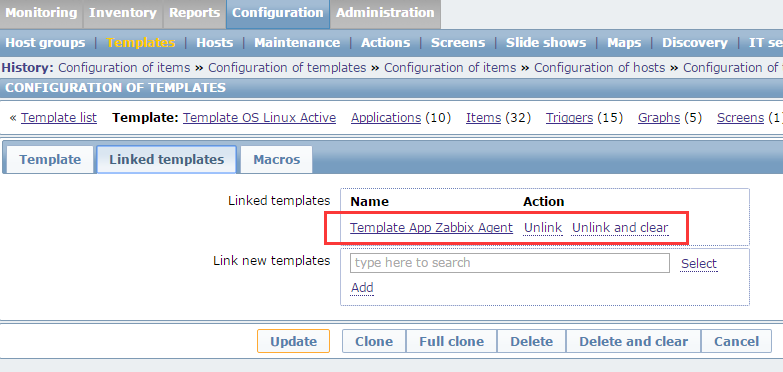
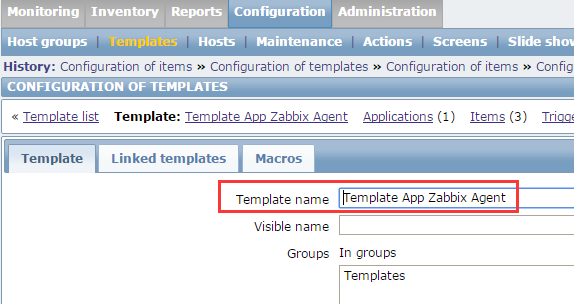
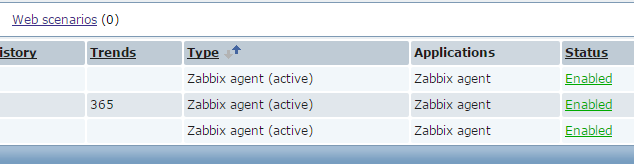
右边的items这里都变成了Active的。上面没变的是link的另一个模板的,因此link的模板也要改


也改成active的

删除之前的node2主机,改成主动模式添加

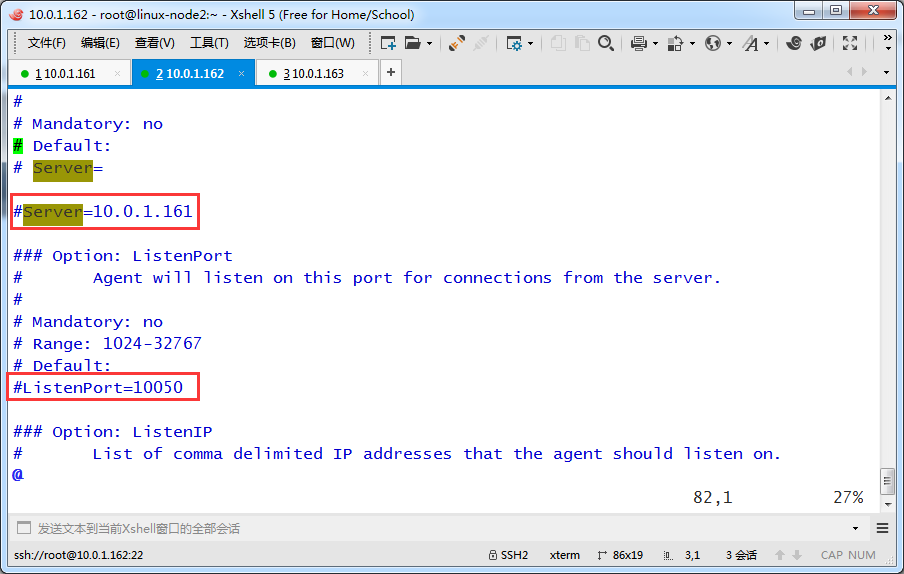
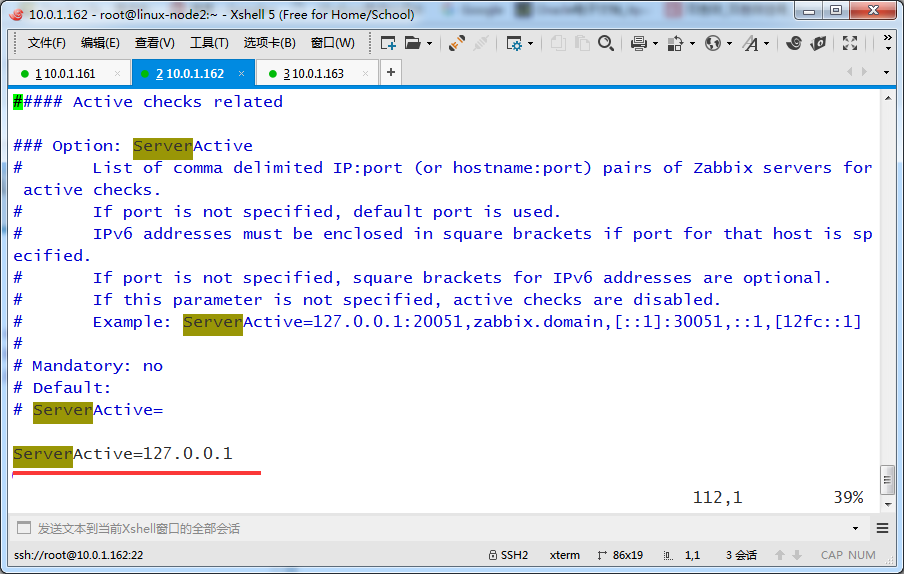
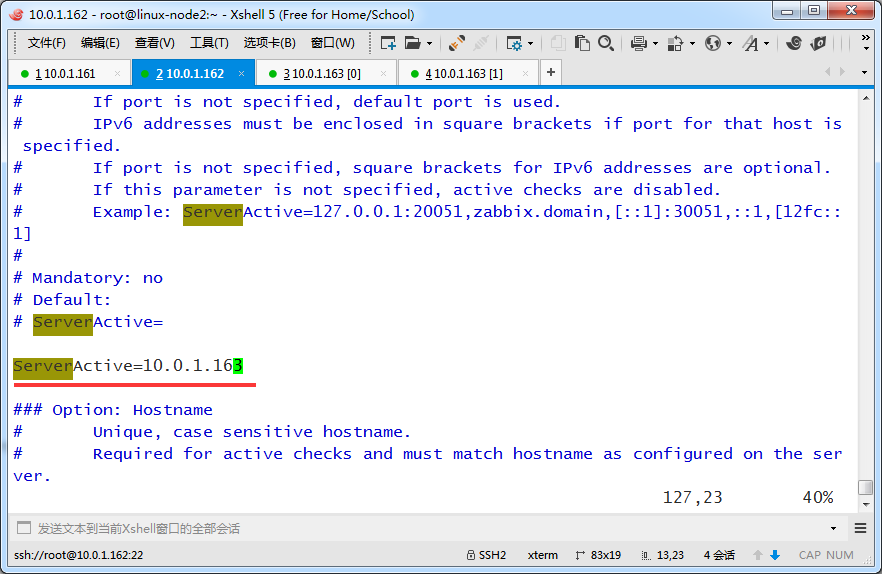
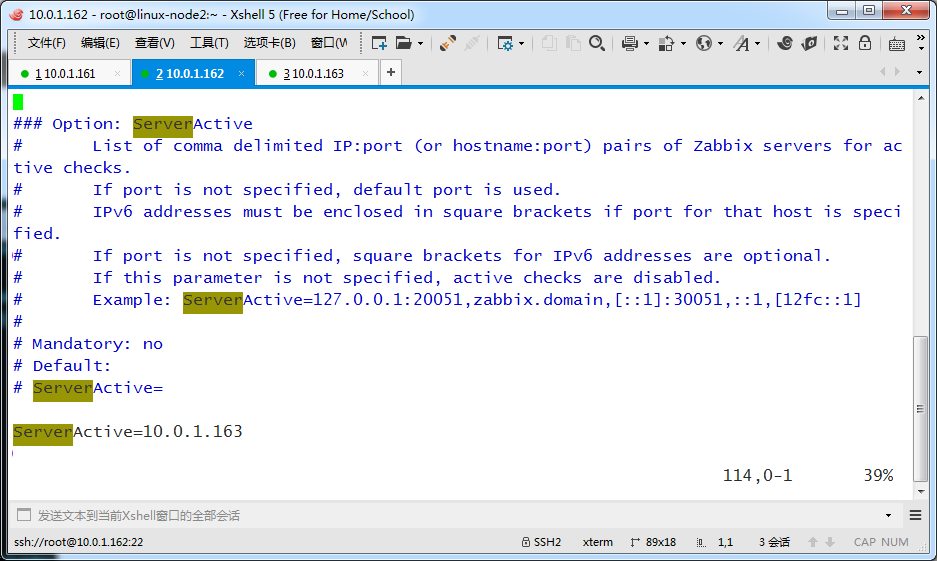
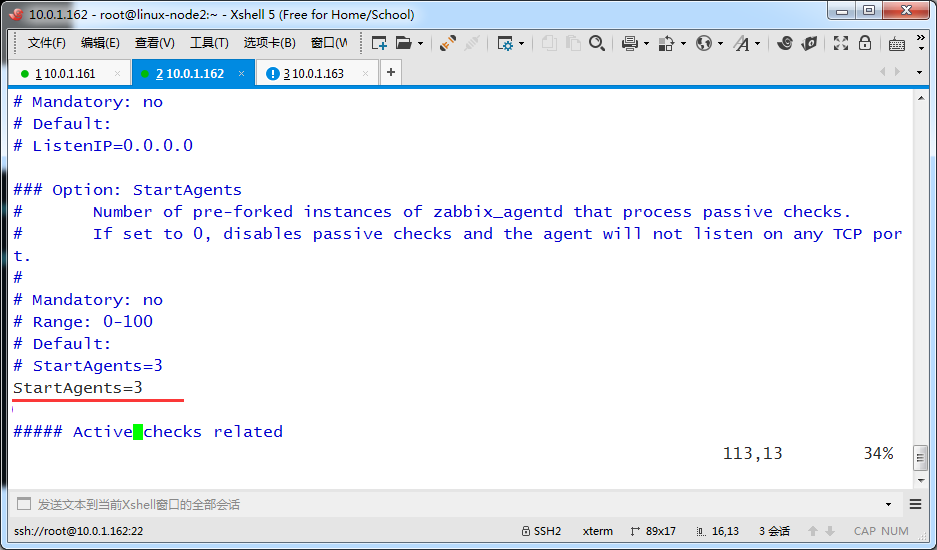
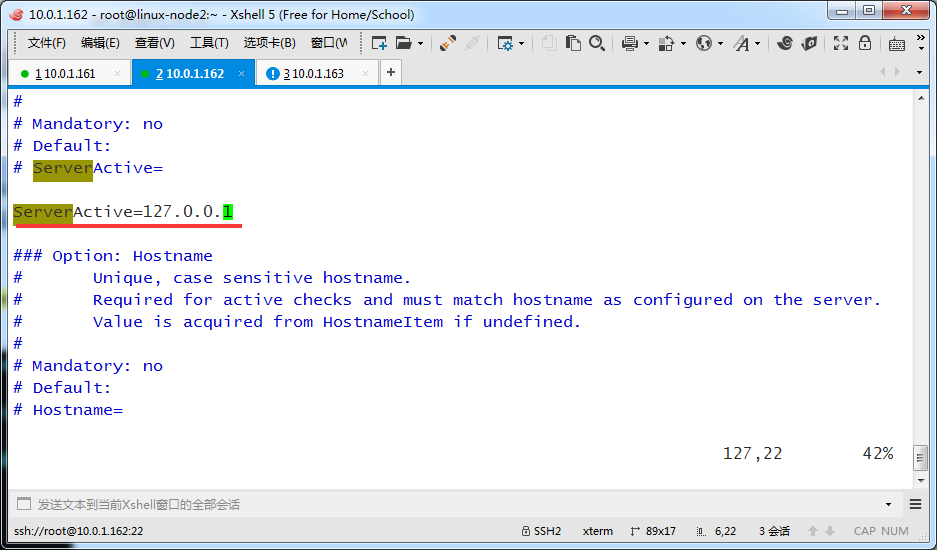
下面是设置为0才表示agent开启主动监控模式
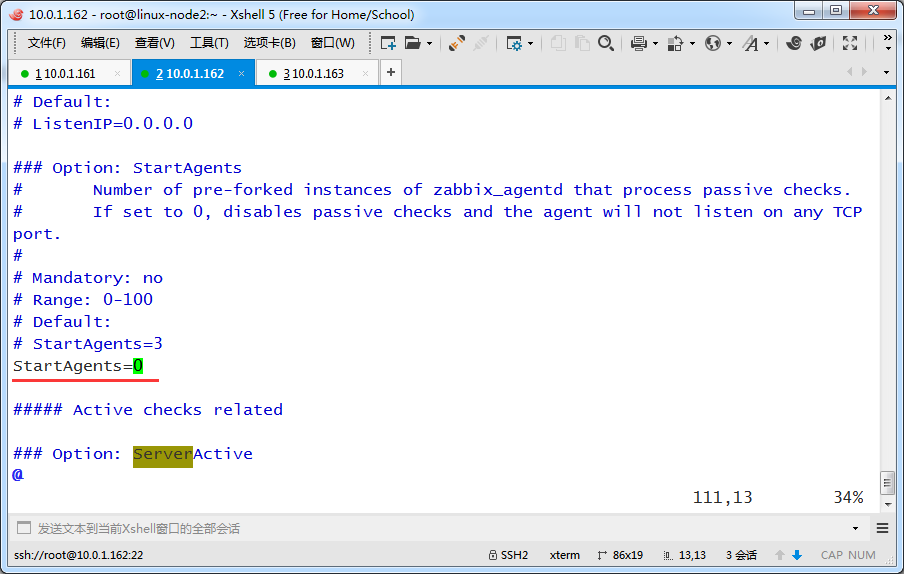
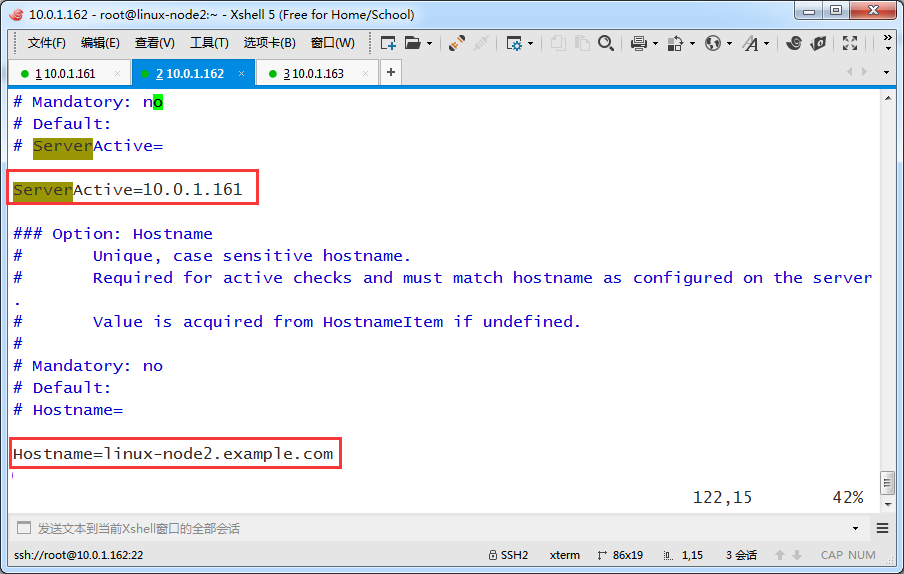
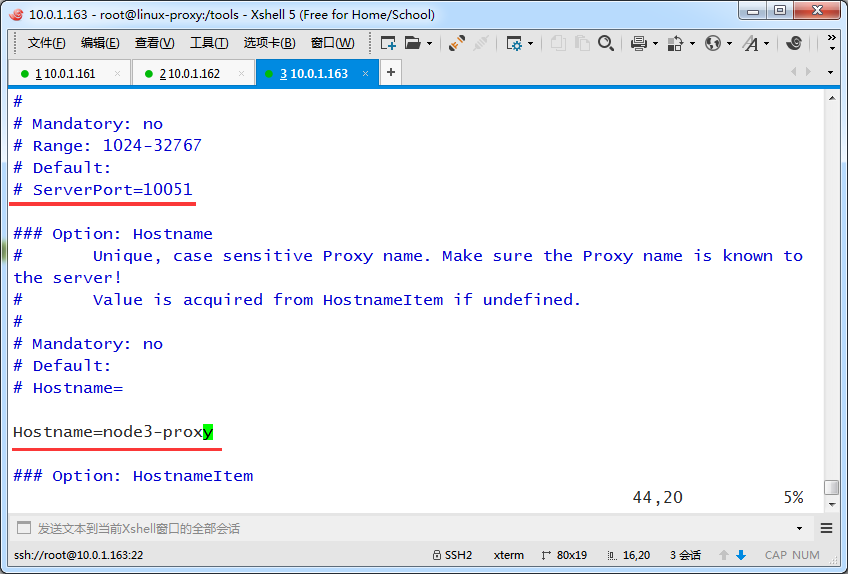
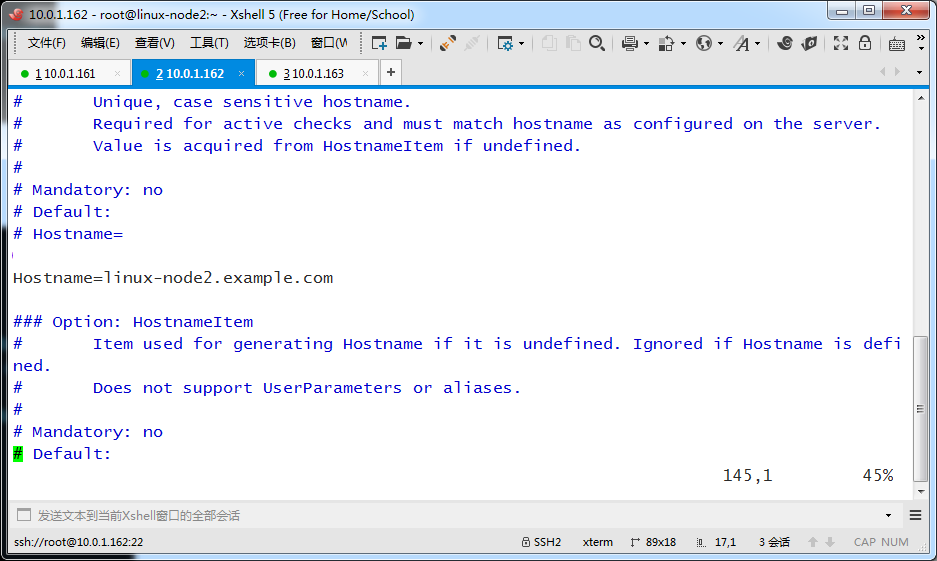
把ServerActive改成Zabbix Server的地址,把Hostname改成自己的主机名
|
1
2
3
4
5
6
7
8
9
10
|
[root@linux-node2 ~]# grep '^[a-Z]' /etc/zabbix/zabbix_agentd.confPidFile=/var/run/zabbix/zabbix_agentd.pidLogFile=/var/log/zabbix/zabbix_agentd.logLogFileSize=0StartAgents=0ServerActive=10.0.1.161Hostname=linux-node2.example.comInclude=/etc/zabbix/zabbix_agentd.d/UserParameter=login-user,uptime | awk -F ' ' '{print $4}'[root@linux-node2 ~]# |
重启agent服务
|
1
2
3
4
|
[root@linux-node2 ~]# /etc/init.d/zabbix-agent restartShutting down Zabbix agent: [ OK ]Starting Zabbix agent: [ OK ][root@linux-node2 ~]# |
看到不再监听端口了
|
1
2
3
4
5
6
7
8
9
10
11
|
[root@linux-node2 ~]# netstat -lntp Active Internet connections (only servers)Proto Recv-Q Send-Q Local Address Foreign Address State PID/Program name tcp 0 0 0.0.0.0:22 0.0.0.0:* LISTEN 2075/sshd tcp 0 0 :::22 :::* LISTEN 2075/sshd [root@linux-node2 ~]# ps -ef | grep zabbixzabbix 76194 1 0 19:38 ? 00:00:00 zabbix_agentd -c /etc/zabbix/zabbix_agentd.confzabbix 76195 76194 0 19:38 ? 00:00:00 zabbix_agentd: collector [idle 1 sec] zabbix 76197 76194 0 19:38 ? 00:00:00 zabbix_agentd: active checks #1 [idle 1 sec] root 76211 75384 0 19:42 pts/0 00:00:00 grep --colour=auto zabbix[root@linux-node2 ~]# |
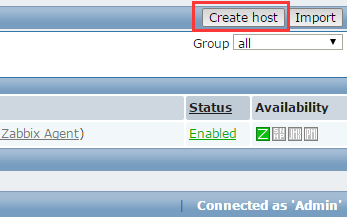
网页里添加主机


|
1
2
3
4
|
mkdir /tools -pcd /tools/wget http://repo.zabbix.com/zabbix/2.4/rhel/6/x86_64/zabbix-release-2.4-1.el6.noarch.rpmrpm -ivh zabbix-release-2.4-1.el6.noarch.rpm |
|
1
|
yum install -y zabbix-proxy zabbix-proxy-mysql mysql-server |
|
1
2
3
4
5
6
7
8
9
10
11
12
|
[root@linux-proxy tools]# yum install -y zabbix-proxy zabbix-proxy-mysql mysql-serverLoaded plugins: fastestmirror, refresh-packagekit, securitySetting up Install ProcessLoading mirror speeds from cached hostfile * base: mirrors.cn99.com * extras: mirrors.cn99.com * updates: mirrors.cn99.comPackage zabbix-proxy-2.4.8-1.el6.x86_64 already installed and latest versionPackage zabbix-proxy-mysql-2.4.8-1.el6.x86_64 already installed and latest versionPackage mysql-server-5.1.73-8.el6_8.x86_64 already installed and latest versionNothing to do[root@linux-proxy tools]# |
启动刚装的mysql,并设置密码
|
1
2
3
4
5
6
7
8
9
10
11
12
13
14
15
16
17
18
19
20
21
22
23
24
25
26
27
28
29
30
31
32
33
34
35
36
37
38
39
40
41
42
43
44
45
46
47
48
49
50
51
52
53
54
55
56
57
58
59
60
61
62
63
64
65
|
[root@linux-proxy tools]# /etc/init.d/mysqld startInitializing MySQL database: WARNING: The host 'linux-proxy.example.com' could not be looked up with resolveip.This probably means that your libc libraries are not 100 % compatiblewith this binary MySQL version. The MySQL daemon, mysqld, should worknormally with the exception that host name resolving will not work.This means that you should use IP addresses instead of hostnameswhen specifying MySQL privileges !Installing MySQL system tables...OKFilling help tables...OKTo start mysqld at boot time you have to copysupport-files/mysql.server to the right place for your systemPLEASE REMEMBER TO SET A PASSWORD FOR THE MySQL root USER !To do so, start the server, then issue the following commands:/usr/bin/mysqladmin -u root password 'new-password'/usr/bin/mysqladmin -u root -h linux-proxy.example.com password 'new-password'Alternatively you can run:/usr/bin/mysql_secure_installationwhich will also give you the option of removing the testdatabases and anonymous user created by default. This isstrongly recommended for production servers.See the manual for more instructions.You can start the MySQL daemon with:cd /usr ; /usr/bin/mysqld_safe &You can test the MySQL daemon with mysql-test-run.plcd /usr/mysql-test ; perl mysql-test-run.plPlease report any problems with the /usr/bin/mysqlbug script! [ OK ]Starting mysqld: [ OK ][root@linux-proxy tools]# /usr/bin/mysqladmin -uroot password 'zabbix'[root@linux-proxy tools]# mysql -uroot -pzabbixWelcome to the MySQL monitor. Commands end with ; or \g.Your MySQL connection id is 3Server version: 5.1.73 Source distributionCopyright (c) 2000, 2013, Oracle and/or its affiliates. All rights reserved.Oracle is a registered trademark of Oracle Corporation and/or itsaffiliates. Other names may be trademarks of their respectiveowners.Type 'help;' or '\h' for help. Type '\c' to clear the current input statement.mysql> show databases;+--------------------+| Database |+--------------------+| information_schema || mysql || test |+--------------------+3 rows in set (0.00 sec)mysql> |
创建zabbix_proxy库,并授权zabbix用户,导入数据
|
1
2
3
4
5
6
7
8
9
10
11
12
13
14
15
16
17
18
19
20
21
22
23
24
25
26
27
28
29
30
31
32
33
34
|
[root@linux-proxy tools]# rpm -ql zabbix-proxy-mysql/usr/sbin/zabbix_proxy_mysql/usr/share/doc/zabbix-proxy-mysql-2.4.8/usr/share/doc/zabbix-proxy-mysql-2.4.8/create/usr/share/doc/zabbix-proxy-mysql-2.4.8/create/schema.sql[root@linux-proxy tools]# /usr/bin/mysqladmin -uroot password 'zabbix'/usr/bin/mysqladmin: connect to server at 'localhost' failederror: 'Access denied for user 'root'@'localhost' (using password: NO)'[root@linux-proxy tools]# mysql -uroot -pzabbixWelcome to the MySQL monitor. Commands end with ; or \g.Your MySQL connection id is 5Server version: 5.1.73 Source distributionCopyright (c) 2000, 2013, Oracle and/or its affiliates. All rights reserved.Oracle is a registered trademark of Oracle Corporation and/or itsaffiliates. Other names may be trademarks of their respectiveowners.Type 'help;' or '\h' for help. Type '\c' to clear the current input statement.mysql> create database zabbix_proxy character set utf8;Query OK, 1 row affected (0.00 sec)mysql> grant all on zabbix_proxy.* to zabbix@localhost identified by 'zabbix';Query OK, 0 rows affected (0.00 sec)mysql> use zabbix_proxy;Database changedmysql> source /usr/share/doc/zabbix-proxy-mysql-2.4.8/create/schema.sqlQuery OK, 0 rows affected (0.01 sec)Query OK, 0 rows affected (0.02 sec)Records: 0 Duplicates: 0 Warnings: 0 |
|
1
|
[root@linux-proxy tools]# vim /etc/zabbix/zabbix_proxy.conf |
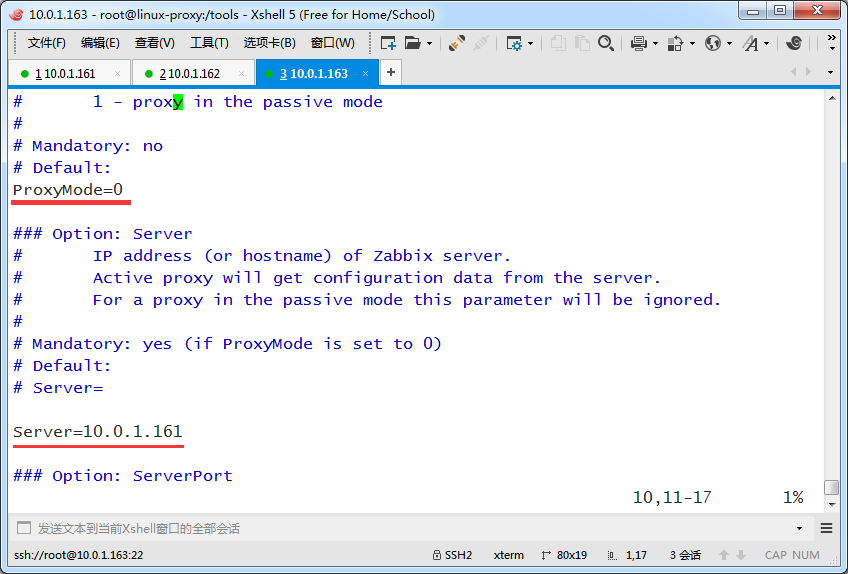
看到如下注释,proxy也可以运行在Active和Passtive模式下,工作中主要还是运行在Active模式下

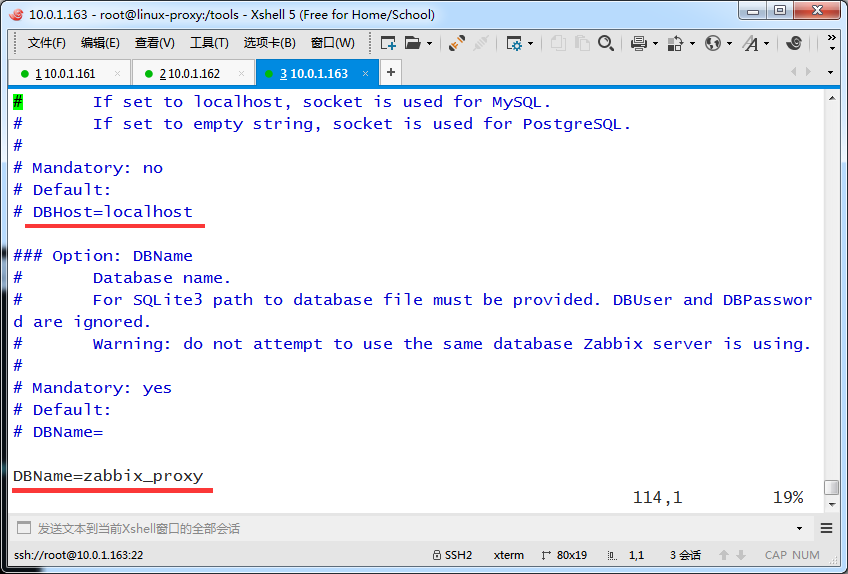
DBHost和DBName都没变,不用修改

检查配置
|
1
2
3
4
5
6
7
8
9
10
11
12
13
14
|
[root@linux-proxy tools]# vim /etc/zabbix/zabbix_proxy.conf [root@linux-proxy tools]# grep '^[a-Z]' /etc/zabbix/zabbix_proxy.confProxyMode=0Server=10.0.1.161Hostname=node3-proxyLogFile=/var/log/zabbix/zabbix_proxy.logLogFileSize=0PidFile=/var/run/zabbix/zabbix_proxy.pidDBName=zabbix_proxyDBUser=zabbixDBPassword=zabbixDBSocket=/var/lib/mysql/mysql.sockExternalScripts=/usr/lib/zabbix/externalscripts[root@linux-proxy tools]# |
|
1
2
3
4
5
6
7
8
9
10
11
|
[root@linux-proxy tools]# /etc/init.d/zabbix-proxy startStarting Zabbix proxy: [ OK ][root@linux-proxy tools]# netstat -lntpActive Internet connections (only servers)Proto Recv-Q Send-Q Local Address Foreign Address State PID/Program name tcp 0 0 0.0.0.0:22 0.0.0.0:* LISTEN 2076/sshd tcp 0 0 0.0.0.0:10051 0.0.0.0:* LISTEN 13310/zabbix_proxy tcp 0 0 0.0.0.0:3306 0.0.0.0:* LISTEN 13219/mysqld tcp 0 0 :::22 :::* LISTEN 2076/sshd tcp 0 0 :::10051 :::* LISTEN 13310/zabbix_proxy [root@linux-proxy tools]# |
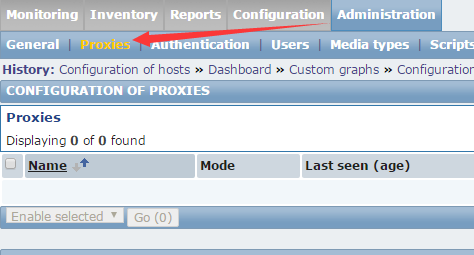

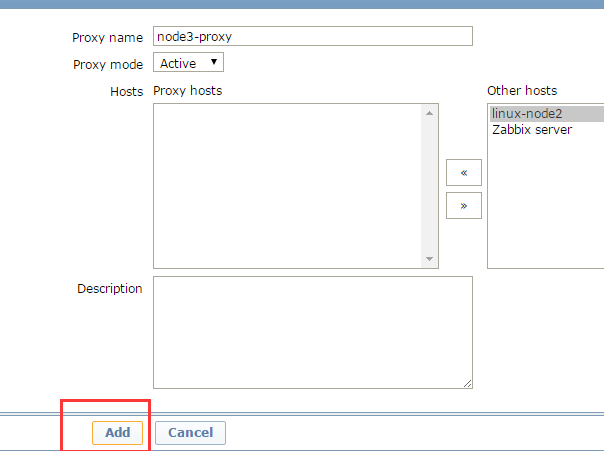
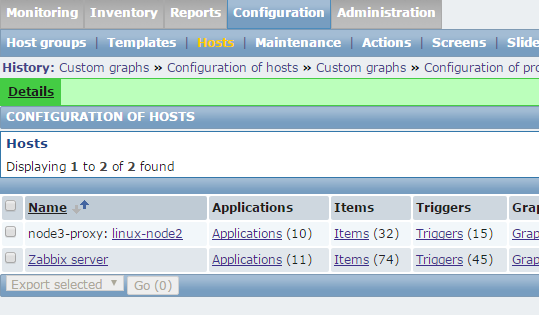
下面这里要选择proxy
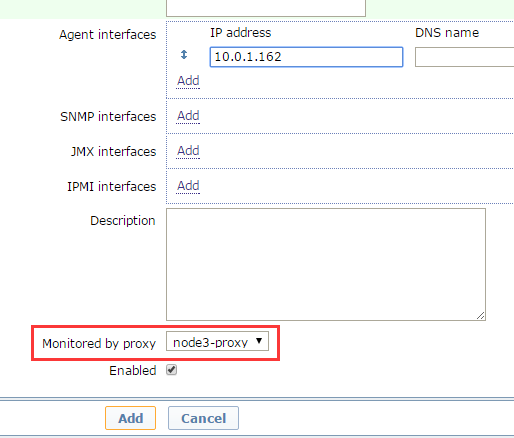

还需要把node2的指向改成proxy
|
1
|
[root@linux-node2 ~]# vim /etc/zabbix/zabbix_agentd.conf |
下面改成proxy地址,因为它要把数据发给proxy
重启agent
|
1
2
3
4
|
[root@linux-node2 ~]# /etc/init.d/zabbix-agent restartShutting down Zabbix agent: [ OK ]Starting Zabbix agent: [ OK ][root@linux-node2 ~]# |
|
1
2
3
4
5
6
7
8
9
10
11
|
[root@linux-proxy tools]# tail -f /var/log/zabbix/zabbix_proxy.log 13537:20170315:225713.912 proxy #17 started [http poller #1] 13542:20170315:225713.918 proxy #22 started [history syncer #4] 13531:20170315:225713.918 proxy #11 started [trapper #2] 13543:20170315:225713.918 proxy #23 started [self-monitoring #1] 13532:20170315:225713.918 proxy #12 started [trapper #3] 13528:20170315:225713.919 proxy #8 started [poller #5] 13533:20170315:225713.922 proxy #13 started [trapper #4] 13538:20170315:225713.941 proxy #18 started [discoverer #1] 13520:20170315:225813.966 sending heartbeat message to server failed: error:"negative response: "failed"", info:"proxy "linux-proxy.example.com" not found" 13534:20170315:225858.853 cannot send list of active checks to [10.0.1.162]: host [linux-node2.example.com] not found |
|
1
2
3
4
5
6
7
8
9
10
11
|
[root@linux-proxy tools]# tail -f /var/log/zabbix/zabbix_proxy.log 13638:20170315:230149.414 proxy #17 started [http poller #1] 13642:20170315:230149.415 proxy #21 started [history syncer #3] 13634:20170315:230149.415 proxy #13 started [trapper #4] 13637:20170315:230149.420 proxy #16 started [housekeeper #1] 13641:20170315:230149.420 proxy #20 started [history syncer #2] 13633:20170315:230149.424 proxy #12 started [trapper #3] 13643:20170315:230149.426 proxy #22 started [history syncer #4] 13635:20170315:230149.431 proxy #14 started [trapper #5] 13639:20170315:230149.448 proxy #18 started [discoverer #1] 13620:20170315:230149.453 received configuration data from server, datalen 7423 |


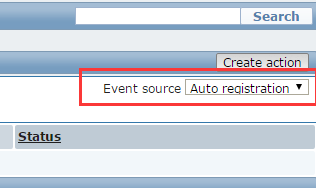
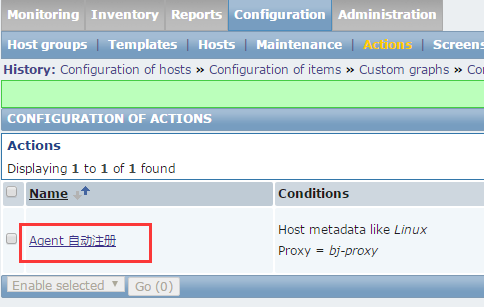
Zabbox自动化监控---自动注册
自动化监控分为:
agent自动注册
server端自动发现
通过zabbix api方式插入数据(比如从cmdb读取资产里的主机,然后通过Zabbix的api插入Zabbix数据库)
|
1
2
|
[root@linux-node1 ~]# zabbix_get -s 10.0.1.161 -k system.unameLinux linux-node1.example.com 2.6.32-504.el6.x86_64 #1 SMP Wed Oct 15 04:27:16 UTC 2014 x86_64 |
|
1
2
3
4
|
[root@linux-node2 ~]# /etc/init.d/zabbix-agent restartShutting down Zabbix agent: [ OK ]Starting Zabbix agent: [ OK ][root@linux-node2 ~]# |


|
1
2
|
[root@linux-node1 ~]# zabbix_get -s 10.0.1.161 -k system.unameLinux linux-node1.example.com 2.6.32-504.el6.x86_64 #1 SMP Wed Oct 15 04:27:16 UTC 2014 x86_64 |
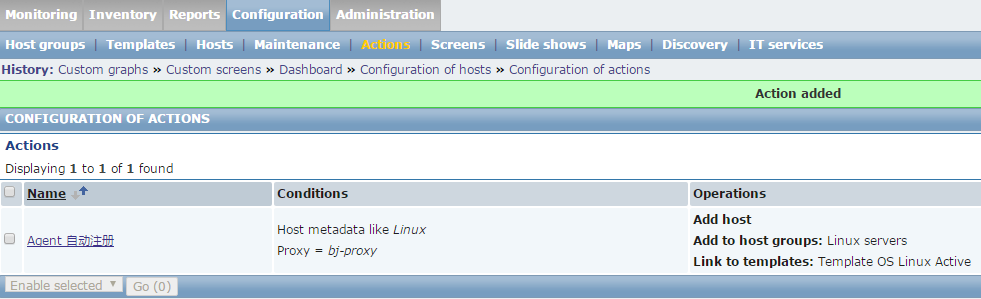
这两个条件
注意你的条件是a and b,operation 表示你想让它干什么。添加这台主机,然后添加主机组,再link一个模板


|
1
2
3
4
5
6
7
8
9
10
11
12
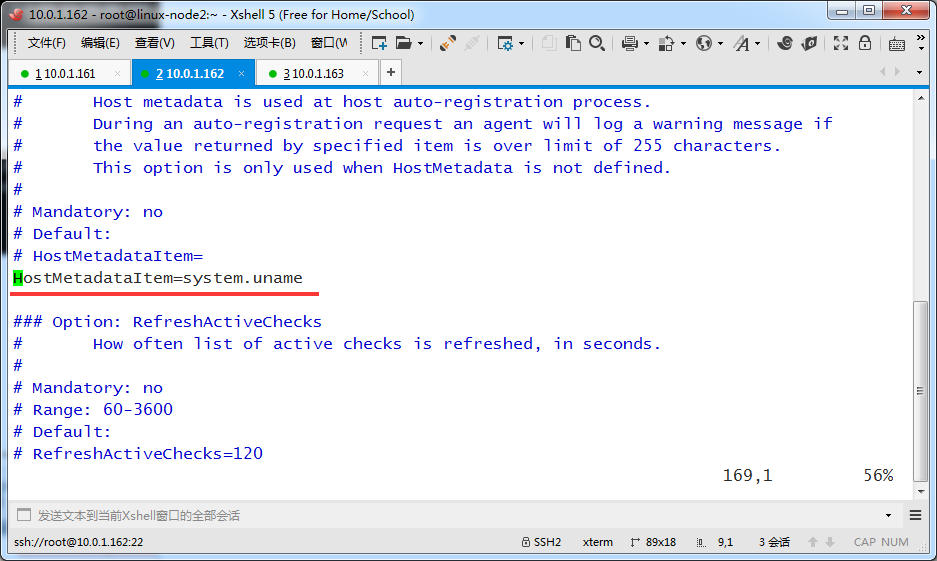
|
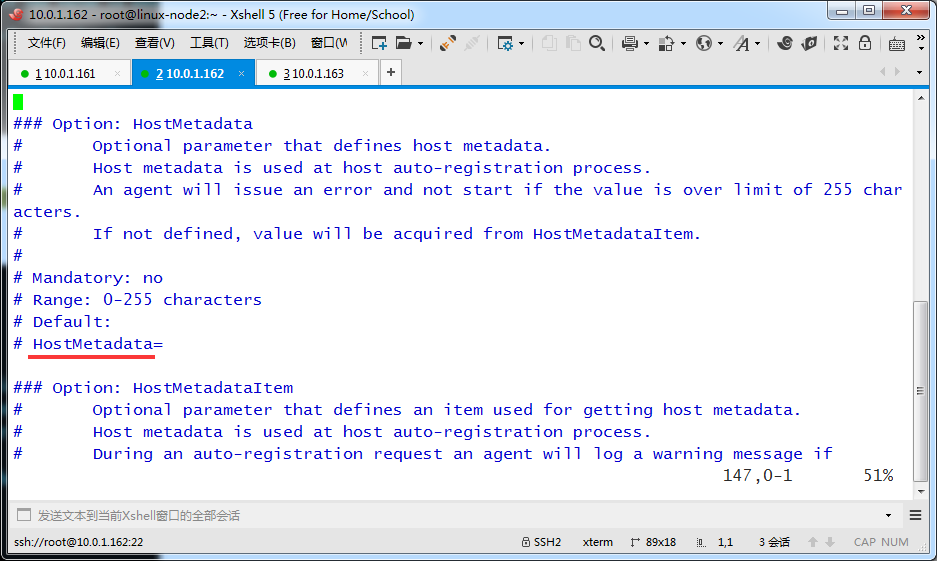
[root@linux-node2 ~]# grep '^[a-Z]' /etc/zabbix/zabbix_agentd.confPidFile=/var/run/zabbix/zabbix_agentd.pidLogFile=/var/log/zabbix/zabbix_agentd.logLogFileSize=0Server=10.0.1.161StartAgents=3ServerActive=127.0.0.1Hostname=linux-node2.example.comHostMetadataItem=system.unameInclude=/etc/zabbix/zabbix_agentd.d/UserParameter=login-user,uptime | awk -F ' ' '{print $4}'[root@linux-node2 ~]# |
|
1
2
3
4
|
[root@linux-node2 ~]# /etc/init.d/zabbix-agent restartShutting down Zabbix agent: [ OK ]Starting Zabbix agent: [ OK ][root@linux-node2 ~]# |


######################################################################################
Zabbix api
对于以上两种方式,有些人都不选,倾向于使用第三种:使用zabbix api加上这个监控
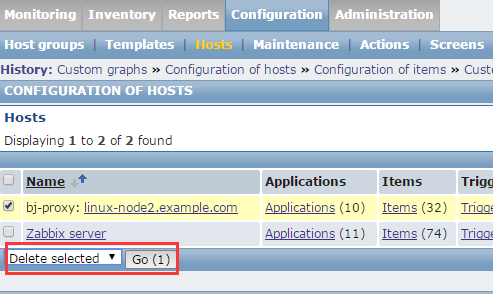
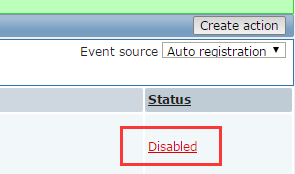
在把这台机器删除了,然后discovery和自动注册的都关闭了
再换一种方式把它加进去,zabbix api两个作用
1、管理zabbix
2、查询一些数,把一些zabbix报警的图形一块发邮件
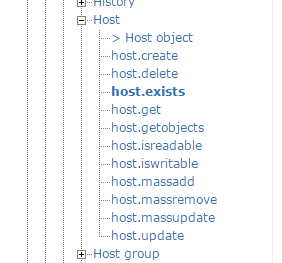
它支持很多方法
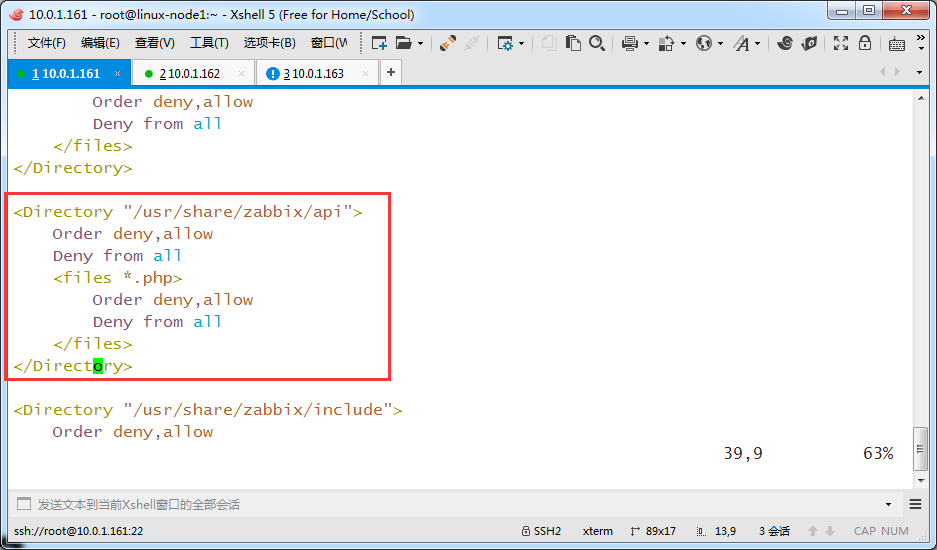
api的配置,在httpd.conf目录下。如下编辑zabbix.conf
|
1
|
[root@linux-node1 ~]# vim /etc/httpd/conf.d/zabbix.conf |
|
1
2
3
4
5
6
|
[root@linux-node1 zabbix]# cd /usr/share/zabbix/[root@linux-node1 zabbix]# ls api_jsonrpc.php api_jsonrpc.php[root@linux-node1 zabbix]# ls api_jsonrpc.php -l-rw-r--r-- 1 root root 2342 Apr 20 2016 api_jsonrpc.php[root@linux-node1 zabbix]# |
可以看到,首先它是个api,传输模式是rpc的,传输格式是json的
既然是api,那肯定有验证,给api发用户名密码,得返回token吧
后面拿这个token就可以继续请求了,和openstack类似
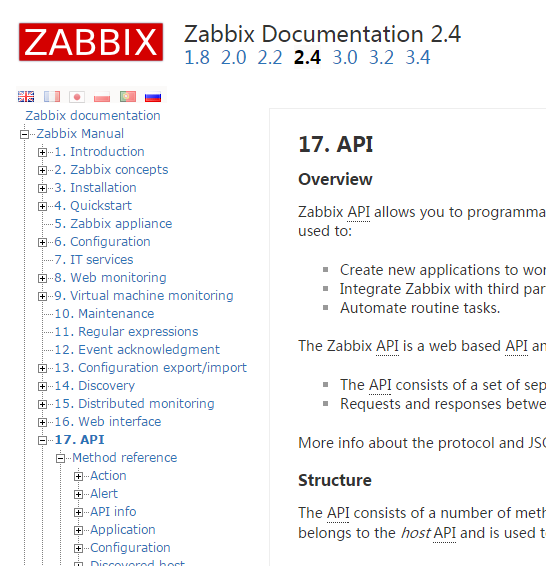
打开文档看
https://www.zabbix.com/documentation/2.4/manual/api/reference
第一步,因为涉及登录,找用户相关的
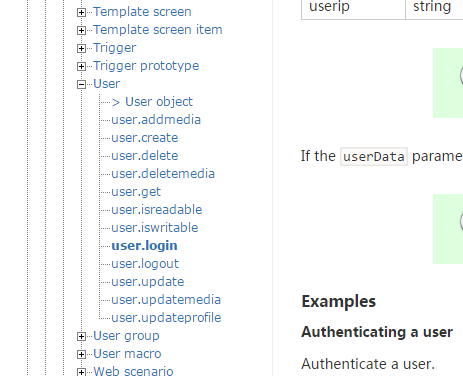
Authenticate a user.
Request:
|
1
2
3
4
5
6
7
8
9
|
{ "jsonrpc": "2.0", "method": "user.login", "params": { "user": "Admin", "password": "zabbix" }, "id": 1} |
Response:
|
1
2
3
4
5
|
{ "jsonrpc": "2.0", "result": "0424bd59b807674191e7d77572075f33", "id": 1} |
通过curl访问
-s 静默
-X POST
-H 接类型
-d 接内容,用单引号引起来
|
1
2
3
4
5
6
7
8
9
10
11
12
|
[root@linux-node2 ~]# curl -s -X POST -H 'Content-Type:application/json' -d '{ "jsonrpc": "2.0", "method": "user.login", "params": { "user": "Admin", "password": "zabbix" }, "id": 1}' http://10.0.1.161/zabbix/api_jsonrpc.php{"jsonrpc":"2.0","result":"5733cec620a75d1f7e2ebcf725c7ccec","id":1}[root@linux-node2 ~]# [root@linux-node2 ~]# |
看着不舒服,给它处理下,调用python的工具处理下,命令如下
|
1
2
3
4
5
6
7
8
9
10
11
|
curl -s -X POST -H 'Content-Type:application/json' -d '{ "jsonrpc": "2.0", "method": "user.login", "params": { "user": "Admin", "password": "zabbix" }, "id": 1}' http://10.0.1.161/zabbix/api_jsonrpc.php |python -mjson.tool |
执行如下
|
1
2
3
4
5
6
7
8
9
10
11
12
13
14
15
16
17
|
[root@linux-node2 ~]# curl -s -X POST -H 'Content-Type:application/json' -d '> > {> "jsonrpc": "2.0",> "method": "user.login",> "params": {> "user": "Admin",> "password": "zabbix"> },> "id": 1> }' http://10.0.1.161/zabbix/api_jsonrpc.php |python -mjson.tool{ "id": 1, "jsonrpc": "2.0", "result": "d05f9fa13c8b182d61e462b8aaded670"}[root@linux-node2 ~]# |
上面为什么要设置id,因为可能又多个请求,给不同的会话设置不同的id
你才知道这个是你的
把这个字符串记录下来
d05f9fa13c8b182d61e462b8aaded670
你请求的时候还可以加个下面userdata为true,这样还能返回用户信息
命令如下
|
1
2
3
4
5
6
7
8
9
10
11
|
curl -s -X POST -H 'Content-Type:application/json' -d '{ "jsonrpc": "2.0", "method": "user.login", "params": { "user": "Admin", "password": "zabbix", "userData": true }, "id": 1}' http://10.0.1.161/zabbix/api_jsonrpc.php |python -mjson.tool |
执行如下
|
1
2
3
4
5
6
7
8
9
10
11
12
13
14
15
16
17
18
19
20
21
22
23
24
25
26
27
28
29
30
31
32
33
34
35
36
37
|
[root@linux-node2 ~]# curl -s -X POST -H 'Content-Type:application/json' -d '> {> "jsonrpc": "2.0",> "method": "user.login",> "params": {> "user": "Admin",> "password": "zabbix",> "userData": true> },> "id": 1> }' http://10.0.1.161/zabbix/api_jsonrpc.php |python -mjson.tool{ "id": 1, "jsonrpc": "2.0", "result": { "alias": "Admin", "attempt_clock": "0", "attempt_failed": "0", "attempt_ip": "", "autologin": "1", "autologout": "0", "debug_mode": false, "gui_access": "0", "lang": "en_GB", "name": "Zabbix", "refresh": "30", "rows_per_page": "50", "sessionid": "dbfdc9c932d15760f0ed05bb5955511b", "surname": "Administrator", "theme": "default", "type": "3", "url": "", "userid": "1", "userip": "10.0.1.162" }}[root@linux-node2 ~]# |
https://www.zabbix.com/documentation/2.4/manual/api/reference/user/get
找一个简单的,只获取hostid,注意auth是sessionid
|
1
2
3
4
5
6
7
8
9
10
|
curl -s -X POST -H 'Content-Type:application/json' -d '{ "jsonrpc": "2.0", "method": "host.get", "params": { "output": ["hostid"] }, "auth": "dbfdc9c932d15760f0ed05bb5955511b", "id": 2} ' http://10.0.1.161/zabbix/api_jsonrpc.php |python -mjson.tool |
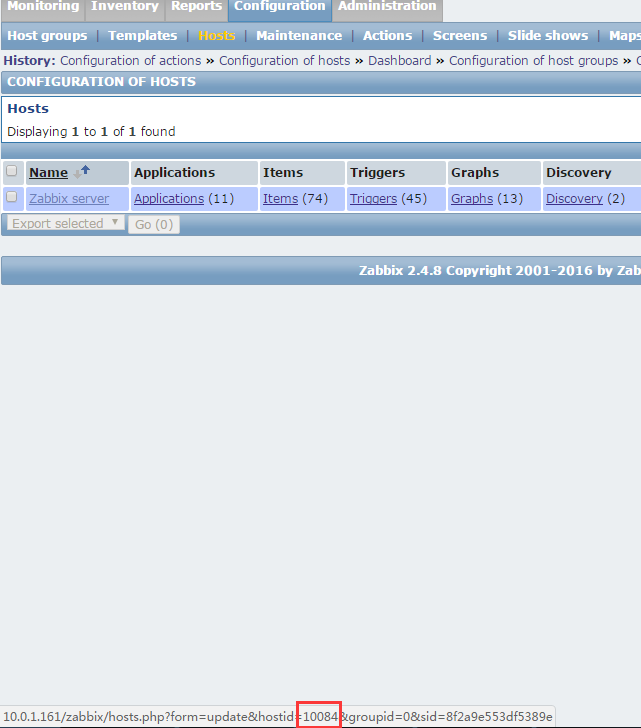
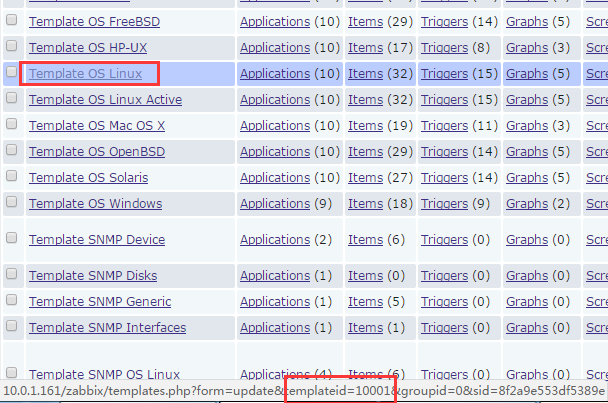
执行结果如下,hostid是10084
|
1
2
3
4
5
6
7
8
9
10
11
12
13
14
15
16
17
18
19
20
|
[root@linux-node2 ~]# curl -s -X POST -H 'Content-Type:application/json' -d '> {> "jsonrpc": "2.0",> "method": "host.get",> "params": {> "output": ["hostid"] > },> "auth": "dbfdc9c932d15760f0ed05bb5955511b",> "id": 2> } ' http://10.0.1.161/zabbix/api_jsonrpc.php |python -mjson.tool{ "id": 2, "jsonrpc": "2.0", "result": [ { "hostid": "10084" } ]}[root@linux-node2 ~]# |
hostid就是下面这里的
|
1
2
3
4
5
6
7
8
9
10
|
curl -s -X POST -H 'Content-Type:application/json' -d '{ "jsonrpc": "2.0", "method": "host.get", "params": { "output": ["host"] }, "auth": "dbfdc9c932d15760f0ed05bb5955511b", "id": 2} ' http://10.0.1.161/zabbix/api_jsonrpc.php |python -mjson.tool |
执行结果如下
|
1
2
3
4
5
6
7
8
9
10
11
12
13
14
15
16
17
18
19
20
21
|
[root@linux-node2 ~]# curl -s -X POST -H 'Content-Type:application/json' -d '> {> "jsonrpc": "2.0",> "method": "host.get",> "params": {> "output": ["host"] > },> "auth": "dbfdc9c932d15760f0ed05bb5955511b",> "id": 2> } ' http://10.0.1.161/zabbix/api_jsonrpc.php |python -mjson.tool{ "id": 2, "jsonrpc": "2.0", "result": [ { "host": "Zabbix server", "hostid": "10084" } ]}[root@linux-node2 ~]# |
接下来使用api方式添加被监控主机
https://www.zabbix.com/documentation/2.4/manual/api/reference/host/create
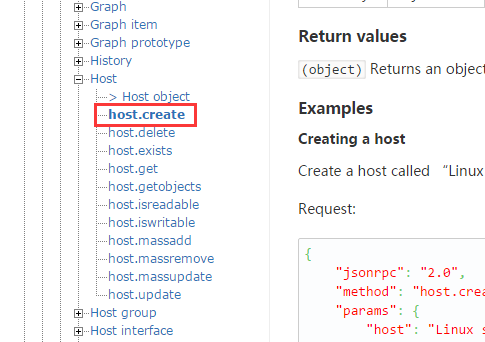
创建的时候可以指定模板,以及主机组
在官网里看到实例如下,添加主机的时候可以指定模板,主机组,资产
|
1
2
3
4
5
6
7
8
9
10
11
12
13
14
15
16
17
18
19
20
21
22
23
24
25
26
27
28
29
30
31
32
33
34
|
{ "jsonrpc": "2.0", "method": "host.create", "params": { "host": "Linux server", "interfaces": [ { "type": 1, "main": 1, "useip": 1, "ip": "192.168.3.1", "dns": "", "port": "10050" } ], "groups": [ { "groupid": "50" } ], "templates": [ { "templateid": "20045" } ], "inventory_mode": 0, "inventory": { "macaddress_a": "01234", "macaddress_b": "56768" } }, "auth": "038e1d7b1735c6a5436ee9eae095879e", "id": 1} |
查看linux servers这个主机组,它的组id是2
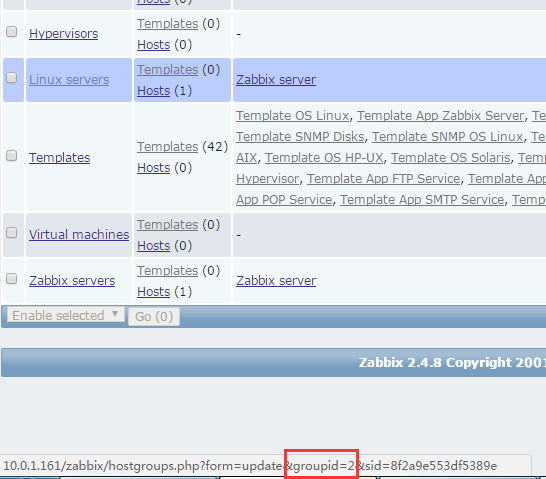
先获取授权的sessionid
|
1
2
3
4
5
6
7
8
9
10
11
|
curl -s -X POST -H 'Content-Type:application/json' -d ' { "jsonrpc": "2.0", "method": "user.login", "params": { "user": "Admin", "password": "zabbix" }, "id": 1 }' http://10.0.1.161/zabbix/api_jsonrpc.php |python -mjson.tool |
根据返回的sessionid来创建主机
|
1
2
3
4
5
6
7
8
9
10
11
12
13
14
15
16
17
|
[root@linux-node2 ~]# curl -s -X POST -H 'Content-Type:application/json' -d ' { "jsonrpc": "2.0", "method": "user.login", "params": { "user": "Admin", "password": "zabbix" }, "id": 1 }' http://10.0.1.161/zabbix/api_jsonrpc.php |python -mjson.tool{ "id": 1, "jsonrpc": "2.0", "result": "4c0999123f2da1b09b6a079c02a363ad"}[root@linux-node2 ~]# |
执行命令如下
|
1
2
3
4
5
6
7
8
9
10
11
12
13
14
15
16
17
18
19
20
21
22
23
24
25
26
27
28
29
30
|
curl -s -X POST -H 'Content-Type:application/json' -d '{ "jsonrpc": "2.0", "method": "host.create", "params": { "host": "Linux server", "interfaces": [ { "type": 1, "main": 1, "useip": 1, "ip": "10.0.1.162", "dns": "", "port": "10050" } ], "groups": [ { "groupid": "2" } ], "templates": [ { "templateid": "10001" } ] }, "id": 1, "auth": "4c0999123f2da1b09b6a079c02a363ad"}' http://10.0.1.161/zabbix/api_jsonrpc.php |python -mjson.tool |
执行结果如下
|
1
2
3
4
5
6
7
8
9
10
11
12
13
14
15
16
17
18
19
20
21
22
23
24
25
26
27
28
29
30
31
32
33
34
35
36
37
38
39
40
|
[root@linux-node2 ~]# curl -s -X POST -H 'Content-Type:application/json' -d '> {> "jsonrpc": "2.0",> "method": "host.create",> "params": {> "host": "Linux server",> "interfaces": [> {> "type": 1,> "main": 1,> "useip": 1,> "ip": "10.0.1.162",> "dns": "",> "port": "10050"> }> ],> "groups": [> {> "groupid": "2"> }> ],> "templates": [> {> "templateid": "10001"> }> ] > },> "id": 1, > "auth": "4c0999123f2da1b09b6a079c02a363ad"> }' http://10.0.1.161/zabbix/api_jsonrpc.php |python -mjson.tool{ "id": 1, "jsonrpc": "2.0", "result": { "hostids": [ "10116" ] }}[root@linux-node2 ~]# |
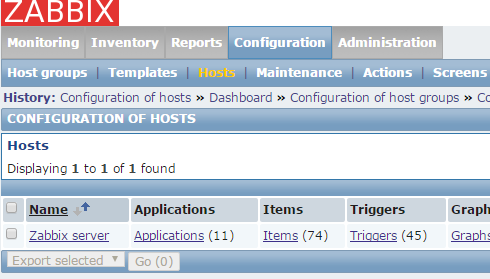
创建成功
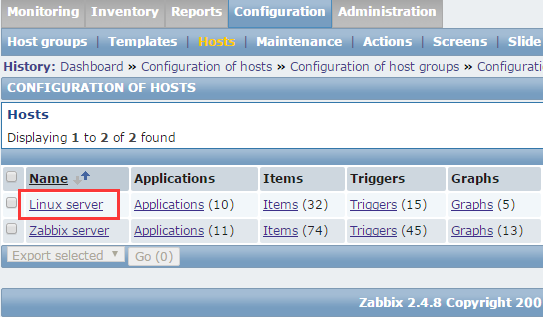
点开看看
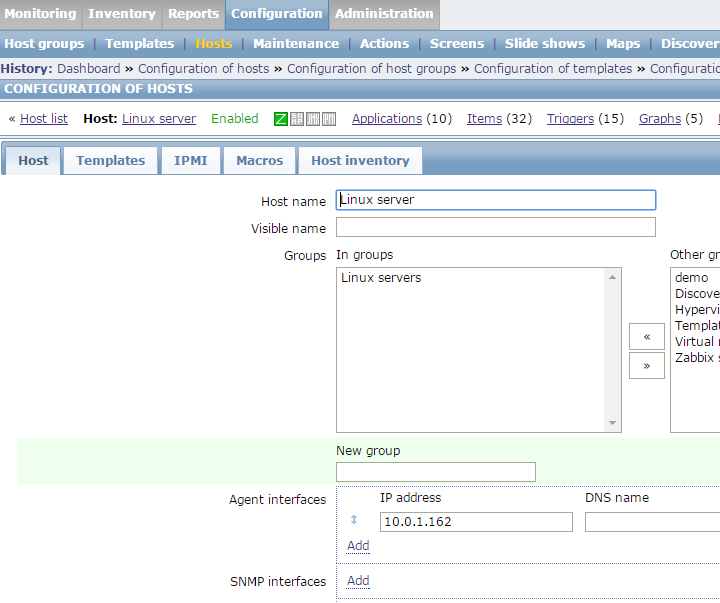
模板也自动加上了
学习zabbix(五)的更多相关文章
- 从零开始学习jQuery (五) 事件与事件对象
本系列文章导航 从零开始学习jQuery (五) 事件与事件对象 一.摘要 事件是脚本编程的灵魂. 所以本章内容也是jQuery学习的重点. 本文将对jQuery中的事件处理以及事件对象进行详细的讲解 ...
- 前端学习 第五弹: CSS (一)
前端学习 第五弹: CSS (一) 创建css: <link rel="stylesheet" type="text/css" href="my ...
- C#可扩展编程之MEF学习笔记(五):MEF高级进阶
好久没有写博客了,今天抽空继续写MEF系列的文章.有园友提出这种系列的文章要做个目录,看起来方便,所以就抽空做了一个,放到每篇文章的最后. 前面四篇讲了MEF的基础知识,学完了前四篇,MEF中比较常用 ...
- Android Animation学习(五) ApiDemos解析:容器布局动画 LayoutTransition
Android Animation学习(五) ApiDemos解析:容器布局动画 LayoutTransition Property animation系统还提供了对ViewGroup中的View改变 ...
- 六、Android学习第五天——Handler的使用(转)
(转自:http://wenku.baidu.com/view/af39b3164431b90d6c85c72f.html) 六.Android学习第五天——Handler的使用 注意:有很多功能是不 ...
- (转)Qt Model/View 学习笔记 (五)——View 类
Qt Model/View 学习笔记 (五) View 类 概念 在model/view架构中,view从model中获得数据项然后显示给用户.数据显示的方式不必与model提供的表示方式相同,可以与 ...
- java之jvm学习笔记五(实践写自己的类装载器)
java之jvm学习笔记五(实践写自己的类装载器) 课程源码:http://download.csdn.net/detail/yfqnihao/4866501 前面第三和第四节我们一直在强调一句话,类 ...
- 文本分类学习 (五) 机器学习SVM的前奏-特征提取(卡方检验续集)
前言: 上一篇比较详细的介绍了卡方检验和卡方分布.这篇我们就实际操刀,找到一些训练集,正所谓纸上得来终觉浅,绝知此事要躬行.然而我在躬行的时候,发现了卡方检验对于文本分类来说应该把公式再变形一般,那样 ...
- Learning ROS for Robotics Programming Second Edition学习笔记(五) indigo computer vision
中文译著已经出版,详情请参考:http://blog.csdn.net/ZhangRelay/article/category/6506865 Learning ROS for Robotics Pr ...
- scrapy爬虫学习系列五:图片的抓取和下载
系列文章列表: scrapy爬虫学习系列一:scrapy爬虫环境的准备: http://www.cnblogs.com/zhaojiedi1992/p/zhaojiedi_python_00 ...
随机推荐
- Linux 网络时间同步
Linux的时间分为System Clock(系统时间)和Real Time Clock (硬件时间,简称RTC). 系统时间:指当前Linux Kernel中的时间. 硬件时间:主板上有电池供电的时 ...
- 【windows 访问控制】四、访问控制项ACE
访问控制项 具体内容 : https://docs.microsoft.com/zh-cn/windows-hardware/drivers/ifs/access-control-entry 访问 ...
- MM32F0020 GPIO驱动LED灯(MM32F0020 GPIO Toggle)
目录: 1.MM32F0020简介 2.MM32F0020系统时钟配置 3.MM32F0020的GPIO外设配置及其初始化 4.使用官网的Systick定时器做延时 5.MM32F0020 GPIO驱 ...
- centos7 下搭建 hfish 2.1.0
HFish是一款基于 Golang 开发的跨平台多功能主动攻击型蜜罐网络钓鱼平台框架系统,为了企业安全防护测试做出了精心的打造 HFish 开发的官网:https://hfish.io HFish地址 ...
- 深入Mybatis框架
深入Mybatis框架 学习了Spring之后,我们已经了解如何将一个类作为Bean交由IoC容器管理,也就是说,现在我们可以通过更方便的方式来使用Mybatis框架,我们可以直接把SqlSessio ...
- java-排查
https://www.chinacion.cn/article/4271.html https://blog.csdn.net/zhengwei223/article/details/7715122 ...
- linux-日常工作积累
Linux常用命令之envsubst https://blog.csdn.net/banche163/article/details/101369495 Linux中的EAGAIN含义 https:/ ...
- LeetCode-029-两数相除
两数相除 题目描述:给定两个整数,被除数 dividend 和除数 divisor.将两数相除,要求不使用乘法.除法和 mod 运算符. 返回被除数 dividend 除以除数 divisor 得到的 ...
- laravel 返回值
先理解几个概念: StdClass 对象 => 基础的对象 Eloquent 模型对象 (Model 对象) => 和模型相关的类对象 Eloquent 集合 => 可以简单理解为对 ...
- 分布式 PostgreSQL 集群(Citus)官方示例 - 实时仪表盘
Citus 提供对大型数据集的实时查询.我们在 Citus 常见的一项工作负载涉及为事件数据的实时仪表板提供支持. 例如,您可以是帮助其他企业监控其 HTTP 流量的云服务提供商.每次您的一个客户端收 ...