Netty使用Google的ProtoBuf
protobuf是由Google开发的一套对数据结构进行序列化的方法,可用做通信协议,数据存储格式,等等。其特点是不限语言、不限平台、扩展性强
Netty也提供了对Protobuf的天然支持,我们今天就写一个简单的示例,简单地了解一下Netty对Google的protoBuf的支持
我们的示例场景很简单的:客户端发送一个信息,这个信息用Protobuf来做序列化,然后服务器端接收这个信息,解码,读取信息
protobuf与xml,json这样的数据格式一样,都有自己的一套语法,且语法很简单,很容易掌握,xml文件的后缀名是xml,json的后缀名是json,以此类推,那么protobuf的后缀名就是proto
关于proto的基本语法与java的bean很像,详细可以参考官网,可以看下这篇博客:
http://blog.sina.com.cn/s/blog_9b0604b40101qm35.html
现在我们定义一个类似java bean的proto文件,我们定义一个“富人”类,他有多辆车,我们先按照语法,写一个RichMan.proto,如下面的代码清单所示:
- package netty;
- option java_package = "com.lyncc.netty.codec.protobuf.demo";
- option java_outer_classname = "RichManProto";
- message RichMan {
- required int32 id = 1;
- required string name = 2;
- optional string email = 3;
- enum CarType {
- AUDI = 0;
- BENZ = 1;
- LAMBORGHINI = 2;
- DASAUTO = 3;
- }
- message Car {
- required string name = 1;
- optional CarType type = 2 [default = BENZ];
- }
- repeated Car cars = 4;
- }
给出上面代码的一些基本解释:
1)java_package值得是该文件生成的java文件的包路径
2)java_outer_classname值的是生成的class的名称
3)message和enum是它的基本类型,很类似于java的class和枚举
4)required表名这个字段是必须的,option表明这个字段可选,default表明这个字段有默认值
5)repeat表明这个字段可以重复,类似于java中的List,该例子中Car的声明中,就相当于java中的List<Car>
6)每个声明的后面的数字,例如1,2,3, 4等等,同级的声明不能重复
总而言之,这个“类”定义了一个富人,该富人有id,名称,邮箱,而且该富人有多个名车,这些名车的类型有奥迪,奔驰,兰博基尼,大众
好了,到目前为止,proto我们已经定义好了,Google提供了一个类似脚本的工具,可以使我们将proto文件转化成java文件
该文件叫做protoc-2.6.1-win32.zip,可以在很多地方下载到,下载地址:
http://download.csdn.net/detail/linuu/9515171
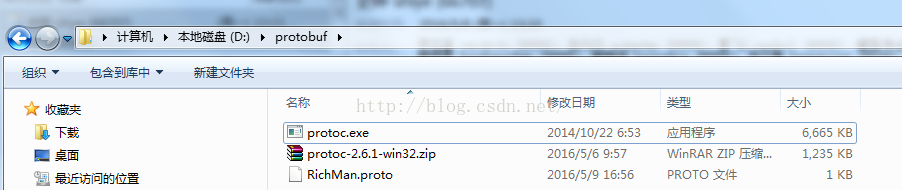
下载好,新建文件夹,且将加载的exe复制到该文件夹,且将我们刚才写的RichMan.proto复制到该文件夹下:
进入命令行,键入:

没有报错的情况下,会在同样的文件夹下生成如下的文件:
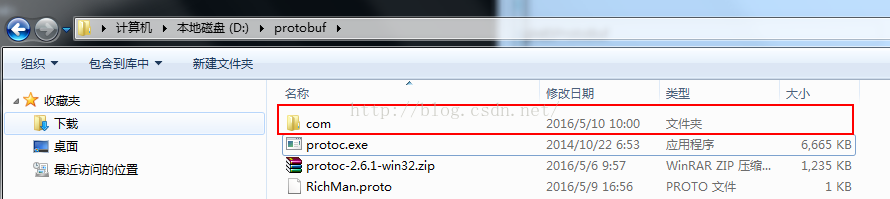
进入com的文件夹,你会发现生成的目录是与你proto中定义的java_package一样:

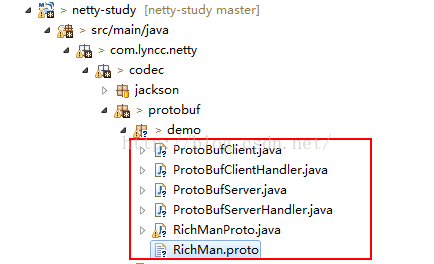
好了,到目前为止,我们已经生成了RichManProto文件了,将其复制到eclipse对应的目录下,整个项目代码的缩略图如下图所示:
添加maven的依赖:
- <dependency>
- <groupId>com.google.protobuf</groupId>
- <artifactId>protobuf-java</artifactId>
- <version>2.6.1</version>
- </dependency>
注意就是版本必须是2.6.1,因为我们用的是protoc-2.6.1的exe去编译的,所以版本必须保持一致,否则有可能会报错
接下来就是一些大家耳熟能详的server,handler,client,bootstrap,废话多不说,上代码:
ProtoBufServer.java
- package com.lyncc.netty.codec.protobuf.demo;
- import io.netty.bootstrap.ServerBootstrap;
- import io.netty.channel.ChannelFuture;
- import io.netty.channel.ChannelInitializer;
- import io.netty.channel.ChannelOption;
- import io.netty.channel.EventLoopGroup;
- import io.netty.channel.nio.NioEventLoopGroup;
- import io.netty.channel.socket.SocketChannel;
- import io.netty.channel.socket.nio.NioServerSocketChannel;
- import io.netty.handler.codec.protobuf.ProtobufDecoder;
- import io.netty.handler.codec.protobuf.ProtobufVarint32FrameDecoder;
- import io.netty.handler.logging.LogLevel;
- import io.netty.handler.logging.LoggingHandler;
- public class ProtoBufServer {
- public void bind(int port) throws Exception {
- // 配置服务端的NIO线程组
- EventLoopGroup bossGroup = new NioEventLoopGroup();
- EventLoopGroup workerGroup = new NioEventLoopGroup();
- try {
- ServerBootstrap b = new ServerBootstrap();
- b.group(bossGroup, workerGroup).channel(NioServerSocketChannel.class).option(ChannelOption.SO_BACKLOG, 100)
- .handler(new LoggingHandler(LogLevel.INFO)).childHandler(new ChannelInitializer<SocketChannel>() {
- @Override
- public void initChannel(SocketChannel ch) {
- ch.pipeline().addLast(new ProtobufVarint32FrameDecoder());
- ch.pipeline().addLast(new ProtobufDecoder(RichManProto.RichMan.getDefaultInstance()));
- ch.pipeline().addLast(new ProtoBufServerHandler());
- }
- });
- // 绑定端口,同步等待成功
- ChannelFuture f = b.bind(port).sync();
- System.out.println("init start");
- // 等待服务端监听端口关闭
- f.channel().closeFuture().sync();
- } finally {
- // 优雅退出,释放线程池资源
- bossGroup.shutdownGracefully();
- workerGroup.shutdownGracefully();
- }
- }
- public static void main(String[] args) throws Exception {
- int port = 8080;
- if (args != null && args.length > 0) {
- try {
- port = Integer.valueOf(args[0]);
- } catch (NumberFormatException e) {
- // 采用默认值
- }
- }
- new ProtoBufServer().bind(port);
- }
- }
可以看见,这个sever的bootstrap与其他的sever很相似,只是channelPipeline中在自定义的handler之前添加了netty对protobuf支持的两个天然的decoder

我没有深究,看名字就知道第一个Decoder是将帧byte数据转化成message,第二步就是将message转化成我们自定义的Rimanproto
自定义的handler很简单,就是打印一下解析的内容:
ProtoBufServerHandler.java
- package com.lyncc.netty.codec.protobuf.demo;
- import io.netty.channel.ChannelHandlerContext;
- import io.netty.channel.ChannelInboundHandlerAdapter;
- import java.util.List;
- import com.lyncc.netty.codec.protobuf.demo.RichManProto.RichMan.Car;
- public class ProtoBufServerHandler extends ChannelInboundHandlerAdapter {
- @Override
- public void channelRead(ChannelHandlerContext ctx, Object msg) throws Exception {
- RichManProto.RichMan req = (RichManProto.RichMan) msg;
- System.out.println(req.getName()+"他有"+req.getCarsCount()+"量车");
- List<Car> lists = req.getCarsList();
- if(null != lists) {
- for(Car car : lists){
- System.out.println(car.getName());
- }
- }
- }
- @Override
- public void exceptionCaught(ChannelHandlerContext ctx, Throwable cause) {
- cause.printStackTrace();
- ctx.close();
- }
- }
客户端代码
ProtoBufClient.java
- package com.lyncc.netty.codec.protobuf.demo;
- import io.netty.bootstrap.Bootstrap;
- import io.netty.channel.ChannelFuture;
- import io.netty.channel.ChannelInitializer;
- import io.netty.channel.ChannelOption;
- import io.netty.channel.EventLoopGroup;
- import io.netty.channel.nio.NioEventLoopGroup;
- import io.netty.channel.socket.SocketChannel;
- import io.netty.channel.socket.nio.NioSocketChannel;
- import io.netty.handler.codec.protobuf.ProtobufEncoder;
- import io.netty.handler.codec.protobuf.ProtobufVarint32LengthFieldPrepender;
- public class ProtoBufClient {
- public void connect(int port, String host) throws Exception {
- // 配置客户端NIO线程组
- EventLoopGroup group = new NioEventLoopGroup();
- try {
- Bootstrap b = new Bootstrap();
- b.group(group).channel(NioSocketChannel.class).option(ChannelOption.TCP_NODELAY, true)
- .handler(new ChannelInitializer<SocketChannel>() {
- @Override
- public void initChannel(SocketChannel ch) throws Exception {
- ch.pipeline().addLast(new ProtobufVarint32LengthFieldPrepender());
- ch.pipeline().addLast(new ProtobufEncoder());
- ch.pipeline().addLast(new ProtoBufClientHandler());
- }
- });
- // 发起异步连接操作
- ChannelFuture f = b.connect(host, port).sync();
- // 当代客户端链路关闭
- f.channel().closeFuture().sync();
- } finally {
- // 优雅退出,释放NIO线程组
- group.shutdownGracefully();
- }
- }
- /**
- * @param args
- * @throws Exception
- */
- public static void main(String[] args) throws Exception {
- int port = 8080;
- if (args != null && args.length > 0) {
- try {
- port = Integer.valueOf(args[0]);
- } catch (NumberFormatException e) {
- // 采用默认值
- }
- }
- new ProtoBufClient().connect(port, "127.0.0.1");
- }
- }
需要注意的是:

在传输之前需要将你的类进行protobuf的序列化,这是两个序列化的编码器
接着看:
ProtoBufClientHandler.java
- package com.lyncc.netty.codec.protobuf.demo;
- import io.netty.channel.ChannelHandlerContext;
- import io.netty.channel.ChannelInboundHandlerAdapter;
- import java.util.ArrayList;
- import java.util.List;
- import com.lyncc.netty.codec.protobuf.demo.RichManProto.RichMan.Car;
- import com.lyncc.netty.codec.protobuf.demo.RichManProto.RichMan.CarType;
- public class ProtoBufClientHandler extends ChannelInboundHandlerAdapter {
- @Override
- public void channelActive(ChannelHandlerContext ctx) {
- System.out.println("=======================================");
- RichManProto.RichMan.Builder builder = RichManProto.RichMan.newBuilder();
- builder.setName("王思聪");
- builder.setId(1);
- builder.setEmail("wsc@163.com");
- List<RichManProto.RichMan.Car> cars = new ArrayList<RichManProto.RichMan.Car>();
- Car car1 = RichManProto.RichMan.Car.newBuilder().setName("上海大众超跑").setType(CarType.DASAUTO).build();
- Car car2 = RichManProto.RichMan.Car.newBuilder().setName("Aventador").setType(CarType.LAMBORGHINI).build();
- Car car3 = RichManProto.RichMan.Car.newBuilder().setName("奔驰SLS级AMG").setType(CarType.BENZ).build();
- cars.add(car1);
- cars.add(car2);
- cars.add(car3);
- builder.addAllCars(cars);
- ctx.writeAndFlush(builder.build());
- }
- @Override
- public void exceptionCaught(ChannelHandlerContext ctx, Throwable cause) {
- cause.printStackTrace();
- ctx.close();
- }
- }
好了,到此为止,所有的代码已经写完毕了,我们运行测试一下:
服务器端启动:

启动客户端后,再看看服务器端的控制台:

好了,到此为止,最简单的demo已经搭建完毕了~
Netty使用Google的ProtoBuf的更多相关文章
- Netty游戏服务器之四protobuf编解码和黏包处理
我们还没讲客户端怎么向服务器发送消息,服务器怎么接受消息. 在讲这个之前我们先要了解一点就是tcp底层存在粘包和拆包的机制,所以我们在进行消息传递的时候要考虑这个问题. 看了netty权威这里处理的办 ...
- google的protobuf简单介绍
google的protobuf是一种轻便高效的结构化数据存储格式,在通信协议和数据存储等领域中使用比较多.protobuf对于结构中的每个成员,会提供set系列函数和get系列函数. 但是,对于使用来 ...
- netty 的 Google protobuf 开发
根据上一篇博文 Google Protobuf 使用 Java 版 netty 集成 protobuf 的方法非常简单.代码如下: server package protobuf.server.imp ...
- Netty学习——Google Protobuf使用方式分析和环境搭建
Google Protobuf使用方式分析 在RPC框架中,Google Protobuf是很常用的一个库,和Apache Thrift 是同款的用于进行序列化的第三方库.原理都是大同小异,无非就是使 ...
- Netty学习——Google Protobuf的初步了解
学习参考的官网: https://developers.google.com/protocol-buffers/docs/javatutorial 简单指南详解:这个文档写的简直是太详细了. 本篇从下 ...
- Netty使用Google Protocol Buffer完成服务器高性能数据传输
一.什么是Google Protocol Buffer(protobuf官方网站) 下面是官网给的解释: Protocol buffers are a language-neutral, platfo ...
- Google的Protobuf协议分析
protobuf和thrift类似,也是一个序列化的协议实现,简称PB(下文出现的PB代表protobuf). Github:https://github.com/google/protobuf 上图 ...
- (原)ubuntu16中简单的使用google的protobuf
转载请注明出处: http://www.cnblogs.com/darkknightzh/p/5804395.html 参考网址: http://www.cnblogs.com/luosongchao ...
- 全图文分析:如何利用Google的protobuf,来思考、设计、实现自己的RPC框架
目录 一.前言 二.RPC 基础概念 1. RPC 是什么? 2. 需要解决什么问题? 3. 有哪些开源实现? 三.protobuf 基本使用 1. 基本知识 2. 使用步骤 四.libevent 1 ...
随机推荐
- 【剑指offer12】矩阵中的路径(回朔法),C++实现
1.题目 请设计一个函数,用来判断在一个矩阵中是否存在一条包含某字符串所有字符的路径.路径可以从矩阵中的任意一个格子开始,每一步可以在矩阵中向左,向右,向上,向下移动一个格子.如果一条路径经过了矩阵中 ...
- JPA级联(一对一 一对多 多对多)注解【实际项目中摘取的】并非自己实际应用
下面把项目中的用户类中有个:一对一 一对多 多对多的注解对应关系列取出来用于学习 说明:项目运行正常 问题类:一对多.一对一.多对多 ============一对多 一方的设置 @One ...
- 如何删除 Windows 10 系统生成的 WindowsApps 文件夹
如果曾经修改过 Windows 10 应用安装路径到非系统盘,那么那个盘下就会生成一些文件夹.如果以后重装了系统或者应用删除了,挪位置了,那些文件夹依然在那里——删不掉! 大家都知道这是权限问题,然而 ...
- 静态分析工具PMD使用说明
质量是衡量一个软件是否成功的关键要素.而对于商业软件系统,尤其是企业应用软件系统来说,除了软件运行质量.文档质量以外,代码的质量也是非常重要的.软件开发进行到编码阶段的时候,最大的风险就在于如何保证代 ...
- 《DSP using MATLAB》示例Example 6.8
今天情人节,又在外地出差,苦逼中…… 继续写读书笔记吧. 代码: % All-Zeros FIR filter to Lattice structure filter b = [2, 13/12, 5 ...
- ckeditor使用教程
ckeditor 的官方网站是 http://ckeditor.com/ 一.使用方法: 1.在页面<head>中引入ckeditor核心文件ckeditor.js <script ...
- python 打印对象所有属性值
from pprint import pprint pprint (vars(your_object)) 另外查看所有属性名用.__dict__
- [MEF]第03篇 MEF延迟加载导出部件及元数据
一.演示概述此演示介绍了MEF的延迟加载及元数据相关的内容.在实际的设计开发中,存在着某些对象是不需要在系统运行或者附属对象初始化的时候进行实例化的,只需要在使用到它的时候才会进行实例化,这种方式就可 ...
- 好用的 convert freestyle jenkins jobs to pipeline 插件使用
1. 安装 安装,重启即可,非常简单 2. 使用 原有配置,主要列出执行 生成的jenkins pipeline 3. 构建效果 4. 参考资料 https:// ...
- uGUI知识点剖析之RectTransform
http://www.2fz1.com/post/unity-ugui-recttransform/#jtss-tsina uGUI知识点剖析之RectTransform 一.基本要点 RectTra ...