SpringBoot学习笔记(四)
本文主要介绍:SpringBoot开发中如何自定义starter
1.什么是starter
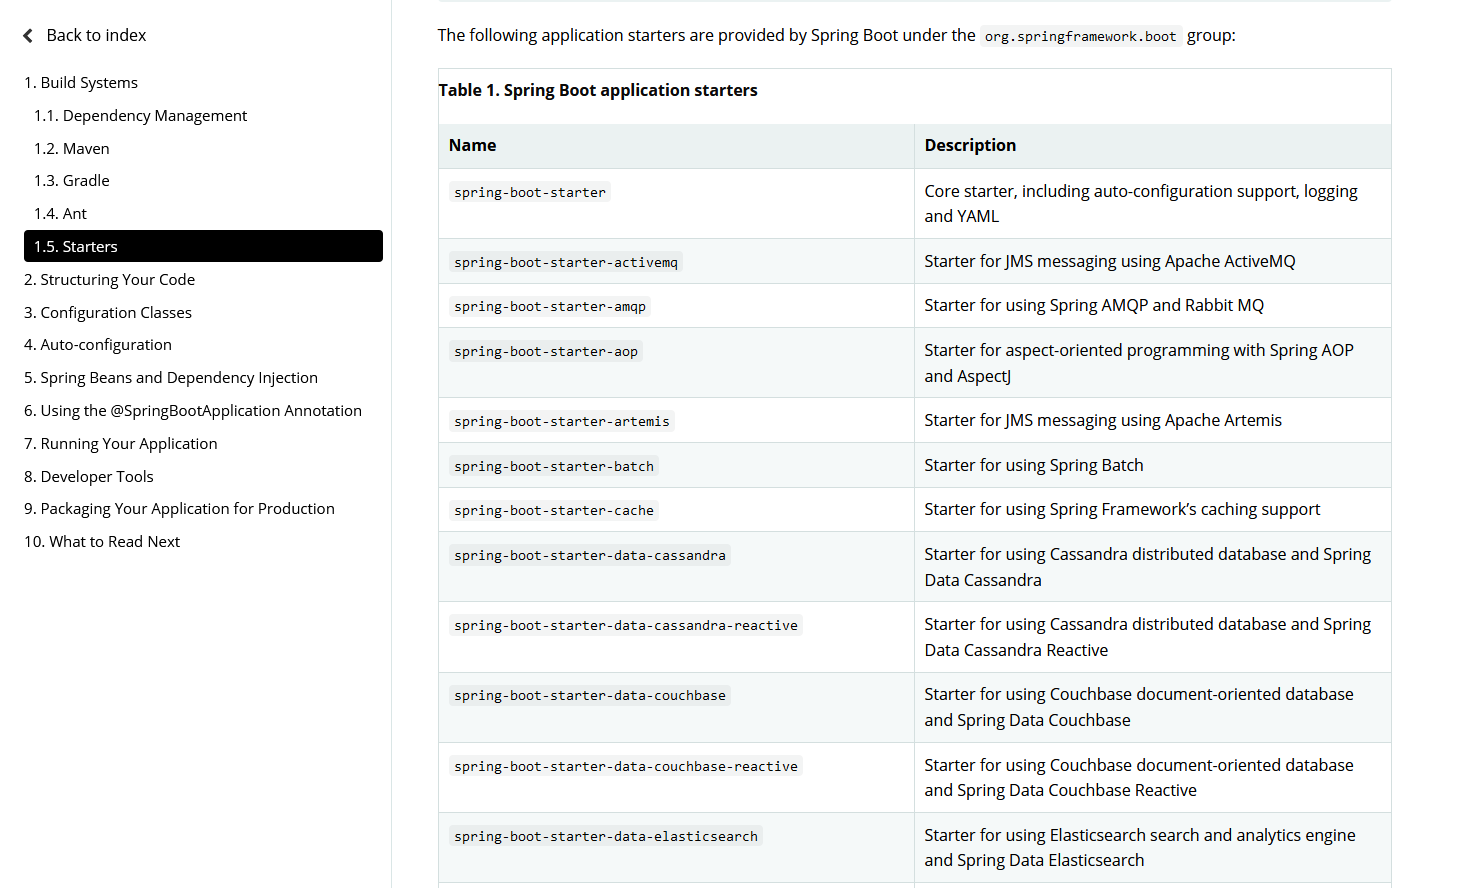
Starter可以理解为一个可拔插式的插件,提供一系列便利的依赖描述符,您可以获得所需的所有Spring和相关技术的一站式服务。应用程序只需要在maven中引入starter依赖,SpringBoot就能自动扫描到要加载的信息并启动相应的默认配置。用一句话描述,就是springboot的场景启动器。
下面是Spring官方提供的部分starter,全部的请参考官网:starter文档
开始自定义starter前看看Springboot的AutoConfiguration机制。
2.Spring boot的AutoConfiguration机制
标记一个应用为Springboot应用,需要一个SpringBootApplication注解,下面是一个标准的spring boot启动程序。
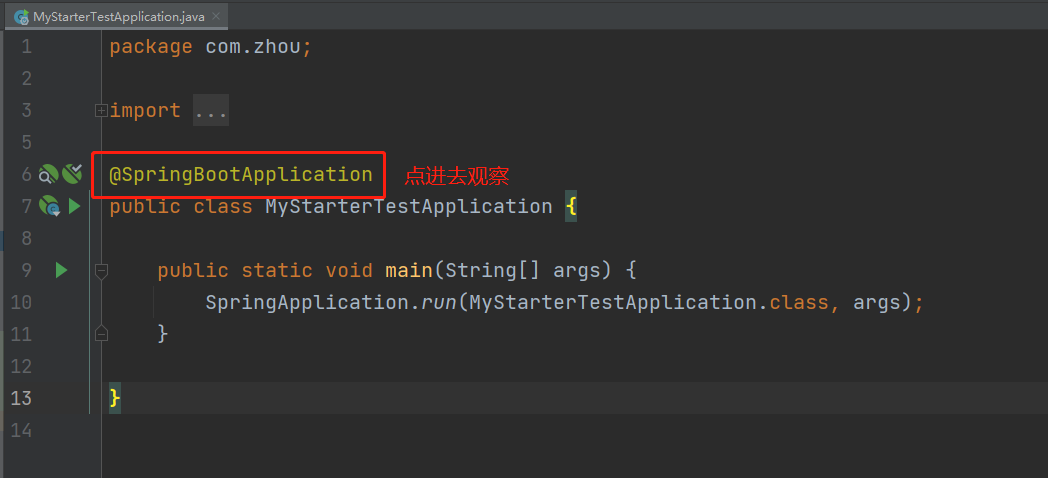
点进去看源码发现,SpringBootApplication注解又被一个EnableAutoConfiguration注解。EnableAutoConfiguration注解就是自动加载配置的关键。

EnableAutoConfiguration是一个组合注解,用Import把AutoConfigurationImportSelector导入容器中,springboot启动的时候会加载所有的selector并执行selectImports方法,这个方法会加载META-INF/spring.factories中配置的EnableAutoConfiguration,从而加载自动配置。

3.自定义starter
首先:编写启动器
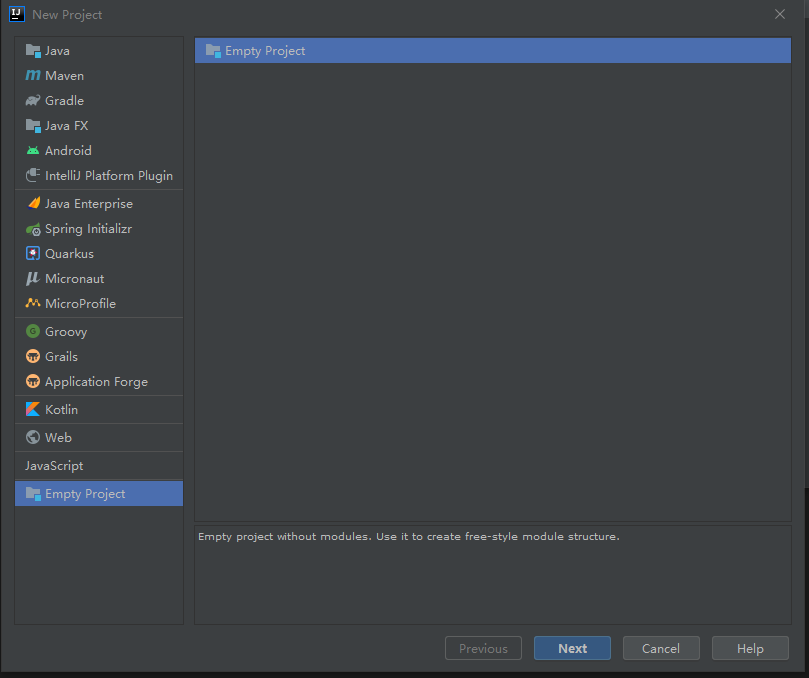
1.在IDEA中新建一个空项目:mystarter
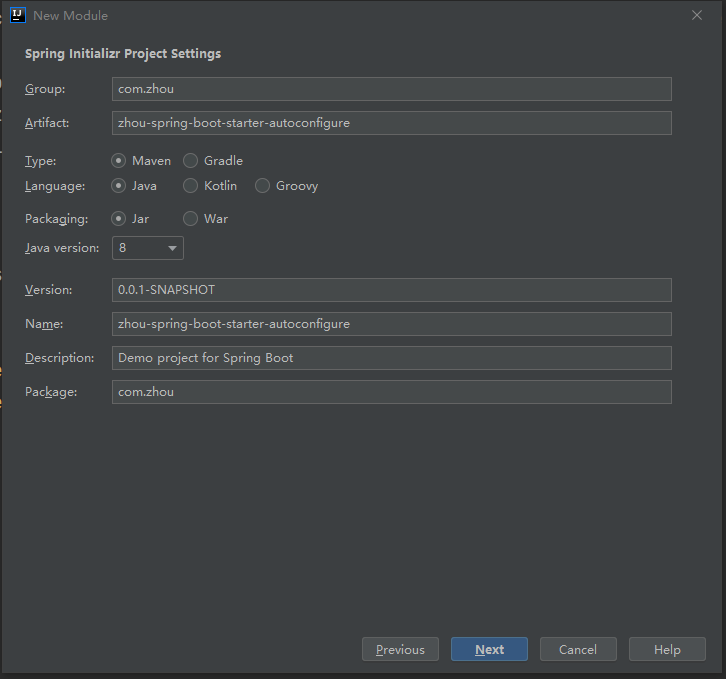
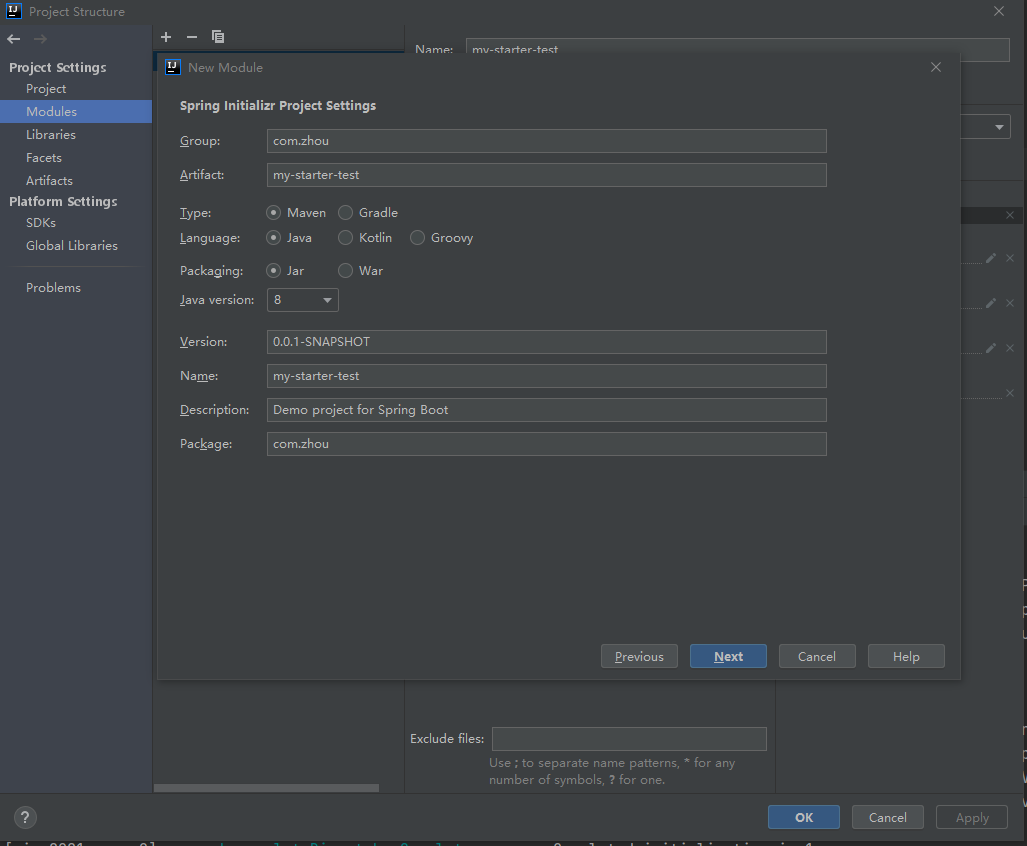
2、新建一个Springboot模块:zhou-spring-boot-starter-autoconfigure
3.新建一个Springboot模块:my-starter-test
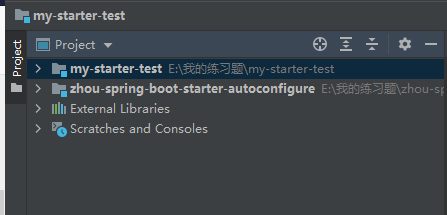
4.基本结构如下:
第二步:编写模块:zhou-spring-boot-starter-autoconfigure
1.导入pom依赖
<dependencies>

        <dependency>

            <groupId>org.springframework.boot</groupId>

            <artifactId>spring-boot-starter</artifactId>

            <version>2.4.3</version>

        </dependency>

        <dependency>

            <groupId>org.springframework.boot</groupId>

            <artifactId>spring-boot-configuration-processor</artifactId>

            <optional>true</optional>

        </dependency>

        <dependency>

            <groupId>org.springframework.boot</groupId>

            <artifactId>spring-boot-starter-web</artifactId>

        </dependency>

        <dependency>

            <groupId>org.junit.jupiter</groupId>

            <artifactId>junit-jupiter-api</artifactId>

            <version>5.5.0</version>

            <scope>test</scope>

        </dependency>

        <dependency>

            <groupId>org.springframework.boot</groupId>

            <artifactId>spring-boot-test</artifactId>

            <version>2.4.3</version>

        </dependency>

    </dependencies>
2.定义配置类:HelloProperties类,添加注解@ConfigurationProperties(prefix = "zhou.hello")

package com.zhou;

import org.springframework.boot.context.properties.ConfigurationProperties;

//编写HelloProperties 配置类

//前缀 zhou.hello

@ConfigurationProperties(prefix = "zhou.hello")

public class HelloProperties {

    private String prefix;

    private String suffix;

    public String getPrefix() {

        return prefix;

    }

    public void setPrefix(String prefix) {

        this.prefix = prefix;

    }

    public String getSuffix() {

        return suffix;

    }

    public void setSuffix(String suffix) {

        this.suffix = suffix;

    }

}
3.创建一个自己的服务类:HelloService类
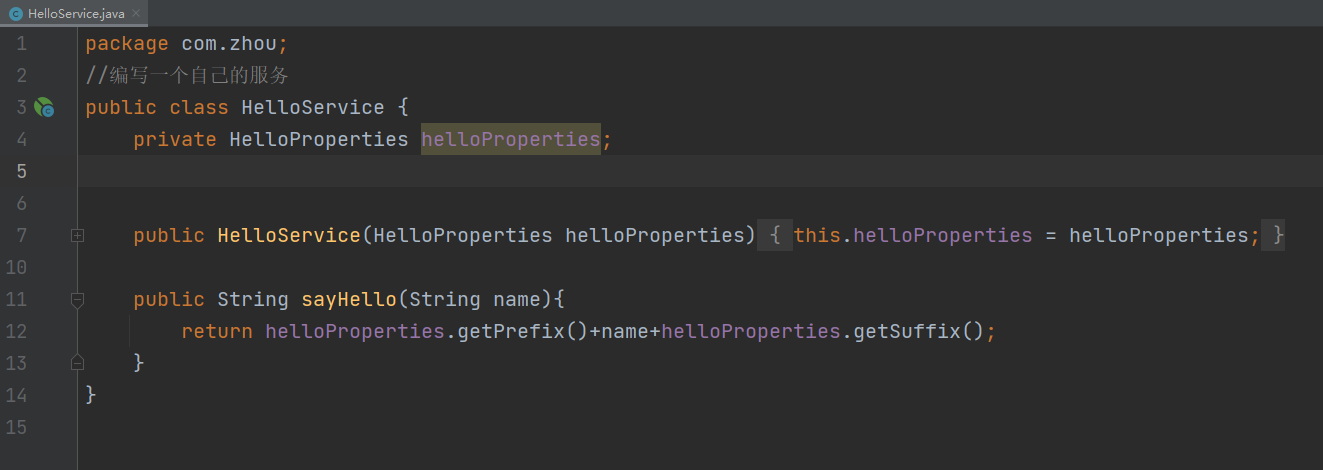
package com.zhou;

//编写一个自己的服务

public class HelloService {

    private HelloProperties helloProperties;

    public HelloService(HelloProperties helloProperties) {

        this.helloProperties = helloProperties;

    }

    public String sayHello(String name){

        return helloProperties.getPrefix()+name+helloProperties.getSuffix();

    }

}
4.创建Configuration类:HelloServiceAutoConfiguration类,添加注解@Configuration和@EnableConfigurationProperties,把当前类设置成配置类,并且注入HelloProperties。
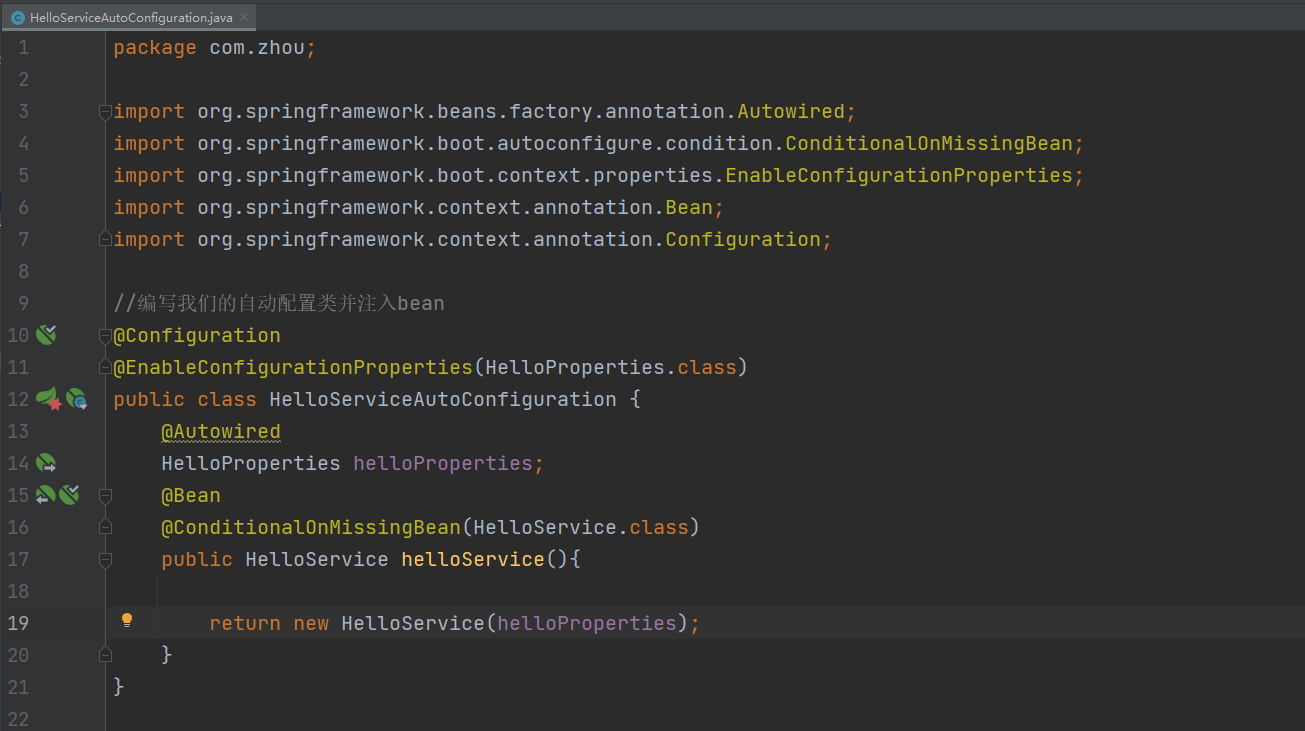
package com.zhou;

import org.springframework.beans.factory.annotation.Autowired;

import org.springframework.boot.autoconfigure.condition.ConditionalOnMissingBean;

import org.springframework.boot.context.properties.EnableConfigurationProperties;

import org.springframework.context.annotation.Bean;

import org.springframework.context.annotation.Configuration;

//编写我们的自动配置类并注入bean

@Configuration

@EnableConfigurationProperties(HelloProperties.class)

public class HelloServiceAutoConfiguration {

    @Autowired

    HelloProperties helloProperties;

    @Bean

    @ConditionalOnMissingBean(HelloService.class)

    public HelloService helloService(){

        return new HelloService(helloProperties);

    }

}
5.重要的一步,在resources目录下创建META-INF目录,并添加文件spring.factories。在这个文件中配置EnableAutoConfiguration,具体如下:
org.springframework.boot.autoconfigure.EnableAutoConfiguration=\

com.zhou.HelloServiceAutoConfiguration
6.避免端口冲突(不想干掉Tomcat端口号)

7.编写完成后,可以安装到maven仓库中!
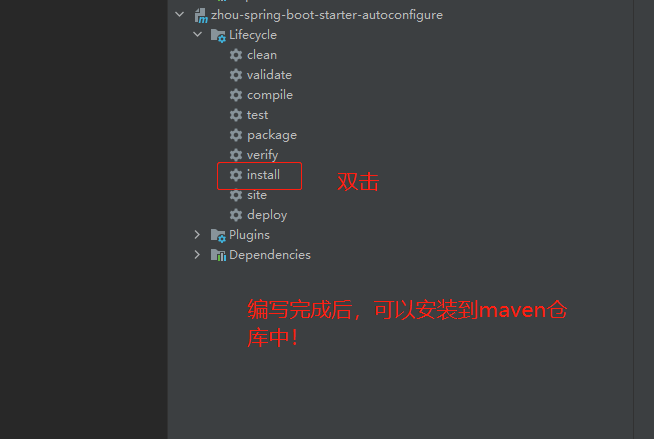
模块:zhou-spring-boot-starter-autoconfigu的整体结构如下:

第三步:模块:my-starter-test(测试自定义的Starter)
1.pom文件添加刚刚创建好的依赖:
<dependency>

	<groupId>com.zhou</groupId>

		<artifactId>zhou-spring-boot-starter-autoconfigure</artifactId>

		<version>0.0.1-SNAPSHOT</version>

</dependency>
2.在application.properties文件中添加自定义前缀/后缀:
zhou.hello.prefix="你好呀,"

zhou.hello.suffix="成了~"
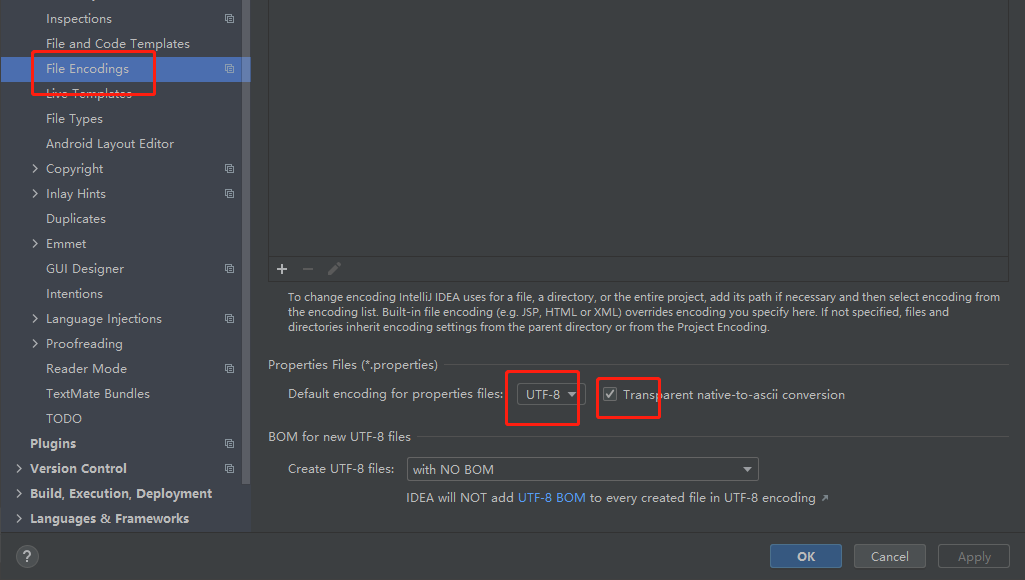
【注意】.properties文件会出现中文会乱码问题。
第一种解决办法:
第二种解决办法:将application.properties文件替换成application.yaml
zhou.hello.prefix: 你好呀,

zhou.hello.suffix: 成了~

3.创建一个Controller,把HelloService注入进来
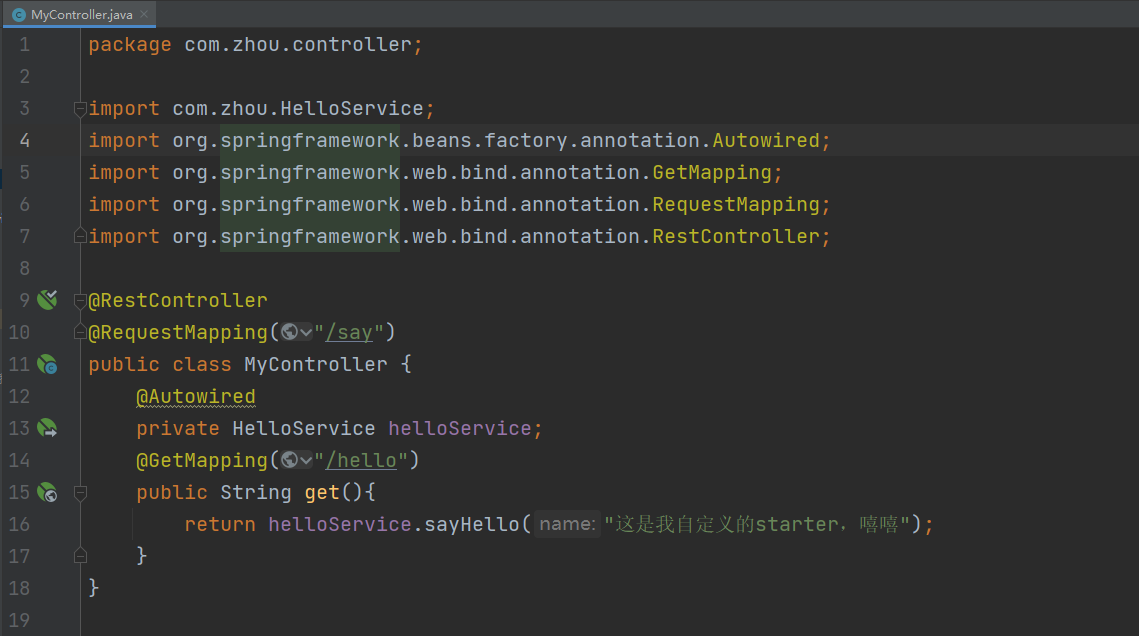
package com.zhou.controller;

import com.zhou.HelloService;

import org.springframework.beans.factory.annotation.Autowired;

import org.springframework.web.bind.annotation.GetMapping;

import org.springframework.web.bind.annotation.RequestMapping;

import org.springframework.web.bind.annotation.RestController;

@RestController

@RequestMapping("/say")

public class MyController {

    @Autowired

    private HelloService helloService;

    @GetMapping("/hello")

    public String get(){

        return helloService.sayHello("这是我自定义的starter,嘻嘻");

    }

}
4.启动,测试
Run:

访问:http://localhost:8081/say/hello

SpringBoot学习笔记(四)的更多相关文章
- SpringBoot学习笔记四之后台登录页面的实现
注:图片如果损坏,点击文章链接: https://www.toutiao.com/i6803542216150090252/ 继续之前完成的内容,首先创建一个常量类 常量类的内容 服务器端渲染 前后端 ...
- SpringBoot学习笔记(2):引入Spring Security
SpringBoot学习笔记(2):用Spring Security来保护你的应用 快速开始 本指南将引导您完成使用受Spring Security保护的资源创建简单Web应用程序的过程. 参考资料: ...
- C#可扩展编程之MEF学习笔记(四):见证奇迹的时刻
前面三篇讲了MEF的基础和基本到导入导出方法,下面就是见证MEF真正魅力所在的时刻.如果没有看过前面的文章,请到我的博客首页查看. 前面我们都是在一个项目中写了一个类来测试的,但实际开发中,我们往往要 ...
- IOS学习笔记(四)之UITextField和UITextView控件学习
IOS学习笔记(四)之UITextField和UITextView控件学习(博客地址:http://blog.csdn.net/developer_jiangqq) Author:hmjiangqq ...
- java之jvm学习笔记四(安全管理器)
java之jvm学习笔记四(安全管理器) 前面已经简述了java的安全模型的两个组成部分(类装载器,class文件校验器),接下来学习的是java安全模型的另外一个重要组成部分安全管理器. 安全管理器 ...
- SpringBoot学习笔记
SpringBoot个人感觉比SpringMVC还要好用的一个框架,很多注解配置可以非常灵活的在代码中运用起来: springBoot学习笔记: .一.aop: 新建一个类HttpAspect,类上添 ...
- Learning ROS for Robotics Programming Second Edition学习笔记(四) indigo devices
中文译著已经出版,详情请参考:http://blog.csdn.net/ZhangRelay/article/category/6506865 Learning ROS for Robotics Pr ...
- Typescript 学习笔记四:回忆ES5 中的类
中文网:https://www.tslang.cn/ 官网:http://www.typescriptlang.org/ 目录: Typescript 学习笔记一:介绍.安装.编译 Typescrip ...
- Springboot学习笔记(六)-配置化注入
前言 前面写过一个Springboot学习笔记(一)-线程池的简化及使用,发现有个缺陷,打个比方,我这个线程池写在一个公用服务中,各项参数都定死了,现在有两个服务要调用它,一个服务的线程数通常很多,而 ...
- ES6学习笔记<四> default、rest、Multi-line Strings
default 参数默认值 在实际开发 有时需要给一些参数默认值. 在ES6之前一般都这么处理参数默认值 function add(val_1,val_2){ val_1 = val_1 || 10; ...
随机推荐
- React Hooks: useContext All In One
React Hooks: useContext All In One useContext https://reactjs.org/docs/hooks-reference.html#useconte ...
- js to svg flowchart
js to svg flowchart flowchart https://flowchart.js.org/ https://github.com/adrai/flowchart.js https: ...
- VAST生态驱动下,NGK算力增量效应初现!
VAST维萨币上线的消息放出来之后,NGK算力的价格一直在上涨,其实这也不难理解,因为VAST维萨币需要VAST星光值进行兑换,VAST星光值又需要SPC算力福利代币进行挖矿释放的,SPC算力福利代币 ...
- JavaScript数据类型判断的四种方法
码文不易啊,转载请带上本文链接呀,感谢感谢 https://www.cnblogs.com/echoyya/p/14416375.html 本文分享了JavaScript类型判断的四种方法:typeo ...
- SQL EXPLAIN解析
本文转载自MySQL性能优化最佳实践 - 08 SQL EXPLAIN解析 什么是归并排序? 如果需要排序的数据超过了sort_buffer_size的大小,说明无法在内存中完成排序,就需要写到临时文 ...
- python的基本运算符
目录 基本运算符 1.算术运算符 2.比较运算符 3.赋值运算符 4.逻辑运算符 5.身份运算符 6.位运算符 7.成员运算符 基本运算符 1.算术运算符 运算符 描述 实例 + 加-两个对象相加 a ...
- Docker-compose封装mysql并初始化数据以及redis
一.概述 现有一台服务器,需要部署mysql和redis.其中mysql容器,需要在第一次启动时,执行sql文件. redis保持空数据即可. 关于Docker-compose的安装,请参考连接: h ...
- Kubernetes-1.概述
内容主要摘自官网文档资料 官方地址 概述Kubernetes基本信息 前提条件: 掌握容器或Docker知识 文档编写基于kubernetes v1.17版本 目录 概述 Kubernetes对象 K ...
- 图解CyclicBarrier运动员接力赛
图解游戏规则 大家都知道运动员短跑接力赛,今天我们并不是讲接力赛,我们讲"接力协作赛",需要我们重新定义下游戏规则:如下图所示 现在有运动员A,B,先定义游戏规则:赛道目前是300 ...
- Ubuntu的点滴-Vim、VM Tools、Samba、换源
<div id="article_content" class="article_content clearfix"> <link rel=& ...