2018-2019-2 20175120 实验四《Android程序设计》实验报告
任务一:Android Studio的安装测试
- 任务要求:参考《Java和Android开发学习指南(第二版)(EPUBIT,Java for Android 2nd)》第二十四章:
- 参考http://www.cnblogs.com/rocedu/p/6371315.html#SECANDROID,安装 Android Stuidio
- 完成Hello World, 要求修改res目录中的内容,Hello World后要显示自己的学号,自己学号前后一名同学的学号,提交代码运行截图和码云Git链接,截图没有学号要扣分
- 学习Android Stuidio调试应用程序
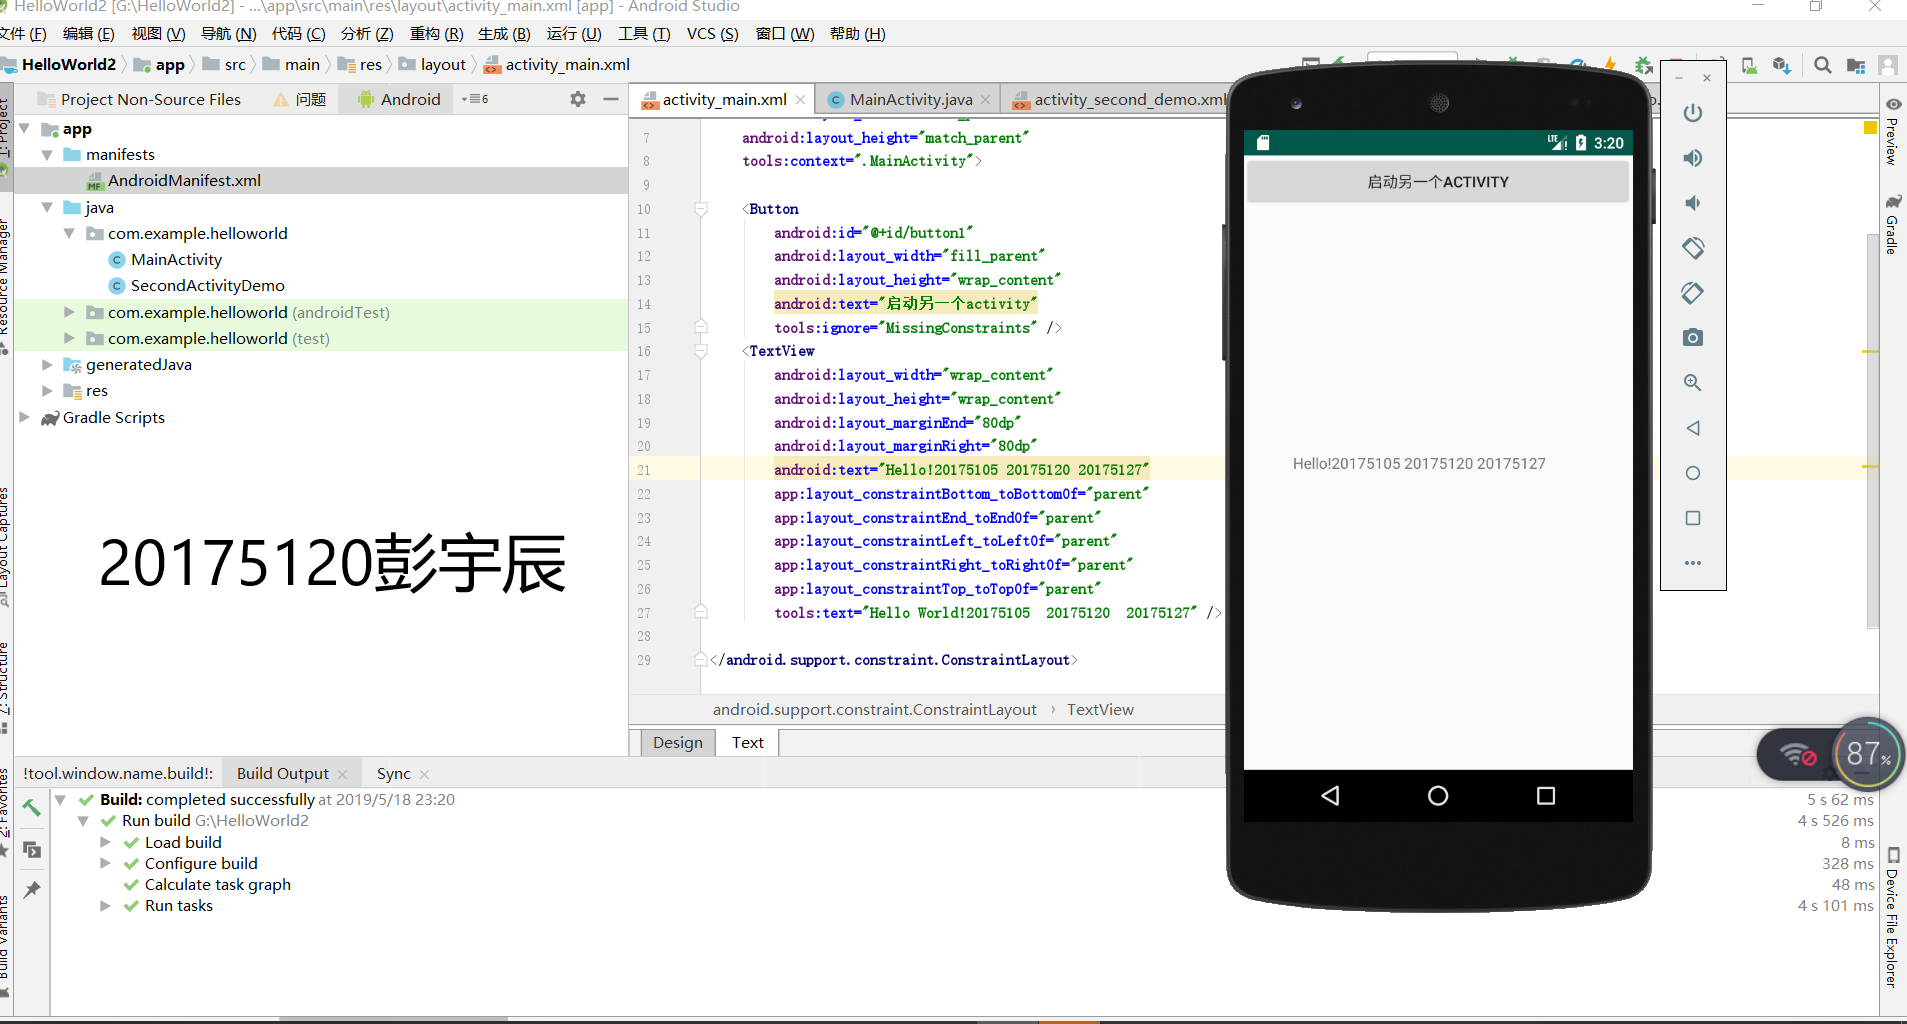
实验步骤
1.下载好Android Studio之后,安装到D盘,在bin目录下打开studio64
2.打开左侧的project,进入res目录下的layout,可以看到activity_main.xml
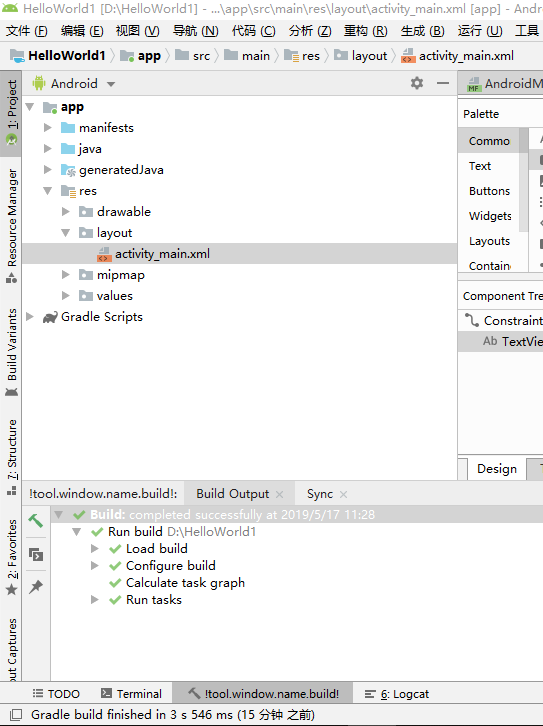
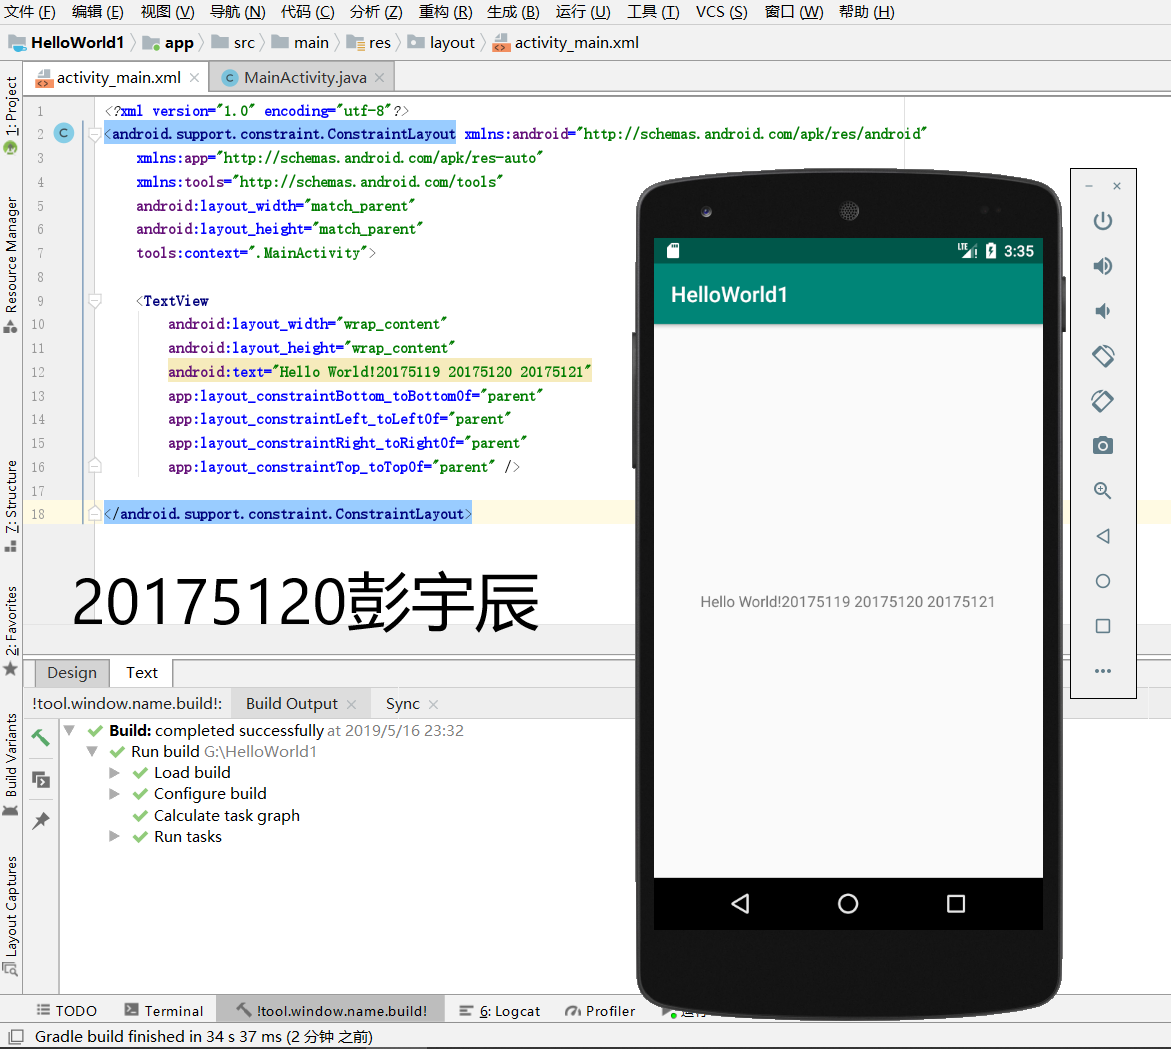
3.修改activity_main.xml第12行代码,在HelloWorld后面加入学号
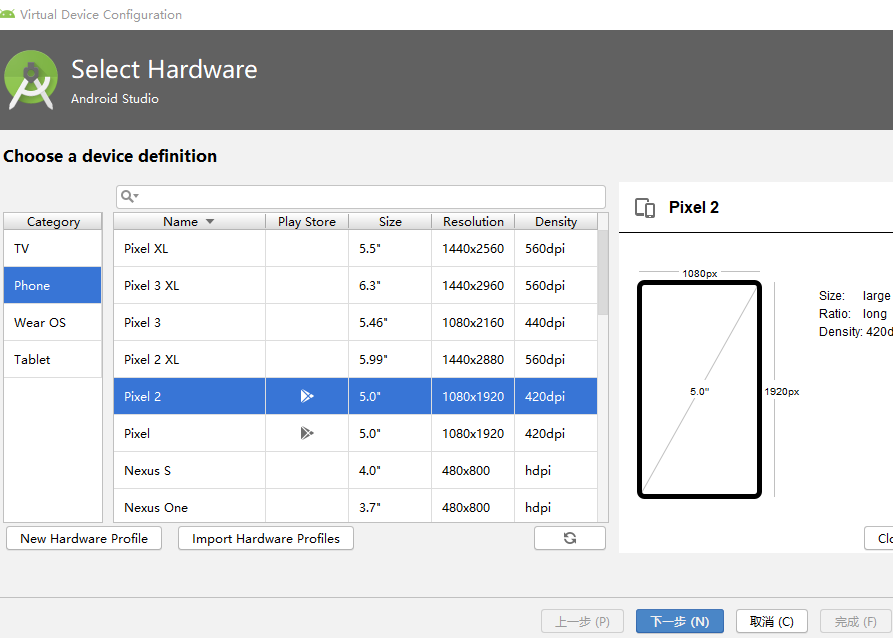
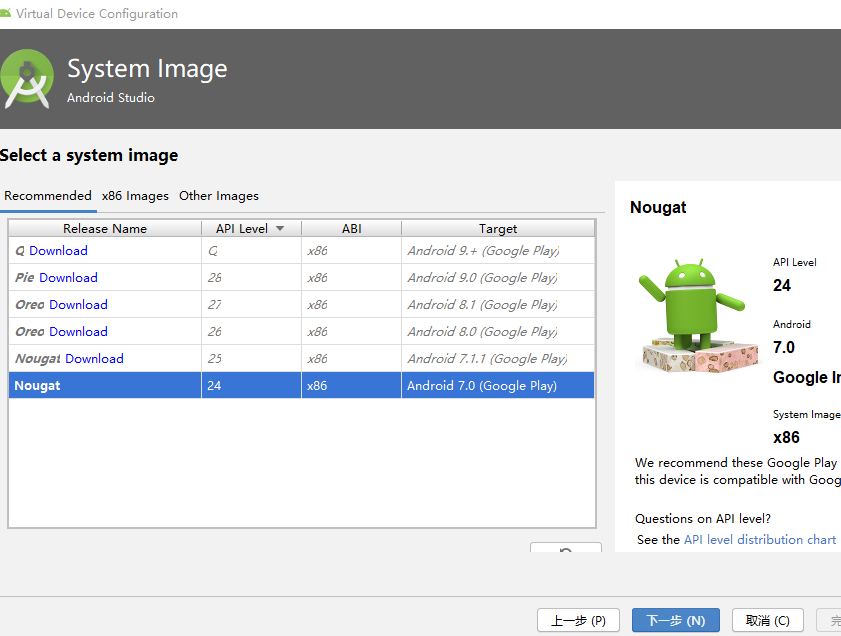
4.打开右上角AVD manager
-Create Virtual Device创建一个安卓虚拟机,选择一个虚拟机下载
下面是我的运行截图
任务二:Activity测试。
- 任务要求:参考《Java和Android开发学习指南(第二版)(EPUBIT,Java for Android 2nd)》第二十五章:
- 构建项目,运行教材相关代码
- 创建 ThirdActivity, 在ThirdActivity中显示自己的学号,修改代码让MainActivity启动ThirdActivity
- 提交代码运行截图和码云Git链接,截图要有学号水印,否则会扣分
实验步骤
1.在MainActivity相同的目录下创建SecondActivityDemo项目
2.按照教材修改MainActivity中相关代码
3.修改在layout中activity_third.xml文件
4.AndroidMainfest.xml注册
代码修改
//在MainActivity.java中创建intent对象

button1 = (Button) findViewById(R.id.button1);
button1.setOnClickListener(new OnClickListener() {

    @Override

    public void onClick(View v) {

        Intent intent = new Intent(

             MainActivity.this, SecondActivityDemo.class);

             startActivity(intent);

//在activity_third.xml中添加一个button
<Button
    android:id="@+id/button1"
    android:layout_width="fill_parent"
    android:layout_height="wrap_content"
    android:text="启动另一个activity"
    tools:ignore="MissingConstraints" />

//SecondActivityDemo
package com.example.helloworld;
import android.support.v7.app.AppCompatActivity;
import android.os.Bundle;
public class SecondActivityDemo extends AppCompatActivity {
   @Override
   protected void onCreate(Bundle savedInstanceState) {
   super.onCreate(savedInstanceState);
   setContentView(R.layout.activity_second_demo);
   }
}

//AndroidMainfest.xml
<?xml version="1.0" encoding="utf-8"?>
<manifest xmlns:android="http://schemas.android.com/apk/res/android"
    xmlns:tools="http://schemas.android.com/tools"
    package="com.example.helloworld" >
    <application
        android:allowBackup="true"
        android:icon="@mipmap/ic_launcher"
        android:label="@string/app_name"
        android:theme="@style/AppTheme"
        tools:ignore="GoogleAppIndexingWarning">
    <activity
        android:name=".MainActivity"
        android:label="@string/app_name" >
        <intent-filter>
    <action
        android:name="android.intent.action.MAIN" />
    <category
        android:name="android.intent.category.LAUNCHER" />
        </intent-filter>
    </activity>
    <activity
        android:name=".SecondActivityDemo"
        android:label="Activity">
    </activity><!--在这里注册-->
    </application>
</manifest>
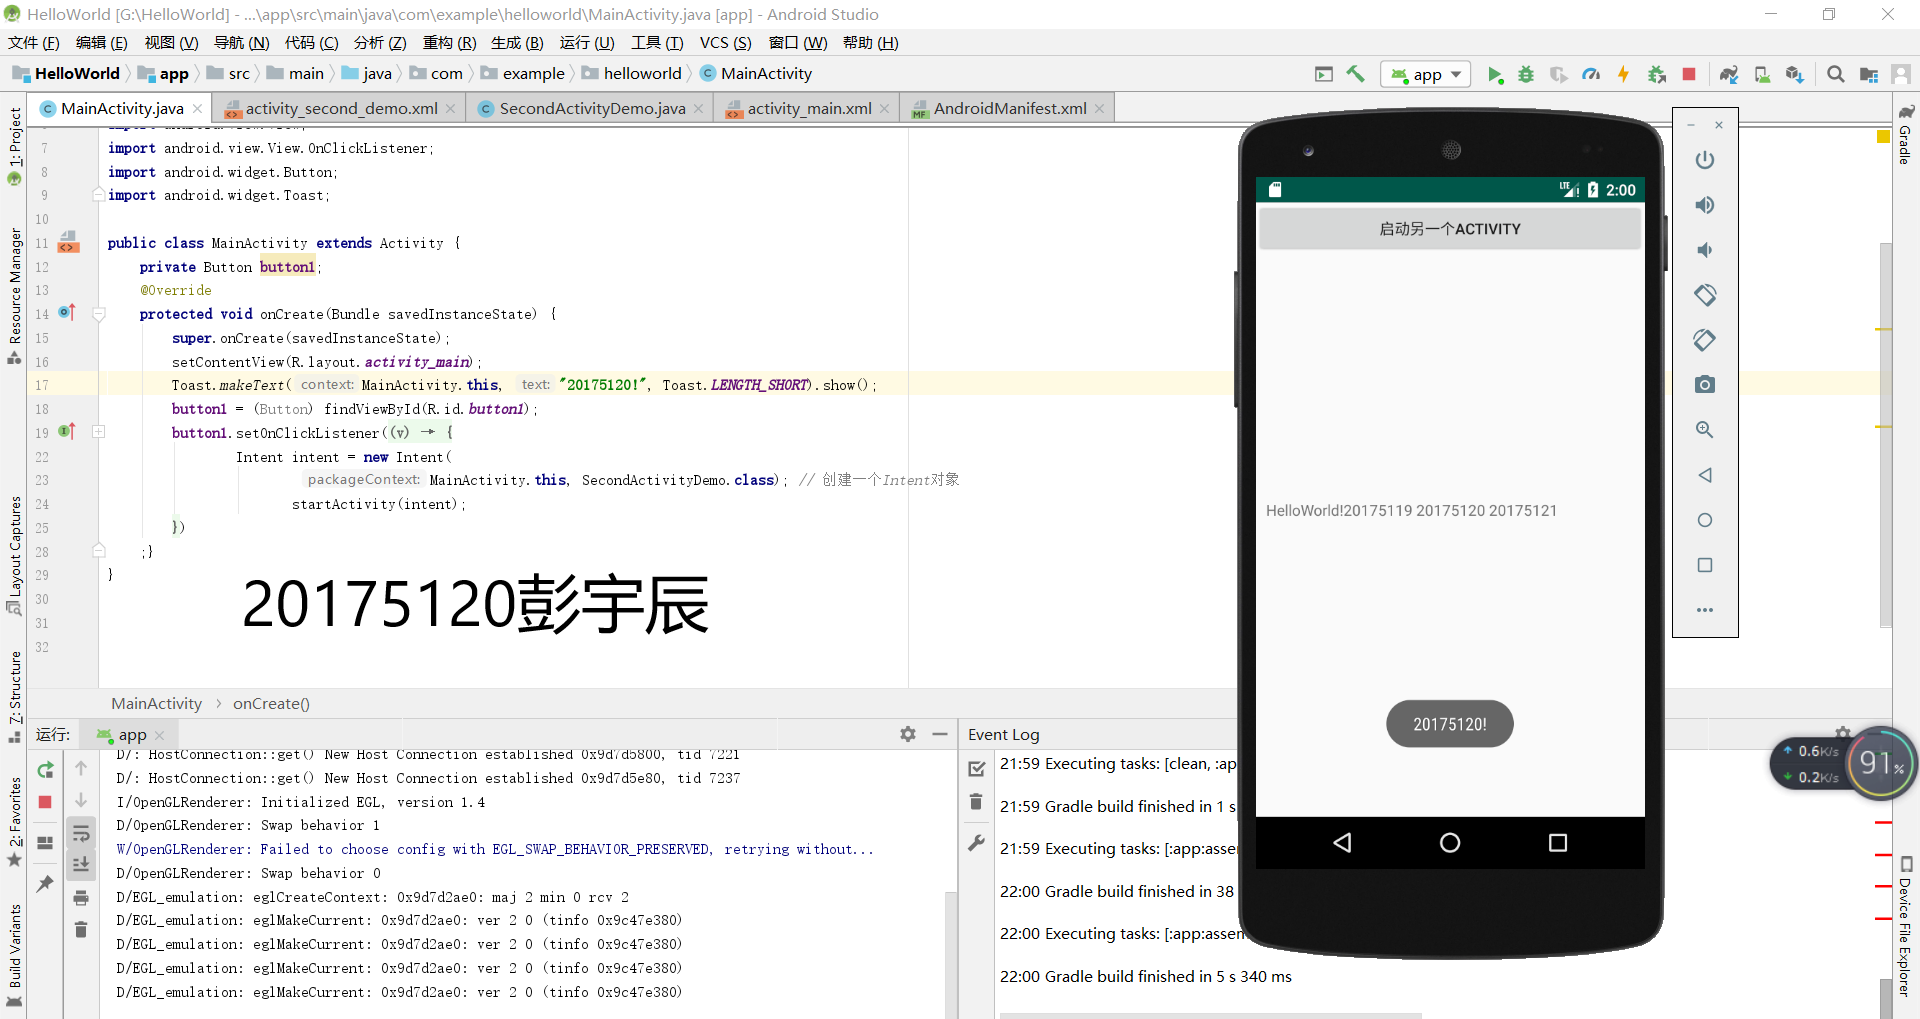
运行截图
任务三:UI测试。
- 任务要求:参考《Java和Android开发学习指南(第二版)(EPUBIT,Java for Android 2nd)》第二十六章:
- 构建项目,运行教材相关代码
- 修改代码让Toast消息中显示自己的学号信息
- 提交代码运行截图和码云Git链接,截图要有学号水印,否则会扣分
实验步骤
1.引入方法
import android.widget.Toast;
2.快速调用
Toast.makeText(MainActivity.this, "20175120!", Toast.LENGTH_SHORT).show();
代码
package com.example.helloworld;

import android.app.Activity;

import android.content.Intent;

import android.os.Bundle;

import android.view.View;

import android.view.View.OnClickListener;

import android.widget.Button;

import android.widget.Toast;

public class MainActivity extends Activity {

    private Button button1;

    @Override

    protected void onCreate(Bundle savedInstanceState) {

        super.onCreate(savedInstanceState);

        setContentView(R.layout.activity_main);

        Toast.makeText(MainActivity.this, "20175120!", Toast.LENGTH_SHORT).show();

        button1 = (Button) findViewById(R.id.button1);

        button1.setOnClickListener(new OnClickListener() {

            @Override

            public void onClick(View v) {

                Intent intent = new Intent(

                        MainActivity.this, SecondActivityDemo.class); // 创建一个Intent对象

                       startActivity(intent);

            }

        }

    }

}
运行截图
任务四:布局测试。
- 任务要求:参考《Java和Android开发学习指南(第二版)(EPUBIT,Java for Android 2nd)》第二十七章:
- 构建项目,运行教材相关代码
- 修改布局让P290页的界面与教材不同
- 提交代码运行截图和码云Git链接,截图要有学号水印,否则会扣分
实验过程:图形界面操作

5.任务五:事件处理测试。
- 任务要求:参考《Java和Android开发学习指南(第二版)(EPUBIT,Java for Android 2nd)》第二十八章:
- 构建项目,运行教材相关代码
- 提交代码运行截图和码云Git链接,截图要有学号水印,否则会扣分
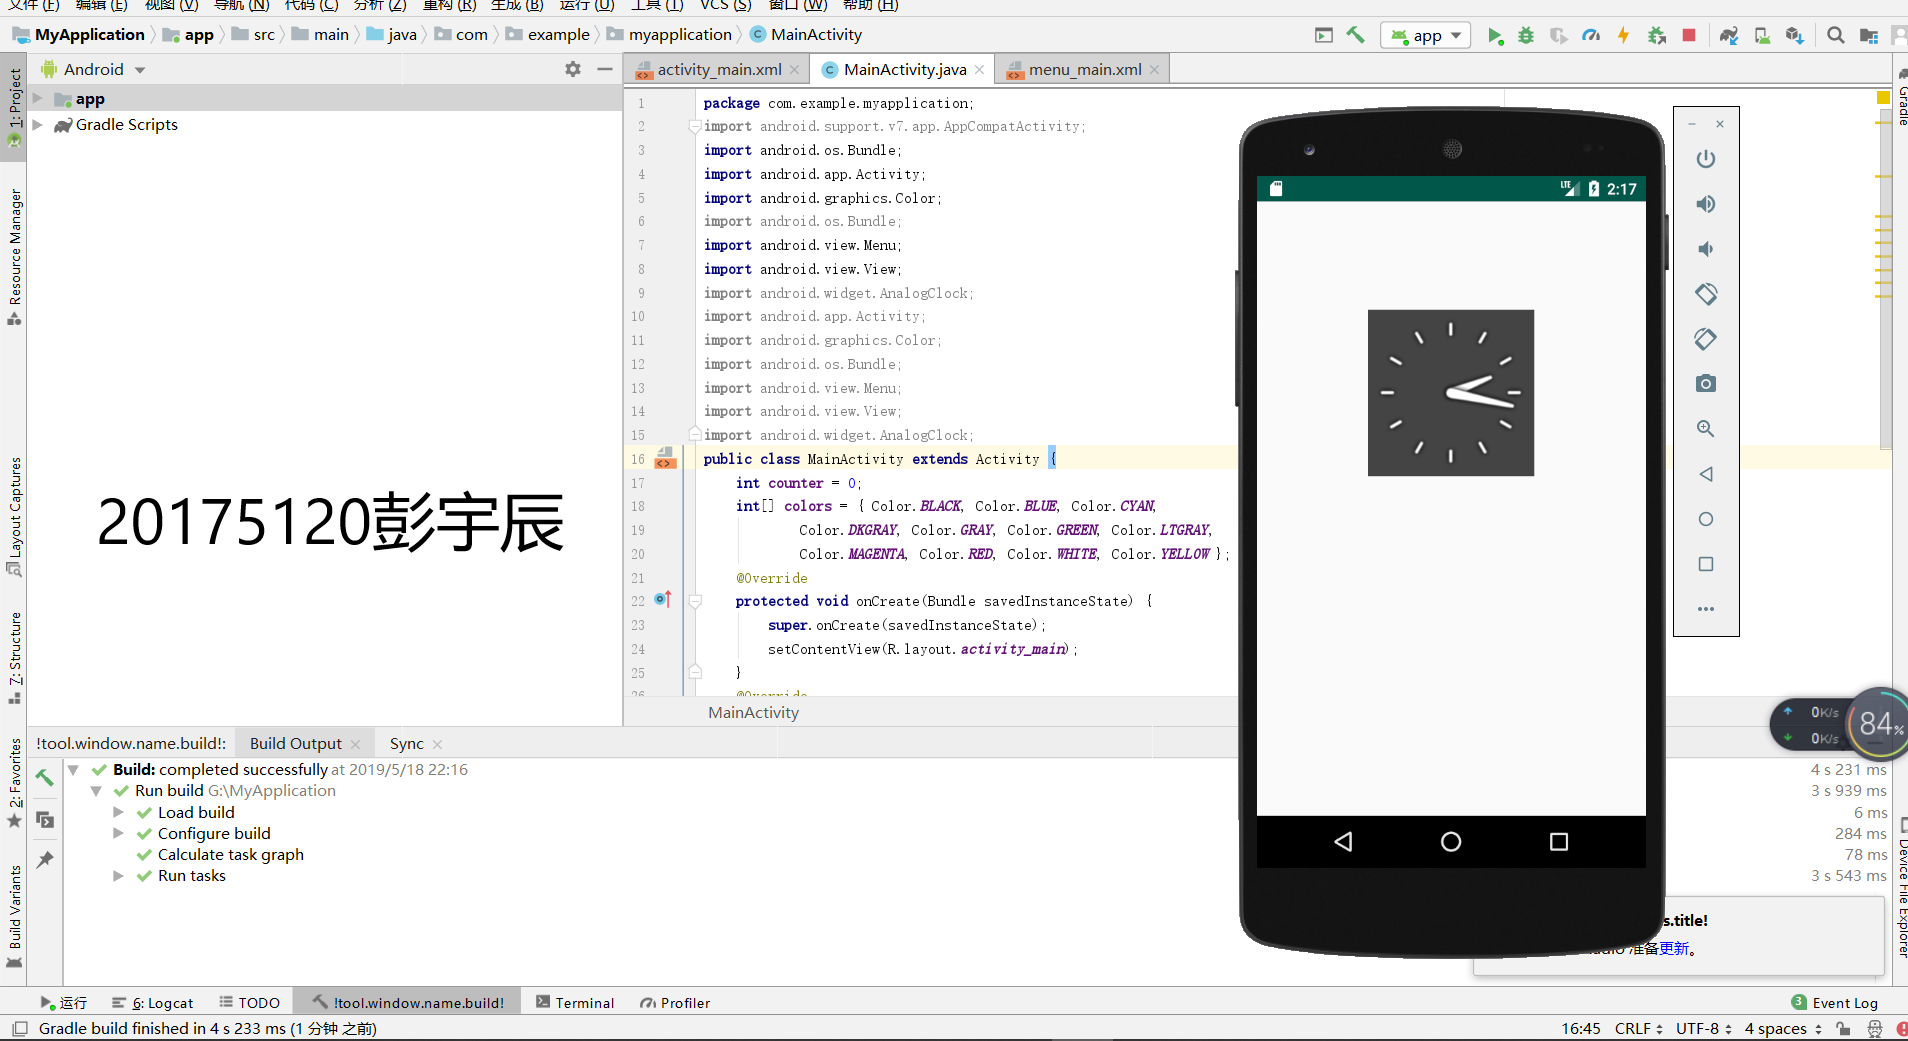
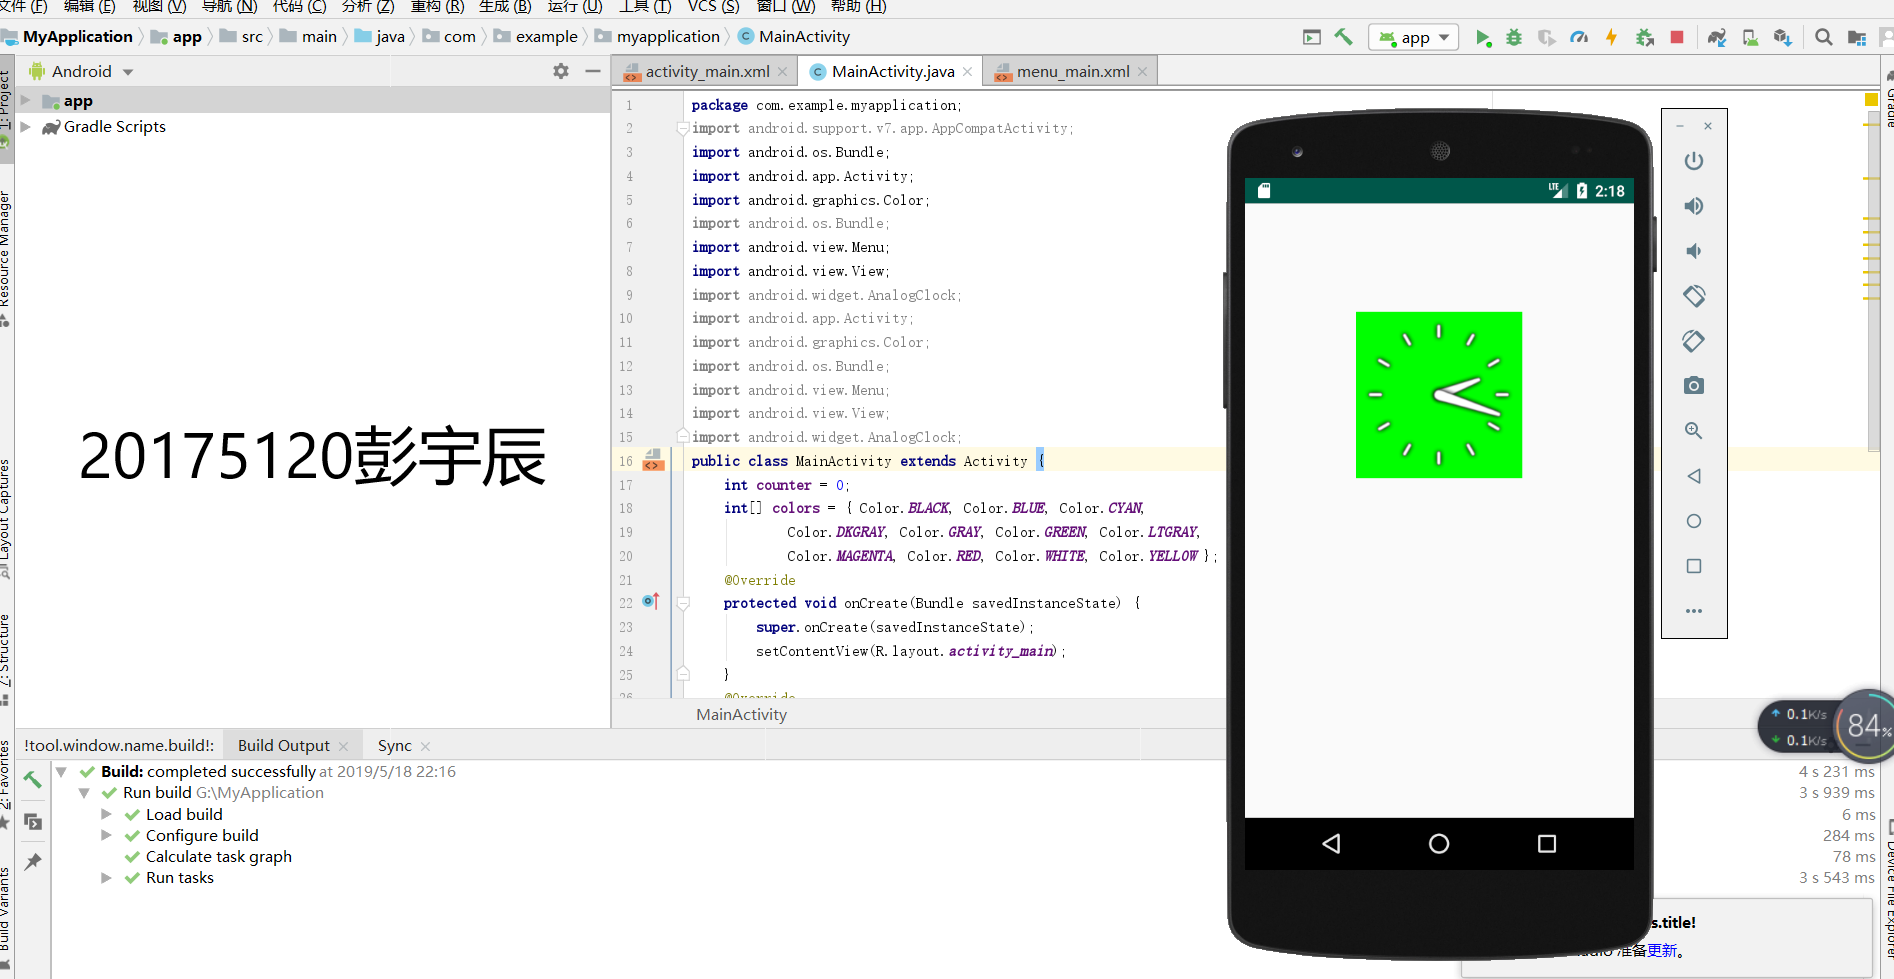
需求:改变时钟背景色
代码
//MainActivity.java

package cn.edu.besti.is.wxh.multicolorclock;

import android.support.v7.app.AppCompatActivity;

import android.os.Bundle;

import android.app.Activity;

import android.graphics.Color;

import android.os.Bundle;

import android.view.Menu;

import android.view.View;

import android.widget.AnalogClock;

import android.app.Activity;

import android.graphics.Color;

import android.os.Bundle;

import android.view.Menu;

import android.view.View;

import android.widget.AnalogClock;

public class MainActivity extends Activity {

    int counter = 0;

    int[] colors = { Color.BLACK, Color.BLUE, Color.CYAN,

            Color.DKGRAY, Color.GRAY, Color.GREEN, Color.LTGRAY,

            Color.MAGENTA, Color.RED, Color.WHITE, Color.YELLOW };

    @Override

    protected void onCreate(Bundle savedInstanceState) {

        super.onCreate(savedInstanceState);

        setContentView(R.layout.activity_main);

    }

    @Override

    public boolean onCreateOptionsMenu(Menu menu) {

// Inflate the menu; this adds items to the action bar if it

// is present.

        getMenuInflater().inflate(R.menu.menu_main, menu);

        return true;

    }

    public void changeColor(View view) {

        if (counter == colors.length) {

            counter = 0;

        }

        view.setBackgroundColor(colors[counter++]);

    }

}

//activity_main.xml

<RelativeLayout

    xmlns:android="http://schemas.android.com/apk/res/android"

    xmlns:tools="http://schemas.android.com/tools"

    android:layout_width="match_parent"

    android:layout_height="match_parent"

    android:paddingBottom="10dp"

    android:paddingLeft="10dp"

    android:paddingRight="10dp"

    android:paddingTop="10dp"

    tools:context=".MainActivity">

    <AnalogClock

        android:id="@+id/analogClock1"

        android:layout_width="wrap_content"

        android:layout_height="wrap_content"

        android:layout_alignParentTop="true"

        android:layout_centerHorizontal="true"

        android:layout_marginTop="90dp"

        android:onClick="changeColor"

        />

</RelativeLayout>
实验截图

2018-2019-2 20175120 实验四《Android程序设计》实验报告的更多相关文章
- 20165230 《Java程序设计》实验四 Android程序设计实验报告
20165230 <Java程序设计>实验四 Android程序设计实验报告 一.实验报告封面 课程:Java程序设计 班级:1652班 姓名:田坤烨 学号:20165230 成绩: 指导 ...
- 实验四 Android程序设计 实验报告
实验四 Android程序设计 实验报告 目录 代码托管地址 Android程序设计-1 Android程序设计-2 Android程序设计-3 Android程序设计-4 Android程序设计-5 ...
- 20155326 实验四 Android程序设计实验报告
20155326 实验四 Android程序设计实验报告 实验内容 1.基于Android Studio开发简单的Android应用并部署测试; 2.了解Android.组件.布局管理器的使用: 3. ...
- 20162325金立清 实验四 Android程序设计 实验报告
实验四 Android程序设计 实验报告 代码托管地址 码云链接 实验内容 安装使用Android Stuidio Activity测试 UI测试 布局测试 事件处理测试 Android程序设计-1 ...
- 实验四 Android程序设计 实验报告 20162305李昱兴
实验四 Android程序设计 实验报告 20162305李昱兴 一.Android Studio的安装测试 1.有关该软件 Android Studio,是基于Itellij IDEA的一款流行的I ...
- 20172302《程序设计与数据结构》实验四Android程序设计实验报告
课程:<程序设计与数据结构> 班级: 1723 姓名: 侯泽洋 学号:20172302 实验教师:王志强老师 实验日期:2018年5月30日 必修/选修: 必修 1.实验内容 (1)And ...
- 20155328 实验四 Android程序设计 实验报告
20155328 实验四 Android程序设计 第24章 初识Android 提交点1:完成HelloWorld并显示自己的学号 安装Android Studio后,创建了属于自己的Project( ...
- 2016-2017-2 20155312 实验四Android程序设计实验报告
遇到的问题及解决过程 「问题1」Android Studio-R文件出错 解决:参考Android Studio-R文件错误的解决办法步骤如下: 第一步:检查xml文件,R文件错误通常是由于我们的xm ...
- 20165235实验四 Android程序设计
20165235实验四 Android程序设计 实验课程:JAVA编程设计 实验名称:Android开发 姓名:祁瑛 学号:20165235 实验时间:2018.05.16 指导老师:娄家鹏 Andr ...
- 实验四 Android程序设计
20155224 实验四 Android程序设计 实验报告 实验报告封面: 课程:Java程序设计 班级:1652班 姓名:王高源 学号:20165225 指导教师:娄嘉鹏 实验日期:2018年5月1 ...
随机推荐
- php远程抓取(下载)文件到本项目指定目录中
function httpcopy($url, $file="", $timeout=60) { $file = empty($file) ? pathinfo($url,PATH ...
- pojPseudoprime numbers (快速幂)
Description Fermat's theorem states that for any prime number p and for any integer a > 1, ap = a ...
- VS2012生成Web时报未能找到元数据文件xxx.dll
问题:引用里已经添加了,还是报‘未能找到元数据文件xxx.dll’ 解决:添加了相同的不同路径的xxx.dll文件,删掉一个用不到的,就不报错了
- python pip报错pip._ vendor.urllib3.exceptions.ReadTimeoutError: HTTPSConnectionPool(host='files.pythonhosted.org', port=443): Read timed out.
AttributeError: module 'pip' has no attribute 'main报错 找到安装目录下 helpers/packaging_tool.py文件,找到如下代码: de ...
- 洛谷P2865 [USACO06NOV]路障Roadblocks——次短路
给一手链接 https://www.luogu.com.cn/problem/P2865 这道题其实就是在维护最短路的时候维护一下次短路就okay了 #include<cstdio> #i ...
- Spring Boot 静态资源处理,妙!
作者:liuxiaopeng https://www.cnblogs.com/paddix/p/8301331.html 做web开发的时候,我们往往会有很多静态资源,如html.图片.css等.那如 ...
- java_第一年_JavaWeb(5)
HttpServletRequest对象 通过HttpServletRequest对象可获取客户端在访问服务器时,请求的所有信息 获取客户机的信息 getRequestURL:返回客户端发出请求时的完 ...
- 【五一qbxt】day7-2 选择客栈
停更20天祭qwq(因为去准备推荐生考试了一直在自习qwq) [noip2011选择客栈] 这道题的前置知识是DP,可以参考=>[五一qbxt]day3 动态规划 鬼知道我写的是什么emm 这道 ...
- [POJ3612] Telephone Wire(暴力dp+剪枝)
[POJ3612] Telephone Wire(暴力dp+剪枝) 题面 有N根电线杆,初始高度为h[i],要给相邻的两根连线.可以选择拔高其中一部分电线杆,把一根电线杆拔高\(\Delta H\)的 ...
- 14、numpy——统计函数
NumPy 统计函数 NumPy 提供了很多统计函数,用于从数组中查找最小元素,最大元素,百分位标准差和方差等. 函数说明如下:(沿哪条轴执行,就是是最后结果的形式) 1.numpy.amin() 和 ...