
[js高手之路]html5 canvas动画教程 - 自己动手做一个类似windows的画图软件
这个绘图工具,我还没有做完,不过已经实现了总架构,以及常见的简易图形绘制功能:
1,可以绘制直线,圆,矩形,正多边形【已完成】
2,填充颜色和描边颜色的选择【已完成】
3,描边和填充功能的选择【已完成】
后续版本:
橡皮擦,坐标系,线形设置,箭头,其他流程图形,裁剪与调整图形。。。。。
终极目标:
流程绘制软件
我是之前看见一位朋友在我的博客中留言说:
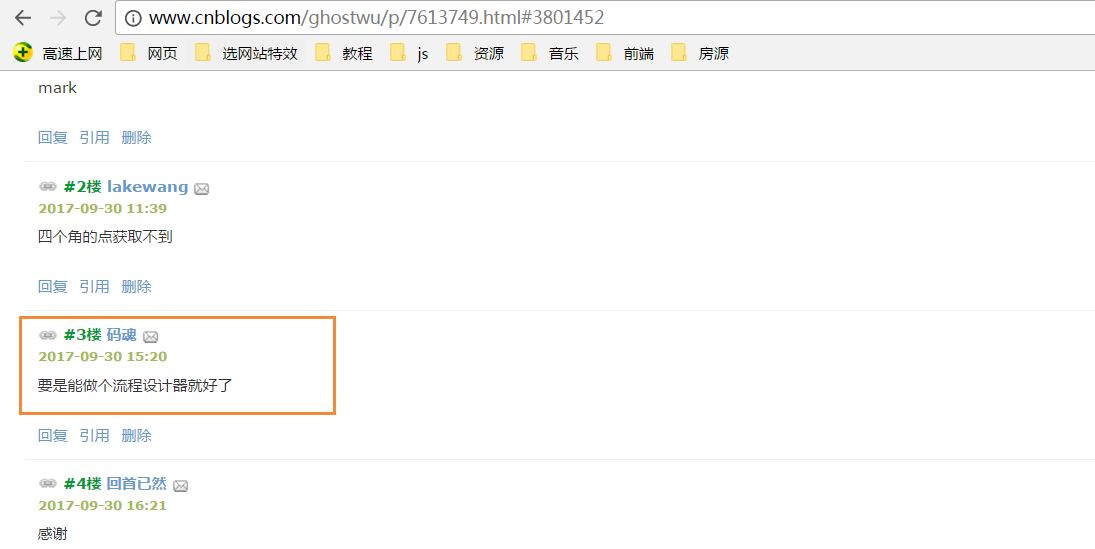
非常感谢这个朋友,今天终于抽出时间完成非常非常小的雏形!
完整的雏形代码,请自行打开,复制到本地测试.
 <head>

     <meta charset="UTF-8">

     <meta name="viewport" content="width=device-width, initial-scale=1.0">

     <meta http-equiv="X-UA-Compatible" content="ie=edge">

     <title>windows简易画图工具 - by ghostwu</title>

 </head>

 <body>

     <div class="paint">

         <div class="paint-header">

             <ul>

                 <li class="active">形状</li>

                 <li>颜色</li>

                 <li>绘制类型</li>

                 <li>线条宽度</li>

                 <li>橡皮擦</li>

             </ul>

         </div>

         <div class="paint-body">

             <div class="siderbar">

                 <div class="item active" data-type="paint-shape">

                     <ul>

                         <li class="active" data-role="line">线条</li>

                         <li data-role="circle">圆形</li>

                         <li data-role="rect">矩形</li>

                         <li data-role="polygon">正多边形</li>

                         <li data-role="arrow">箭头</li>

                     </ul>

                 </div>

                 <div class="item" data-type="paint-color">

                     <ul>

                         <li data-role="strokeStyle">

                             <input type="color" data-role="strokeStyle">

                         </li>

                         <li data-role="fillStyle">

                             <input type="color" data-role="fillStyle">

                         </li>

                     </ul>

                 </div>

                 <div class="item" data-type="paint-type">

                     <ul>

                         <li data-role="stroke">描边</li>

                         <li data-role="fill">填充</li>

                     </ul>

                 </div>

                 <div class="item" data-type="paint-line">

                     <ul>

                         <li data-role="1">小号</li>

                         <li data-role="4">中号</li>

                         <li data-role="7">大号</li>

                         <li>

                             <input type="number" data-role="line-size" placeholder="请输入数字">

                         </li>

                     </ul>

                 </div>

                 <div class="item" data-type="paint-erase">

                     <ul>

                         <li>

                             <input type="number" data-role="erase-size" placeholder="请输入数字">

                         </li>

                     </ul>

                 </div>

             </div>

         </div>

     </div>

     <script>// <![CDATA[

         var oPaintBody = document.querySelector( '.paint-body' );

         var oC = document.createElement( 'canvas' );

         oC.setAttribute( 'width', '830' );

         oC.setAttribute( 'height', '500' );

         oPaintBody.appendChild( oC );

         var aHeaderLi = document.querySelectorAll('.paint-header li'),

             aItem = document.querySelectorAll('.paint-body .item'),

             oCanvas = document.querySelector('.paint canvas'),

             oGc = oCanvas.getContext('2d'),

             cWidth = oCanvas.width, cHeight = oCanvas.height,

             curItem = aItem[0],

             aItemLi = curItem.querySelectorAll('li');

         for (let i = 0, len = aHeaderLi.length; i < len; i++) { //头部选项卡切换功能

             aHeaderLi[i].onclick = function () {

                 for (let j = 0; j < len; j++) {

                     aHeaderLi[j].classList.remove('active');

                     aItem[j].style.display = 'none';

                 }

                 aItem[i].style.display = "block";

                 this.classList.add('active');

                 curItem = aItem[i];

                 aItemLi = curItem.querySelectorAll('li');

                 activeItem(aItemLi);

             }

         }

         activeItem(aItemLi);

         var role = null;

         function activeItem(aItemLi) { //canvas左侧选项卡切换功能

             for (let i = 0, len = aItemLi.length; i < len; i++) {

                 aItemLi[i].onclick = function () {

                     checkPaintType(this); //绘制类型

                     for (let j = 0; j < len; j++) {

                         aItemLi[j].classList.remove('active');

                     }

                     this.classList.add('active');

                 }

             }

         }

         function Shape(canvasObj, cxtObj, w, h) {

             this.oCanvas = canvasObj;

             this.oGc = cxtObj;

             this.oCanvas.width = w;

             this.oCanvas.height = h;

             this.fillStyle = '#000';

             this.storkeStyle = '#000';

             this.lineWidth = 1;

             this.drawType = 'line';

             this.paintType = 'stroke';

             this.nums = 6; //正多边形的边数

         }

         Shape.prototype = {

             init: function () {

                 this.oGc.fillStyle = this.fillStyle;

                 this.oGc.strokeStyle = this.strokeStyle;

                 this.oGc.lineWidth = this.lineWidth;

             },

             draw: function () {

                 var _this = this;

                 this.oCanvas.onmousedown = function (ev) {

                     _this.init();

                     var oEvent = ev || event,

                         startX = oEvent.clientX - _this.oCanvas.offsetLeft,

                         startY = oEvent.clientY - _this.oCanvas.offsetTop;

                     _this.oCanvas.onmousemove = function (ev) {

                         _this.oGc.clearRect(0, 0, _this.oCanvas.width, _this.oCanvas.height);

                         var oEvent = ev || event,

                             endX = oEvent.clientX - _this.oCanvas.offsetLeft,

                             endY = oEvent.clientY - _this.oCanvas.offsetTop;

                         _this[_this.drawType](startX, startY, endX, endY);

                     };

                     _this.oCanvas.onmouseup = function () {

                         _this.oCanvas.onmousemove = null;

                         _this.oCanvas.onmouseup = null;

                     }

                 }

             },

             line: function (x1, y1, x2, y2) {

                 this.oGc.beginPath();

                 this.oGc.moveTo(x1, y1);

                 this.oGc.lineTo(x2, y2);

                 this.oGc.closePath();

                 this.oGc.stroke();

             },

             circle: function (x1, y1, x2, y2) {

                 this.oGc.beginPath();

                 var r = Math.sqrt(Math.pow(x2 - x1, 2) + Math.pow(y2 - y1, 2));

                 this.oGc.arc(x1, y1, r, 0, 2 * Math.PI, false);

                 this.oGc.closePath();

                 this.oGc[this.paintType]();

             },

             rect: function (x1, y1, x2, y2) {

                 this.oGc.beginPath();

                 this.oGc.rect(x1, y1, x2 - x1, y2 - y1);

                 this.oGc[this.paintType]();

             },

             polygon: function (x1, y1, x2, y2) {

                 var angle = 360 / this.nums * Math.PI / 180;//边对应的角的弧度

                 var r = Math.sqrt(Math.pow(x2 - x1, 2) + Math.pow(y2 - y1, 2));

                 this.oGc.beginPath();

                 for (var i = 0; i < this.nums; i++) {

                     this.oGc.lineTo(x1 + r * Math.cos(angle * i), y1 + r * Math.sin(angle * i));

                 }

                 this.oGc.closePath();

                 this.oGc[this.paintType]();

             }

         }

         var oShape = new Shape(oCanvas, oGc, cWidth, cHeight);

         function checkPaintType(liType) {

             var dataType = liType.parentNode.parentNode.dataset.type;

             var curType = liType.dataset.role;

             switch (dataType) {

                 case 'paint-shape': //形状

                     oShape.drawType = curType;

                     if (curType == 'polygon') {

                         oShape.nums = prompt("请输入边数", 6);

                     }

                     oShape.draw();

                     break;

                 case 'paint-color': //绘制颜色

                     liType.children[0].onchange = function () {

                         oShape[this.dataset.role] = this.value;

                     }

                     oShape.draw();

                     break;

                 case 'paint-type': //绘制类型

                     oShape.paintType = curType;

                     oShape.draw();

                     break;

             }

         }

 // ]]></script>

     <style>

         .paint * {

             margin: 0;

             padding: 0;

         }

         .paint ul,

         .paint li {

             list-style: none;

         }

         .paint li:hover {

             cursor: pointer;

         }

         .paint {

             width: 980px;

             margin: 20px auto;

             border: 1px solid #ccc;

             overflow: hidden;

         }

         .paint .paint-header ul {

             width: 980px;

             height: 40px;

             line-height: 40px;

             border-bottom: 1px solid #ccc;

         }

         .paint .paint-header li {

             float: left;

             width: 120px;

             height: 40px;

             line-height: 40px;

             text-align: center;

         }

         .paint li.active {

             box-shadow: #666 0px 1px 8px inset;

         }

         .paint .paint-body .siderbar {

             float: left;

             width: 150px;

             height: 500px;

         }

         .paint .paint-body .item {

             width: 150px;

             overflow: hidden;

             display: none;

             height: 500px;

             border-right: 1px solid #ccc;

         }

         .paint .paint-body canvas {

             float: right;

         }

         .paint .paint-body .item li {

             height: 40px;

             text-align: center;

             border-bottom: 1px solid #ccc;

             line-height: 40px;

         }

         .paint .paint-body .active {

             display: block;

         }

     </style>

 </body>
关于流程设计,后期要做的功能,思路基本上已经有了,好了,圆规正传,想要完成这个终极目标,完成一个画图工具应该就能接近目标了。先体验下目前的简易功能,下面是可以正常画图的,【需要你的浏览器支持canvas才可以额】
- 形状
- 颜色
- 绘制类型
- 线条宽度
- 橡皮擦
- 线条
- 圆形
- 矩形
- 正多边形
- 箭头
- 描边
- 填充
- 小号
- 中号
- 大号
主要来讲下目标的雏形架构:
1,图形绘制部分,我封装了一个类Shape
 function Shape(canvasObj, cxtObj, w, h) {

         this.oCanvas = canvasObj;

         this.oGc = cxtObj;

         this.oCanvas.width = w;

         this.oCanvas.height = h;

         this.fillStyle = '#000';

         this.storkeStyle = '#000';

         this.lineWidth = 1;

         this.drawType = 'line';

         this.paintType = 'stroke';

         this.nums = 6; //正多边形的边数

     }
canvasObj: 就是canvas画布对象
cxtObj: 就是上下文绘图环境
w: canvas的宽度
h: canvas的高度
fillStyle: 填充颜色
strokeStyle: 描边颜色
lineWidth: 线宽
drawType: 默认为画直线
paintType: stroke/fill 两种选择( 描边/填充)
2,在原型对象上扩展一个公共方法draw用来绘制图形
draw方法,主要获取起始点坐标(startX, startY),以及终点坐标( endX, endY );
然后调用init方法来获取绘制状态,绘制具体的图形靠下面这个关键方法:
_this[_this.drawType](startX, startY, endX, endY)
这个方法的drawType会根据界面的实时选择,变换对应的绘制类型,如:
_this['line']( startX, startY, endX, endY )
调用的就是oShape对象中的line,画直线的方法
 Shape.prototype = {

         init: function () {

             this.oGc.fillStyle = this.fillStyle;

             this.oGc.strokeStyle = this.strokeStyle;

             this.oGc.lineWidth = this.lineWidth;

         },

         draw: function () {

             var _this = this;

             this.oCanvas.onmousedown = function ( ev ) {

                 _this.init();

                 var oEvent = ev || event,

                     startX = oEvent.clientX - _this.oCanvas.offsetLeft,

                     startY = oEvent.clientY - _this.oCanvas.offsetTop;

                 _this.oCanvas.onmousemove = function ( ev ) {

                     _this.oGc.clearRect( 0, 0, _this.oCanvas.width, _this.oCanvas.height );

                     var oEvent = ev || event,

                         endX = oEvent.clientX - _this.oCanvas.offsetLeft,

                         endY = oEvent.clientY - _this.oCanvas.offsetTop;

                     _this[_this.drawType](startX, startY, endX, endY);

                 };

                 _this.oCanvas.onmouseup = function(){

                     _this.oCanvas.onmousemove = null;

                     _this.oCanvas.onmouseup = null;

                 }

             }

         },

         line: function ( x1, y1, x2, y2 ) {

             this.oGc.beginPath();

             this.oGc.moveTo( x1, y1 );

             this.oGc.lineTo( x2, y2 );

             this.oGc.closePath();

             this.oGc.stroke();

         },

         circle : function( x1, y1, x2, y2 ){

             this.oGc.beginPath();

             var r = Math.sqrt( Math.pow( x2 - x1, 2 ) + Math.pow( y2 - y1, 2 ) );

             this.oGc.arc( x1, y1, r, 0, 2 * Math.PI, false );

             this.oGc.closePath();

             this.oGc[this.paintType]();

         },

         rect : function( x1, y1, x2, y2 ){

             this.oGc.beginPath();

             this.oGc.rect( x1, y1, x2 - x1, y2 - y1 );

             this.oGc[this.paintType]();

         },

         polygon : function( x1, y1, x2, y2 ){

             var angle = 360 / this.nums * Math.PI / 180;//边对应的角的弧度

             var r = Math.sqrt( Math.pow( x2 - x1, 2 ) + Math.pow( y2 - y1, 2 ) );

             this.oGc.beginPath();

             for( var i = 0; i < this.nums; i ++ ){

                 this.oGc.lineTo( x1 + r * Math.cos( angle * i ), y1 + r * Math.sin( angle * i ) );

             }

             this.oGc.closePath();

             this.oGc[this.paintType]();

         }

     }
3,界面操作很简单,基本是选项卡的操作+html5的自定义属性+classList的应用
[js高手之路]html5 canvas动画教程 - 自己动手做一个类似windows的画图软件的更多相关文章
- [js高手之路]html5 canvas动画教程 - 边界判断与小球粒子模拟喷泉,散弹效果
备注:本文后面的代码,如果加载了ball.js,那么请使用这篇文章[js高手之路] html5 canvas动画教程 - 匀速运动的ball.js代码. 本文,我们要做点有意思的效果,首先,来一个简单 ...
- [js高手之路]html5 canvas动画教程 - 边界判断与反弹
备注:本文后面的代码,如果加载了ball.js,那么请使用这篇文章[js高手之路] html5 canvas动画教程 - 匀速运动的ball.js代码. 边界反弹: 当小球碰到canvas的四个方向的 ...
- [js高手之路] html5 canvas动画教程 - 实时获取鼠标的当前坐标
有了前面的canvas基础之后,现在开始就精彩了,后面写的canvas教程都是属于综合应用,前面已经写了常用的canvas基础知识,参考链接如下: [js高手之路] html5 canvas系列教程 ...
- [js高手之路]html5 canvas动画教程 - 下雪效果
利用canvas,实现一个下雪的效果,我们先预览下效果: 我们先分析下这个效果: 1,随机产生雪花 2,雪花的产生不是同时产生,而是有先后顺序的 3,雪花怎么表示 4,怎么源源不断的下雪 5,雪花有大 ...
- [js高手之路]html5 canvas动画教程 - 跟着鼠标移动消失的一堆炫彩小球
综合利用前面所学,实现一个绚丽的小球动画,这个实例用到的知识点,在我的博客全部都有,可以去这里查看所有的canvas教程 <head> <meta charset='utf-8' / ...
- [js高手之路] html5 canvas动画教程 - 匀速运动
匀速运动:指的是物体在一条直线上运动,并且物体在任何相等时间间隔内通过的位移都是相等的.其实就是匀速直线运动,它的特点是加速度为0,从定义可知,在任何相等的时间间隔内,速度大小和方向是相同的. < ...
- [js高手之路]html5 canvas动画教程 - 重力、摩擦力、加速、抛物线运动
上节,我们讲了匀速运动,本节分享的运动就更有意思了: 加速运动 重力加速度 抛物线运动 摩擦力 加速运动: <head> <meta charset='utf-8' /> &l ...
- [js高手之路] html5 canvas系列教程 - 状态详解(save与restore)
本文内容与路径([js高手之路] html5 canvas系列教程 - 开始路径beginPath与关闭路径closePath详解)是canvas中比较重要的概念.掌握理解他们是做出复杂canvas动 ...
- [js高手之路] html5 canvas系列教程 - 掌握画直线图形的常用API
我们接着上文[js高手之路] html5 canvase系列教程 - 认识canvas以及基本使用方法继续. 一.直线的绘制 cxt.moveTo( x1, y1 ): 将画笔移动到x1, y1这个点 ...
随机推荐
- 提高SQL执行效率的16种方法
项目中优化sql语句执行效率的方法:1)尽量选择较小的列2)将where中用的比较频繁的字段建立索引3)select子句中避免使用'*'4)避免在索引列上使用计算.not in 和<> ...
- JAVA基础第三组(5道题)
11 [程序11] 题目:有1.2.3.4个数字,能组成多少个互不相同且无重复数字的三位数?都是多少? 1.程序分析:可填在百位.十位.个位的数字都是1.2.3.4.组成所有的排列后再去 掉不满足条件 ...
- 201521123073 《Java程序设计》第1周学习总结
1.本章学习总结 你对于本章知识的学习总结 1.Java中使用Scanner处理输入,需要注意如下几个地方 程序开头必须import java.util.Scanner导入Scanner类. 使用Sc ...
- 201521123035《Java程序设计》第十三周学习总结
1. 本周学习总结 以你喜欢的方式(思维导图.OneNote或其他)归纳总结多网络相关内容. 2. 书面作业 1. 网络基础 1.1 比较ping www.baidu.com与ping cec.jmu ...
- 201521123075 《Java程序设计》第13周学习总结
1. 本周学习总结 协议 网络中为了进行数据交换(通信)而建立的规则.标准或约定(=语义+语法+规则),比如http, ftp等 IP层协议(Internet Protocol) Internet上的 ...
- JAVA课程设计--------五子棋
1.团队课程设计博客链接 http://www.cnblogs.com/mz201521044152/p/7065575.html 2.个人负责模块或任务说明 1.重新开始:写一个restartgam ...
- java基础知识4--数组的常用方法(Array)
先说一个idea编辑器的问题,编辑器的光标变成黑色光标无法移动,按一下insert键就好了. 数组是线性数据存储结构.它用牺牲自动扩展大小来换取与集合相比的唯一优势--查询效率的提升.本身是一种引用类 ...
- 《Head First Java》读书笔记(1) - Java语言基础
<Head First Java>(点击查看详情) 1.写在前面的话 这本书的知识点说实话感觉有点散乱,但是贵在其将文字转换成了生动和更容易接受的图片,大量的比喻让人感受到了知识点的有趣之 ...
- 关于Linux的虚拟内存管理
在linux中可以通过free指令查看当前内存,在后面加-m参数能让数字单位显示为MB. 一般机器,有一个实际内存和一个虚拟内存. swap就是虚拟内存,这个虚拟内存可以是文件,也可以是磁盘分区.通常 ...
- [js高手之路] es6系列教程 - 迭代器与生成器详解
什么是迭代器? 迭代器是一种特殊对象,这种对象具有以下特点: 1,所有对象都有一个next方法 2,每次调用next方法,都会返回一个对象,该对象包含两个属性,一个是value, 表示下一个将要返回的 ...