
[js高手之路] html5 canvas系列教程 - 状态详解(save与restore)
本文内容与路径([js高手之路] html5 canvas系列教程 - 开始路径beginPath与关闭路径closePath详解)是canvas中比较重要的概念。掌握理解他们是做出复杂canvas动画必要的基础之一.
再谈clip函数,这个函数在这篇文章[js高手之路] html5 canvas系列教程 - 图片操作(drawImage,clip,createPattern)已经有讲到过他的基本用法,我们来两个简单的例子复习一下:
 <meta charset='utf-8' />

 <style>

 #canvas,#canvas2{

     border:1px dashed #aaa;

 }

 </style>

 <script>

 window.onload = function(){

     var oCanvas = document.querySelector( "#canvas" ),

         oGc = oCanvas.getContext( '2d' );

     var oCanvas2 = document.querySelector( "#canvas2" ),

         oGc2 = oCanvas2.getContext( '2d' );

     oGc.beginPath();

     oGc.strokeStyle = '#09f';

     oGc.arc( 100, 100, 100, 0, 360 * Math.PI / 180, false );

     oGc.stroke();

     oGc.closePath();

     oGc.clip();

     oGc.beginPath();

     oGc.fillStyle = 'red';

     oGc.fillRect( 100, 100, 200, 100 );

     oGc.closePath();

     oGc2.beginPath();

     oGc2.strokeStyle = '#09f';

     oGc2.rect( 0, 0, 100, 100 );

     oGc2.stroke();

     oGc2.closePath();

     oGc2.clip();

     oGc2.beginPath();

     oGc2.fillStyle = 'red';

     oGc2.arc( 100, 100, 100, 0, 360 * Math.PI / 180, false );

     oGc2.fill();

     oGc2.closePath();

 }

 </script>

 </head>

 <body>

 <canvas id="canvas" width="500" height="400"></canvas>

 <canvas id="canvas2" width="500" height="400"></canvas>

 </body>
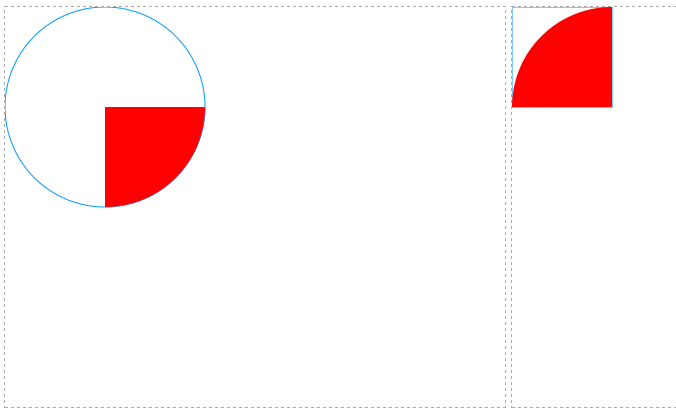
请注意,如果用矩形作为裁剪区域,用使用rect,不能使用strokeRect和fillRect,即下面这段代码不能改成strokeRect或者fillRect
 <meta charset='utf-8' />

 <style>

 #canvas{

     border:1px dashed #aaa;

 }

 </style>

 <script>

 window.onload = function(){

     var oCanvas = document.querySelector( "#canvas" ),

         oGc = oCanvas.getContext( '2d' ),

         oBtn = document.querySelector( "input" );

     oGc.beginPath();

     oGc.strokeStyle = '#09f';

     oGc.arc( 100, 100, 100, 0, 360 * Math.PI / 180, false );

     oGc.stroke();

     oGc.closePath();

     oGc.clip();

     function loadImg( imgPath ){

         var oImg = new Image();

         oImg.src = imgPath;

         oImg.onload = function(){

             oGc.drawImage( oImg, 0, 0 );

         }

     }

     loadImg( './img/mv.jpg' );

     oBtn.onclick = function(){

         loadImg( './img/mv2.jpg' );

     }

 }

 </script>

 </head>

 <body>

 <canvas id="canvas" width="500" height="400"></canvas>

 <br/><input type="button" value="加载另一张图片">

 </body>
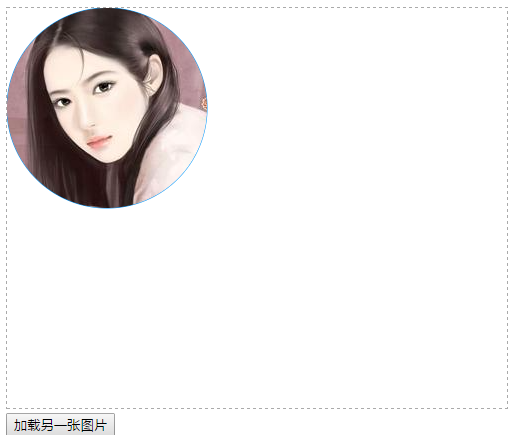
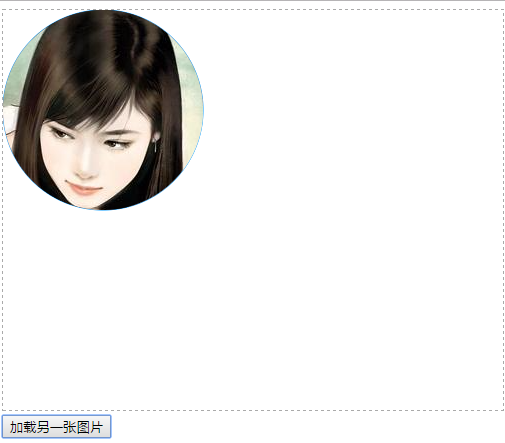
当点击按钮的时候,加载一张新的图片,但是加载后的图片,也产生了裁剪效果.
如果,不需要保留裁剪效果怎么做呢?利用save方法保存最初的状态,再加载图片的使用,用restore来恢复
 <meta charset='utf-8' />

 <style>

 #canvas{

     border:1px dashed #aaa;

 }

 </style>

 <script>

 window.onload = function(){

     var oCanvas = document.querySelector( "#canvas" ),

         oGc = oCanvas.getContext( '2d' ),

         oBtn = document.querySelector( "input" );

     oGc.save(); //保存画布最初的状态,即没有产生裁剪效果的

     oGc.beginPath();

     oGc.strokeStyle = '#09f';

     oGc.arc( 100, 100, 100, 0, 360 * Math.PI / 180, false );

     oGc.stroke();

     oGc.closePath();

     oGc.clip();

     function loadImg( imgPath ){

         var oImg = new Image();

         oImg.src = imgPath;

         oImg.onload = function(){

             oGc.drawImage( oImg, 0, 0 );

         }

     }

     loadImg( './img/mv.jpg' );

     oBtn.onclick = function(){

         oGc.restore(); //恢复画布最初始的状态

         loadImg( './img/mv2.jpg' );

     }

 }

 </script>

 </head>

 <body>

 <canvas id="canvas" width="500" height="400"></canvas>

 <br/><input type="button" value="加载另一张图片">

 </body>
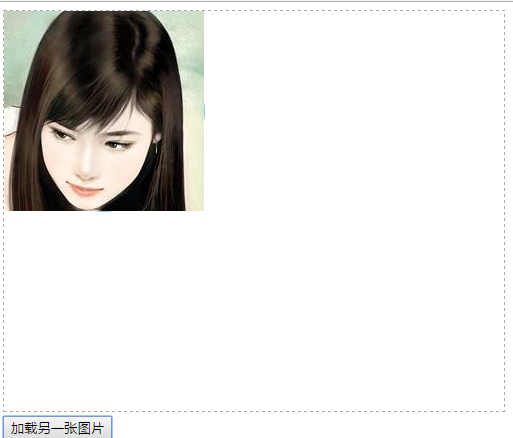
再次点击之后,就没有产生裁剪效果了
保存与恢复变形状态,如果一个形状产生多次平移效果,如果没有保存和恢复状态,那么平移相对的是他上一次变化后的状态
 <meta charset='utf-8' />

 <style>

 #canvas{

     border:1px dashed #aaa;

 }

 </style>

 <script>

 window.onload = function(){

     var oCanvas = document.querySelector( "#canvas" ),

         oGc = oCanvas.getContext( '2d' ),

         oBtn = document.querySelector( "input" );

     // oGc.save();

     oGc.beginPath();

     oGc.fillStyle = '#09f';

     oGc.fillRect( 50, 50, 100, 100 );

     oGc.translate( 100, 100 );

     oGc.fillRect( 50, 50, 100, 100 );

     oGc.closePath();

     oGc.beginPath();

     // oGc.restore();

     oGc.fillStyle = 'red';

     oGc.translate( 150, 150 );

     oGc.fillRect( 50, 50, 100, 100 );

     oGc.closePath();

 }

 </script>

 </head>

 <body>

 <canvas id="canvas" width="500" height="400"></canvas>

 </body>
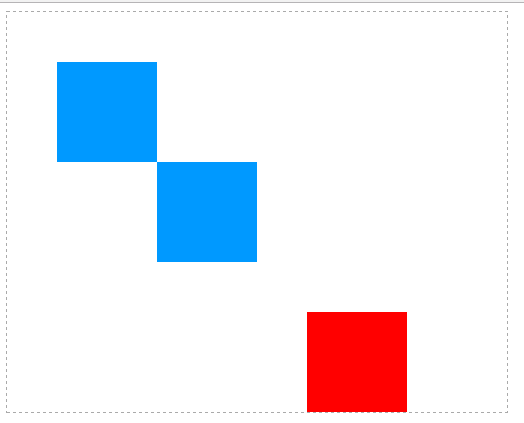
把save()和restore打开,红色的方块将是针对第一次绘制的蓝色方块平移,而不是针对平移后的状态平移【关于平移,后面会有文章,如果你有css3的基础。这个跟css3是一样的,就是相对原来的位置进行平移, 不过这里要注意一点,平移这个动作是写在渲染(fillRect)之前】

保存与恢复字体相关样式
 <meta charset='utf-8' />

 <style>

 #canvas{

     border:1px dashed #aaa;

 }

 </style>

 <script>

 window.onload = function(){

     var oCanvas = document.querySelector( "#canvas" ),

         oGc = oCanvas.getContext( '2d' ),

         oBtn = document.querySelector( "input" ),

         text = '跟着ghostwu学习html5 canvas';

     oGc.font = 'bold 30px 微软雅黑';

     oGc.fillStyle = '#09f';

     // oGc.save();

     oGc.fillText( text, 12, 60 );

     oGc.fillStyle = 'red';

     oGc.fillText( text, 12, 160 );

     // oGc.restore();

     oGc.fillText( text, 12, 260 );

 }

 </script>

 </head>

 <body>

 <canvas id="canvas" width="500" height="400"></canvas>

 </body>
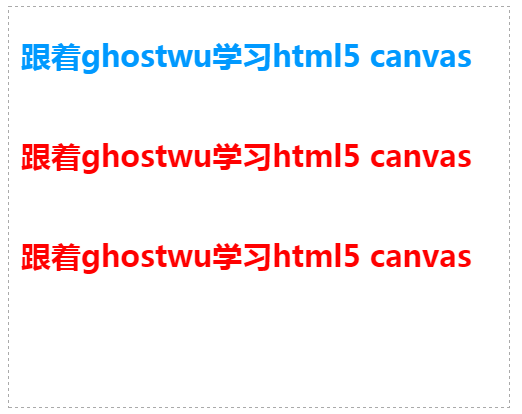
打开注释的save和restore状态之后,第三行文字就会应用到保存之前的状态(天蓝色:oGc.fillStyle = '#09f';)

[js高手之路] html5 canvas系列教程 - 状态详解(save与restore)的更多相关文章
- [js高手之路] html5 canvas系列教程 - 像素操作(反色,黑白,亮度,复古,蒙版,透明)
接着上文[js高手之路] html5 canvas系列教程 - 状态详解(save与restore),相信大家都应该玩过美颜功能,而我们今天要讲的就是canvas强大的像素处理能力,通过像素处理,实现 ...
- [js高手之路] html5 canvas系列教程 - 掌握画直线图形的常用API
我们接着上文[js高手之路] html5 canvase系列教程 - 认识canvas以及基本使用方法继续. 一.直线的绘制 cxt.moveTo( x1, y1 ): 将画笔移动到x1, y1这个点 ...
- [js高手之路] html5 canvas系列教程 - arcTo(弧度与二次,三次贝塞尔曲线以及在线工具)
之前,我写了一个arc函数的用法:[js高手之路] html5 canvas系列教程 - arc绘制曲线图形(曲线,弧线,圆形). arcTo: cxt.arcTo( cx, cy, x2, y2, ...
- [js高手之路] html5 canvas系列教程 - arc绘制曲线图形(曲线,弧线,圆形)
绘制曲线,经常会用到路径的知识,如果你对路径有疑问,可以参考我的这篇文章[js高手之路] html5 canvas系列教程 - 开始路径beginPath与关闭路径closePath详解. arc:画 ...
- [js高手之路] html5 canvas系列教程 - 图片操作(drawImage,clip,createPattern)
接着上文[js高手之路] html5 canvas系列教程 - 文本样式(strokeText,fillText,measureText,textAlign,textBaseline)继续,本文介绍的 ...
- [js高手之路] html5 canvas系列教程 - 文本样式(strokeText,fillText,measureText,textAlign,textBaseline)
接着上文线条样式[js高手之路] html5 canvas系列教程 - 线条样式(lineWidth,lineCap,lineJoin,setLineDash)继续. canvas提供两种输出文本的方 ...
- [js高手之路] html5 canvas系列教程 - 线条样式(lineWidth,lineCap,lineJoin,setLineDash)
上文,写完弧度与贝塞尔曲线[js高手之路] html5 canvas系列教程 - arcTo(弧度与二次,三次贝塞尔曲线以及在线工具),本文主要是关于线条的样式设置 lineWidth: 设置线条的宽 ...
- [js高手之路] html5 canvas系列教程 - 线形渐变,径向渐变与阴影设置
接着上文[js高手之路] html5 canvas系列教程 - 像素操作(反色,黑白,亮度,复古,蒙版,透明)继续. 一.线形渐变 线形渐变指的是一条直线上发生的渐变. 用法: var linear ...
- [js高手之路] html5 canvas动画教程 - 实时获取鼠标的当前坐标
有了前面的canvas基础之后,现在开始就精彩了,后面写的canvas教程都是属于综合应用,前面已经写了常用的canvas基础知识,参考链接如下: [js高手之路] html5 canvas系列教程 ...
随机推荐
- 论述Redis和Memcached的差异
原文 https://yq.aliyun.com/articles/60981?utm_campaign=wenzhang&utm_medium=article&utm_source= ...
- github开源项目学习-front-end-collect
About 项目地址 项目预览demo(githubio加载较慢) 开源项目fork自:https://github.com/foru17/front-end-collect 此文章是对此开源项目使用 ...
- INotifyPropertyChanged(监听数据),当数据改变时调用
public class BaseViewModel : INotifyPropertyChanged { public event PropertyChangedEventHan ...
- 最近完成的AndroidStudio项目实现思路及应用技术
主要内容: Android Studio的介绍 AS中个Gradle及Groovy介绍 AS中的依赖管理 Maven以及Nexus私库管理依赖 Gradle对变种代码的管理以及多渠道打包 eclips ...
- python程序之profile分析
操作系统 : CentOS7.3.1611_x64 python版本:2.7.5 问题描述 1.Python开发的程序在使用过程中很慢,想确定下是哪段代码比较慢: 2.Python开发的程序在使用过程 ...
- html5 响应式布局(媒体查询)
响应式布局 响应式布局,简而言之,就是一个网站能够兼容多个终端--而不是为每个终端做一个特定的版本.这个概念是为解决移动互联网浏览而诞生的. 响应式布局可以为不同终端的用户 ...
- protobuf和thrift对比
详见:http://blog.yemou.net/article/query/info/tytfjhfascvhzxcyt383 数据类型 protobuf thrift protobuf thrif ...
- 201521123101 《Java程序设计》第8周学习总结
1. 本周学习总结 2. 书面作业,本次作业题集集合 1.List中指定元素的删除(题目4-1) 1.1 实验总结 学习使用泛型,熟悉定义泛型,熟悉List中实现删除 2.统计文字中的单词数量并按出现 ...
- 201521123088《Java程序设计》第6周学习总结
1. 本周学习总结 2. 书面作业 clone方法1.1 Object对象中的clone方法是被protected修饰,在自定义的类中覆盖clone方法时需要注意什么? ...
- 201521123073 《Java程序设计》第1周学习总结
1.本章学习总结 你对于本章知识的学习总结 1.Java中使用Scanner处理输入,需要注意如下几个地方 程序开头必须import java.util.Scanner导入Scanner类. 使用Sc ...