Spring Cloud 注册中心Eureka
一、简介
最近在看Spring Cloud微服务,接下来的时间和大家一起分享我所看到的,公司现在用的是dubbo ,之后有时间也去了解了解dubbo的源码。与dubbo相比较,Spring Cloud 在微服务方面有很多全面的实践。今天主要和大家简单介绍一下其中的一个组件Eureka注册中心。Eureka同其他服务注册中心一样,支持高可用配置。如果Eureka以集群模式不熟,当集群中有分片出现故障时,那么Eureka就转入自我保护模式。它允许在分片故障期间继续提供服务的发现和注册,当故障分片恢复运行时,集群的其他分片会把它们的状态再次同步回来。
二、实践
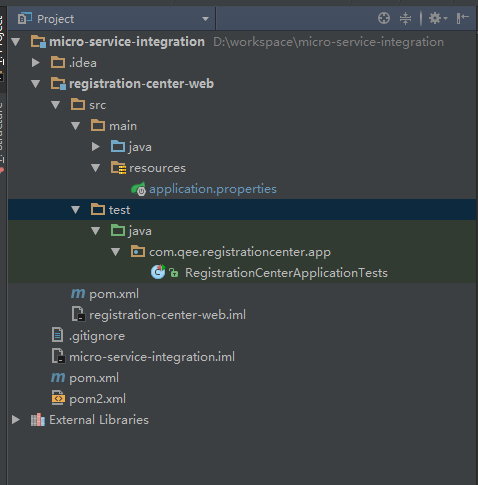
首先我们创建一个Spring Boot的maven工程,名为micro-service-integration。下面有一个子模块名为registration-center-web,该子模块就是我们今天介绍的注册中心。其工程目录如下:
在父工程中pom.xml文件的内容如下:
<?xml version="1.0" encoding="UTF-8"?>

<project xmlns="http://maven.apache.org/POM/4.0.0"

         xmlns:xsi="http://www.w3.org/2001/XMLSchema-instance"

         xsi:schemaLocation="http://maven.apache.org/POM/4.0.0 http://maven.apache.org/xsd/maven-4.0.0.xsd">

    <modelVersion>4.0.0</modelVersion>

    <groupId>spring.cloud</groupId>

    <artifactId>micro-service-integration</artifactId>

    <packaging>pom</packaging>

    <version>1.0-SNAPSHOT</version>

    <modules>

        <module>registration-center-web</module>

    </modules>

    <name>micro-service-integration</name>

    <description>Demo project for Spring Boot</description>

    <parent>

        <groupId>org.springframework.boot</groupId>

        <artifactId>spring-boot-starter-parent</artifactId>

        <version>1.5.2.RELEASE</version>

    </parent>

    <dependencyManagement>

        <dependencies>

            <dependency>

                <groupId>org.springframework.cloud</groupId>

                <artifactId>spring-cloud-dependencies</artifactId>

                <version>Dalston.RELEASE</version>

                <type>pom</type>

                <scope>import</scope>

            </dependency>

            <dependency>

                <groupId>org.springframework.boot</groupId>

                <artifactId>spring-boot-starter-test</artifactId>

                <version>1.5.2.RELEASE</version>

                <scope>test</scope>

            </dependency>

        </dependencies>

    </dependencyManagement>

</project>
在该父模块引入 spring-boot-starter-parent作为其父模块,这样可以简单的默认的使用Spring Boot 配置。并且引入Spring Cloud 的版本为Dalston.RELEASE。
而在子模块 registration-center-web 的pom.xml 依赖该Spring Cloud的版本。以后的其他服务也依赖该版本的Spring Cloud。下面是该pom.xml的内容
<?xml version="1.0" encoding="UTF-8"?>

<project xmlns="http://maven.apache.org/POM/4.0.0"

         xmlns:xsi="http://www.w3.org/2001/XMLSchema-instance"

         xsi:schemaLocation="http://maven.apache.org/POM/4.0.0 http://maven.apache.org/xsd/maven-4.0.0.xsd">

    <parent>

        <artifactId>micro-service-integration</artifactId>

        <groupId>spring.cloud</groupId>

        <version>1.0-SNAPSHOT</version>

    </parent>

    <modelVersion>4.0.0</modelVersion>

    <artifactId>registration-center-web</artifactId>

    <dependencies>

        <dependency>

            <groupId>org.springframework.cloud</groupId>

            <artifactId>spring-cloud-starter-eureka-server</artifactId>

        </dependency>

        <dependency>

            <groupId>org.springframework.boot</groupId>

            <artifactId>spring-boot-starter-test</artifactId>

            <scope>test</scope>

        </dependency>

    </dependencies>

    <profiles>

        <profile>

            <id>register-first</id>

            <properties>

                <final.project.name>registration-center-first</final.project.name>

                <server.port>8881</server.port>

            </properties>

            <activation>

                <activeByDefault>true</activeByDefault>

            </activation>

        </profile>

        <profile>

            <id>register-second</id>

            <properties>

                <final.project.name>registration-center-second</final.project.name>

                <server.port>8882</server.port>

            </properties>

        </profile>

        <profile>

            <id>register-third</id>

            <properties>

                <final.project.name>registration-center-third</final.project.name>

                <server.port>8883</server.port>

            </properties>

        </profile>

    </profiles>

    <build>

        <finalName>${final.project.name}</finalName>

        <resources>

            <resource>

                <directory>src/main/resources</directory>

                <filtering>true</filtering>

            </resource>

        </resources>

    </build>

</project>
在该pom.xml 中,可以根据profile中来制定不同的服务启动端口。
接下来我们来看一下java代码
package com.qee.registrationcenter.app;

import org.springframework.boot.SpringApplication;

import org.springframework.boot.autoconfigure.SpringBootApplication;

import org.springframework.cloud.netflix.eureka.server.EnableEurekaServer;

@SpringBootApplication

@EnableEurekaServer

public class RegistrationCenterApplication {

	public static void main(String[] args) {

		SpringApplication.run(RegistrationCenterApplication.class, args);

	}

}
非常的简单,主要通过main函数启动该工程,2个注解 @SpringBootApplication 和 @EnableEurekaServer。然后我们来看一下我们application.properties文件。
server.port=@server.port@

spring.application.name=registration-center-web

server.register.port1=8881

server.register.port2=8882

server.register.port3=8883

eureka.instance.hostname=register.center.com

#由于该应用为注册中心,所以设置为false,代表不向注册中心注册自己

eureka.client.register-with-eureka=true

#由于注册中心的职责就是维护服务实例,所以他不需要去检索服务

eureka.client.fetch-registry=true

eureka.server.enable-self-preservation=false

#默认的注册域

#eureka.client.serviceUrl.defaultZone=http://${eureka.instance.hostname}:${server.port}/eureka/

eureka.client.serviceUrl.defaultZone=http://${eureka.instance.hostname}:${server.register.port1}/eureka/,http://${eureka.instance.hostname}:${server.register.port2}/eureka/

#控制台彩色输出

spring.output.ansi.enabled=ALWAYS
这里我们是搭建一个高可用的注册中心,其中有三个注册中心分别为K1,K2,K3,其中K1的端口为8881 ,K2的端口为8882,K3的端口为8883。接着然后K1向K2,K3注册中心注册自己,而K2向K1,K3注册中心注册自己,而K3向K1,K2注册中心注册自己。由于在启动K1注册中心时,K2和K3注册中心还没开启,所以K1会报异常,但是服务还是会正常启动,同理K2也会由于K3没有启动,所以也会报异常,但是启动K3的时候,K1和K2注册中心已经正常启动,所以K3不会报异常。最后在各自的注册中心可以看到其他2个注册中心最为服务注册上去。各自的访问地址为 http://register.center.com:8881、http://register.center.com:8882、http://register.center.com:8883。
接着我们启动三个注册中心,我们看下如下结果:

三、分析
@EnableEurekaServer 该注解启动一个服务注册中心提供给其他应用进行对话。
eureka.client.register-with-eureka : 该参数代表该Eureka应用(包括注册中心)是否注册到注册中心中,如果只是一个单一注册中心,那么把该参数设置为false,代表不向注册中心注册自己。如果是搭建高可用的集群注册中心,则该属性设置为true。该属性值默认true。
eureka.client.fetch-registry : 该参数代表是否需要检索服务,如果是单一注册中心则不需要去检索服务,则设置为false。该参数默认值为true。
eureka.client.serviceUrl.defaultZone : 该参数指定默认注册中心的注册地址,其他的微服务应用就是通过该属性值来注册服务。
eureka.server.enable-self-preservation :设置为false 代表关闭注册中心的保护机制,默认为true。

其他的详细属性和配置可以查看官方文档。或者留言大家一起讨论。
该工程的gitHub地址为:https://github.com/vOoT/micro-service-integration.git
Spring Cloud 注册中心Eureka的更多相关文章
- spring cloud 注册中心--eureka注册与发现
本文详细介绍spring cloud微服务的默认注册中心--eureka注册与发现.开发环境需要Windows系统.jdk和intellij idea.与zookeeper注册中心相比,eureka不 ...
- kubernetes部署spring cloud注册中心 Eureka
系统环境 java JDK 1.8 Docker 18.09.6 kubernetes 1.16 创建Eureka Server 1.Maven引入相应的jar 引入 SpringBoot 做基础框架 ...
- JAVA Spring Cloud 注册中心 Eureka 相关配置
转载至 https://www.cnblogs.com/fangfuhai/p/7070325.html Eureka客户端配置 1.RegistryFetchIntervalSecon ...
- Spring Cloud注册中心Eureka设置访问权限并自定义鉴权页面
原文:https://blog.csdn.net/a823007573/article/details/88971496 使用Spring Security实现鉴权 1. 导入Spring Secur ...
- Spring Cloud注册中心高可用搭建
Spring Cloud的注册中心可以由Eureka.Consul.Zookeeper.ETCD等来实现,这里推荐使用Spring Cloud Eureka来实现注册中心,它基于Netfilix的Eu ...
- spring cloud - 注册中心
服务注册与发现 这里我们会用到Spring Cloud Netflix,该项目是Spring Cloud的子项目之一,主要内容是对Netflix公司一系列开源产品的包装,它为Spring Boot应用 ...
- Spring Cloud注册中心之Consul
Consul简介 Consul是HashiCorp公司使用Golang语言开发的一中多服务解决方案工具,相比于其他服务注册中心来说,Consul的功能更为强大,丰富,其中最基本的功能包含下面几点(翻译 ...
- Spring Cloud注册中心之Zookeeper
zookeeper可以作为分布式服务的注册中心 在服务端安装zookeeper 参考:https://www.cnblogs.com/conly/p/12267506.html 创建spring bo ...
- spring cloud 服务注册中心eureka高可用集群搭建
spring cloud 服务注册中心eureka高可用集群搭建 一,准备工作 eureka可以类比zookeeper,本文用三台机器搭建集群,也就是说要启动三个eureka注册中心 1 本文三台eu ...
随机推荐
- Java内存泄露实例
- Myeclipse8.5开发-插件安装二:安装findbugs方法
环境:Myeclipse8.5 step 1:首先从官网下载findbugs插件:http://downloads.sourceforge.net/project/findbugs/findbugs% ...
- linux mail命令详解
用程序发送邮件有3种方式,分别是: 1.模拟http请求邮件服务商网页实现邮件的发送 2.如果邮件服务商开通了smtp服务,那么可以通过smtp协议通过邮件代理服务商发送邮件 3.自己部署邮件服务器, ...
- Spring事务管理的实现方式:编程式事务与声明式事务
1.上篇文章讲解了Spring事务的传播级别与隔离级别,以及分布式事务的简单配置,点击回看上篇文章 2.编程式事务:编码方式实现事务管理(代码演示为JDBC事务管理) Spring实现编程式事务,依赖 ...
- 网站与域名知识扫盲-DNS
域名概述 域名的概念 IP地址不易记忆 早期使用Hosts解析域名 主机名称重复 主机维护困难 DNS(Domain Name System 域名系统) 分布式 层次性 域名空间结构 根域 组织域[. ...
- [原]使用MessageAnalyzer实时查看远端日志
1. 下载安装Message Analyzer 从Message Analyzer下载链接下载,安装过程从略. 说明:关于Message Analyzer的视频教程,可以在打开后的主界面上看到. 2. ...
- C/C++常考面试题(一)
这算是一个系列吧,记录一下在准备秋招期间,所准备的C++面试题,望秋招顺利.所有的面试题均来源于各大论坛,网络. C/C++常考面试题(一) 常用的C++数据结构有哪些? vector,序列式容器,相 ...
- 记因PHP的内存溢出导致的事故之解决
如果对您有用记得关注,更多干货. 今天上午刚到公司,就有同事在公司群里反映某个计划任务出现问题了.我就怀着刨根问底的心,去查看了log.发现挺有意思的一个问题,PHP内存溢出导致脚本执行失败.那就一起 ...
- JavaEE开发之SpringMVC中的自定义拦截器及异常处理
上篇博客我们聊了<JavaEE开发之SpringMVC中的路由配置及参数传递详解>,本篇博客我们就聊一下自定义拦截器的实现.以及使用ModelAndView对象将Controller的值加 ...
- 浅谈聚类算法(K-means)
聚类算法(K-means)目的是将n个对象根据它们各自属性分成k个不同的簇,使得簇内各个对象的相似度尽可能高,而各簇之间的相似度尽量小. 而如何评测相似度呢,采用的准则函数是误差平方和(因此也叫K-均 ...