muduo网络库源码学习————无界队列和有界队列
muduo库里实现了两个队列模板类:无界队列为BlockingQueue.h,有界队列为BoundedBlockingQueue.h,两个测试程序实现了生产者和消费者模型。(这里以无界队列为例,有界队列和无界的差不多)代码如下:
BlockingQueue.h
#include <muduo/base/Condition.h>

#include <muduo/base/Mutex.h>

#include <boost/noncopyable.hpp>

#include <deque>

#include <assert.h>

namespace muduo

{

template<typename T>//队列模板

class BlockingQueue : boost::noncopyable

{

 public:

  BlockingQueue(): mutex_(), notEmpty_(mutex_),queue_()

  {//构造函数对3个成员进行初始化

  }

  void put(const T& x)//生产产品

  {

    MutexLockGuard lock(mutex_);//先加上锁对队列进行保护,构造函数中调用lock,析构函数会自动调用unlock

    queue_.push_back(x);//产品放进队列

    //队列不为空,通知消费者可以进行消费

    notEmpty_.notify(); // TODO: move outside of lock

  }

  T take()//消费产品

  {

    MutexLockGuard lock(mutex_);//加锁保护队列

    // always use a while-loop, due to spurious wakeup

    while (queue_.empty())//如果队列为空,则一直等待

    {

      notEmpty_.wait();

    }

    assert(!queue_.empty());//断言队列非空

    T front(queue_.front());//取出队首元素

    queue_.pop_front();//将队首元素弹出

    return front;//返回队首元素

  }

  size_t size() const//队列大小

  {

    MutexLockGuard lock(mutex_);//加锁保护

    return queue_.size();//返回队列大小

  }

 private:

  mutable MutexLock mutex_;//互斥锁

  Condition         notEmpty_;//条件变量

  std::deque<T>     queue_;//队列使用stl中的deque

};

}

#endif  // MUDUO_BASE_BLOCKINGQUEUE_H
测试代码有两个:
BlockingQueue_test.cc
#include <muduo/base/BlockingQueue.h>

#include <muduo/base/CountDownLatch.h>

#include <muduo/base/Thread.h>

#include <boost/bind.hpp>

#include <boost/ptr_container/ptr_vector.hpp>

#include <string>

#include <stdio.h>

class Test

{

 public://numThreads初始化为5,条件变量count初始化为5,线程个数也为5

  Test(int numThreads) : latch_(numThreads), threads_(numThreads)

  {

    for (int i = 0; i < numThreads; ++i)

    {//线程名称

      char name[32];

      snprintf(name, sizeof name, "work thread %d", i);

      //创建5个线程,threadFunc为线程回调函数

      threads_.push_back(new muduo::Thread(boost::bind(&Test::threadFunc, this), muduo::string(name)));

    }

    //启动线程

    for_each(threads_.begin(), threads_.end(), boost::bind(&muduo::Thread::start, _1));

  }

  void run(int times)

  {

    printf("waiting for count down latch\n");

    latch_.wait();//等待count被减为0

    printf("all threads started\n");

    for (int i = 0; i < times; ++i)//100次

    {

      char buf[32];

      snprintf(buf, sizeof buf, "hello %d", i);

      queue_.put(buf);//往队列中添加100个产品

      //打印信息

      printf("tid=%d, put data = %s, size = %zd\n", muduo::CurrentThread::tid(), buf, queue_.size());

    }

  }

  void joinAll()

  {

    for (size_t i = 0; i < threads_.size(); ++i)

    {//往5个线程添加stop

      queue_.put("stop");

    }

    //执行join

    for_each(threads_.begin(), threads_.end(), boost::bind(&muduo::Thread::join, _1));

  }

 private:

//线程回调函数

  void threadFunc()

  {//输出线程id和名称

    printf("tid=%d, %s started\n", muduo::CurrentThread::tid(),muduo::CurrentThread::name());

   //计数值减一

    latch_.countDown();//count减为0时将通知所有等待线程

    bool running = true;

    while (running)

    {

      std::string d(queue_.take());//消费产品

      //打印取出的值

      printf("tid=%d, get data = %s, size = %zd\n", muduo::CurrentThread::tid(), d.c_str(), queue_.size());

    //直到产品的名称==stop,跳出循环

      running = (d != "stop");

    }

   //打印停止信息

    printf("tid=%d, %s stopped\n",muduo::CurrentThread::tid(),muduo::CurrentThread::name());

  }

  muduo::BlockingQueue<std::string> queue_;//队列

  muduo::CountDownLatch latch_;//条件变量

  boost::ptr_vector<muduo::Thread> threads_;//线程数组

};

int main()

{//打印进程,线程id

  printf("pid=%d, tid=%d\n", ::getpid(), muduo::CurrentThread::tid());

  Test t(5);//定义test类

  t.run(100);

  t.joinAll();

  printf("number of created threads %d\n", muduo::Thread::numCreated());

}
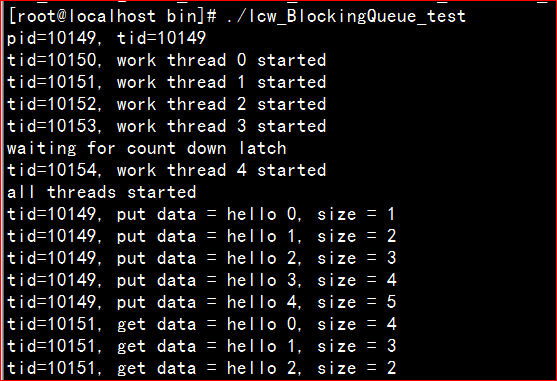
单独编译后运行结果如下:
BlockingQueue_bench.cc
#include <muduo/base/BlockingQueue.h>

#include <muduo/base/CountDownLatch.h>

#include <muduo/base/Thread.h>

#include <muduo/base/Timestamp.h>

#include <boost/bind.hpp>

#include <boost/ptr_container/ptr_vector.hpp>

#include <map>

#include <string>

#include <stdio.h>

class Bench//Bench是用来度量时间的一个类

{

 public://count初始化为numThreads,创建numThreads个线程

  Bench(int numThreads) : latch_(numThreads),threads_(numThreads)

  {

    for (int i = 0; i < numThreads; ++i)

    {

      char name[32];

      snprintf(name, sizeof name, "work thread %d", i);

      //创建线程,设置回调

      threads_.push_back(new muduo::Thread( boost::bind(&Bench::threadFunc, this), muduo::string(name)));

    }

    //线程start

    for_each(threads_.begin(), threads_.end(), boost::bind(&muduo::Thread::start, _1));

  }

  void run(int times)//生产产品

  {//10000个

    printf("waiting for count down latch\n");

    latch_.wait();//等待count降为0

    printf("all threads started\n");

    for (int i = 0; i < times; ++i)

    {

      muduo::Timestamp now(muduo::Timestamp::now());

      queue_.put(now);//当前时间戳进队

      usleep(1000);//1000微秒一次

    }

  }

  void joinAll()

  {

    for (size_t i = 0; i < threads_.size(); ++i)

    {

      queue_.put(muduo::Timestamp::invalid());//产生非法时间,即产生跳出循环的条件

    }

    for_each(threads_.begin(), threads_.end(), boost::bind(&muduo::Thread::join, _1));

  }

 private:

  void threadFunc()//用于消费产品

  {

    printf("tid=%d, %s started\n",muduo::CurrentThread::tid(),muduo::CurrentThread::name());

    //Map是STL[1]  的一个关联容器,它提供一对一

    //(其中第一个可以称为关键字,每个关键字只能在map中出现一次,第二个可能称为该关键字的值)的数据处理能力

    //第一个是delay值,第二个是相同delay的次数

    std::map<int, int> delays;//map容器

    latch_.countDown();

    bool running = true;

    while (running)

    {

      muduo::Timestamp t(queue_.take());//取出队列中的时间戳

      muduo::Timestamp now(muduo::Timestamp::now());//建立当前时间戳对象

      if (t.valid())//如果是一个合法的时间

      {//计算差值

        int delay = static_cast<int>(timeDifference(now, t) * 1000000);//以微秒为单位

        // printf("tid=%d, latency = %d us\n", muduo::CurrentThread::tid(), delay);

        ++delays[delay];//??

      }

      running = t.valid();//t为非法的时间则跳出循环

    }

    printf("tid=%d, %s stopped\n", muduo::CurrentThread::tid(),muduo::CurrentThread::name());

    //使用迭代器遍历map容器

    for (std::map<int, int>::iterator it = delays.begin(); it != delays.end(); ++it)

    {

      printf("tid = %d, delay = %d, count = %d\n",muduo::CurrentThread::tid(),it->first, it->second);

    }

  }

  muduo::BlockingQueue<muduo::Timestamp> queue_;

  muduo::CountDownLatch latch_;

  boost::ptr_vector<muduo::Thread> threads_;

};

int main(int argc, char* argv[])

{//若参数大于1则是传入的参数,否则设为1

  int threads = argc > 1 ? atoi(argv[1]) : 1;

  Bench t(threads);//建立Bench对象

  t.run(10000);

  t.joinAll();

}
单独编译后运行结构如下:(输出过长,时间也太长,截图时中断了程序)

muduo网络库源码学习————无界队列和有界队列的更多相关文章
- muduo网络库源码学习————Timestamp.cc
今天开始学习陈硕先生的muduo网络库,moduo网络库得到很多好评,陈硕先生自己也说核心代码不超过5000行,所以我觉得有必要拿过来好好学习下,学习的时候在源码上面添加一些自己的注释,方便日后理解, ...
- muduo网络库源码学习————线程池实现
muduo库里面的线程池是固定线程池,即创建的线程池里面的线程个数是一定的,不是动态的.线程池里面一般要包含线程队列还有任务队列,外部程序将任务存放到线程池的任务队列中,线程池中的线程队列执行任务,也 ...
- muduo网络库源码学习————线程类
muduo库里面的线程类是使用基于对象的编程思想,源码目录为muduo/base,如下所示: 线程类头文件: // Use of this source code is governed by a B ...
- muduo网络库源码学习————互斥锁
muduo源码的互斥锁源码位于muduo/base,Mutex.h,进行了两个类的封装,在实际的使用中更常使用MutexLockGuard类,因为该类可以在析构函数中自动解锁,避免了某些情况忘记解锁. ...
- muduo网络库源码学习————线程特定数据
muduo库线程特定数据源码文件为ThreadLocal.h //线程本地存储 // Use of this source code is governed by a BSD-style licens ...
- muduo网络库源码学习————日志滚动
muduo库里面的实现日志滚动有两种条件,一种是日志文件大小达到预设值,另一种是时间到达超过当天.滚动日志类的文件是LogFile.cc ,LogFile.h 代码如下: LogFile.cc #in ...
- muduo网络库源码学习————日志类封装
muduo库里面的日志使方法如下 这里定义了一个宏 #define LOG_INFO if (muduo::Logger::logLevel() <= muduo::Logger::INFO) ...
- muduo网络库源码学习————线程本地单例类封装
muduo库中线程本地单例类封装代码是ThreadLocalSingleton.h 如下所示: //线程本地单例类封装 // Use of this source code is governed b ...
- muduo网络库源码学习————线程安全
线程安全使用单例模式,保证了每次只创建单个对象,代码如下: Singleton.h // Use of this source code is governed by a BSD-style lice ...
随机推荐
- "字符反向拼接"组件:<reverse> —— 快应用组件库H-UI
 <import name="reverse" src="../Common/ui/h-ui/text/c_text_reverse"></ ...
- Jmeter发送jdbc请求进行大批量造数
创建批量造数脚本,一个简单的结构如下图所示, 1.线程组(10个线程重复运行2次,相当于造20个数) 2.用户定义变量(这是全局变量,用于后面随机筛选用) 3.数据库连接配置 4.计数器(用于主键递增 ...
- Ignatius and the Princess IV HDU 1029
题目大意: n个数字,找出其中至少出现(n+1)/2次的数字,并且保证n是奇数. 题解:这道题数组是不能用的,因为题目没有明确输入的数据范围,比如输入了一个1e9,数组肯定开不了这么大.所以要用map ...
- Java 基础讲解
Hello,老同学们,又见面啦,新同学们,你们好哦! 在看完本人的<数据结构与算法>专栏的博文的老同学,恭喜你们在学习本专栏时,你们将会发现好多知识点都讲解过,都易于理解,那么,没看过的同 ...
- SpringBoot集成MyBatis底层原理及简易实现
MyBatis是可以说是目前最主流的Spring持久层框架了,本文主要探讨SpringBoot集成MyBatis的底层原理.完整代码可移步Github. 如何使用MyBatis 一般情况下,我们在Sp ...
- python列表简介
什么是列表?如何使用列表?https://docs.python.org/3/library/stdtypes.html#sequence-types-list-tuple-range 列表相关知识: ...
- phpstudy xdebug 配置
来源:https://baijiahao.baidu.com/s?id=1607680791440431678&wfr=spider&for=pc https://www.cnblog ...
- dhcp协议抓包分析
dhcp协议 DHCP,动态主机配置协议,前身是BOOTP协议,是一个局域网的网络协议,使用UDP协议工作,常用的2个端口:67(DHCP server),68(DHCP client). wires ...
- Kubernetes产生背景、核心概念
Kubernetes是什么 • Kubernetes是Google在2014年开源的一个容器集群管理系统,Kubernetes简称K8S. • Kubernetes用于容器化应用程序的部署,扩展和管理 ...
- Spring Boot中使用@JsonComponent
文章目录 序列化 反序列化 在同一个class中序列化和反序列化 Spring Boot中使用@JsonComponent @JsonComponent 是Spring boot的核心注解,使用@Js ...