[No0000D1]WPF—TreeView无限极绑定集合形成树结构
1.如图所示:绑定树效果图
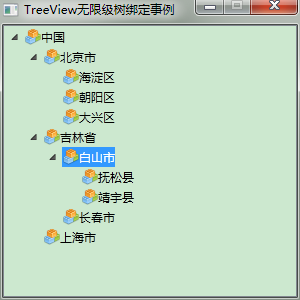
2.前台Xaml代码:
<Window x:Class="WpfTest.MainWindow"

        xmlns="http://schemas.microsoft.com/winfx/2006/xaml/presentation"

        xmlns:x="http://schemas.microsoft.com/winfx/2006/xaml"

        xmlns:mode="clr-namespace:WpfTest"

        Title="TreeView无限级树绑定事例" Height="300" Width="300" WindowStartupLocation="CenterScreen" ResizeMode="CanMinimize">

    <Grid>

        <Grid.Resources>

            <HierarchicalDataTemplate DataType="{x:Type mode:Node}" ItemsSource="{Binding Nodes}">

                <StackPanel Orientation="Horizontal" Margin="0,2,0,2">

                    <!--<Image Source="pack://application:,,,/WpfTest;Component/Resources/KnowDot.png" Width="16" Height="16" />-->

                    <!--<Image Source="Resources/KnowDot.png" Width="16" Height="16" />-->

                    <Image Source="/WpfTest;Component/Resources/KnowDot.png" Width="16" Height="16" />

                    <TextBlock Text="{Binding Name}" ToolTip="{Binding Name}" Tag="{Binding}"/>

                </StackPanel>

            </HierarchicalDataTemplate>

        </Grid.Resources>

        <TreeView Name="TreeView"/>

    </Grid>

</Window>
2.后台cs代码:采用递归无限极向下查询
using System;

using System.Collections.Generic;

using System.Linq;

using System.Text;

using System.Windows;

using System.Windows.Controls;

using System.Windows.Data;

using System.Windows.Documents;

using System.Windows.Input;

using System.Windows.Media;

using System.Windows.Media.Imaging;

using System.Windows.Navigation;

using System.Windows.Shapes;

using System.Threading;

using System.Diagnostics;

using System.Windows.Markup;

namespace WpfTest

{

    /// <summary>

    /// MainWindow.xaml 的交互逻辑

    /// </summary>

    public partial class MainWindow : Window

    {

        public MainWindow()

        {

            InitializeComponent();

            List<Node> nodes = new List<Node>()

            {

                new Node { ID = , Name = "中国" },

                new Node { ID = , Name = "北京市", ParentID =  },

                new Node { ID = , Name = "吉林省", ParentID =  },

                new Node { ID = , Name = "上海市", ParentID =  },

                new Node { ID = , Name = "海淀区", ParentID =  },

                new Node { ID = , Name = "朝阳区", ParentID =  },

                new Node { ID = , Name = "大兴区", ParentID =  },

                new Node { ID = , Name = "白山市", ParentID =  },

                new Node { ID = , Name = "长春市", ParentID =  },

                new Node { ID = , Name = "抚松县", ParentID =  },

                new Node { ID = , Name = "靖宇县", ParentID =  }

            };

            // 绑定树

            List<Node> outputList = Bind(nodes);

            //(TreeView.SelectedItem as Node).ID

            this.TreeView.ItemsSource = outputList;

            //TreeViewItem item = new TreeViewItem();

            //item.Header = "";

        }

        /// <summary>

        /// 绑定树

        /// </summary>

        List<Node> Bind(List<Node> nodes)

        {

            List<Node> outputList = new List<Node>();

            for (int i = ; i < nodes.Count; i++)

            {

                if (nodes[i].ParentID == -)

                {

                    outputList.Add(nodes[i]);

                }

                else

                {

                    FindDownward(nodes, nodes[i].ParentID).Nodes.Add(nodes[i]);

                }

            }

            return outputList;

        }

        /// <summary>

        /// 递归向下查找

        /// </summary>

        Node FindDownward(List<Node> nodes, int id)

        {

            if (nodes == null) return null;

            for (int i = ; i < nodes.Count; i++)

            {

                if (nodes[i].ID == id)

                {

                    return nodes[i];

                }

                Node node = FindDownward(nodes[i].Nodes, id);

                if (node != null)

                {

                    return node;

                }

            }

            return null;

        }

    }

    public class Node

    {

        public Node()

        {

            this.Nodes = new List<Node>();

            this.ParentID = -;

        }

        public int ID { get; set; }

        public string Name { get; set; }

        public int ParentID { get; set; }

        public List<Node> Nodes { get; set; }

    }

}
[No0000D1]WPF—TreeView无限极绑定集合形成树结构的更多相关文章
- WPF—TreeView无限极绑定集合形成树结构
1.如图所示:绑定树效果图 2.前台Xaml代码: <Window x:Class="WpfTest.MainWindow" xmlns="http://schem ...
- wpf treeview 数据绑定 递归绑定节点
1.先上效果 将所有节点加入ComboBox数据源,在ComboBox中选择时下方Treeview显示该节点下的子节点. 1.xaml文件,将以下代码加入界面合适位置 <StackPanel&g ...
- 转:打造DropDownList,TreeView,ListBox无限极分类目录树
[csharp] view plaincopyprint? #region DropDownList无限递归显示层次关系 /// <summary> /// 创建无限分级下拉列表框 /// ...
- WPF 绑定集合 根据集合个数改变样式 INotifyCollectionChanged
问题:当前ListBox Items 绑定 集合数据源ListA时候:ListA集合数据源中存在另外一个集合ListB,当更改或往ListB集合中添加数据的时候,通知改变? 实体类继承 INotify ...
- WPF Binding学习(四) 绑定各种数据源
转自:http://blog.csdn.net/lisenyang/article/details/18312199 1.集合作为数据源 首先我们先创建一个模型类 public class Stude ...
- WPF TreeView HierarchicalDataTemplate
原文 WPF TreeView HierarchicalDataTemplate HierarchicalDataTemplate 的DataType是本层的绑定,而ItemsSource是绑定下层的 ...
- C#无限极分类树-创建-排序-读取 用Asp.Net Core+EF实现
今天做一个管理后台菜单,想着要用无限极分类,记得园子里还是什么地方见过这种写法,可今天找了半天也没找到,没办法静下心来自己写了: 首先创建节点类(我给它取名:AdminUserTree): /// & ...
- [WPF 基础知识系列] —— 绑定中的数据校验Vaildation
前言: 只要是有表单存在,那么就有可能有对数据的校验需求.如:判断是否为整数.判断电子邮件格式等等. WPF采用一种全新的方式 - Binding,来实现前台显示与后台数据进行交互,当然数据校验方式也 ...
- 【laravel5.4】Baum无限极分类和collect助手函数、transform()中间件(转换数据)方法使用
1.目的,无限极分类 /* * getdepartment:获取[当前登录用户对应公司的所有有效部门] * DB::table ==>返回查询构造器结果,不会返回一个collect实例 * 而 ...
随机推荐
- iframe之间操作记录
1.watch.js (function ($) { $.fn.watch = function (callback) { return this.each(function () { //缓存以前的 ...
- Effective Java 第三版—— 86. 非常谨慎地实现SERIALIZABLE接口
Tips 书中的源代码地址:https://github.com/jbloch/effective-java-3e-source-code 注意,书中的有些代码里方法是基于Java 9 API中的,所 ...
- 关于 Docker Hub 上不能注册 Docker ID 的问题
1. 引言 我们中国大陆访问dockerhub的时候,想要注册一个dockerID,发现sign up按钮是灰色的,不能点击进行注册.这个时候通过点击右键"查看网页源代码"和&qu ...
- Java并发之线程转储
一.java线程转储 java的线程转储可以被定义为JVM中在某一个给定的时刻运行的所有线程的快照.一个线程转储可能包含一个单独的线程或者多个线程.在多线程环境中,比如J2EE应用服务器,将会有许多线 ...
- Kafka 生产者和消费者入门代码基础
这篇博文讲解Kafka 的生产者和消费者实例. 基础版本一 生产者 ProducerFastStart.java package com.xingyun.tutorial_1; import org. ...
- 音视频编解码: YUV存储格式中的YUV420P,YUV420SP,NV12, NV21理解(转)
概述 之前介绍了YUV码流的采样格式,下面分析下YUV码流的存储格式,YUV码流的存储格式与采样格式息息相关.总的来讲,YUV存储格式主要分为两种: planar 平面格式 指先连续存储所有像素点的 ...
- 【Spark深入学习 -13】Spark计算引擎剖析
----本节内容------- 1.遗留问题解答 2.Spark核心概念 2.1 RDD及RDD操作 2.2 Transformation和Action 2.3 Spark程序架构 2.4 Spark ...
- Canvas入门到高级详解(上)
神奇的 canvas--AICODER 全栈培训 IT 培训专家 一.canvas 简介 1.1 什么是 canvas?(了解) 是 HTML5 提供的一种新标签 <canvas>< ...
- hdoj:2071
Max Num Time Limit: 1000/1000 MS (Java/Others) Memory Limit: 32768/32768 K (Java/Others)Total Sub ...
- 解决vscode无法安装golang相关插件的问题 - 即无法直连golang.org的问题
喜欢挂vpn或者代理的请无视本文. 其实golang.org上的插件在github.com上都有镜像,直接 git clone https://github.com/golang/tools git ...