IdentityServer(二)客户端授权模式
前言
客户端授权模,客户端直接向Identity Server申请token并访问资源。客户端授权模式比较适用于服务之间的通信。

搭建Identity服务
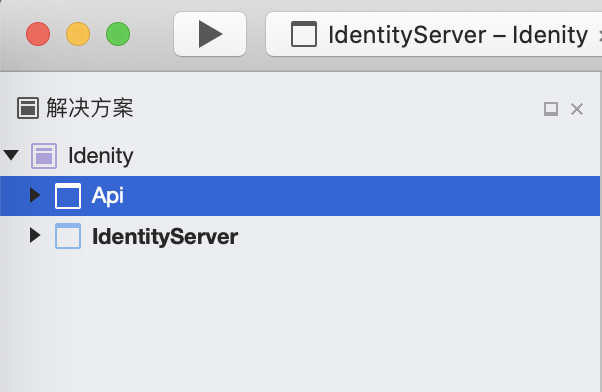
新建名为 IdentityServer 的WebApi空项目,设置端口为5000,作为我们的授权认证服务。
新建名为 Api 的WebApi空项目,设置端口为5001,作为我们的Api资源。
通过NuGet安装 IdentityServer4 或者通过程序包管理执行 Install-Package IdentityServer4 安装依赖包。

新一个 Config 文件来定义Identity资源
using System.Collections.Generic;

using IdentityServer4;

using IdentityServer4.Models;

namespace IdentityServer

{

    public static class Config

    {

        public static IEnumerable<IdentityResource> GetIdentityResourceResources()

        {

            return new List<IdentityResource>

            {

                new IdentityResources.OpenId(), //必须要添加,否则报无效的scope错误

            };

        }

        // scopes define the API resources in your system

        public static IEnumerable<ApiResource> GetApiResources()

        {

            //api资源({资源名称}{描述})

            return new List<ApiResource>

            {

                new ApiResource("Api", "Api"),

            };

        }

        // clients want to access resources (aka scopes)

        public static IEnumerable<Client> GetClients()

        {

            return new List<Client>

            {

                new Client

                {

                    //客户端id,必须唯一

                    ClientId = "client_a",

                    //授权方式,这里采用的是客户端认证模式,只要ClientId,以及ClientSecrets正确即可访问对应的AllowedScopes里面的api资源

                    AllowedGrantTypes = GrantTypes.ClientCredentials,

                    ClientSecrets =

                    {

                        new Secret("secret".Sha256())

                    },

                    AllowedScopes =

                    {

                        "Api",

                    }

                }

            };

        }

    }

}
在 Startup 中配置IdentityServer
using Microsoft.AspNetCore.Builder;

using Microsoft.AspNetCore.Hosting;

using Microsoft.Extensions.Configuration;

using Microsoft.Extensions.DependencyInjection;

using Microsoft.Extensions.Hosting;

namespace IdentityServer

{

    public class Startup

    {

        public Startup(IConfiguration configuration)

        {

            Configuration = configuration;

        }

        public IConfiguration Configuration { get; }

        // This method gets called by the runtime. Use this method to add services to the container.

        public void ConfigureServices(IServiceCollection services)

        {

            //注入DI

            services.AddIdentityServer()

                 .AddDeveloperSigningCredential()

                .AddInMemoryApiResources(Config.GetApiResources())//Api资源信息

                .AddInMemoryClients(Config.GetClients());//客户端信息

        }

        // This method gets called by the runtime. Use this method to configure the HTTP request pipeline.

        public void Configure(IApplicationBuilder app, IWebHostEnvironment env)

        {

            if (env.IsDevelopment())

            {

                app.UseDeveloperExceptionPage();

            }

            //放入HTTP管道中

            app.UseIdentityServer();

        }

    }

}
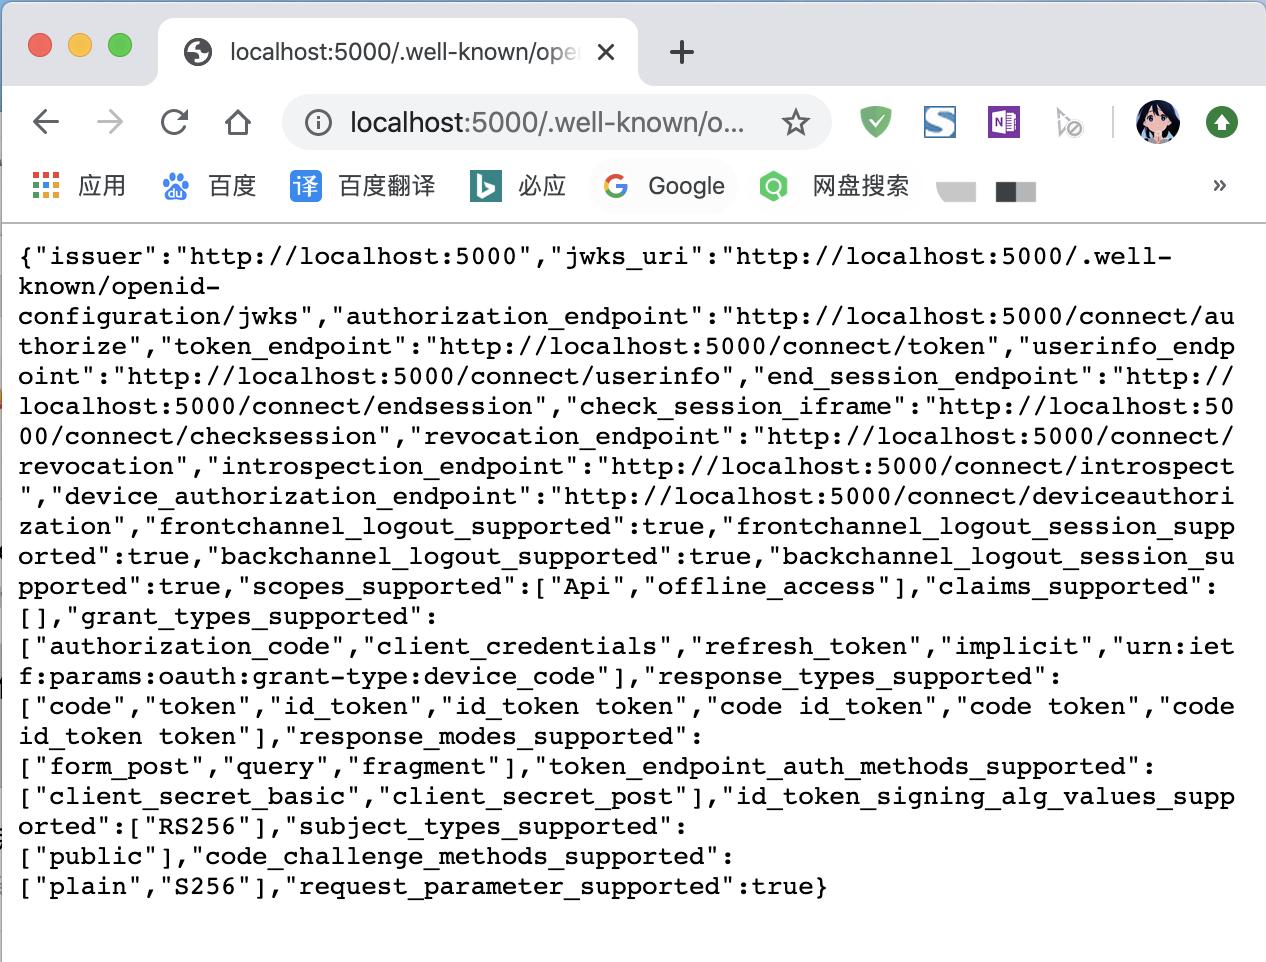
运行当前项目,并访问 http://localhost:5000/.well-known/openid-configuration 就会看到当前IdentityServer的一些信,首次启动会创建一个名为tempkey.rsa 的文件,里面保存的是你的签名密钥。
定义Api资源
通过NuGet安装 IdentityServer4.AccessTokenValidation 或者通过程序包管理执行 IInstall-Package IdentityServer4.AccessTokenValidation 安装依赖包。
在 Api 项目中新增一个ValuesController并添加一个 Print 接口 Authorize表示该接口被身份认证所保护
using Microsoft.AspNetCore.Authorization;

using Microsoft.AspNetCore.Mvc;

namespace Api.Controllers

{

    [Route("api/[controller]")]

    public class ValuesController : Controller

    {

        [HttpGet("Print")]

        [Authorize]

        public ActionResult Print()

        {

            return new JsonResult("hello word");

        }

    }

}
在 Startup 中把身份认证服务注入DI,并放入HTTP管道。
uusing Microsoft.AspNetCore.Builder;

using Microsoft.AspNetCore.Hosting;

using Microsoft.Extensions.Configuration;

using Microsoft.Extensions.DependencyInjection;

using Microsoft.Extensions.Hosting;

namespace Api

{

    public class Startup

    {

        public Startup(IConfiguration configuration)

        {

            Configuration = configuration;

        }

        public IConfiguration Configuration { get; }

        // This method gets called by the runtime. Use this method to add services to the container.

        public void ConfigureServices(IServiceCollection services)

        {

            services.AddControllers();

            //将身份认证注入到DI

            services.AddAuthentication("Bearer")

                .AddJwtBearer("Bearer", options =>

                {

                    options.Authority = "http://localhost:5000";

                    options.RequireHttpsMetadata = false;

                    options.Audience = "Api";

                });

        }

        // This method gets called by the runtime. Use this method to configure the HTTP request pipeline.

        public void Configure(IApplicationBuilder app, IWebHostEnvironment env)

        {

            if (env.IsDevelopment())

            {

                app.UseDeveloperExceptionPage();

            }

            app.UseRouting();

            //身份认证添加到HTTP管道

            app.UseAuthentication();

            app.UseAuthorization();

            app.UseEndpoints(endpoints =>

            {

                endpoints.MapControllers();

            });

        }

    }

}
测试效果
我们同时运行两个项目。这时候我们直接访问Api资源。会直接抛出401(用户没有权限访问)

我们用配置的client向IdentityServer申请token来访问Api资源
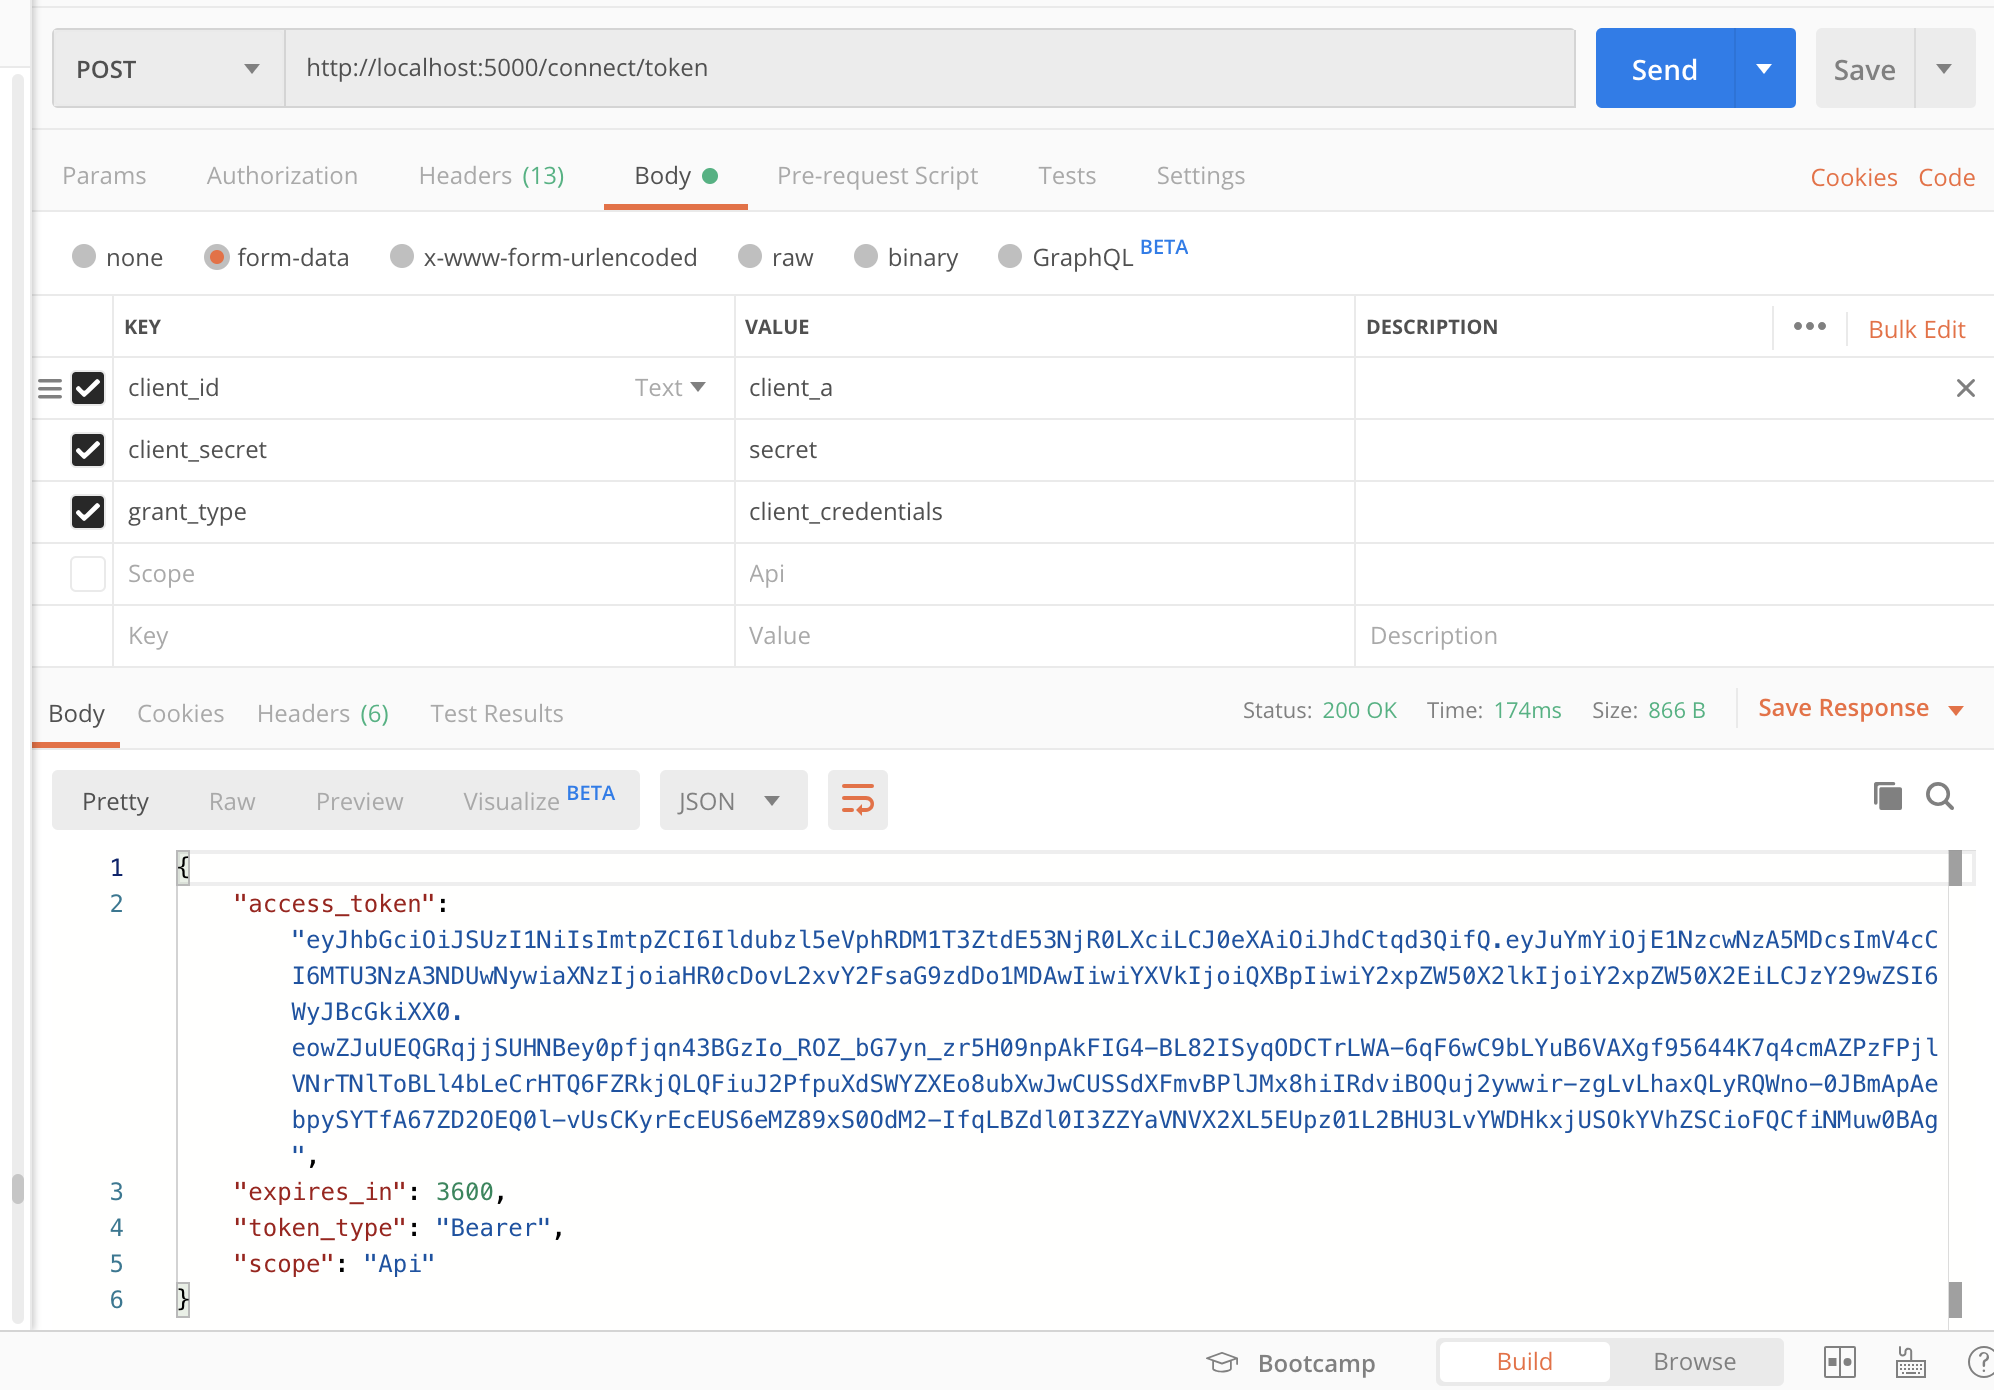
client_id - 我们配置的客户端id
client_secret - 签名密钥。
grant_type - 授权模式
access_token - 访问令牌
expires_in - 过去时间(秒)
token_type - 令牌类型
scope - 可以访问资源名称
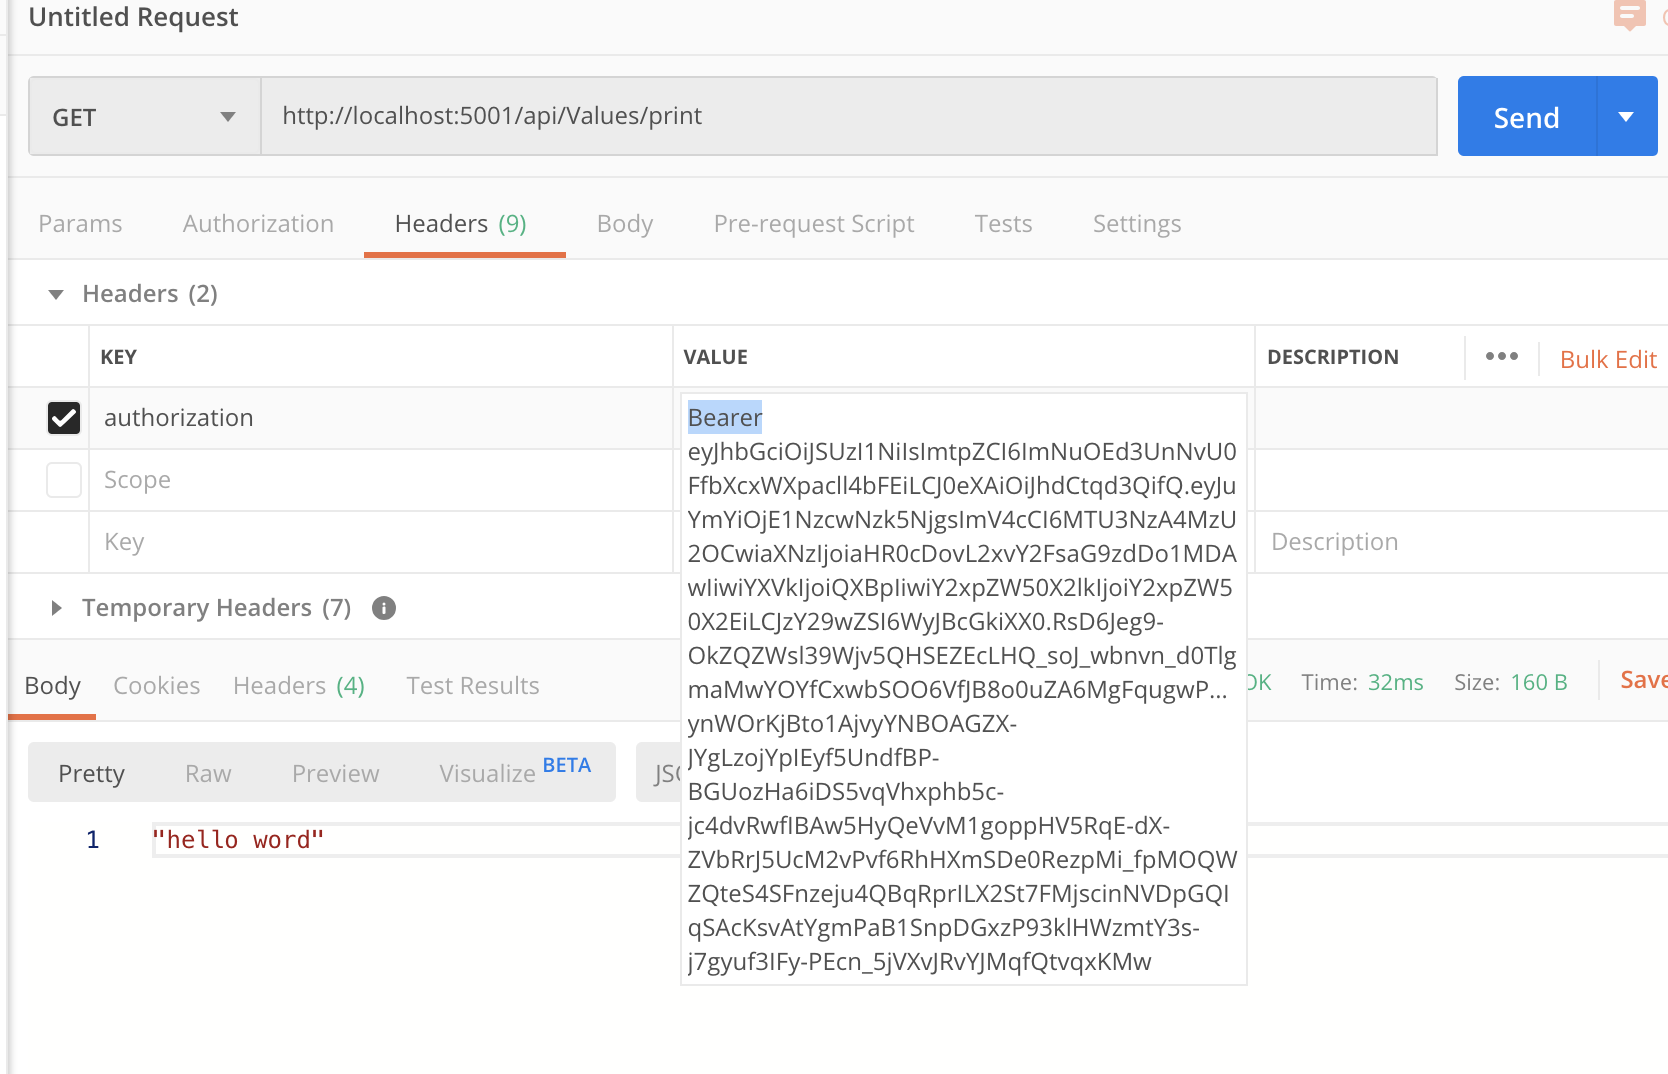
使用资源访问Api资源,在Hraders中加入 authorization 传入刚申请的token(Bearer后面有一个空格)
IdentityServer(二)客户端授权模式的更多相关文章
- IdentityServer4 (1) 客户端授权模式(Client Credentials)
写在前面 1.源码(.Net Core 2.2) git地址:https://github.com/yizhaoxian/CoreIdentityServer4Demo.git 2.相关章节 2.1. ...
- IdentityServer4(客户端授权模式)
1.新建三个项目 IdentityServer:端口5000 IdentityAPI:端口5001 IdentityClient: 2.在IdentityServer项目中添加IdentityServ ...
- IdentityServer4[3]:使用客户端认证控制API访问(客户端授权模式)
使用客户端认证控制API访问(客户端授权模式) 场景描述 使用IdentityServer保护API的最基本场景. 我们定义一个API和要访问API的客户端.客户端从IdentityServer请求A ...
- (十)React Ant Design Pro + .Net5 WebApi:后端环境搭建-IdentityServer4(二)授权模式
一.前言 先交代一下整个Demo项目结构: 一个认证服务(端口5000)IdentityServer4.Authentication 五个授权模式(两个控制台程序,三个MVC项目端口5001)文件夹G ...
- IdentityServer4(7)- 使用客户端认证控制API访问(客户端授权模式)
一.前言 本文已更新到 .NET Core 2.2 本文包括后续的Demo都会放在github:https://github.com/stulzq/IdentityServer4.Samples (Q ...
- 微服务(入门四):identityServer的简单使用(客户端授权)
IdentityServer简介(摘自Identity官网) IdentityServer是将符合规范的OpenID Connect和OAuth 2.0端点添加到任意ASP.NET核心应用程序的中间件 ...
- 【.NET Core项目实战-统一认证平台】第十一章 授权篇-密码授权模式
[.NET Core项目实战-统一认证平台]开篇及目录索引 上篇文章介绍了基于Ids4客户端授权的原理及如何实现自定义的客户端授权,并配合网关实现了统一的授权异常返回值和权限配置等相关功能,本篇将介绍 ...
- Spring Cloud2.0之Oauth2环境搭建(授权码模式和密码授权模式)
oauth2 server 微服务授权中心, github源码 https://github.com/spring-cloud/spring-cloud-security 对微服务接口做一些权 ...
- 认证授权:IdentityServer4 - 各种授权模式应用
前言: 前面介绍了IdentityServer4 的简单应用,本篇将继续讲解IdentityServer4 的各种授权模式使用示例 授权模式: 环境准备 a)调整项目结构如下: b)调整cz.Id ...
随机推荐
- 17-js观察者模式
<!DOCTYPE html> <html lang="en"> <head> <meta charset="UTF-8&quo ...
- ab webbench 网站测压解决
ab 网站测压解决 ab –c 100 –n 100 http://192.168.1.117/forum.php (测试方式) 同时发100人发100个请求 ab –c 100 –n 1000 ht ...
- rebbitMQwindows安装及使用
python中RabbitMQ的使用(安装和简单教程) 1,简介 RabbitMQ(Rabbit Message Queue)是流行的开源消息队列系统,用erlang语言开发. 1.1关键词说明: ...
- HDMI/DVI 显示器热插拔与检测原理(HPD)
HDMI(19Pin)/DVI(16 pin)的功能是热插拔检测(HPD),这个信号将作为主机系统是否对HDMI/DVI是否发送TMDS信号的依据.HPD是从显示器输出送往计算机主机的一个检测信号.热 ...
- jira邮箱配置
系统-邮件-外发邮件
- Netty框架原理
用这张图表示的就是一个基本的Netty框架 通过创建两个线程池,一个负责接入, 一个负责处理 public class Start { public static void main(String[] ...
- windows和linux环境下使用google的glog日志库
一.概述 glog是google推出的一款轻量级c++开源日志框架,源码在github上,目前最新release版本是v0.3.5. githut地址:https://github.com/googl ...
- 【C++札记】new和delete
介绍 1.malloc,free和new,delete区别. a.malloc,free是C/C++的标准库函数.new,delete是c++的操作符. b.malloc申请的是内存,严格意义不是&q ...
- Centos7.3安装jdk和maven
安装jdk和maven 通过winscp上传jdk 解压 tar -zxvf jdk-8u91-linux-x64.ta ...
- Mongo DB分片
分片,指的就是把数据拆分,将其分散到不同机器上的过程.MongoDB支持自动分片,对应用而言,好像始终和一个单机的服务器交互一样. 分片和复制复制是让多台服务器拥有相同的数据副本,而分片是每个分片都拥 ...