Scrapy框架爬虫
一、sprapy爬虫框架
pip install pypiwin32
1) 创建爬虫框架
scrapy startproject Project        # 创建爬虫项目

    You can start your first spider with:

        cd Project

        scrapy genspider example example.com

cd Project    # 进入项目

scrapy genspider chouti chouti.com    # 创建爬虫
创建爬虫框架

2)执行爬虫
class ChoutiSpider(scrapy.Spider):

    name = 'chouti'

    allowed_domains = ['chouti.com']

    # start_urls = ['http://dig.chouti.com/']   #

    start_urls = ['http://www.autohome.com.cn/news']

    def parse(self, response):

        # response 访问网页的后的返回值

        print(response) # < https://www.autohome.com.cn/news/>

        print(response.url) # https://www.autohome.com.cn/news/
爬虫文件编写
(debug模式)

scrapy --help 参数帮助

pip install pypiwin32    # 执行爬虫的依赖包

scrapy crawl chouti        # 执行爬虫,查看经过的中间键

# 常用执行爬虫操作

scrapy crawl chouti --nolog        # 执行爬虫
执行爬虫命令
3)处理显示编码
import scrapy

import sys

import io

sys.stdout = io.TextIOWrapper(sys.stdout.buffer,encoding='gb18030')   # 处理显示编码

class ChoutiSpider(scrapy.Spider):

    .........

    def parse(self, response):

        content = str(response.body,encoding='utf-8')

        print(content)
编码
4.1)寻找标签:from scrapy.selector import Selector,HtmlXPathSelector
class ChoutiSpider(scrapy.Spider):

    name = 'chouti'

    allowed_domains = ['chouti.com']

    # start_urls = ['http://dig.chouti.com/']

    start_urls = ['http://www.autohome.com.cn/news']

    def parse(self, response):

        '''

        # # response 访问网页的后的返回值

        # print(response) # < https://www.autohome.com.cn/news/>

        # # 查看访问的地址

        # print(response.url) # https://www.autohome.com.cn/news/

        # 获取到网页文本代码

        # print(response.text)    # 网页代码

        print(response.body)

        '''

        # 第一种 找到整个文档所有的 a 便签

        # hax = Selector(response=response).xpath('//a')  # 标签对象列表

        # for i in hax:

        #     print(i)    # 便签对象

        # 第二种 找到所有的div标签且属性是 id="content-list"

        # hax = Selector(response=response).xpath('//div[@id="content-list"]').extract()  # 拿到便签非标签对象

        # 第三种 找到所有的div标签且属性是 id="content-list",并寻找它的儿子标签  (/)

        # hxs = Selector(response=response).xpath('//div[@id="content-list"]/div[@class="item"]').extract()   # 标签对象转换成字符串

        # for i in hxs:

        #     print(i)

        # 第四种 找到所有的div标签且属性是 id="content-list",并寻找它的儿子标签  (/)

        hxs = Selector(response=response).xpath('//div[@id="content-list"]/div[@class="item"]')

        for obj in hxs:

            # 在当前标签下取所有的a 标签  .//a

            a = obj.xpath('.//a[@class="show-content"]/text()').extract()

            #  a = obj.xpath('.//a[@class="show-content"]/text()').extract_first() # 拿列表的第一个

            # print(a)

            print(a.strip())    # 去除空白
寻找标签
常用标签寻找总结
//   表示子孙中

.//  当前对象的子孙中

/    儿子

/div 儿子中的div标签

/div[@id="i1"]  儿子中的div标签且id=i1

/div[@id="i1"]  儿子中的div标签且id=i1

obj.extract()         # 列表中的每一个对象转换字符串 =》 []

obj.extract_first()   # 列表中的每一个对象转换字符串 => 列表第一个元素

//div/text()    获取某个标签的文本
hax = Selector(response=response).xpath('//div[@id="dig_lepage"]//a/text()')  # 拿内容
hax = Selector(response=response).xpath('//div[@id="dig_lepage"]//a/@href')  # 拿标签属性
# starts-with(@href, "/all/hot/recent/ 以什么开头
hax = Selector(response=response).xpath('//a[starts-with(@href, "/all/hot/recent/")]/@href').extract()
# 正则取
hxs2 = Selector(response=response).xpath('//a[re:test(@href, "/all/hot/recent/\d+")]/@href').extract()
print(response.meta) 查询寻找深度
4.2)所有选择器示例归纳
response = HtmlResponse(url='http://example.com', body=html,encoding='utf-8')

# hxs = HtmlXPathSelector(response)

# print(hxs)

# hxs = Selector(response=response).xpath('//a')

# print(hxs)

# hxs = Selector(response=response).xpath('//a[2]')

# print(hxs)

# hxs = Selector(response=response).xpath('//a[@id]')

# print(hxs)

# hxs = Selector(response=response).xpath('//a[@id="i1"]')

# print(hxs)

# hxs = Selector(response=response).xpath('//a[@href="link.html"][@id="i1"]')

# print(hxs)

# hxs = Selector(response=response).xpath('//a[contains(@href, "link")]')

# print(hxs)

# hxs = Selector(response=response).xpath('//a[starts-with(@href, "link")]')

# print(hxs)

# hxs = Selector(response=response).xpath('//a[re:test(@id, "i\d+")]')

# print(hxs)

# hxs = Selector(response=response).xpath('//a[re:test(@id, "i\d+")]/text()').extract()

# print(hxs)

# hxs = Selector(response=response).xpath('//a[re:test(@id, "i\d+")]/@href').extract()

# print(hxs)

# hxs = Selector(response=response).xpath('/html/body/ul/li/a/@href').extract()

# print(hxs)

# hxs = Selector(response=response).xpath('//body/ul/li/a/@href').extract_first()

# print(hxs)

# ul_list = Selector(response=response).xpath('//body/ul/li')

# for item in ul_list:

#     v = item.xpath('./a/span')

#     # 或

#     # v = item.xpath('a/span')

#     # 或

#     # v = item.xpath('*/a/span')

#     print(v)
选择器示例
5.1)获取当前页的所有页面,即a 标签的href属性内容
class ChoutiSpider(scrapy.Spider):

    name = 'chouti'

    allowed_domains = ['chouti.com']

    # start_urls = ['http://dig.chouti.com/']

    start_urls = ['http://www.autohome.com.cn/news']

    visited_urls = set()

    def parse(self, response):

        # 获取当前页的所有页码

        '''

        hax = Selector(response=response).xpath('//div[@id="dig_lepage"]//a/@href').extract()

        for item in hax:

            print(item)     # 可能有重复的页面

        '''

        hax = Selector(response=response).xpath('//div[@id="dig_lepage"]//a/@href').extract()

        for item in hax:

            if item in self.visited_urls:

                print('已经存在')

            else:

                self.visited_urls.add(item)

                print(item)
对url内容加密保存
class ChoutiSpider(scrapy.Spider):

    name = 'chouti'

    allowed_domains = ['chouti.com']

    # start_urls = ['http://dig.chouti.com/']

    start_urls = ['http://www.autohome.com.cn/news']

    visited_urls = set()

    def parse(self, response):

        hax = Selector(response=response).xpath('//div[@id="dig_lepage"]//a/@href').extract()

        for url in hax:

            md5_url = self.md5(url)

            if url in self.visited_urls:

                print('已经存在')

            else:

                self.visited_urls.add(md5_url)

                print(url)

    def md5(self,url):

        import hashlib

        obj = hashlib.md5()

        obj.update(bytes(url,encoding='utf-8'))

        return obj.hexdigest()
5.2)获取该网站的所有页面
# -*- coding: utf- -*-

import scrapy

from scrapy.selector import Selector,HtmlXPathSelector

from scrapy.http import Request

import sys

import io

sys.stdout = io.TextIOWrapper(sys.stdout.buffer,encoding='gb18030')   # 处理显示编码

class ChoutiSpider(scrapy.Spider):

    name = 'chouti'

    allowed_domains = ['chouti.com']

    # start_urls = ['http://dig.chouti.com/']

    start_urls = ['http://www.autohome.com.cn/news']

    visited_urls = set()

    def parse(self, response):

        hax = Selector(response=response).xpath('//a[starts-with(@href, "/all/hot/recent/")]/@href').extract()

        for url in hax:

            md5_url = self.md5(url)

            if url in self.visited_urls:

                pass

            else:

                print(url)

                self.visited_urls.add(md5_url)

                url = "http://dig.chouti.com%s" %url

                # 将新要访问的url添加到调度器

                yield Request(url=url,callback=self.parse)

    def md5(self,url):

        import hashlib

        obj = hashlib.md5()

        obj.update(bytes(url,encoding='utf-8'))

        return obj.hexdigest()
5.3)设置访问深度,即不获取到所有的页面,递归寻找的层数
#配置文件最后写入

DEPIH_LIMIT =
setting.py
6)数据保存操作
配置文件取消注释pipeline
ITEM_PIPELINES = {

   'Project.pipelines.ProjectPipeline': ,

}
settings.py
定义保存的数据类字段名
class ChoutiItem(scrapy.Item):

    # define the fields for your item here like:

    # name = scrapy.Field()

    title = scrapy.Field()

    href = scrapy.Field()
items.py
将获取的对象传递给pipelines进行持久化保存
    def parse(self, response):

        hxs1 = Selector(response=response).xpath('//div[@id="content-list"]/div[@class="item"]')  # 标签对象列表

        for obj in hxs1:

            title = obj.xpath('.//a[@class="show-content"]/text()').extract_first().strip()

            href =  obj.xpath('.//a[@class="show-content"]/@href').extract_first().strip()

            item_obj = ChoutiItem(title=title,href=href)

            # 将item 对象传递给pipeline

            yield item_obj
6.1)写入文件
class ProjectPipeline(object):

    def process_item(self, item, spider):

        print(spider,item)

        tpl = "%s\n%s\n\n" %(item['item'],item['href'])

        f = open('news.json','a')

        f.write(tpl)

        f.close()
pipeline.py
7)知识小结
命令:

    scrapy startproject xxx

    cd xxx

    scrapy genspider name  name.com

    scrapy crawl name

编写代码:

    a. name不能省略

    b. start_urls,起始URL地址

    c. allowed_domains = ["chouti.com"] 允许的域名

    d. 重写start_requests,指定初始处理请求的函数

            def start_requests(self):

                for url in self.start_urls:

                    yield Request(url,callback=self.parse1)

    e. 响应response

        repsonse.url

        repsonse.text

        repsonse.body

        response.meta = {'depth': ‘深度’}

    f. 采集数据

        Selector(response=response).xpath()

        //div

        //div[@id="i1"]

        //div[starts-with(@id,"i1")]

        //div[re:test(@id,"i1")]

        //div/a

        #

        obj.xpath('./')

        obj.xpath('.//')

        //div/a/text()

        //div/a/@href

        Selector().extract()

        Selector().extract_first()

        //a[@id]

        //a/@id

    g. yield Request(url='',callback='xx')

    h. yield Item(name='xx',titile='xxx')

    i. pipeline

        class Foo:

            def process_item(self,item,spider):

                ....

        settings = {

            "xx.xx.xxx.Foo1": ,        # 谁小谁先执行

            "xx.xx.xxx.Foo2": ,

        }
知识点小结
二、scrapy框架知识补充
from scrapy.dupefilter import RFPDupeFilter # 查看去重的url源代码,在编写自己的
1)自定义类,url去重,内容保存方式
class RepeatFilter(object):

    def __init__(self):

        #

        self.visited_set = set()

    @classmethod

    def from_settings(cls, settings):

        #

        return cls()

    def request_seen(self, request):

        #

        if request.url in self.visited_set:

            return True

        self.visited_set.add(request.url)

        return False

    def open(self):  # can return deferred

        #

        # print('open')

        pass

    def close(self, reason):  # can return a deferred

        #

        # print('close')

        pass

    def log(self, request, spider):  # log that a request has been filtered

        # print('log....')

        pass
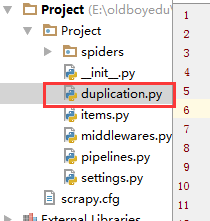
duplication.py
配置文件引入自定义类
DUPEFILTER_CLASS = "day96.duplication.RepeatFilter" # 自定义的

# DUPEFILTER_CLASS = "scrapy.dupefilters.RFPDupeFilter"     # scrapy框架自带的
配置文件引用自定义类
主逻辑文件调用回调函数
class ChoutiSpider(scrapy.Spider):

    name = 'chouti'

    allowed_domains = ['chouti.com']

    # start_urls = ['http://dig.chouti.com/']

    start_urls = ['http://www.autohome.com.cn/news']

    def parse(self, response):

        hax2 = Selector(response=response).xpath('//a[starts-with(@href, "/all/hot/recent/")]/@href').extract()

        for url in hax2:

            url = "http://dig.chouti.com%s" %url

            yield Request(url=url,callback=self.parse)
chouti.py
2.1)pipelines数据库持久化补充(分工明细)
class ProjectPipeline(object):

    def __init__(self,conn_str):

        # 数据的初始化

        self.conn_str = conn_str

    @classmethod

    def from_crawler(cls, crawler):

        """

        初始化时候,用于创建pipeline对象,读取配置文件

        :param crawler:

        :return:

        """

        conn_str = crawler.settings.get('DB')

        return cls(conn_str)

    def open_spider(self,spider):

        """

        爬虫开始执行时,调用

        :param spider:

        :return:

        """

        print('')

        self.conn = open(self.conn_str,'a')

    def close_spider(self,spider):

        """

        爬虫关闭时,被调用

        :param spider:

        :return:

        """

        print('')

        self.conn.close()

    def process_item(self, item, spider):

        # 每当数据需要持久化时,就需要被调用

        # if spider.name == "chouti":

        tpl = "%s\n%s\n\n" %(item['item'],item['href'])

        self.conn.write(tpl)
pipelines.py
2.2)如果有多个pipelines时,是否考虑让下一个执行
配置文件配置pipelines。根据执行顺序考虑谁先谁后
ITEM_PIPELINES = {

   'day96.pipelines.Day96Pipeline': ,

   'day96.pipelines.Day97Pipeline': ,

}
settings.py
from scrapy.exceptions import DropItem
根据返回值决定是否交给下一个pipelines执行
class ProjectPipeline(object):

    def __init__(self,conn_str):

        # 数据的初始化

        self.conn_str = conn_str

    @classmethod

    def from_crawler(cls, crawler):

        """

        初始化时候,用于创建pipeline对象,读取配置文件

        :param crawler:

        :return:

        """

        conn_str = crawler.settings.get('DB')

        return cls(conn_str)

    def open_spider(self,spider):

        """

        爬虫开始执行时,调用

        :param spider:

        :return:

        """

        print('')

        self.conn = open(self.conn_str,'a')

    def close_spider(self,spider):

        """

        爬虫关闭时,被调用

        :param spider:

        :return:

        """

        print('')

        self.conn.close()

    def process_item(self, item, spider):

        # 每当数据需要持久化时,就需要被调用

        # if spider.name == "chouti":

        tpl = "%s\n%s\n\n" %(item['item'],item['href'])

        self.conn.write(tpl)

        # 交给下一个pipeline处理

        return item

        # 丢弃item,不交给下一个pipeline处理

        # raise DropItem()

class ProjectPipeline2(object):

    pass
return item 或 DropItem()
2.3)pipelines总结
pipeline补充

from scrapy.exceptions import DropItem

class Day96Pipeline(object):

    def __init__(self,conn_str):

        self.conn_str = conn_str

    @classmethod

    def from_crawler(cls, crawler):

        """

        初始化时候,用于创建pipeline对象

        :param crawler:

        :return:

        """

        conn_str = crawler.settings.get('DB')

        return cls(conn_str)

    def open_spider(self,spider):

        """

        爬虫开始执行时,调用

        :param spider:

        :return:

        """

        self.conn = open(self.conn_str, 'a')

    def close_spider(self,spider):

        """

        爬虫关闭时,被调用

        :param spider:

        :return:

        """

        self.conn.close()

    def process_item(self, item, spider):

        """

        每当数据需要持久化时,就会被调用

        :param item:

        :param spider:

        :return:

        """

        # if spider.name == 'chouti'

        tpl = "%s\n%s\n\n" %(item['title'],item['href'])

        self.conn.write(tpl)

        # 交给下一个pipeline处理

        return item

        # 丢弃item,不交给

        # raise DropItem()

    """

    4个方法

    crawler.settings.get('setting中的配置文件名称且必须大写')

    process_item方法中,如果抛出异常DropItem表示终止,否则继续交给后续的pipeline处理

    spider进行判断

    """
pipelines总结
3.1)使用cookie登录抽屉,验证是否成功
from scrapy.http.cookies import CookieJar 导入cookies模块
# -*- coding: utf- -*-

import scrapy

import sys

import io

from scrapy.http import Request

from scrapy.selector import Selector, HtmlXPathSelector

from ..items import ChoutiItem

sys.stdout = io.TextIOWrapper(sys.stdout.buffer,encoding='gb18030')

from scrapy.http.cookies import CookieJar

class ChoutiSpider(scrapy.Spider):

    name = "chouti"

    allowed_domains = ["chouti.com",]

    start_urls = ['http://dig.chouti.com/']

    def parse(self, response):

        cookie_obj = CookieJar()

        cookie_obj.extract_cookies(response,response.request)

        # print(cookie_obj._cookies)  # 查看cookie

        # 带上用户名密码+cookie

        yield Request(

            url="http://dig.chouti.com/login",

            method='POST',

            body = "phone=8615331254089&password=woshiniba&oneMonth=1",

            headers={'Content-Type': "application/x-www-form-urlencoded; charset=UTF-8"},

            cookies=cookie_obj._cookies,

            callback=self.check_login

        )

    def check_login(self,response):

        print(response.text)    # 验证是否登录成功
chouti.py
登录成功的信息

3.2)首页的当前页点赞
import scrapy

import sys

import io

from scrapy.http import Request

from scrapy.selector import Selector, HtmlXPathSelector

from ..items import ChoutiItem

sys.stdout = io.TextIOWrapper(sys.stdout.buffer,encoding='gb18030')

from scrapy.http.cookies import CookieJar

class ChoutiSpider(scrapy.Spider):

    name = "chouti"

    allowed_domains = ["chouti.com",]

    start_urls = ['http://dig.chouti.com/']

    cookie_dict = None

    def parse(self, response):

        cookie_obj = CookieJar()

        cookie_obj.extract_cookies(response,response.request)

        # print(cookie_obj._cookies)  # 查看cookie

        self.cookie_dict = cookie_obj._cookies

        # 带上用户名密码+cookie

        yield Request(

            url="http://dig.chouti.com/login",

            method='POST',

            body = "phone=8615331254089&password=woshiniba&oneMonth=1",

            headers={'Content-Type': "application/x-www-form-urlencoded; charset=UTF-8"},

            cookies=cookie_obj._cookies,

            callback=self.check_login

        )

    def check_login(self,response):

        print(response.text)    # 验证是否登录成功

        # 如果成功

        yield Request(url="http://dig.chouti.com/",callback=self.good)

    def good(self,response):

        id_list = Selector(response=response).xpath('//div[@share-linkid]/@share-linkid').extract()

        for nid in id_list:

            print(nid)

            url = "http://dig.chouti.com/link/vote?linksId=%s" % nid

            yield Request(

                url=url,

                method="POST",

                cookies=self.cookie_dict,

                callback=self.show  # 对发送点赞请求的返回数据

            )

    def show(self,response):

        # 查看是否点赞成功

        print(response.text)
chouti.py
3.3)为所有的页面点赞
# -*- coding: utf- -*-

import scrapy

import sys

import io

from scrapy.http import Request

from scrapy.selector import Selector, HtmlXPathSelector

from ..items import ChoutiItem

sys.stdout = io.TextIOWrapper(sys.stdout.buffer,encoding='gb18030')

from scrapy.http.cookies import CookieJar

class ChoutiSpider(scrapy.Spider):

    name = "chouti"

    allowed_domains = ["chouti.com",]

    start_urls = ['http://dig.chouti.com/']

    cookie_dict = None

    def parse(self, response):

        cookie_obj = CookieJar()

        cookie_obj.extract_cookies(response,response.request)

        # print(cookie_obj._cookies)  # 查看cookie

        self.cookie_dict = cookie_obj._cookies

        # 带上用户名密码+cookie

        yield Request(

            url="http://dig.chouti.com/login",

            method='POST',

            body = "phone=8615331254089&password=woshiniba&oneMonth=1",

            headers={'Content-Type': "application/x-www-form-urlencoded; charset=UTF-8"},

            cookies=cookie_obj._cookies,

            callback=self.check_login

        )

    def check_login(self,response):

        print(response.text)    # 验证是否登录成功

        # 如果成功

        yield Request(url="http://dig.chouti.com/",callback=self.good)

    def good(self,response):

        id_list = Selector(response=response).xpath('//div[@share-linkid]/@share-linkid').extract()

        for nid in id_list:

            print(nid)

            url = "http://dig.chouti.com/link/vote?linksId=%s" % nid

            yield Request(

                url=url,

                method="POST",

                cookies=self.cookie_dict,

                callback=self.show  # 对发送点赞请求的返回数据

            )

        # 找到所有的页面

        page_urls = Selector(response=response).xpath('//div[@id="dig_lcpage"]//a/@href').extract()

        for page in page_urls:

            url = "http://dig.chouti.com%s" % page

            yield Request(url=url,callback=self.good)   # 回调自己,为所有的页面内容点赞

    def show(self,response):

        # 查看是否点赞成功

        print(response.text)
chouti.py
配置文件设置访问深度,可以指定到页面的深度点赞
3.4)cookies小结
Cookie问题

from scrapy.http.cookies import CookieJar

cookie_obj = CookieJar()

cookie_obj.extract_cookies(response,response.request)

print(cookie_obj._cookies)
cookies使用小结
4)scrapy框架扩展
from scrapy.extensions.telnet import TelnetConsole 查看模拟扩展的源代码
自定义扩展内容
from scrapy import signals

class MyExtend:

    def __init__(self,crawler):

        self.crawler = crawler

        # 钩子上挂障碍物

        # 在指定信号上注册操作

        crawler.signals.connect(self.start, signals.engine_started)

        crawler.signals.connect(self.close, signals.spider_closed)

    @classmethod

    def from_crawler(cls, crawler):

        return cls(crawler)

    def start(self):

        print('signals.engine_started.start')

    def close(self):

        print('signals.spider_closed.close')
extensions.py

配置文件引入extension.py
EXTENSIONS = {

   # 'scrapy.extensions.telnet.TelnetConsole': None,

    'day96.extensions.MyExtend': ,

}
settings.py
5)配置文件详解
# -*- coding: utf- -*-

# Scrapy settings for step8_king project

#

# For simplicity, this file contains only settings considered important or

# commonly used. You can find more settings consulting the documentation:

#

#     http://doc.scrapy.org/en/latest/topics/settings.html

#     http://scrapy.readthedocs.org/en/latest/topics/downloader-middleware.html

#     http://scrapy.readthedocs.org/en/latest/topics/spider-middleware.html

# . 爬虫名称

BOT_NAME = 'step8_king'

# . 爬虫应用路径

SPIDER_MODULES = ['step8_king.spiders']

NEWSPIDER_MODULE = 'step8_king.spiders'

# Crawl responsibly by identifying yourself (and your website) on the user-agent

# . 客户端 user-agent请求头

# USER_AGENT = 'step8_king (+http://www.yourdomain.com)'

# Obey robots.txt rules

# . 禁止爬虫配置

# ROBOTSTXT_OBEY = False

# Configure maximum concurrent requests performed by Scrapy (default: )

# . 并发请求数

# CONCURRENT_REQUESTS =

# Configure a delay for requests for the same website (default: )

# See http://scrapy.readthedocs.org/en/latest/topics/settings.html#download-delay

# See also autothrottle settings and docs

# . 延迟下载秒数

# DOWNLOAD_DELAY =

# The download delay setting will honor only one of:

# . 单域名访问并发数,并且延迟下次秒数也应用在每个域名

# CONCURRENT_REQUESTS_PER_DOMAIN =

# 单IP访问并发数,如果有值则忽略:CONCURRENT_REQUESTS_PER_DOMAIN,并且延迟下次秒数也应用在每个IP

# CONCURRENT_REQUESTS_PER_IP =

# Disable cookies (enabled by default)

# . 是否支持cookie,cookiejar进行操作cookie

# COOKIES_ENABLED = True

# COOKIES_DEBUG = True

# Disable Telnet Console (enabled by default)

# . Telnet用于查看当前爬虫的信息,操作爬虫等...

#    使用telnet ip port ,然后通过命令操作

# TELNETCONSOLE_ENABLED = True

# TELNETCONSOLE_HOST = '127.0.0.1'

# TELNETCONSOLE_PORT = [,]

# . 默认请求头

# Override the default request headers:

# DEFAULT_REQUEST_HEADERS = {

#     'Accept': 'text/html,application/xhtml+xml,application/xml;q=0.9,*/*;q=0.8',

#     'Accept-Language': 'en',

# }

# Configure item pipelines

# See http://scrapy.readthedocs.org/en/latest/topics/item-pipeline.html

# . 定义pipeline处理请求

# ITEM_PIPELINES = {

#    'step8_king.pipelines.JsonPipeline': ,

#    'step8_king.pipelines.FilePipeline': ,

# }

# . 自定义扩展,基于信号进行调用

# Enable or disable extensions

# See http://scrapy.readthedocs.org/en/latest/topics/extensions.html

# EXTENSIONS = {

#     # 'step8_king.extensions.MyExtension': ,

# }

# . 爬虫允许的最大深度,可以通过meta查看当前深度;0表示无深度

# DEPTH_LIMIT =

# . 爬取时,0表示深度优先Lifo(默认);1表示广度优先FiFo

# 后进先出,深度优先

# DEPTH_PRIORITY =

# SCHEDULER_DISK_QUEUE = 'scrapy.squeue.PickleLifoDiskQueue'

# SCHEDULER_MEMORY_QUEUE = 'scrapy.squeue.LifoMemoryQueue'

# 先进先出,广度优先

# DEPTH_PRIORITY =

# SCHEDULER_DISK_QUEUE = 'scrapy.squeue.PickleFifoDiskQueue'

# SCHEDULER_MEMORY_QUEUE = 'scrapy.squeue.FifoMemoryQueue'

# . 调度器队列

# SCHEDULER = 'scrapy.core.scheduler.Scheduler'

# from scrapy.core.scheduler import Scheduler

# . 访问URL去重

# DUPEFILTER_CLASS = 'step8_king.duplication.RepeatUrl'

# Enable and configure the AutoThrottle extension (disabled by default)

# See http://doc.scrapy.org/en/latest/topics/autothrottle.html

"""

. 自动限速算法

    from scrapy.contrib.throttle import AutoThrottle

    自动限速设置

    . 获取最小延迟 DOWNLOAD_DELAY

    . 获取最大延迟 AUTOTHROTTLE_MAX_DELAY

    . 设置初始下载延迟 AUTOTHROTTLE_START_DELAY

    . 当请求下载完成后,获取其"连接"时间 latency,即:请求连接到接受到响应头之间的时间

    . 用于计算的... AUTOTHROTTLE_TARGET_CONCURRENCY

    target_delay = latency / self.target_concurrency

    new_delay = (slot.delay + target_delay) / 2.0 # 表示上一次的延迟时间

    new_delay = max(target_delay, new_delay)

    new_delay = min(max(self.mindelay, new_delay), self.maxdelay)

    slot.delay = new_delay

"""

# 开始自动限速

# AUTOTHROTTLE_ENABLED = True

# The initial download delay

# 初始下载延迟

# AUTOTHROTTLE_START_DELAY =

# The maximum download delay to be set in case of high latencies

# 最大下载延迟

# AUTOTHROTTLE_MAX_DELAY =

# The average number of requests Scrapy should be sending in parallel to each remote server

# 平均每秒并发数

# AUTOTHROTTLE_TARGET_CONCURRENCY = 1.0

# Enable showing throttling stats for every response received:

# 是否显示

# AUTOTHROTTLE_DEBUG = True

# Enable and configure HTTP caching (disabled by default)

# See http://scrapy.readthedocs.org/en/latest/topics/downloader-middleware.html#httpcache-middleware-settings

"""

. 启用缓存

    目的用于将已经发送的请求或相应缓存下来,以便以后使用

    from scrapy.downloadermiddlewares.httpcache import HttpCacheMiddleware

    from scrapy.extensions.httpcache import DummyPolicy

    from scrapy.extensions.httpcache import FilesystemCacheStorage

"""

# 是否启用缓存策略

# HTTPCACHE_ENABLED = True

# 缓存策略:所有请求均缓存,下次在请求直接访问原来的缓存即可

# HTTPCACHE_POLICY = "scrapy.extensions.httpcache.DummyPolicy"

# 缓存策略:根据Http响应头:Cache-Control、Last-Modified 等进行缓存的策略

# HTTPCACHE_POLICY = "scrapy.extensions.httpcache.RFC2616Policy"

# 缓存超时时间

# HTTPCACHE_EXPIRATION_SECS =

# 缓存保存路径

# HTTPCACHE_DIR = 'httpcache'

# 缓存忽略的Http状态码

# HTTPCACHE_IGNORE_HTTP_CODES = []

# 缓存存储的插件

# HTTPCACHE_STORAGE = 'scrapy.extensions.httpcache.FilesystemCacheStorage'

"""

. 代理,需要在环境变量中设置

    from scrapy.contrib.downloadermiddleware.httpproxy import HttpProxyMiddleware

    方式一:使用默认

        os.environ

        {

            http_proxy:http://root:woshiniba@192.168.11.11:9999/

            https_proxy:http://192.168.11.11:9999/

        }

    方式二:使用自定义下载中间件

    def to_bytes(text, encoding=None, errors='strict'):

        if isinstance(text, bytes):

            return text

        if not isinstance(text, six.string_types):

            raise TypeError('to_bytes must receive a unicode, str or bytes '

                            'object, got %s' % type(text).__name__)

        if encoding is None:

            encoding = 'utf-8'

        return text.encode(encoding, errors)

    class ProxyMiddleware(object):

        def process_request(self, request, spider):

            PROXIES = [

                {'ip_port': '111.11.228.75:80', 'user_pass': ''},

                {'ip_port': '120.198.243.22:80', 'user_pass': ''},

                {'ip_port': '111.8.60.9:8123', 'user_pass': ''},

                {'ip_port': '101.71.27.120:80', 'user_pass': ''},

                {'ip_port': '122.96.59.104:80', 'user_pass': ''},

                {'ip_port': '122.224.249.122:8088', 'user_pass': ''},

            ]

            proxy = random.choice(PROXIES)

            if proxy['user_pass'] is not None:

                request.meta['proxy'] = to_bytes("http://%s" % proxy['ip_port'])

                encoded_user_pass = base64.encodestring(to_bytes(proxy['user_pass']))

                request.headers['Proxy-Authorization'] = to_bytes('Basic ' + encoded_user_pass)

                print "**************ProxyMiddleware have pass************" + proxy['ip_port']

            else:

                print "**************ProxyMiddleware no pass************" + proxy['ip_port']

                request.meta['proxy'] = to_bytes("http://%s" % proxy['ip_port'])

    DOWNLOADER_MIDDLEWARES = {

       'step8_king.middlewares.ProxyMiddleware': ,

    }

"""

"""

. Https访问

    Https访问时有两种情况:

    . 要爬取网站使用的可信任证书(默认支持)

        DOWNLOADER_HTTPCLIENTFACTORY = "scrapy.core.downloader.webclient.ScrapyHTTPClientFactory"

        DOWNLOADER_CLIENTCONTEXTFACTORY = "scrapy.core.downloader.contextfactory.ScrapyClientContextFactory"

    . 要爬取网站使用的自定义证书

        DOWNLOADER_HTTPCLIENTFACTORY = "scrapy.core.downloader.webclient.ScrapyHTTPClientFactory"

        DOWNLOADER_CLIENTCONTEXTFACTORY = "step8_king.https.MySSLFactory"

        # https.py

        from scrapy.core.downloader.contextfactory import ScrapyClientContextFactory

        from twisted.internet.ssl import (optionsForClientTLS, CertificateOptions, PrivateCertificate)

        class MySSLFactory(ScrapyClientContextFactory):

            def getCertificateOptions(self):

                from OpenSSL import crypto

                v1 = crypto.load_privatekey(crypto.FILETYPE_PEM, open('/Users/wupeiqi/client.key.unsecure', mode='r').read())

                v2 = crypto.load_certificate(crypto.FILETYPE_PEM, open('/Users/wupeiqi/client.pem', mode='r').read())

                return CertificateOptions(

                    privateKey=v1,  # pKey对象

                    certificate=v2,  # X509对象

                    verify=False,

                    method=getattr(self, 'method', getattr(self, '_ssl_method', None))

                )

    其他:

        相关类

            scrapy.core.downloader.handlers.http.HttpDownloadHandler

            scrapy.core.downloader.webclient.ScrapyHTTPClientFactory

            scrapy.core.downloader.contextfactory.ScrapyClientContextFactory

        相关配置

            DOWNLOADER_HTTPCLIENTFACTORY

            DOWNLOADER_CLIENTCONTEXTFACTORY

"""

"""

. 爬虫中间件

    class SpiderMiddleware(object):

        def process_spider_input(self,response, spider):

            '''

            下载完成,执行,然后交给parse处理

            :param response:

            :param spider:

            :return:

            '''

            pass

        def process_spider_output(self,response, result, spider):

            '''

            spider处理完成,返回时调用

            :param response:

            :param result:

            :param spider:

            :return: 必须返回包含 Request 或 Item 对象的可迭代对象(iterable)

            '''

            return result

        def process_spider_exception(self,response, exception, spider):

            '''

            异常调用

            :param response:

            :param exception:

            :param spider:

            :return: None,继续交给后续中间件处理异常;含 Response 或 Item 的可迭代对象(iterable),交给调度器或pipeline

            '''

            return None

        def process_start_requests(self,start_requests, spider):

            '''

            爬虫启动时调用

            :param start_requests:

            :param spider:

            :return: 包含 Request 对象的可迭代对象

            '''

            return start_requests

    内置爬虫中间件:

        'scrapy.contrib.spidermiddleware.httperror.HttpErrorMiddleware': ,

        'scrapy.contrib.spidermiddleware.offsite.OffsiteMiddleware': ,

        'scrapy.contrib.spidermiddleware.referer.RefererMiddleware': ,

        'scrapy.contrib.spidermiddleware.urllength.UrlLengthMiddleware': ,

        'scrapy.contrib.spidermiddleware.depth.DepthMiddleware': ,

"""

# from scrapy.contrib.spidermiddleware.referer import RefererMiddleware

# Enable or disable spider middlewares

# See http://scrapy.readthedocs.org/en/latest/topics/spider-middleware.html

SPIDER_MIDDLEWARES = {

   # 'step8_king.middlewares.SpiderMiddleware': ,

}

"""

. 下载中间件

    class DownMiddleware1(object):

        def process_request(self, request, spider):

            '''

            请求需要被下载时,经过所有下载器中间件的process_request调用

            :param request:

            :param spider:

            :return:

                None,继续后续中间件去下载;

                Response对象,停止process_request的执行,开始执行process_response

                Request对象,停止中间件的执行,将Request重新调度器

                raise IgnoreRequest异常,停止process_request的执行,开始执行process_exception

            '''

            pass

        def process_response(self, request, response, spider):

            '''

            spider处理完成,返回时调用

            :param response:

            :param result:

            :param spider:

            :return:

                Response 对象:转交给其他中间件process_response

                Request 对象:停止中间件,request会被重新调度下载

                raise IgnoreRequest 异常:调用Request.errback

            '''

            print('response1')

            return response

        def process_exception(self, request, exception, spider):

            '''

            当下载处理器(download handler)或 process_request() (下载中间件)抛出异常

            :param response:

            :param exception:

            :param spider:

            :return:

                None:继续交给后续中间件处理异常;

                Response对象:停止后续process_exception方法

                Request对象:停止中间件,request将会被重新调用下载

            '''

            return None

    默认下载中间件

    {

        'scrapy.contrib.downloadermiddleware.robotstxt.RobotsTxtMiddleware': ,

        'scrapy.contrib.downloadermiddleware.httpauth.HttpAuthMiddleware': ,

        'scrapy.contrib.downloadermiddleware.downloadtimeout.DownloadTimeoutMiddleware': ,

        'scrapy.contrib.downloadermiddleware.useragent.UserAgentMiddleware': ,

        'scrapy.contrib.downloadermiddleware.retry.RetryMiddleware': ,

        'scrapy.contrib.downloadermiddleware.defaultheaders.DefaultHeadersMiddleware': ,

        'scrapy.contrib.downloadermiddleware.redirect.MetaRefreshMiddleware': ,

        'scrapy.contrib.downloadermiddleware.httpcompression.HttpCompressionMiddleware': ,

        'scrapy.contrib.downloadermiddleware.redirect.RedirectMiddleware': ,

        'scrapy.contrib.downloadermiddleware.cookies.CookiesMiddleware': ,

        'scrapy.contrib.downloadermiddleware.httpproxy.HttpProxyMiddleware': ,

        'scrapy.contrib.downloadermiddleware.chunked.ChunkedTransferMiddleware': ,

        'scrapy.contrib.downloadermiddleware.stats.DownloaderStats': ,

        'scrapy.contrib.downloadermiddleware.httpcache.HttpCacheMiddleware': ,

    }

"""

# from scrapy.contrib.downloadermiddleware.httpauth import HttpAuthMiddleware

# Enable or disable downloader middlewares

# See http://scrapy.readthedocs.org/en/latest/topics/downloader-middleware.html

# DOWNLOADER_MIDDLEWARES = {

#    'step8_king.middlewares.DownMiddleware1': ,

#    'step8_king.middlewares.DownMiddleware2': ,

# }

settings
settings详解
5.1)对于缓存策略选择
# 缓存策略:所有请求均缓存,下次在请求直接访问原来的缓存即可

# HTTPCACHE_POLICY = "scrapy.extensions.httpcache.DummyPolicy"        # 简单粗暴,不建议

# 缓存策略:根据Http响应头:Cache-Control、Last-Modified 等进行缓存的策略

# HTTPCACHE_POLICY = "scrapy.extensions.httpcache.RFC2616Policy"    # 可以使用

# 缓存超时时间

# HTTPCACHE_EXPIRATION_SECS =

# 缓存保存路径

# HTTPCACHE_DIR = 'httpcache'

# 缓存忽略的Http状态码

# HTTPCACHE_IGNORE_HTTP_CODES = []

# 缓存存储的插件

# HTTPCACHE_STORAGE = 'scrapy.extensions.httpcache.FilesystemCacheStorage'        # 可以使用
缓存策略
6)下载中间键配置
下载中间键编写
# -*- coding: utf- -*-

# Define here the models for your spider middleware

#

# See documentation in:

# http://doc.scrapy.org/en/latest/topics/spider-middleware.html

from scrapy import signals

from scrapy.core.engine import ExecutionEngine

class DownMiddleware1(object):

    def process_request(self, request, spider):

        '''

        请求需要被下载时,经过所有下载器中间件的process_request调用

        :param request:

        :param spider:

        :return:

            None,继续后续中间件去下载;

            Response对象,停止process_request的执行,开始执行process_response

            Request对象,停止中间件的执行,将Request重新调度器

            raise IgnoreRequest异常,停止process_request的执行,开始执行process_exception

        '''

        print('DownMiddleware1.process_request',request.url)

    def process_response(self, request, response, spider):

        '''

        spider处理完成,返回时调用

        :param response:

        :param result:

        :param spider:

        :return:

            Response 对象:转交给其他中间件process_response

            Request 对象:停止中间件,request会被重新调度下载

            raise IgnoreRequest 异常:调用Request.errback

        '''

        print('DownMiddleware1.process_response')

        return response

    def process_exception(self, request, exception, spider):

        '''

        当下载处理器(download handler)或 process_request() (下载中间件)抛出异常

        :param response:

        :param exception:

        :param spider:

        :return:

            None:继续交给后续中间件处理异常;

            Response对象:停止后续process_exception方法

            Request对象:停止中间件,request将会被重新调用下载

        '''

        return None

class DownMiddleware2(object):

    def process_request(self, request, spider):

        '''

        请求需要被下载时,经过所有下载器中间件的process_request调用

        :param request:

        :param spider:

        :return:

            None,继续后续中间件去下载;

            Response对象,停止process_request的执行,开始执行process_response

            Request对象,停止中间件的执行,将Request重新调度器

            raise IgnoreRequest异常,停止process_request的执行,开始执行process_exception

        '''

        print('DownMiddleware2.process_request',request.url)

    def process_response(self, request, response, spider):

        '''

        spider处理完成,返回时调用

        :param response:

        :param result:

        :param spider:

        :return:

            Response 对象:转交给其他中间件process_response

            Request 对象:停止中间件,request会被重新调度下载

            raise IgnoreRequest 异常:调用Request.errback

        '''

        print('DownMiddleware2.process_response')

        return response
middlewares.py
配置文件配置
# Enable or disable downloader middlewares

# See http://scrapy.readthedocs.org/en/latest/topics/downloader-middleware.html

DOWNLOADER_MIDDLEWARES = {

   'day96.middlewares.DownMiddleware1': ,

   'day96.middlewares.DownMiddleware2': ,

}
settings.py
下载中间件运行流程归纳
DownMiddleware1.process_request http://dig.chouti.com/

DownMiddleware2.process_request http://dig.chouti.com/

DownMiddleware2.process_response

DownMiddleware1.process_response

spider.reponse < http://dig.chouti.com/>

. process_request下载完成,后续无需下载

. process_response比如有return response
运行流程规律
7)spider 爬虫中间件配置
爬虫中间件编写
class SpiderMiddleware(object):

    def process_spider_input(self, response, spider):

        '''

        下载完成,执行,然后交给parse处理

        :param response:

        :param spider:

        :return:

        '''

        pass

    def process_spider_output(self, response, result, spider):

        '''

        spider处理完成,返回时调用

        :param response:

        :param result:

        :param spider:

        :return: 必须返回包含 Request 或 Item 对象的可迭代对象(iterable)

        '''

        return result

    def process_spider_exception(self, response, exception, spider):

        '''

        异常调用

        :param response:

        :param exception:

        :param spider:

        :return: None,继续交给后续中间件处理异常;含 Response 或 Item 的可迭代对象(iterable),交给调度器或pipeline

        '''

        return None

    def process_start_requests(self, start_requests, spider):

        '''

        爬虫启动时调用

        :param start_requests:

        :param spider:

        :return: 包含 Request 对象的可迭代对象

        '''

        return start_requests
middlewares.py
配置文件配置
# Enable or disable spider middlewares

# See http://scrapy.readthedocs.org/en/latest/topics/spider-middleware.html

SPIDER_MIDDLEWARES = {

   'day96.middlewares.SpiderMiddleware': ,

}
settings.py
spcrapy框架链接:https://www.cnblogs.com/linhaifeng/articles/7811861.html
Scrapy框架爬虫的更多相关文章
- Scrapy框架-----爬虫
说明:文章是本人读了崔庆才的Python3---网络爬虫开发实战,做的简单整理,希望能帮助正在学习的小伙伴~~ 1. 准备工作: 安装Scrapy框架.MongoDB和PyMongo库,如果没有安装, ...
- 第三百三十五节,web爬虫讲解2—Scrapy框架爬虫—豆瓣登录与利用打码接口实现自动识别验证码
第三百三十五节,web爬虫讲解2—Scrapy框架爬虫—豆瓣登录与利用打码接口实现自动识别验证码 打码接口文件 # -*- coding: cp936 -*- import sys import os ...
- 第三百三十四节,web爬虫讲解2—Scrapy框架爬虫—Scrapy爬取百度新闻,爬取Ajax动态生成的信息
第三百三十四节,web爬虫讲解2—Scrapy框架爬虫—Scrapy爬取百度新闻,爬取Ajax动态生成的信息 crapy爬取百度新闻,爬取Ajax动态生成的信息,抓取百度新闻首页的新闻rul地址 有多 ...
- 第三百三十三节,web爬虫讲解2—Scrapy框架爬虫—Scrapy模拟浏览器登录—获取Scrapy框架Cookies
第三百三十三节,web爬虫讲解2—Scrapy框架爬虫—Scrapy模拟浏览器登录 模拟浏览器登录 start_requests()方法,可以返回一个请求给爬虫的起始网站,这个返回的请求相当于star ...
- 第三百三十二节,web爬虫讲解2—Scrapy框架爬虫—Scrapy使用
第三百三十二节,web爬虫讲解2—Scrapy框架爬虫—Scrapy使用 xpath表达式 //x 表示向下查找n层指定标签,如://div 表示查找所有div标签 /x 表示向下查找一层指定的标签 ...
- 第三百三十一节,web爬虫讲解2—Scrapy框架爬虫—Scrapy安装—Scrapy指令
第三百三十一节,web爬虫讲解2—Scrapy框架爬虫—Scrapy安装—Scrapy指令 Scrapy框架安装 1.首先,终端执行命令升级pip: python -m pip install --u ...
- Python爬虫进阶(Scrapy框架爬虫)
准备工作: 配置环境问题什么的我昨天已经写了,那么今天直接安装三个库 首先第一步: ...
- python scrapy框架爬虫遇到301
1.什么是状态码301 301 Moved Permanently(永久重定向) 被请求的资源已永久移动到新位置,并且将来任何对此资源的引用都应该使用本响应返回的若干个URI之一.如果可能,拥有链接编 ...
- 十二 web爬虫讲解2—Scrapy框架爬虫—Scrapy模拟浏览器登录—获取Scrapy框架Cookies
模拟浏览器登录 start_requests()方法,可以返回一个请求给爬虫的起始网站,这个返回的请求相当于start_urls,start_requests()返回的请求会替代start_urls里 ...
随机推荐
- as3.0复制影片简介(自我复制的三种形式)
//mc是被复制影片简介的实例名,(===在库中找到mc影片简介,右击“属性”,点击“为actionscript导出”,选中确定即可===这个是重点) var newSprite:Sprite=mc; ...
- 第三章 列表(d)选择排序
- unity美少女动作RPG游戏源码Action-RPG Starter Kit v5.0a
功能完整的ARPG游戏模板 Core Features!! - Combat System - Skill Tree - Enemy AI - Save-Load Game - Shop System ...
- 宋体freetype16和12号字无法正常显示
在使用freetype过程中发现,从window下拷贝来的simsun.ttc, simkai.ttf两个字体, 在调用 FT_Set_Pixel_Sizes(face, 12, 0): 将字体大小设 ...
- swift - 添加定时器
mport UIKit /// 控制定时器的类 class ZDTimerTool: NSObject { /// 定时器 // private var timer: Timer? /// GCD定时 ...
- Spring <context:annotation-config> 和 <context:component-scan> 区别
一篇很不错的文章,看到就是赚到Get.... https://www.cnblogs.com/leiOOlei/p/3713989.html 说白了 :<context:component-sc ...
- git log的用法
git log 查看 提交历史默认不用任何参数的话,git log 会按提交时间列出所有的更新,最近的更新排在最上面. git log --graph --pretty=format:'%Cred%h ...
- js DomContentLoaded 和 load 的区别
如题:DOMContentLoaded和load都是页面加载的时候触发的事件.区别在于触发的时机不一样. 浏览器渲染页面DOM文档加载的步骤: 1.解析HTML结构. 2.加载外部脚本和css文件. ...
- python sockerserver tcp 文件下载 udp
#tcp serverclass MyHandler(socketserver.BaseRequestHandler): def handle(self): # 通信循环 while True: tr ...
- 优化myeclipse启动速度以及解决内存不足问题
解决myeclipse内存不足问题: 使用 MyEclipse 开发项目后,随着项目文件的增多,以及运行时间的增加,实际上 MyEclipse 所消耗的内存是会一直增大的,有的时候会出现 MyEcli ...