asp.net core 使用EF7 Code First 创建数据库,同时使用命令创建数据库
1.首先下载vs2015的Asp.Net Core(RC2)的插件工具(https://www.microsoft.com/net/core#windows)
2.创建一个asp.net Core的项目,这里我创建一个最简单的项目,就是一个console,在这个基础上我准备一步一步搭建一个Asp.Net Core的项目
3.添加相关的依赖(mvc的依赖和EF的依赖)在projecr.json中:
{

  "dependencies": {

    "Microsoft.NETCore.App": {

      "version": "1.0.0-rc2-3002702",

      "type": "platform"

    },

    "Microsoft.AspNetCore.Server.IISIntegration": "1.0.0-rc2-final",

    "Microsoft.AspNetCore.Server.Kestrel": "1.0.0-rc2-final",

    "Microsoft.AspNetCore.StaticFiles": "1.0.0-rc2-final",

    "Microsoft.AspNetCore.Mvc": "1.0.0-rc2-final",

    "Microsoft.AspNetCore.Razor.Tools": {

      "version": "1.0.0-preview1-final",

      "type": "build"

    },

    "Npgsql.EntityFrameworkCore.PostgreSQL": "1.0.0-rc2-release1",

    "Microsoft.EntityFrameworkCore.Tools": {

      "version": "1.0.0-preview1-final",

      "type": "build"

    },

    "Microsoft.Extensions.Configuration.EnvironmentVariables": "1.0.0-rc2-final",

    "Microsoft.Extensions.Configuration.Json": "1.0.0-rc2-final",

    "Microsoft.Extensions.Logging": "1.0.0-rc2-final",

    "Microsoft.Extensions.Logging.Console": "1.0.0-rc2-final",

    "Microsoft.Extensions.Logging.Debug": "1.0.0-rc2-final"

  },

  "tools": {

    "Microsoft.AspNetCore.Razor.Tools": {

      "version": "1.0.0-preview1-final",

      "imports": "portable-net45+win8+dnxcore50"

    },

    "Microsoft.AspNetCore.Server.IISIntegration.Tools": {

      "version": "1.0.0-preview1-final",

      "imports": "portable-net45+win8+dnxcore50"

    },

    "Microsoft.EntityFrameworkCore.Tools": {

      "version": "1.0.0-preview1-final",

      "imports": [

        "portable-net45+win8+dnxcore50",

        "portable-net45+win8"

      ]

    }

  },

  "frameworks": {

    "netcoreapp1.0": {

      "imports": [

        "dotnet5.6",

        "dnxcore50",

        "portable-net45+win8"

      ]

    }

  },

  "buildOptions": {

    "emitEntryPoint": true,

    "preserveCompilationContext": true

  },

  "runtimeOptions": {

    "gcServer": true

  },

  "publishOptions": {

    "include": [

      "wwwroot",

      "web.config"

    ]

  },

  "scripts": {

    "postpublish": [ "dotnet publish-iis --publish-folder %publish:OutputPath% --framework %publish:FullTargetFramework%" ]

  }

}
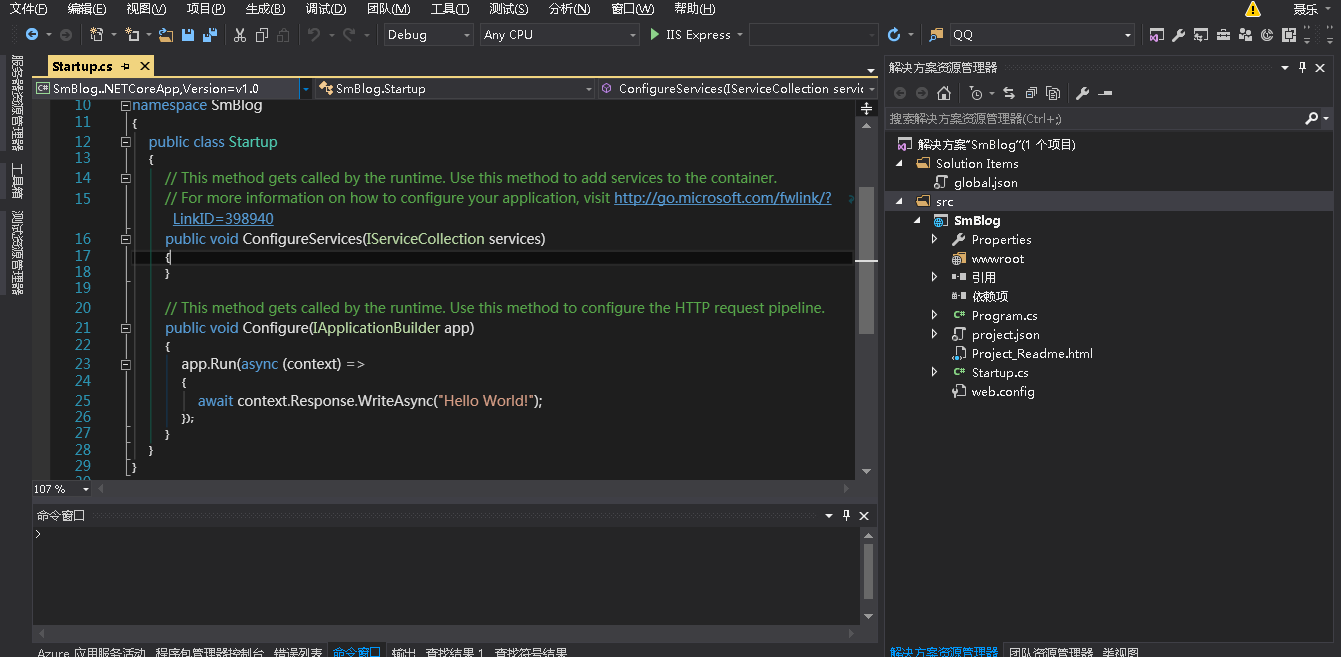
4。在Startup.cs 文件中做如下修改:
using System;

using System.Collections.Generic;

using System.Linq;

using System.Threading.Tasks;

using Microsoft.AspNetCore.Builder;

using Microsoft.AspNetCore.Hosting;

using Microsoft.AspNetCore.Http;

using Microsoft.Extensions.DependencyInjection;

using Microsoft.Extensions.Configuration;

using Microsoft.Extensions.Logging;

namespace SmBlog

{

    public class Startup

    {

        public Startup(IHostingEnvironment env)

        {

            var builder = new ConfigurationBuilder()

               .SetBasePath(env.ContentRootPath)

               .AddJsonFile("appsettings.json", optional: true, reloadOnChange: true)

               .AddJsonFile($"appsettings.{env.EnvironmentName}.json", optional: true);

            if (env.IsDevelopment())

            {

            }

            builder.AddEnvironmentVariables();

            Configuration = builder.Build();

        }

        public IConfigurationRoot Configuration { get; }

        public void ConfigureServices(IServiceCollection services)

        {

            services.AddMvc();

        }

        // This method gets called by the runtime. Use this method to configure the HTTP request pipeline.

        public void Configure(IApplicationBuilder app, IHostingEnvironment env, ILoggerFactory loggerFactory)

        {

            loggerFactory.AddConsole(Configuration.GetSection("Logging"));

            loggerFactory.AddDebug();

            app.UseStaticFiles();

            app.UseMvc(routes =>

            {

                routes.MapRoute(

                    name: "default",

                   template: "{controller=Home}/{action=Index}/{id?}");

            }

            );

        }

    }

}
现在并没有添加Ef的服务。
5.新建一个appsettings.json 文件用于项目相关配置,在Startup.cs中的log的配置,以及后来的EF数据库的配置都在这个文件中。
{

  "ConnectionStrings": {

    "PostgreSql": "User ID=postgres;Password=123456;Host=localhost;Port=5432;Database=smbloh"

  },

  "Logging": {

    "IncludeScopes": false,

    "LogLevel": {

      "Default": "Debug",

      "System": "Information",

      "Microsoft": "Information"

    }

  }

}
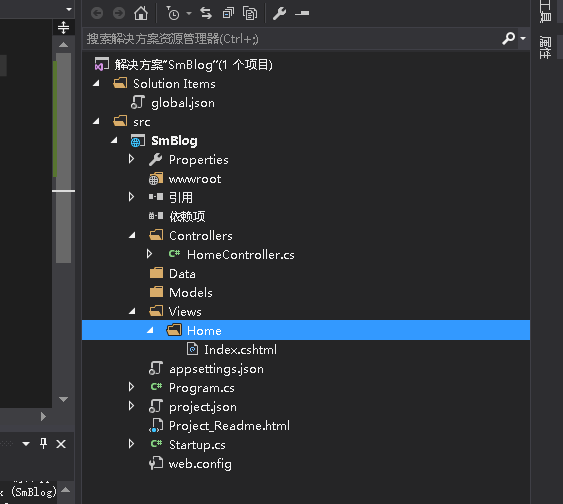
6.依照MVC5中的项目目录结构创建如Controllers 和Views和Models文件如下图所示,新建一个HomeController 和Index Action和Index的视图,用于测试。
7.用过dotnet的方式运行(dotnet 相当于之前的dnx) 看到这个结果说明mvc6项目搭建完成

8.开始Ef的操作。在Models中新建一个实体Article简单的给他三个字段
    public class Article

    {

        public int Id { set; get; }

        public string Title { set; get; }

        public string Description { set; get; }

    }
9.在Models中新建一个SMContext(ef上下文对象)代码如下:
 public class SMContext : DbContext

    {

        public SMContext(DbContextOptions option) : base(option)

        {

        }

        public DbSet<Article> Articles { set; get; }

        protected override void OnModelCreating(ModelBuilder modelBuilder)

        {

            base.OnModelCreating(modelBuilder);

        }

    }
10.修改Startup.cs 文件。增加对Ef的支持:代码如下
     public void ConfigureServices(IServiceCollection services)

        {

            services.AddMvc();

            services.AddDbContext<SMContext>(option => option.UseNpgsql(Configuration.GetConnectionString("PostgreSql")));

        }
11.为了初始化数据库,在此新建一个SampleData类,在项目启动的时候,调用此类,进行数据库的初始化。代码如下:
namespace SmBlog.Models

{

    public class SampleData

    {

        public async static Task InitDB(IServiceProvider service)

        {

            var db = service.GetService<SMContext>();

            if (db.Database != null && db.Database.EnsureCreated())

            {

                Article article = new Article

                {

                    Title = "test",

                    Description = "SMBlog Test"

                };

                db.Articles.Add(article);

                await db.SaveChangesAsync();

            }

        }

    }

}
这个地方比较灵活,我们初始化创建数据库的时候可以插入一条数据,也可以不插入。我在这个地方插入了一条文章的数据。当然系统中有用户,插入管理员是比较适当的操作的。
12.再次修改Startup文件 调用SampleData 在加载项目的时候创建数据库 并初始化。代码如下:
  public async void Configure(IApplicationBuilder app, IHostingEnvironment env, ILoggerFactory loggerFactory)

        {

            loggerFactory.AddConsole(Configuration.GetSection("Logging"));

            loggerFactory.AddDebug();

            app.UseStaticFiles();

            app.UseMvc(routes =>

            {

                routes.MapRoute(

                    name: "default",

                   template: "{controller=Home}/{action=Index}/{id?}");

            }

            );

            await SampleData.InitDB(app.ApplicationServices);

        }
13.再次启动项目,我的数据已经创建成功,并且插入一条数据。如图:

14.数据库迁移 。当我们增加一个User实体,并且修改了Article的实体,现在要进行数据库的迁移,不是简单的把数据库删除重新建立。要保证原有的数据不变,修改数据库结构。
增加的User实体如下:
    public class User

    {

        public int Id { set; get; }

        public string UserName { set; get; }

        public string Password { set; get; }

    }
修改后的Article实体如下,加了个Label的字段
   public class Article

    {

        public int Id { set; get; }

        public string Title { set; get; }

        public string Description { set; get; }

        public string Label { set; get; }
    }
在SMContext文件中,增加User的DbConetxt;
如下代码:
public DbSet<User> Users { set; get; }
15.在vs的PM命令输入 Add-Migration newBook
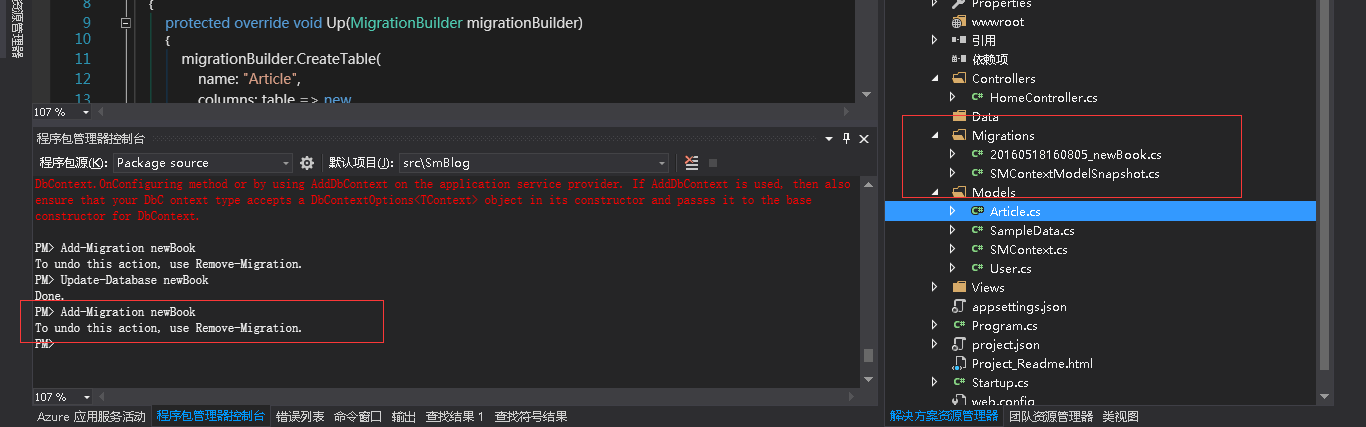
成功后会在项目中产生一个Migrations文件夹。里面有个快照文件和一个迁移的文件。在此不扩展了。
在执行命令: Update-Database newBook 发现报错了

问题解决,不用SampleData来初始化数据库,用 Add-Migration init Update-Database init 来初始化数据库。
注:也可以在cmd控制台输入命令来实现code first
首先打开cmd 切换到项目的project.json 文件所在文件。执行如下命令
dotnet ef migrations add FirstMigration

dotnet ef database update
asp.net core 使用EF7 Code First 创建数据库,同时使用命令创建数据库的更多相关文章
- 创建基于ASP.NET core 3.1 的RazorPagesMovie项目(一)-创建和使用默认的模板
声明:参考于asp.net core 3.1 官网(以后不再说明) 本教程是系列教程中的第一个教程,介绍生成 ASP.NET Core Razor Pages Web 应用的基础知识. 在本系列结束时 ...
- 学习ASP.NET Core Razor 编程系列十一——把新字段更新到数据库
学习ASP.NET Core Razor 编程系列目录 学习ASP.NET Core Razor 编程系列一 学习ASP.NET Core Razor 编程系列二——添加一个实体 学习ASP.NET ...
- 在ASP.NET Core中如何支持每个租户数据存储策略的数据库
在ASP.NET Core中如何支持每个租户数据存储策略的数据库 不定时更新翻译系列,此系列更新毫无时间规律,文笔菜翻译菜求各位看官老爷们轻喷,如觉得我翻译有问题请挪步原博客地址 本博文翻译自: ht ...
- ASP.NET Core EFCore 之Code First
1.在.NET Core项目中使用Nuget引用包 Sql Server 请安装 Microsoft.EntityFrameworkCore.SqlServer 2.添加实体类 [Table(&quo ...
- asp.net core for vs code
1,命令 2,模板 3,更换启动浏览器 4,vscode使用nuget 5,使用ef migration 6,配置.net core的工作目录 7,使用dotnet ef migrations命令 8 ...
- ASP.NET Core 中文文档 第二章 指南(2)用 Visual Studio 和 ASP.NET Core MVC 创建首个 Web API
原文:Building Your First Web API with ASP.NET Core MVC and Visual Studio 作者:Mike Wasson 和 Rick Anderso ...
- Docker 为 ASP.NET Core WebApi 应用程序生成 Docker 映像,创建容器并运行
1.使用VS2017新建ASP.NET Core WebApi项目 选择API启用Docker支持 2.为 ASP.NET Core WebApi 应用程序生成 Docker 映像,并创建容器运行 生 ...
- kubernetes高级之创建只读文件系统以及只读asp.net core容器
系列目录 使用docker创建只读文件系统 容器化部署对应用的运维带来了极大的方便,同时也带来一些新的安全问题需要考虑.比如黑客入侵到容器内,对容器内的系统级别或者应用级别文件进行修改,会造成难以估量 ...
- Asp.Net Core 项目实战之权限管理系统(3) 通过EntityFramework Core使用PostgreSQL
0 Asp.Net Core 项目实战之权限管理系统(0) 无中生有 1 Asp.Net Core 项目实战之权限管理系统(1) 使用AdminLTE搭建前端 2 Asp.Net Core 项目实战之 ...
随机推荐
- ubuntu与centos安装软件的不同点总结
ubuntu与redhat系列的linux操作系统安装软件区别是很大的.下表列出了两者之间的对比.
- ubuntu下怎么给普通用户赋予sudo权限
ununtu系统安装过程中,系统会提示建立一个默认用户,比如用户名为:zhuhui.这个默认用户具有一定的管理功能,即可以通过sudo命令执行root权限的操作.由于Ubuntu系统默认不允许通过ro ...
- win7如何恢复以前的ie版本
如何恢复以前的ie版本-控制面板,程序和功能-查看已安装的更新-搜索Internet explorer,然后卸载更新就Ok.
- NYOJ 451
光棍节的快乐 描述 光棍们,今天是光棍节.聪明的NS想到了一个活动来丰富这个光棍节. 规则如下: 每个光棍在一个纸条上写一个自己心仪女生的名字,然后把这些纸条装进一个盒子里,这些光 棍依次抽取一张纸条 ...
- JSP前三章测试改错
分析:文件.数据库都是持久化保存数据的,所以是正确的,而servletcontext是上下文对象当然也可以.所以正确答案为A 分析: A:判断学员是否手动安装过Tomcat(练习熟练度) B:使学员了 ...
- Java中Array.sort()的几种用法(需要初始化要排序的对象)
====================================================== 1.Arrays.sort(int[] a) 这种形式是对一个数组的所有元素进行排序,并且 ...
- jdbc java数据库连接 2)jdbc接口核心的API
JDBC接口核心的API java.sql.* 和 javax.sql.*(java2.0以后更新的扩展) |- Driver接口: 表示java驱动程序接口.所有的具体的数据库厂商要来实现此接 ...
- Eclipse swt开发环境搭建
原料: eclipse swt.下载链接为: Eclipse 4.6.2 Release Build: 4.6.2 配置说明: Developing SWT applications using Ec ...
- 让Web API支持Protocol Buffers
简介 现在我们Web API项目基本上都是使用的Json作为通信的格式,随着移动互联网的兴起,Web API不仅其他系统可以使用,手机端也可以使用,但是手机端也有相对特殊的地方,网络通信除了wifi, ...
- RedHat/Centos修改root密码
Linux主机忘记密码,只要你能接触物理主机都可以修改root密码的! Redhat6.x 5.x / Centos6.x 5.x 01.开机-空格/enter 02.e-编辑模式 CentO ...