
C# Winform 自定义控件——竖着的Navbar
效果:
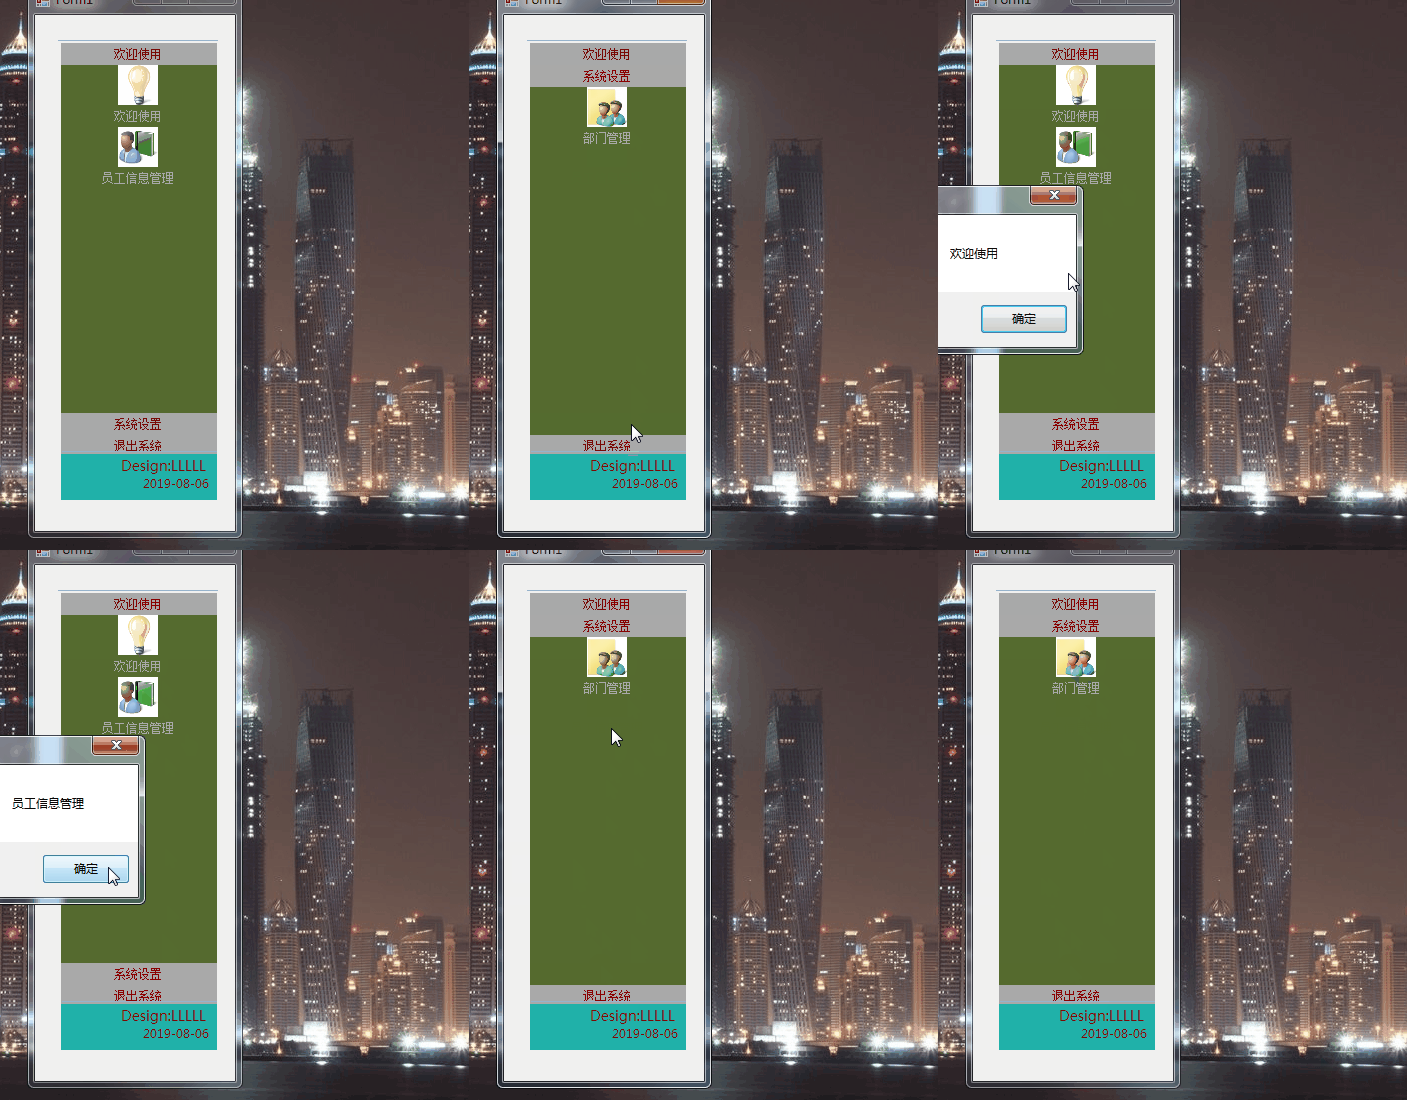
描述:

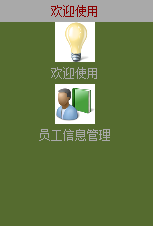
代码:
public partial class CustomNavBar : UserControl

    {

        public CustomNavBar()

        {

            InitializeComponent();

            InitializeButtonGroup();

            pnlMain.BackColor = Color.DarkOliveGreen;

            ResetMenu();

        }

        private string _jsonString;

        /// <summary>

        ///暴露接口,可从外部(数据库)获得菜单的信息

        /// </summary>

        public string JsonString

        {

            get { return _jsonString; }

            set { _jsonString = value; }

        }

        private List<ButtonGroup> listGroup;

        private int currentItemIndex;

        public delegate  void ImageButtonClick(object o,string moduleName);

        public event ImageButtonClick NavButtonClick;

        public void InitializeButtonGroup()

        {

            listGroup = new List<ButtonGroup>() {

                new ButtonGroup("欢迎使用",

                new List<ImageButton>()

                {

                    new ImageButton("欢迎使用",Resources.LogoMain),

                    new ImageButton("员工信息管理",Resources.LogoManageEmployee)

                }),

                new ButtonGroup("系统设置",

              new List<ImageButton>(){

                  new ImageButton("部门管理", Resources.LogoManageDepartment)}),

               new ButtonGroup("退出系统",null)

                };

            ButtonGroup bgPre=null;

            int sum = ;

            for (int i = ; i < listGroup.Count; i++)

            {

                int height = bgPre == null ?  : bgPre.Height;

                sum += height;

                var buttonGroup = listGroup[i];

                buttonGroup.Tag = i;

                buttonGroup.SetButtonLocation();

                buttonGroup.ImageButtonClick += new ImageButtonClick(NavClick);

                buttonGroup.Left = ;

                buttonGroup.Top = sum;

                buttonGroup.ItemMeunClick += ButtonGroup_ItemMeunClick;

                this.pnlMain.Controls.Add(buttonGroup);

                bgPre = buttonGroup;

            }

        }

        private void NavClick(object sender,string moduleName)

        {

            NavButtonClick?.Invoke(sender, moduleName);

        }

        private void ButtonGroup_ItemMeunClick(object sender, EventArgs e)

        {

            Label lblItem = sender as Label;

             currentItemIndex = ;

            if (lblItem != null)

            {

                ButtonGroup bg = lblItem.Parent as ButtonGroup;

                if (bg != null)

                {

                    currentItemIndex = Convert.ToInt32(bg.Tag);

                }

            }

            ResetMenu();

        }

        private void ResetMenu()

        {

            if (listGroup != null && listGroup.Count > )

            {

                int barHeight = ;

                int totalHeight = pnlMain.Height;

                for (int n = ; n < listGroup.Count; n++)

                {

                    ButtonGroup buttonGroup = listGroup[n];

                    int thisIndex = Convert.ToInt32(buttonGroup.Tag);

                    if (thisIndex <= currentItemIndex)

                    {

                        buttonGroup.Top =n * barHeight;

                    }

                    else

                    {

                        buttonGroup.Top = totalHeight - (listGroup.Count-n) * barHeight;

                    }

                    if (thisIndex == currentItemIndex)

                    {

                        buttonGroup.Height = totalHeight - (listGroup.Count - ) * barHeight;

                    }

                    else

                    {

                        buttonGroup.Height = barHeight;

                    }

                }

            }

        }

        #region ButtonGroup

        public class ButtonGroup : UserControl

        {

            private Label lblItem = new Label();

            private string text;

            private Panel ButtonArea = new Panel();

            public event EventHandler ItemMeunClick;

            public event ImageButtonClick ImageButtonClick;

            public ButtonGroup(string txt,List<ImageButton> listImageButton)

            {

                this.text = txt;

                this._listImageButton = listImageButton;

                this.Initialize();

            }

            private List<ImageButton> _listImageButton;

            public List<ImageButton> ListImageButton

            {

                get { return _listImageButton; }

                set { _listImageButton = value; }

            }

            public void Initialize()

            {

                lblItem.Text = this.text;

                lblItem.Height = ;

                lblItem.Width = ;

                lblItem.TextAlign = ContentAlignment.MiddleCenter;

                lblItem.BackColor = Color.DarkGray;

                lblItem.ForeColor = Color.DarkRed;

                lblItem.Cursor = Cursors.Hand;

                lblItem.Click += LblItem_Click;

                this.Width = ;

                this.BackColor = Color.DarkOliveGreen;

                this.Controls.Add(lblItem);

                this.Controls.Add(ButtonArea);

            }

            private void LblItem_Click(object sender, EventArgs e)

            {

                ItemMeunClick?.Invoke(sender, e);

            }

            public void SetButtonLocation()

            {

                ButtonArea.Location = new Point(, );

                int buttonCount = _listImageButton == null ?  : _listImageButton.Count;

                int Height = ;

                //ButtonArea.BackColor = Color.Red;

                ButtonArea.Size = new Size(, buttonCount * Height);

                if (_listImageButton != null && _listImageButton.Count > )

                {

                    for (int i = ; i < _listImageButton.Count; i++)

                    {

                        var imgButton = _listImageButton[i];

                        imgButton.Top = i * imgButton.Height;

                        imgButton.Left = ;

                        imgButton.PictureBoxClick += ImgButton_PictureBoxClick;

                        ButtonArea.Controls.Add(imgButton);

                    }

                }

                this.Height = lblItem.Height + ButtonArea.Height;

            }

            private void ImgButton_PictureBoxClick(object o, string moduleName)

            {

                ImageButtonClick?.Invoke(o, moduleName);

            }

        }

        #endregion

        #region ImageButton

        public class ImageButton : UserControl

        {

            private string text;

            private Image img;

            private PictureBox picBox=new PictureBox();

            private Label lblText = new Label();

            public event ImageButtonClick PictureBoxClick;

            public ImageButton(string txt, Image image)

            {

                this.text = txt;

                this.img = image;

                this.InitialImageButtonControl();

            }

            public void InitialImageButtonControl()

            {

                picBox.Size = new Size(, );

                picBox.Left = ;

                picBox.Top = ;

                picBox.Image = this.img;

                picBox.Anchor = AnchorStyles.Top;

                picBox.SizeMode = PictureBoxSizeMode.StretchImage;

                picBox.Cursor = Cursors.Hand;

                picBox.Click += new EventHandler(PicBoxClick);

                lblText.Width = ;

                lblText.Height = ;

                lblText.Location = new Point(, );

                lblText.Text = this.text;

                lblText.TextAlign = ContentAlignment.MiddleCenter;

                lblText.BackColor = Color.DarkOliveGreen;

                lblText.ForeColor = Color.DarkGray;

                lblText.Cursor = Cursors.Hand;

                this.Height = picBox.Height + lblText.Height;

                this.Controls.Add(picBox);

                this.Controls.Add(lblText);

            }

            private void PicBoxClick(object sender,EventArgs args)

            {

                PictureBoxClick?.Invoke(sender, this.text);

            }

        }

        #endregion

    }
C# Winform 自定义控件——竖着的Navbar的更多相关文章
- C# winform 自定义控件
近来因为项目的问题,开始研究winform自定义控件,这篇主要是将自定义控件的属性在属性编辑器中可编辑,如果你对自定义控件比较了解的,就不用继续往下看了 首先,我创建了一个类UserButton,继承 ...
- C#winform自定义控件模拟设计时界面鼠标移动和调节大小、选中效果
要想玩转Winform自定义控件需要对GDI+非常熟悉,对常用的控件有一些了解,好选择合适的基类控件来简化. 要点说明及代码 1)定义接口: using System; using System.Wi ...
- Winform自定义控件实例
本文转自http://www.cnblogs.com/hahacjh/archive/2010/04/29/1724125.html 写在前面: .Net已经成为许多软件公司的选择,而.Net自定义W ...
- winform 自定义控件:半透明Loading控件
winform 自定义控件:半透明Loading控件 by wgscd date:2015-05-05 效果: using System;using System.Drawing;using Sys ...
- c#Winform自定义控件-目录
前提 入行已经7,8年了,一直想做一套漂亮点的自定义控件,于是就有了本系列文章. 开源地址:https://gitee.com/kwwwvagaa/net_winform_custom_control ...
- (二)c#Winform自定义控件-按钮
前提 入行已经7,8年了,一直想做一套漂亮点的自定义控件,于是就有了本系列文章. 开源地址:https://gitee.com/kwwwvagaa/net_winform_custom_control ...
- (三)c#Winform自定义控件-有图标的按钮
前提 入行已经7,8年了,一直想做一套漂亮点的自定义控件,于是就有了本系列文章. 开源地址:https://gitee.com/kwwwvagaa/net_winform_custom_control ...
- (四)c#Winform自定义控件-选择按钮组
前提 入行已经7,8年了,一直想做一套漂亮点的自定义控件,于是就有了本系列文章. 开源地址:https://gitee.com/kwwwvagaa/net_winform_custom_control ...
- (七)c#Winform自定义控件-进度条
前提 入行已经7,8年了,一直想做一套漂亮点的自定义控件,于是就有了本系列文章. 开源地址:https://gitee.com/kwwwvagaa/net_winform_custom_control ...
随机推荐
- 03_javaSE面试题:类初始化和实例初始化
题目 下面代码运行的结果是什么? Father 类 /** * @author kevin * @date 2019/7/8 15:48 */ public class Father { privat ...
- 跟着大彬读源码 - Redis 2 - 服务器如何响应客户端请求?(上)
上次我们通过问题"启动服务器,程序都干了什么?",跟着源码,深入了解了 Redis 服务器的启动过程. 既然启动了 Redis 服务器,那我们就要连上 Redis 服务干些事情.这 ...
- 带你全面了解高级 Java 面试中需要掌握的 JVM 知识点
目录 JVM 内存划分与内存溢出异常 垃圾回收算法与收集器 虚拟机中的类加载机制 Java 内存模型与线程 虚拟机性能监控与故障处理工具 参考 带你全面了解高级 Java 面试中需要掌握的 JVM 知 ...
- Java内存模型与内存结构
Java内存模型 一.简介 Java内存模型(JMM)主要是为了规定线程和内存之间的一些关系:根据JMM的设计,系统存在一个主内存(Main Memory)和工作内存(Work Memory),Jav ...
- C++学习书籍推荐《Accelerated C++中文版》下载
百度云及其他网盘下载地址:点我 媒体推荐 书评 这是一本一流的C++入门书,它采用了一种和实践相结合的方式来解决具体的问题.相比我所见过的其他C++入门书来说,本书以令人惊奇的紧凑格式覆盖了更多的关于 ...
- WinForm控件之【ListBox】
基本介绍 列表控件,将一个或多个数据项列表展示供选择处理. 常设置属性 DataSource:绑定加载项的数据源,设置属性DisplayMember绑定需要显示字段名: ColumnWidth:当属性 ...
- MyBatis bind标签的用法
From<MyBatis从入门到精通> <!-- 4.5 bind用法 bind标签可以使用OGNL表达式创建一个变量并将其绑定到上下文中. 需求: concat函数连接字符串,在M ...
- python基础知识四 小数据池,深浅拷贝,集合+菜中菜
四.小数据池,深浅拷贝,集合+菜中菜 1小数据池 --缓存机制(驻留机制) '==' 判断两边内容是否相等 'is' 基于内存地址进行判断是否相同 a = 10 b = 10 print(a ...
- dubbo框架设计学习
1.整体设计 (1)架构图 图例说明: 图中左边淡蓝背景的为服务消费方使用的接口,右边淡绿色背景的为服务提供方使用的接口,位于中轴线上的为双方都用到的接口. 图中从下至上分为十层,各层均为单向依赖,右 ...
- 高德网络定位之“移动WiFi识别”
导读随着时代的发展,近10年来位置产业蓬勃发展,定位能力逐渐从低精度走向高精度,从部分场景走向泛在定位.设备和场景的丰富,使得定位技术和能力也不断的优化更新.定位能力包括GNSS.DR(航迹推算).M ...