Spring boot Sample 001之spring-boot-begin-hello
一、环境
1.1、Idea 2020.1
1.2、JDK 1.8
二、目的
三、步骤
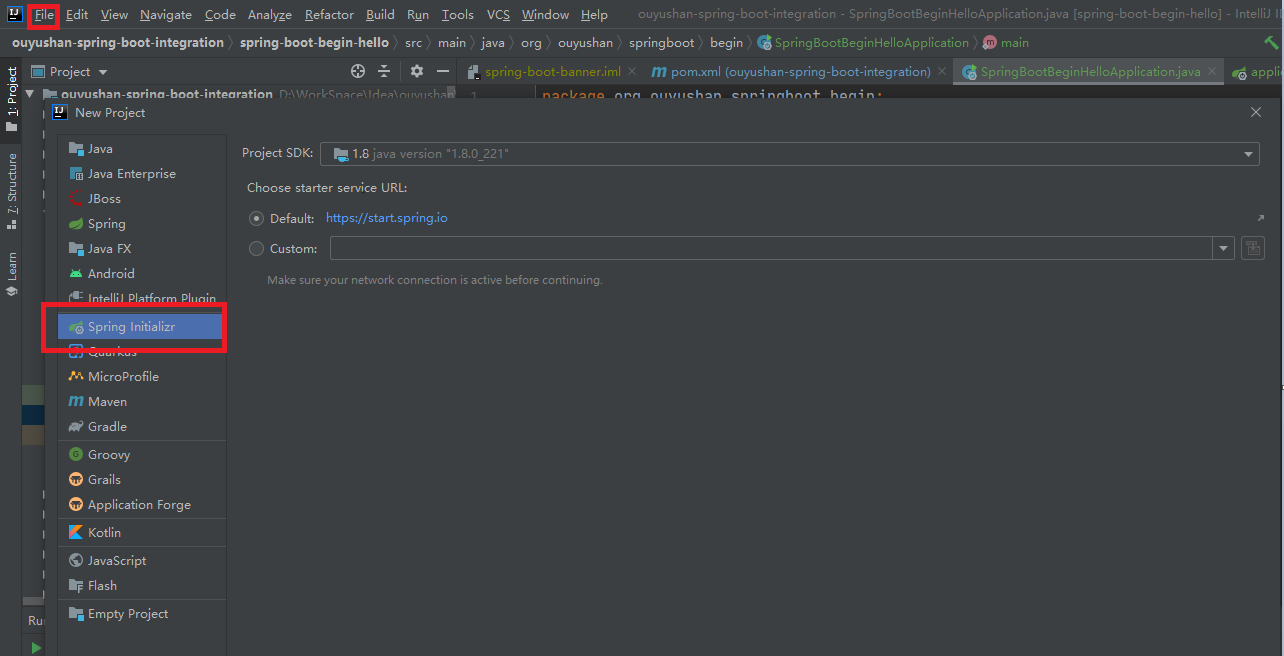
3.1、点击File -> New Project -> Spring Initializer,点击next
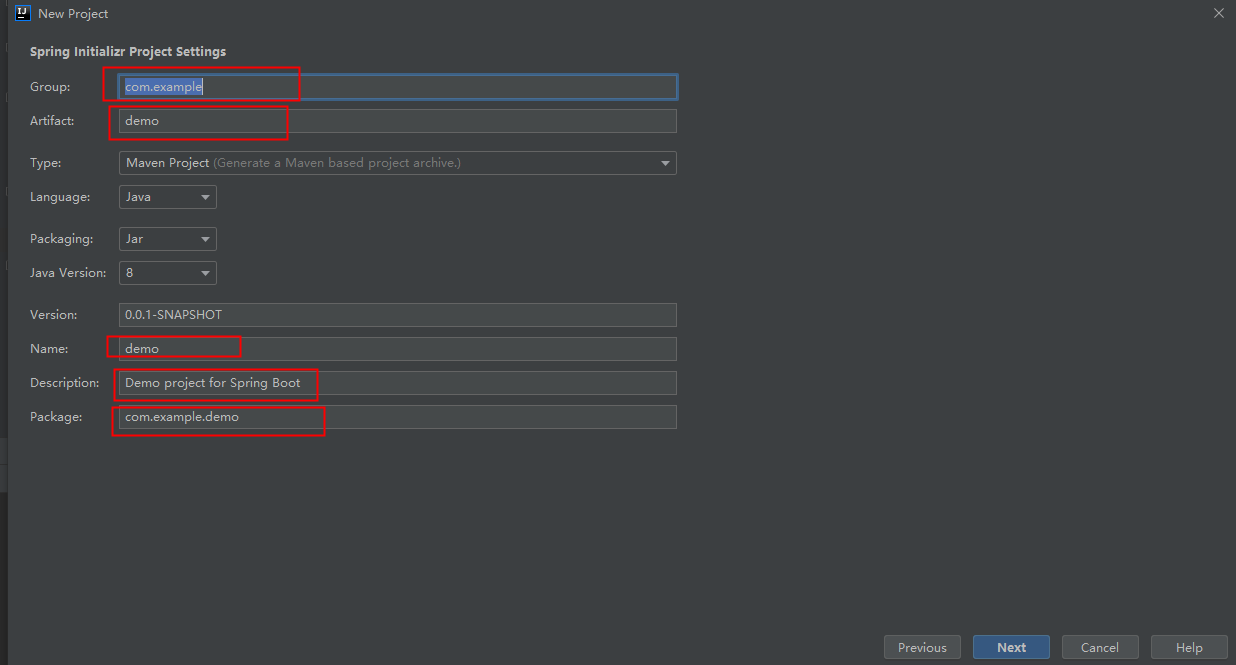
3.2、在对应地方修改自己的项目信息
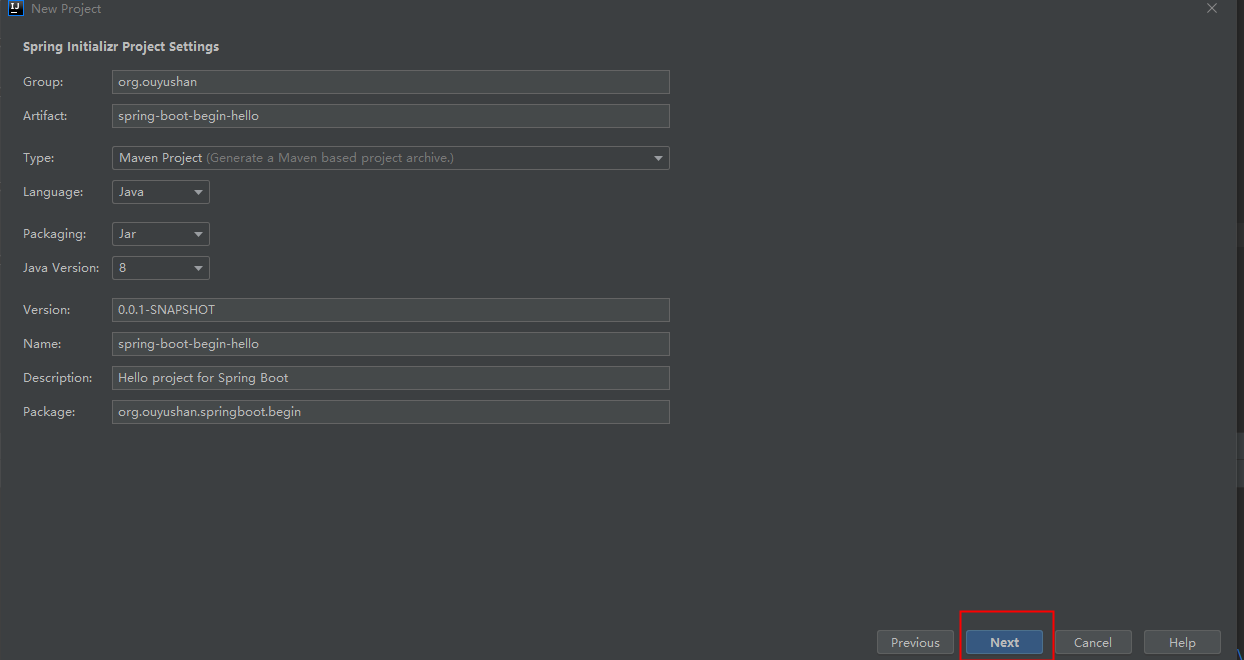
3.3、修改后如下,点击next
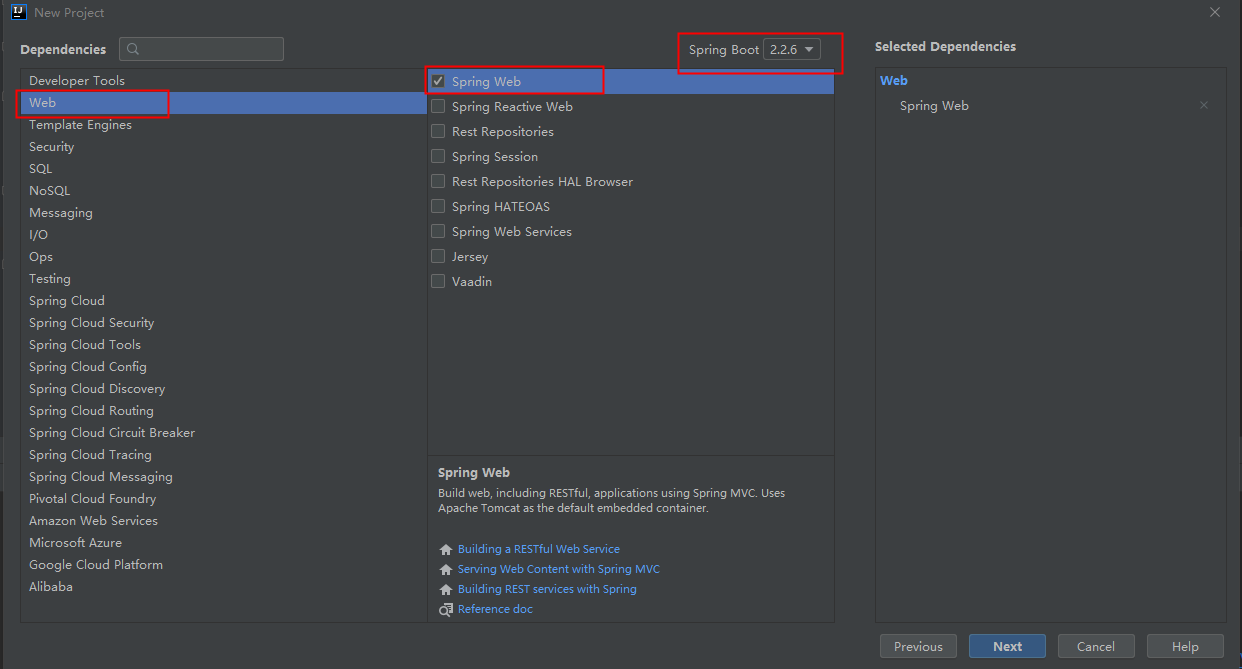
3.4、选择Web依赖,选中Spring Web。可以选择Spring Boot版本,本次默认为2.2.6,点击Next
3.5、编辑工程名和项目路径,确定后点击Finish完成

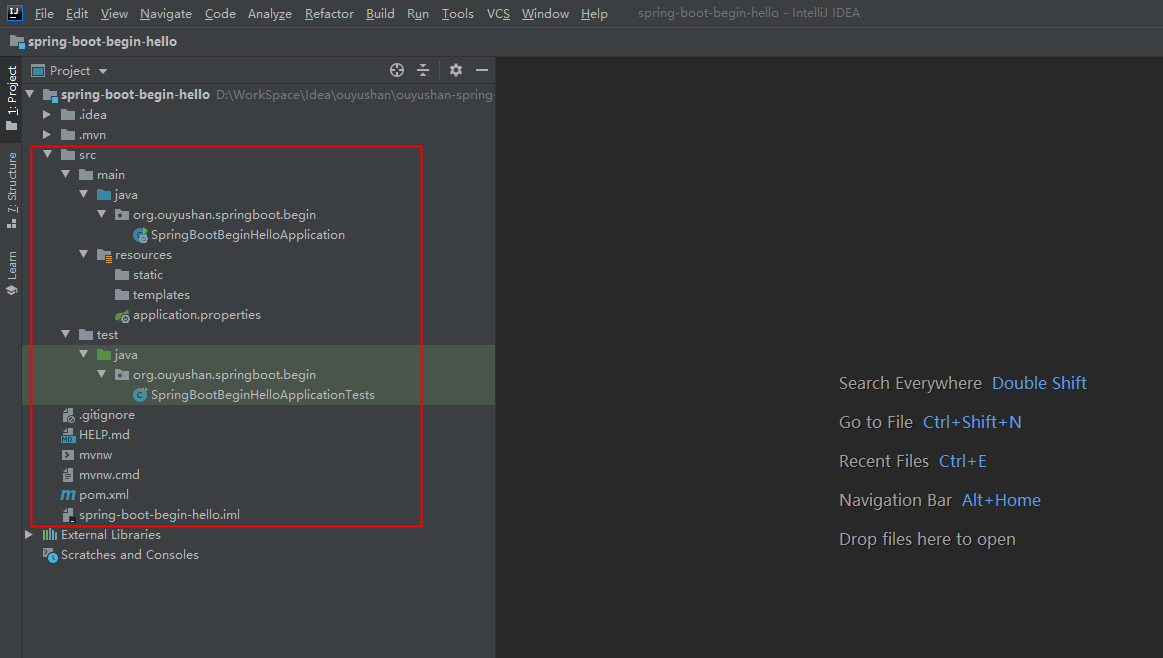
3.6、完成新建工程
四、代码分析
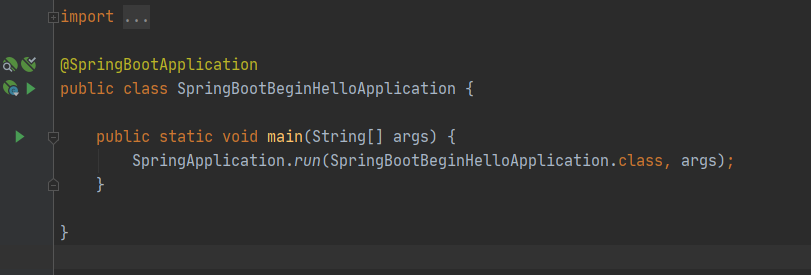
4.1、运行项目 执行SpringBootBeginHelloApplication下的main方法
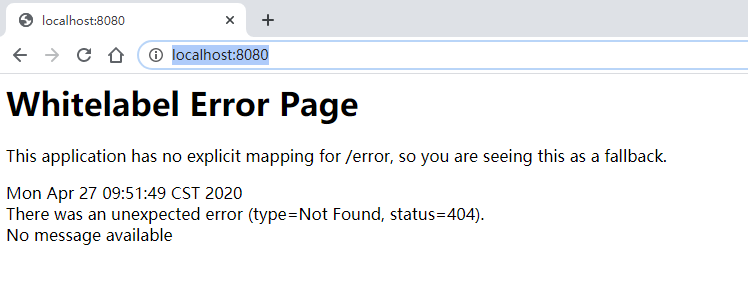
4.2、测试运行
4.3、新增测试接口

 package org.ouyushan.springboot.begin.controller;

 import org.springframework.web.bind.annotation.GetMapping;

 import org.springframework.web.bind.annotation.RequestMapping;

 import org.springframework.web.bind.annotation.RestController;

 /**

  * @Description

  * @Author ouyushan

 * @Email ouyushan@hotmail.com

 * @Date 2020/4/27

 */

 @RestController

 @RequestMapping("/springboot")

 public class HelloController {

     @GetMapping("/hello")

     public String hello() {

         return "Hello,Spring Boot!";

     }

 }
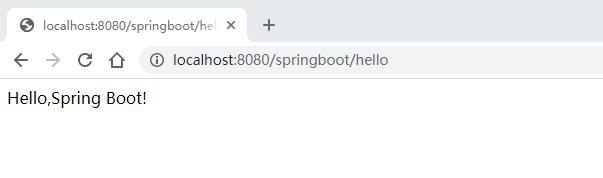
4.4、新接口测试
 <?xml version="1.0" encoding="UTF-8"?>

 <project xmlns="http://maven.apache.org/POM/4.0.0" xmlns:xsi="http://www.w3.org/2001/XMLSchema-instance"

          xsi:schemaLocation="http://maven.apache.org/POM/4.0.0 https://maven.apache.org/xsd/maven-4.0.0.xsd">

     <modelVersion>4.0.0</modelVersion>

     <parent>

         <groupId>org.springframework.boot</groupId>

         <artifactId>spring-boot-starter-parent</artifactId>

         <version>2.2.6.RELEASE</version>

         <relativePath/> <!-- lookup parent from repository -->

     </parent>

     <groupId>org.ouyushan</groupId>

     <artifactId>spring-boot-begin-hello</artifactId>

     <version>0.0.1-SNAPSHOT</version>

     <name>spring-boot-begin-hello</name>

     <description>Hello project for Spring Boot</description>

     <!--指定jdk版本-->

     <properties>

         <java.version>1.8</java.version>

     </properties>

     <dependencies>

         <!--指定spring boot web依赖-->

         <dependency>

             <groupId>org.springframework.boot</groupId>

             <artifactId>spring-boot-starter-web</artifactId>

         </dependency>

         <dependency>

             <groupId>org.springframework.boot</groupId>

             <artifactId>spring-boot-starter-test</artifactId>

             <scope>test</scope>

             <exclusions>

                 <exclusion>

                     <groupId>org.junit.vintage</groupId>

                     <artifactId>junit-vintage-engine</artifactId>

                 </exclusion>

             </exclusions>

         </dependency>

     </dependencies>

     <build>

         <plugins>

             <plugin>

                 <groupId>org.springframework.boot</groupId>

                 <artifactId>spring-boot-maven-plugin</artifactId>

             </plugin>

         </plugins>

     </build>

 </project>
五、知识点
5.1、spring boot 项目可通过以下方式指定jdk版本
     <!--指定jdk版本-->

     <properties>

         <java.version>1.8</java.version>

     </properties>
5.2、spring boot 端口默认是8080
Spring boot Sample 001之spring-boot-begin-hello的更多相关文章
- Spring boot Sample 012之spring-boot-web-upload
一.环境 1.1.Idea 2020.1 1.2.JDK 1.8 二.目的 spring boot 整合web实现文件上传下载 三.步骤 3.1.点击File -> New Project -& ...
- Spring boot Sample 0010之spring-boot-web-freemarker
一.环境 1.1.Idea 2020.1 1.2.JDK 1.8 二.目的 spring boot 整合freemarker模板开发web项目 三.步骤 3.1.点击File -> New Pr ...
- Spring boot Sample 009之spring-boot-web-thymeleaf
一.环境 1.1.Idea 2020.1 1.2.JDK 1.8 二.目的 spring boot 整合thymeleaf模板开发web项目 三.步骤 3.1.点击File -> New Pro ...
- Spring boot Sample 006之spring-boot-custom-servlet
一.环境 1.1.Idea 2020.1 1.2.JDK 1.8 二.步骤 2.1.点击File -> New Project -> Spring Initializer,点击next 2 ...
- Spring boot Sample 005之spring-boot-profile
一.环境 1.1.Idea 2020.1 1.2.JDK 1.8 二.目的 通过yaml文件配置spring boot 属性文件 三.步骤 3.1.点击File -> New Project - ...
- Spring Boot (五)Spring Data JPA 操作 MySQL 8
一.Spring Data JPA 介绍 JPA(Java Persistence API)Java持久化API,是 Java 持久化的标准规范,Hibernate是持久化规范的技术实现,而Sprin ...
- Spring 5.x 、Spring Boot 2.x 、Spring Cloud 与常用技术栈整合
项目 GitHub 地址:https://github.com/heibaiying/spring-samples-for-all 版本说明: Spring: 5.1.3.RELEASE Spring ...
- spring cloud教程之使用spring boot创建一个应用
<7天学会spring cloud>第一天,熟悉spring boot,并使用spring boot创建一个应用. Spring Boot是Spring团队推出的新框架,它所使用的核心技术 ...
- Spring Boot——2分钟构建spring web mvc REST风格HelloWorld
之前有一篇<5分钟构建spring web mvc REST风格HelloWorld>介绍了普通方式开发spring web mvc web service.接下来看看使用spring b ...
随机推荐
- A - Aragorn's Story HDU - 3966 树剖裸题
这个题目是一个比较裸的树剖题,很好写. http://acm.hdu.edu.cn/showproblem.php?pid=3966 #include <cstdio> #include ...
- java基础篇 之 再探内部类跟final
之前写过一篇文章:从垃圾回收机制解析为什么局部内部类只能访问final修饰的局部变量以及为什么加final能解决问题,经过这两天的学习,发现有些不对,必须再来捋一捋 先看之前的例子: /** * @a ...
- LabVIEW(数据库自动编号)
数据库如果字段是自动编号,则在插入数据时,可以不考虑.
- 设计模式之GOF23装饰模式
装饰模式decorator 作用: -动态的为一个对象增加新功能 -装饰模式是一种用于代替继承的技术,无需通过增加子类就能扩展对象的新功能,适用对象的组合关系代替继承关系,更加灵活,同时避免类型体系的 ...
- xilinx VDMA IP核使用
VDMA实用配置说明 VDMA是通过AXI Stream协议对视频数据在PS与PL端进行搬运,开发者无需关注AXI Stream协议,在BlockDesign设计中只需要把相应信号进行连接即可. VD ...
- 微服务框架 ketchup 介绍
1.背景 在ketchup诞生之前.期间也是用surging开发了两个项目.奈何surging没有文档,升级之后,只能从头在读一遍源码,了解新功能,会消耗大量的时间.商业化也使一些 想学习微服务的人望 ...
- PAT 1002 A+B for Polynomials (25分)
题目 This time, you are supposed to find A+B where A and B are two polynomials. Input Specification: E ...
- 「雕爷学编程」Arduino动手做(41)---激光接收管模块
37款传感器与模块的提法,在网络上广泛流传,其实Arduino能够兼容的传感器模块肯定是不止37种的.鉴于本人手头积累了一些传感器和模块,依照实践出真知(一定要动手做)的理念,以学习和交流为目的,这里 ...
- 「雕爷学编程」Arduino动手做(31)——ISD1820语音模块
37款传感器与模块的提法,在网络上广泛流传,其实Arduino能够兼容的传感器模块肯定是不止37种的.鉴于本人手头积累了一些传感器和模块,依照实践出真知(一定要动手做)的理念,以学习和交流为目的,这里 ...
- python操作excel----openpyxl模块
openpyxl模块支持.xls和.xlsx格式的excel创建,但是只支持.xlsx格式的读取操作,不支持.xls的读取(可以使用xlrd模块来读取,写入操作也可使用xlwt模块),也可使用pand ...