centos6源码编译安装lnmp环境
操作系统 版本
64位 CentOS-6.6 10.0.0.20
安装环境所需依赖包
yum -y install gcc automake autoconf libtool make gcc-c++ glibc libxslt-devel libjpeg libjpeg-devel libpng libpng-devel freetype freetype-devel libxml2 libxml2-devel zlib zlib-devel glibc glibc-devel glib2 glib2-devel bzip2 bzip2-devel ncurses ncurses-devel curl curl-devel e2fsprogs e2fsprogs-devel krb5-devel libidn libidn-devel openssl openssl-devel pcre pcre-devel libmcrypt libmcrypt-devel cmake
pcre、openssl、zlib是安装nginx时需要的
cmake是安装mysql时需要的
lnmp 是 linux+nginx+mysql+php 的缩写
一.编译安装mysql
- 上传下载mysql到/tmp
[root@manager tmp]# rz
rz waiting to receive.
Starting zmodem transfer. Press Ctrl+C to cancel.
Transferring mysql-5.5.32-linux2.6-x86_64.tar.gz...
100% 182346 KB 20260 KB/sec 00:00:09 0 Errors
- 解压
[root@manager tmp]# tar xf mysql-5.5.32-linux2.6-x86_64.tar.gz
- 把解压完的数据移动到/usr/local/mysql
[root@manager tmp]# mv mysql-5.5.32-linux2.6-x86_64 /usr/local/mysql
- 建立mysql用户
[root@manager tmp]# useradd -s /sbin/nologin mysql
- 初始化数据库
[root@manager tmp]# useradd -s /sbin/nologin mysql
[root@manager tmp]# cd /usr/local/mysql/
[root@manager mysql]# mkdir -p /data/mysql;chown -R mysql:mysql /data/mysql
[root@manager mysql]# ./scripts/mysql_install_db --user=mysql --datadir=/data/mysql
WARNING: The host 'manager' could not be looked up with resolveip.
This probably means that your libc libraries are not 100 % compatible
with this binary MySQL version. The MySQL daemon, mysqld, should work
normally with the exception that host name resolving will not work.
This means that you should use IP addresses instead of hostnames
when specifying MySQL privileges !
Installing MySQL system tables...
OK
Filling help tables...
OK
--user 定义数据库的所属主, --datadir 定义数据库安装到哪里,建议放到大空间的分区上,这个目录需要自行创建。这一步骤很关键,如果你看到两个 “OK” 说明执行正确,否则请仔细查看错误信息。
[root@manager mysql]# cp support-files/my-large.cnf /etc/my.cnf
- 拷贝启动脚本文件并修改其属性
[root@manager mysql]# cp support-files/mysql.server /etc/init.d/mysqld
[root@manager mysql]# chmod 755 /etc/init.d/mysqld
- 修改启动脚本
[root@localhost mysql]# vim /etc/init.d/mysqld
需要修改的地方有 “datadir=/data/mysql” (前面初始化数据库时定义的目录)
- 把启动脚本加入系统服务项,并设定开机启动,启动mysql
[root@localhost mysql]# chkconfig --add mysqld

[root@localhost mysql]# chkconfig mysqld on

[root@localhost mysql]# service mysqld start

如果启动不了,请到 /data/mysql/ 下查看错误日志,这个日志通常是主机名.err. 检查mysql是否启动的命令为:

[root@localhost mysql]# ps aux |grep mysqld
二.编译安装nginx
1.下载nginx的源码包
wget -P /tmp http://nginx.org/download/nginx-1.8.1.tar.gz #指定下载保存到/tmp目录下
2.解压安装
[root@manager ~]# cd /tmp/
[root@manager tmp]# tar xf nginx-1.8.1.tar.gz
[root@manager tmp]# cd nginx-1.8.1
[root@manager nginx-1.8.1]# ./configure --help(查看参数)
3、编译nginx
如果指定用户和用户组,需要先创建
#创建用户www和用户组www

groupadd www

useradd -g www www
4.指定参数编译安装
cd nginx-1.4.4

./configure \

--prefix=/usr/local/nginx \

--with-http_realip_module \

--with-http_sub_module \

--with-http_gzip_static_module \

--with-http_stub_status_module  \

--with-pcre
[root@manager nginx-1.8.]# make && make install
5.编写nginx启动脚本,并加入系统服务
vim /etc/init.d/nginx
#!/bin/bash

# chkconfig: - 30 21

# description: http service.

# Source Function Library

. /etc/init.d/functions

# Nginx Settings

NGINX_SBIN="/usr/local/nginx/sbin/nginx"

NGINX_CONF="/usr/local/nginx/conf/nginx.conf"

NGINX_PID="/usr/local/nginx/logs/nginx.pid"

RETVAL=0

prog="Nginx"

start() {

        echo -n $"Starting $prog: "

        mkdir -p /dev/shm/nginx_temp

        daemon $NGINX_SBIN -c $NGINX_CONF

        RETVAL=$?

        echo

        return $RETVAL

}

stop() {

        echo -n $"Stopping $prog: "

        killproc -p $NGINX_PID $NGINX_SBIN -TERM

        rm -rf /dev/shm/nginx_temp

        RETVAL=$?

        echo

        return $RETVAL

}

reload(){

        echo -n $"Reloading $prog: "

        killproc -p $NGINX_PID $NGINX_SBIN -HUP

        RETVAL=$?

        echo

        return $RETVAL

}

restart(){

        stop

        start

}

configtest(){

    $NGINX_SBIN -c $NGINX_CONF -t

    return 0

}

case "$1" in

  start)

        start

        ;;

  stop)

        stop

        ;;

  reload)

        reload

        ;;

  restart)

        restart

        ;;

  configtest)

        configtest

        ;;

  *)

        echo $"Usage: $0 {start|stop|reload|restart|configtest}"

        RETVAL=1

esac

exit $RETVAL
保存后,更改权限:
chmod 755 /etc/init.d/nginx

chkconfig --add nginx
如果想开机启动,请执行:
chkconfig nginx on
6.更改nginx配置
更改nginx配置

首先把原来的配置文件清空(先备份):

> /usr/local/nginx/conf/nginx.conf

vim /usr/local/nginx/conf/nginx.conf

写入如下内容:

user nobody nobody;

worker_processes ;

error_log /usr/local/nginx/logs/nginx_error.log crit;

pid /usr/local/nginx/logs/nginx.pid;

worker_rlimit_nofile ;

events

{

    use epoll;

    worker_connections ;

}

http

{

    include mime.types;

    default_type application/octet-stream;

    server_names_hash_bucket_size ;

    server_names_hash_max_size ;

    log_format combined_realip '$remote_addr $http_x_forwarded_for [$time_local]'

    '$host "$request_uri" $status'

    '"$http_referer" "$http_user_agent"';

    sendfile on;

    tcp_nopush on;

    keepalive_timeout ;

    client_header_timeout 3m;

    client_body_timeout 3m;

    send_timeout 3m;

    connection_pool_size ;

    client_header_buffer_size 1k;

    large_client_header_buffers  4k;

    request_pool_size 4k;

    output_buffers  32k;

    postpone_output ;

    client_max_body_size 10m;

    client_body_buffer_size 256k;

    client_body_temp_path /usr/local/nginx/client_body_temp;

    proxy_temp_path /usr/local/nginx/proxy_temp;

    fastcgi_temp_path /usr/local/nginx/fastcgi_temp;

    fastcgi_intercept_errors on;

    tcp_nodelay on;

    gzip on;

    gzip_min_length 1k;

    gzip_buffers  8k;

    gzip_comp_level ;

    gzip_http_version 1.1;

    gzip_types text/plain application/x-javascript text/css text/htm application/xml;

server

{

    listen ;

    server_name localhost;

    index index.html index.htm index.php;

    root /usr/local/nginx/html;

    location ~ \.php$ {

        include fastcgi_params;

        fastcgi_pass unix:/tmp/php-fcgi.sock;

        fastcgi_index index.php;

        fastcgi_param SCRIPT_FILENAME /usr/local/nginx/html$fastcgi_script_name;

    }

}

}
检查是否有错
[root@manager nginx-1.8.]# /etc/init.d/nginx configtest

nginx: the configuration file /usr/local/nginx/conf/nginx.conf syntax is ok

nginx: configuration file /usr/local/nginx/conf/nginx.conf test is successful
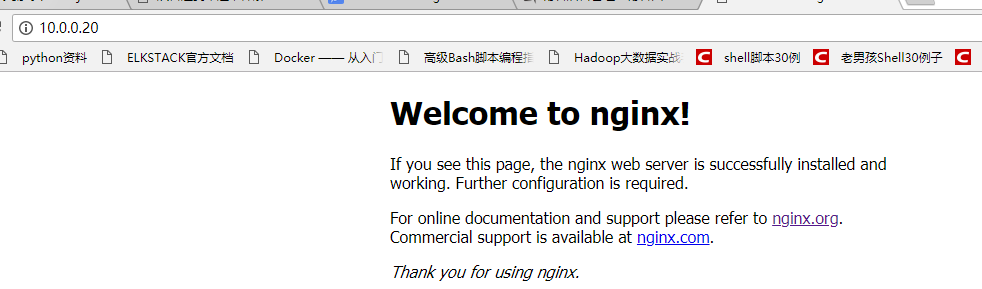
登陆网页检验是否成功
三.编译安装php
- 下载php
[root@manager ~]# wget -P /tmp http://am1.php.net/distributions/php-5.3.27.tar.gz
- 解压php
[root@localhost src]# tar zxf php-5.3.27.tar.gz
- 创建相关账户
[root@nginx tmp]# useradd -s /sbin/nologin php-fpm
- 配置编译参数
[root@manager tmp]# cd php-5.3.

[root@manger php-5.3.]# ./configure \

--prefix=/usr/local/php \

--with-config-file-path=/usr/local/php/etc \

--enable-fpm \

--with-fpm-user=php-fpm \

--with-fpm-group=php-fpm \

--with-mysql=/usr/local/mysql \

--with-mysql-sock=/tmp/mysql.sock \

--with-libxml-dir \

--with-gd \

--with-jpeg-dir \

--with-png-dir \

--with-freetype-dir \

--with-iconv-dir \

--with-zlib-dir \

--with-mcrypt \

--enable-soap \

--enable-gd-native-ttf \

--enable-ftp \

--enable-mbstring \

--enable-exif \

--enable-zend-multibyte \

--disable-ipv6 \

--with-pear \

--with-curl \

--with-openssl
5.编译安装
make && make install
6. 修改配置文件
cp php.ini-production /usr/local/php/etc/php.ini

vim /usr/local/php/etc/php-fpm.conf
[global]

pid = /usr/local/php/var/run/php-fpm.pid

error_log = /usr/local/php/var/log/php-fpm.log

[www]

listen = /tmp/php-fcgi.sock

user = php-fpm

group = php-fpm

pm = dynamic

pm.max_children =

pm.start_servers =

pm.min_spare_servers =

pm.max_spare_servers =

pm.max_requests =

rlimit_files =
保存配置文件后,检验配置是否正确的方法为:
/usr/local/php/sbin/php-fpm -t
[12-Mar-2018 07:37:02] NOTICE: configuration file /usr/local/php/etc/php-fpm.conf test is successful
# 如果出现诸如 “test is successful” 字样,说明配置没有问题。
7.启动php-fpm
cp /tmp/php-5.3.27/sapi/fpm/init.d.php-fpm /etc/init.d/php-fpm

chmod  /etc/init.d/php-fpm

service php-fpm start
如果想让它开机启动,执行:
chkconfig php-fpm on
检测是否启动:
ps aux |grep php-fpm

看看是不是有很多个进程(大概20多个)。
测试是否解析php文件
创建测试文件:
vim /usr/local/nginx/html/.php
内容如下:
<?php

    echo "测试php是否解析";

?>
测试:
[root@manager ~]# curl localhost/2.php
测试php是否解析[root@manager ~]#
centos6源码编译安装lnmp环境的更多相关文章
- 源码编译安装lnmp环境
一.源码编译安装步骤 首先说明源码安装的好处 速度快,可自定义路径 主要有三步:1.配置 进入源码安装包 ./configure --prefix=/uer/local/nginx 可指定参数 ...
- 源码编译安装LNMP环境及配置基于域名访问的多虚拟主机
实验环境及软件版本: CentOS版本: 6.6(2.6.32.-504.el6.x86_64) nginx版本: nginx-1.6.2 mysql版本: Mysql-5.6.23 php版本: ...
- 源码编译安装lnmp环境(nginx-1.14.2 + mysql-5.6.43 + php-5.6.30 )------踩了无数坑,重装了十几次服务器才会的,不容易啊!
和LAMP不同的是,LNMP中的N指的是Nginx(类似于Apache的一种web服务软件),并且php是作为一个独立服务存在的,这个服务叫做php-fpm,Nginx直接处理静态请求,动态请求会转发 ...
- WordPress安装篇(5):源码编译安装LNMP并部署WordPress
与YUM方式安装相比,源码编译安装方式更灵活,安装过程中能自定义功能和参数,特别是在批量部署服务器又要求软件版本及配置一致时,源码编译安装的优势很明显.本文介绍如何通过源码编译方式安装Nginx1.1 ...
- 源码编译搭建LNMP环境
LNMP源码编译 1.LNMP介绍 LNMP=Linux Nginx Mysql PHP Nginx ("engine x") 是一个高性能的 HTTP 和 反向代理 服务器.Ng ...
- 源码编译安装LAMP环境及配置基于域名访问的多虚拟主机
实验环境及软件版本: CentOS版本: 6.6(2.6.32.-504.el6.x86_64) apache版本: apache2.2.27 mysql版本: Mysql-5.6.23 php版本 ...
- 年终福利,PHP7+Apache2.4+MySQL5.6 源码编译安装,环境配置,搭建你自己的LAMP环境
PHP7 都出来了,你还在玩PHP5吗? MySQL5.6 早都出来了,你还在玩MySql5.2吗? Apache2.4 早都出来了,你还在玩Apache2.2吗? 笔者不才,愿意亲自搭建环境,供搭建 ...
- centos7源码编译安装LNMP+ZABBIX4.0LTS(1)——nginx
环境:192.168.117.132--zabbix server192.168.117.133--zabbix proxy 安装路径为/zabbix 安装nginx 1.安装包下载http://ng ...
- 源码编译安装 LNMP及论坛
一.安装Nginx服务 systemctl stop firewalld systemctl disable firewalld setenforce 0 1.安装依赖包 yum -y install ...
随机推荐
- 4,远程连接Linux
为什么要远程连接Linux 在实际的工作场景中,虚拟机界面或者物理服务器本地的终端都是很少接触的,因为服务器装完系统之后,都要拉倒IDC机房托管,如果是购买的云主机,那更碰不到服务器本体了,只能通过远 ...
- 接口&抽象类&继承&父类和子类
1.接口是什么? 接口可以理解为一个特殊的抽象类,是由全局常量和公共抽象方法组成的. 所以,如果,一个抽象类的方法都是抽象的,那么就可以通过接口的形式来表示. class 用于定义类 interfac ...
- 《Cracking the Coding Interview》——第1章:数组和字符串——题目4
2014-03-18 01:36 题目:给定一个字符串,将其中的空格‘ ’替换为‘%20’,你可以认为字符串尾部有足够空间来容纳新增字符.请不要额外开辟数组完成. 解法:先从前往后统计空格个数,然后从 ...
- leetcode 【 Remove Duplicates from Sorted List 】 python 实现
题目: Given a sorted linked list, delete all duplicates such that each element appear only once. For e ...
- LCS+LIS
#include<iostream> #include<string> using namespace std; string a,b; ][]; int main() { w ...
- Java基础-4变量与数据类型
变量:变量是Java程序中的一个基本存储单元.变量是一个标识符.类型及一个可选初始值的组合定义.所有的变量都有一个作用域,即变量在某一区域有效. 基本的变量声明方式如下: int a; float b ...
- mac虚拟机上(centos系统)设置联网第二种方式
这种方式简单,不容易出错,用的桥接的方式. 这样的安装的centos会得到ip地址 然后编辑一下网卡配置,使其变为静态得ip 输入命令 # vi /etc/sysconfig/network-scri ...
- Elasticsearch同义词词汇单元过滤器
1 简单扩展 "jump,hop,leap" 搜索jump会检索出包含jump.hop或leap的词 1.1 扩展应用在索引阶段 1.2 扩展应用在查询阶段 1.3 对比 2 简单 ...
- [转载]有关如何入门ACM
来源: 吴垠的日志 一些题外话 首先就是我为什么要写这么一篇日志.原因很简单,就是因为前几天有个想起步做ACM人很诚恳的问我该如何入门.其实就现在而言,我并不是很想和人再去讨论这样的话题,特别是当我发 ...
- 201621123033 《Java程序设计》第3周学习总结
第三周作业 1. 本周学习总结 初学面向对象,会学习到很多碎片化的概念与知识.尝试学会使用思维导图将这些碎片化的概念.知识点组织起来.请使用工具画出本周学习到的知识点及知识点之间的联系.步骤如下: 1 ...