android:使用RemoteView自定义Notification
//网上相关内容较少,遂记录下来,备忘.
//依然以音乐播放器demo为例.
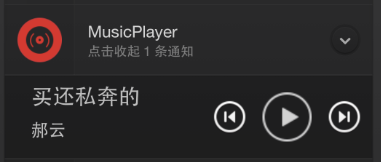
效果截图
//锤子手机上的效果
step1 准备自定义layout
常规的实现方式,并不会因为是用于notification的而在实现上有所不同.
<?xml version="1.0" encoding="utf-8"?>

<LinearLayout xmlns:android="http://schemas.android.com/apk/res/android"

              android:orientation="horizontal"

              android:layout_margin="10dp"

              android:layout_width="match_parent"

              android:layout_height="match_parent">

    <LinearLayout

        android:layout_gravity="center"

        android:layout_marginLeft="10dp"

        android:orientation="vertical"

        android:layout_width="170dp"

        android:layout_height="wrap_content">

        <TextView

            android:layout_marginLeft="10dp"

            android:id="@+id/music_name"

            android:textSize="20dp"

            android:text="要怎么办"

            android:maxLines="1"

            android:ellipsize="end"

            android:layout_width="wrap_content"

            android:layout_height="wrap_content"/>

        <TextView

            android:layout_marginLeft="10dp"

            android:layout_marginTop="6dp"

            android:id="@+id/singer_name"

            android:textSize="16dp"

            android:text="李柏凝"

            android:layout_width="wrap_content"

            android:layout_height="wrap_content"/>

    </LinearLayout>

    <LinearLayout

        android:layout_gravity="center"

        android:layout_marginTop="5dp"

        android:orientation="horizontal"

        android:layout_width="match_parent"

        android:layout_height="wrap_content"

        android:gravity="center">

        <ImageButton

            android:id="@+id/btn_prev"

            android:background="@drawable/desk_pre"

            android:layout_width="40dp"

            android:layout_height="40dp"/>

        <ImageButton

            android:layout_marginLeft="10dp"

            android:id="@+id/btn_play"

            android:src="@drawable/note_btn_play"

            android:background="#00ffffff"

            android:layout_width="wrap_content"

            android:layout_height="wrap_content"/>

        <ImageButton

            android:layout_marginLeft="10dp"

            android:id="@+id/btn_next"

            android:background="@drawable/desk_next"

            android:layout_width="40dp"

            android:layout_height="40dp"/>

    </LinearLayout>

</LinearLayout>
//以下内容均为service中的实现
step2 使用以上layout文件创建一个RemoteView实例
    private void initRemoteView() {

        //创建一个RemoteView实例

        mRemoteViews = new RemoteViews(getPackageName(), R.layout.music_notification);

        mRemoteViews.setTextViewText(R.id.music_name, mMusicDatas.get(i).getName());

        mRemoteViews.setTextViewText(R.id.singer_name, mMusicDatas.get(i).getSinger());

        //实例化一个指向MusicService的intent

        Intent intent = new Intent(this, MusicService.class);

        intent.setAction(ACTION_NOTIFICATION);

        //设置play按钮的点击事件

        intent.putExtra(BUTTON_INDEX, BUTTON_PLAY);

        PendingIntent pendingIntent = PendingIntent.getService(this, 2, intent, PendingIntent.FLAG_CANCEL_CURRENT);

        mRemoteViews.setOnClickPendingIntent(R.id.btn_play, pendingIntent);

        //设置next按钮的点击事件

        intent.putExtra(BUTTON_INDEX, BUTTON_NEXT);

        pendingIntent = PendingIntent.getService(this, 3, intent, PendingIntent.FLAG_CANCEL_CURRENT);

        mRemoteViews.setOnClickPendingIntent(R.id.btn_next, pendingIntent);

        //设置prev按钮的点击事件

        intent.putExtra(BUTTON_INDEX, BUTTON_PREV);

        pendingIntent = PendingIntent.getService(this, 1, intent, PendingIntent.FLAG_UPDATE_CURRENT);

        mRemoteViews.setOnClickPendingIntent(R.id.btn_prev, pendingIntent);

    }
step3 使用RemoteView实例创建Nitification
    private void initNotification() {

        //实例化一个Builder

        mBuilder = new NotificationCompat.Builder(this);

        mBuilder.setSmallIcon(R.drawable.default_pic);

        //将remoteView设置进去

        mBuilder.setContent(mRemoteViews);

        //获取NotificationManager实例

        mNotificationManager = (NotificationManager) getSystemService(Context.NOTIFICATION_SERVICE);

        mNotificationManager.notify(NOTIFICATION_ID, mBuilder.build());

    }
step4 重写onStartCommand()用于处理Notification中按钮的点击事件,举例如下:
 @Override

    public int onStartCommand(Intent intent, int flags, int startId) {

        String action = intent.getAction();

        String stringExtra = intent.getStringExtra(BUTTON_INDEX);

        //校验action

        if(TextUtils.equals(action, ACTION_NOTIFICATION)) {

            //校验stringExtra

            if (TextUtils.equals(stringExtra, BUTTON_NEXT)) {

                i = (i+1)>=mMusicDatas.size()? 0 : i+1;

                mMediaPlayer.stop();

                mMediaPlayer = MediaPlayer.create(MusicService.this, mMusicDatas.get(i).getSrc());

                if(isPlaying) {

                    mMediaPlayer.start();

                }

                //重置Notification显示的内容

                mRemoteViews.setTextViewText(R.id.music_name, mMusicDatas.get(i).getName());

                mRemoteViews.setTextViewText(R.id.singer_name, mMusicDatas.get(i).getSinger());

                mNotificationManager.notify(NOTIFICATION_ID, mBuilder.build());

            } else if(TextUtils.equals(stringExtra, BUTTON_PLAY)) {

               //...

            } else {

               //...

            }

        }

        return super.onStartCommand(intent, flags, startId);

    }
以上.
github地址:https://github.com/zhangbz/MusicPlayer
android:使用RemoteView自定义Notification的更多相关文章
- Android -- 系统和自定义Notification
Notification是一种让你的应用程序在不使用Activity的情况下警示用户,Notification是看不见的程序组件警示用户有需要注意的事件发生的最好途径. 作为UI部分,Notifica ...
- Android自定义Notification并没有那么简单
背景 最近需要实现一个自定义Notification的功能.网上找了找代码,解决方案就是通过RemoteViews来实现.但是在实现过程中遇到不少问题,网上也没有很好的文章描述这些问题,所以在这里做个 ...
- Android消息通知(notification)和PendingIntent传值
通知栏的自定义布局:转:http://blog.csdn.net/vipzjyno1/article/details/25248021 拓展 实现自定义的通知栏效果: 这里要用到RemoteViews ...
- Android自定义控件之自定义ViewGroup实现标签云
前言: 前面几篇讲了自定义控件绘制原理Android自定义控件之基本原理(一),自定义属性Android自定义控件之自定义属性(二),自定义组合控件Android自定义控件之自定义组合控件(三),常言 ...
- Android自定义控件之自定义组合控件
前言: 前两篇介绍了自定义控件的基础原理Android自定义控件之基本原理(一).自定义属性Android自定义控件之自定义属性(二).今天重点介绍一下如何通过自定义组合控件来提高布局的复用,降低开发 ...
- Android新旧版本Notification
Android新旧版本Notification 在notification.setLatestEventInfo() 过时了 以前: NotificationManager mn = (Notific ...
- android开发之自定义组件
android开发之自定义组件 一:自定义组件: 我认为,自定义组件就是android给我们提供的的一个空白的可以编辑的图片,它帮助我们实现的我们想要的界面,也就是通过自定义组件我们可以把我们要登入的 ...
- [Android Tips] 9. framework notification layout font size
android 4.4 framework notification layout 相关字体大小 * title: notification_title_text_size: 18dp * conte ...
- Android中制作自定义dialog对话框的实例
http://www.jb51.net/article/83319.htm 这篇文章主要介绍了Android中制作自定义dialog对话框的实例分享,安卓自带的Dialog显然不够用,因而我们要继 ...
随机推荐
- Jenkins+SVN+tomcat持续集成发布
有代码更新后重新打包到tomcat再发布,是不是很烦? 看了下面的东西你就不会烦了. SVN或者git等代码版本控制工具不说了,如果是本地开发,也可以安装一个svn server端 jenkins下载 ...
- 窥探Swift之新添数据类型元组与可选值
今天的博客中就总结一下关于Swift中相对Objc新添加的两个数据类型:元组(Tuple)和可选值类型(Optional).上面这两个类型是Swift独有的类型,使用起来也是非常方便的,今天就通过一些 ...
- (转)运维角度浅谈MySQL数据库优化
转自:http://lizhenliang.blog.51cto.com/7876557/1657465 一个成熟的数据库架构并不是一开始设计就具备高可用.高伸缩等特性的,它是随着用户量的增加,基础架 ...
- log4net 记录MVC监控日志
由于MVC自身的特点,可以让我们记录每一个Controller下Action的执行时间以及View视图渲染完成的时间,本文采用log4net记录MVC每个Action的执行时间和View视图渲染完成时 ...
- PHPStorm如何配置,phpstorm的mac配置文件目录
PHPStorm的配置分为2大类:项目配置和IDE配置. 项目配置(设置),主要是配置具体项目.IDE 配置(设置),通用的设置会应用到所有的项目上. 项目配置每个项目的配置存储在项目所在目录的 .i ...
- IE滤镜及其使用技巧
Gradient Filter和AlphaImageLoader Filter 这两个属性是legend IE(IE6,7,8)中的渐变滤镜和透明滤镜,我们先详细介绍下这两个属性的用法,详情 可查看M ...
- mybatis入门基础(四)----输入映射和输出映射
一:输入映射 通过parameterType指定输入参数的类型,类型可以是简单类型.hashmap.pojo的包装类型. 1.1.传递pojo的包装对象 1.1.1.需求描述 完成用户信息的综合查询, ...
- SignalR的Javascript客户端API使用方式整理
SignalR的服务端提供了两种实现方式,分别是PersistentConnection和Hub,这两种方式的侧重点不同: PersistentConnection更接近于底层,编程接口比较简单,传输 ...
- 【原创】Kafka console consumer源代码分析(一)
上一篇中分析了Scala版的console producer代码,这篇文章为读者带来一篇console consumer工作原理分析的随笔.其实不论是哪个consumer,大部分的工作原理都是类似的. ...
- Visual Studio 2013 Update 3 RTM 正式发布
VS2013.3 RTM已发布! 完整安装包:http://download.microsoft.com/download/6/F/0/6F0777D3-3541-465F-8639-A8F9D36B ...