QT 基于QScrollArea的界面嵌套移动
在实际的应用场景中,经常会出现软件界面战场图大于实际窗体大小,利用QScrollArea可以为widget窗体添加滚动条,可以实现小窗体利用滚动条显示大界面需求。实现如下:
- QT创建一个qWidget界面
- 在ui界面中利用QT自带的widget控件布局一个如下图所示的层叠关系,widget_2界面大小需大于widget大小

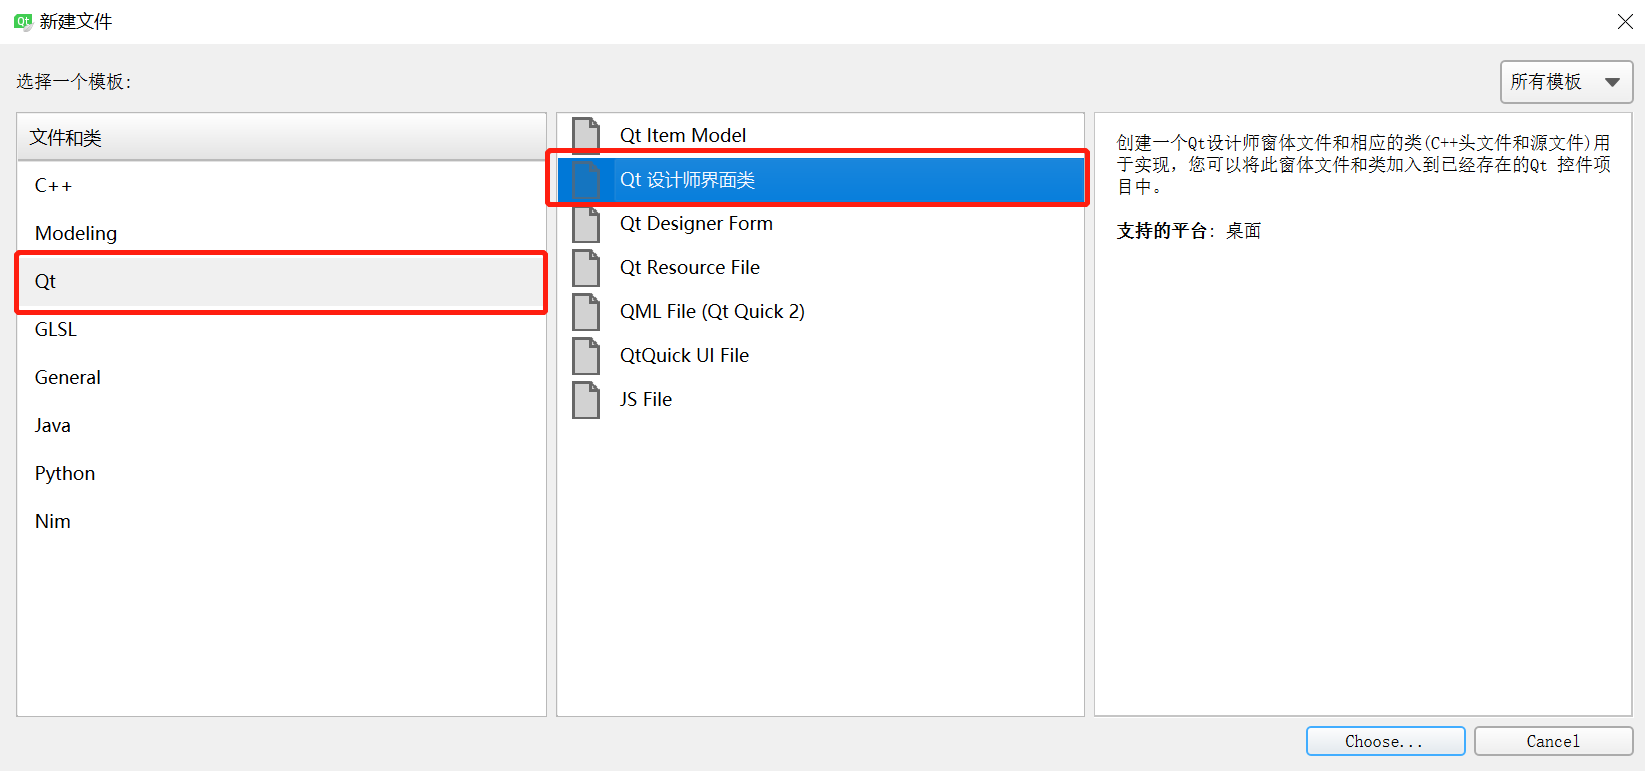
- 界面布局好后,将widget_2提升为类,提升之前需为工程新添加一个设计界面类,添加完之后,将widget_2提升为类类名和前面新添加的设计界面类名一致
- 源码实现如下
patchwindow.h


 1 #ifndef PATCHWINDOW_H

 2 #define PATCHWINDOW_H

 3

 4 #include <QDebug>

 5 #include <QPainter>

 6 #include <QWidget>

 7 #include <QMouseEvent>

 8 #include <QStyleOption>

 9 #include <QPaintEvent>

10

11 enum CursorRegion{

12     NONE,

13     TOPLEFT,

14     TOPRIGHT,

15     BOTTOMRIGHT,

16     BOTTOMLEFT

17 };

18

19 namespace Ui {

20 class Patchwindow;

21 }

22

23 class Patchwindow : public QWidget

24 {

25     Q_OBJECT

26

27 public:

28     explicit Patchwindow(QWidget *parent = 0);

29     ~Patchwindow();

30     CursorRegion getCursorRegion(QPoint);

31

32 public:

33     int borderWidth;

34     int handleSize;

35

36     bool mousePressed;

37     QPoint previousPos;

38

39 private:

40     Ui::Patchwindow *ui;

41

42 protected:

43     void mousePressEvent(QMouseEvent*);

44     void mouseReleaseEvent(QMouseEvent*);

45     void mouseMoveEvent(QMouseEvent*);

46

47 signals:

48     void send_widget_rx_ry(int rx,int ry);

49 };

50

51 #endif // PATCHWINDOW_H
patchwindow.cpp
 1 #include "patchwindow.h"

 2 #include "ui_patchwindow.h"

 3

 4 Patchwindow::Patchwindow(QWidget *parent) :

 5     QWidget(parent),

 6     ui(new Ui::Patchwindow)

 7 {

 8     ui->setupUi(this);

 9

10     this->setMouseTracking(true);

11

12     setFocusPolicy(Qt::StrongFocus);

13

14     mousePressed = false;

15     borderWidth = 1;

16     handleSize = 8;

17

18 }

19

20 Patchwindow::~Patchwindow()

21 {

22     delete ui;

23 }

24

25

26 //设置鼠标形状

27 CursorRegion Patchwindow::getCursorRegion(QPoint pos)

28 {

29     if (pos.x() > 0 && pos.x() < (handleSize + borderWidth) &&

30         pos.y() > 0 && pos.y() < (handleSize + borderWidth)  ){

31         if (this->hasFocus())

32             this->setCursor(QCursor(Qt::SizeFDiagCursor));

33         return CursorRegion::TOPLEFT;

34     }

35

36     if (pos.x() > (this->width() - handleSize - borderWidth) && pos.x() < this->width() &&

37         pos.y() > 0 && pos.y() < (handleSize + borderWidth)  ){

38         if (this->hasFocus())

39             this->setCursor(QCursor(Qt::SizeBDiagCursor));

40         return CursorRegion::TOPRIGHT;

41     }

42

43     if (pos.x() > (this->width() - handleSize - borderWidth) && pos.x() < this->width() &&

44         pos.y() > (this->height() - handleSize - borderWidth) && pos.y() < this->height()  ){

45         if (this->hasFocus())

46             this->setCursor(QCursor(Qt::SizeFDiagCursor));

47         return CursorRegion::BOTTOMRIGHT;

48     }

49

50

51     if (pos.x() > 0 && pos.x() < (handleSize + borderWidth) &&

52         pos.y() > (this->height() - handleSize - borderWidth) && pos.y() < this->height()  ){

53         if (this->hasFocus())

54             this->setCursor(QCursor(Qt::SizeBDiagCursor));

55         return CursorRegion::BOTTOMLEFT;

56     }

57

58     this->setCursor(Qt::ArrowCursor);

59     return CursorRegion::NONE;

60 }

61

62 void Patchwindow::mousePressEvent(QMouseEvent *event)

63 {

64     mousePressed = true;

65     previousPos = this->mapToParent(event->pos());

66     //qDebug()<<"previousPos = "<<previousPos;

67 }

68

69 void Patchwindow::mouseReleaseEvent(QMouseEvent*)

70 {

71     mousePressed = false;

72 }

73

74 void Patchwindow::mouseMoveEvent(QMouseEvent *event)

75 {

76     if (mousePressed){

77         QPoint _curPos = this->mapToParent(event->pos());

78         QPoint _offPos = _curPos - previousPos;

79         previousPos = _curPos;

80         //qDebug()<<"_offPos = "<<_offPos;

81         //qDebug()<<"_curPos = "<<_curPos;

82         emit send_widget_rx_ry(_offPos.rx(),_offPos.ry());

83     }

84 }
mainwindow.h
 1 #ifndef MAINWINDOW_H

 2 #define MAINWINDOW_H

 3

 4 #include <QMainWindow>

 5 #include <QHBoxLayout>

 6 #include <QDebug>

 7 #include <QScrollArea>

 8

 9

10 namespace Ui {

11 class MainWindow;

12 }

13

14 class MainWindow : public QMainWindow

15 {

16     Q_OBJECT

17

18 public:

19     explicit MainWindow(QWidget *parent = 0);

20     ~MainWindow();

21

22     QScrollArea *m_pScroll;

23

24

25 private:

26     Ui::MainWindow *ui;

27

28 private slots:

29     void remove_widget(int r_x,int r_y);

30

31

32 };

33

34 #endif // MAINWINDOW_H
mainwindow.cpp
 1 #include "mainwindow.h"

 2 #include "ui_mainwindow.h"

 3 #include <QPalette>

 4

 5 #include <QScrollBar>

 6

 7 MainWindow::MainWindow(QWidget *parent) :

 8     QMainWindow(parent),

 9     ui(new Ui::MainWindow)

10 {

11     ui->setupUi(this);

12     //this->resize(600,600);

13

14     //给父窗体填充颜色

15     QPalette palette = ui->widget_2->palette();

16     palette.setBrush(QPalette::Window,QBrush(QColor(61,61,61)));

17     ui->widget_2->setAutoFillBackground(true);

18     ui->widget_2->setPalette(palette);

19

20     ui->widget_2->setAttribute(Qt::WA_StyledBackground);

21     ui->widget_2->setStyleSheet("QWidget{background: black}");

22

23     ui->widget_3->setAttribute(Qt::WA_TransparentForMouseEvents, true);//设置该层鼠标事件透明,可以设置为显示层

24

25     m_pScroll = new QScrollArea(ui->widget);

26     m_pScroll->setWidget(ui->widget_2);//给widget_2设置滚动条

27     //ui->widget_2->setMinimumSize(1500,1000);//这里注意,要比主窗体的尺寸要大,不然太小的话会留下一片空白

28

29     QHBoxLayout *pLayout = new QHBoxLayout;

30     pLayout->addWidget(m_pScroll);

31     pLayout->setMargin(0);

32     pLayout->setSpacing(0);

33     ui->widget->setLayout(pLayout);

34

35     connect(ui->widget_2,&Patchwindow::send_widget_rx_ry,this,&MainWindow::remove_widget);

36

37 }

38

39 MainWindow::~MainWindow()

40 {

41     delete ui;

42 }

43

44 void MainWindow::remove_widget(int r_x,int r_y)

45 {

46     r_y = m_pScroll->verticalScrollBar()->value()-r_y;

47     r_x = m_pScroll->horizontalScrollBar()->value()-r_x;

48

49     if((0 < r_y) | (r_y == 0))

50     {

51         if(r_y > m_pScroll->verticalScrollBar()->maximum())

52         {

53             r_y = m_pScroll->verticalScrollBar()->maximum();

54         }

55     }

56     else

57     {

58         r_y = 0;

59     }

60

61     if((0 < r_x) | (r_x == 0))

62     {

63         if(r_x > m_pScroll->horizontalScrollBar()->maximum())

64         {

65             r_x = m_pScroll->horizontalScrollBar()->maximum();

66         }

67     }

68     else

69     {

70         r_x = 0;

71     }

72

73     m_pScroll->verticalScrollBar()->setValue(r_y);

74     m_pScroll->horizontalScrollBar()->setValue(r_x);

75

76 }
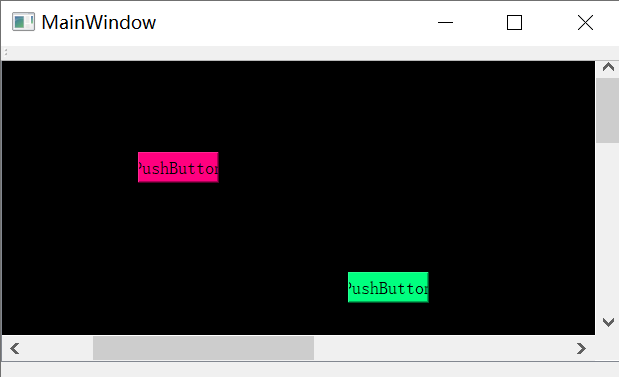
- 最终实现效果如下,可以通过滚轮滚动界面,也可以通过鼠标拖拽来实现界面拖拽效果:
工程源码下载路径:
「ScrollArea」https://www.aliyundrive.com/s/QMf912nt86A 点击链接保存,或者复制本段内容,打开「阿里云盘」APP ,无需下载极速在线查看,视频原画倍速播放。
QT 基于QScrollArea的界面嵌套移动的更多相关文章
- 基于qml创建最简单的图像处理程序(1)-基于qml创建界面
<基于qml创建最简单的图像处理程序>系列课程及配套代码基于qml创建最简单的图像处理程序(1)-基于qml创建界面http://www.cnblogs.com/jsxyhelu/p/83 ...
- Qt基于tcp协议网络编程
基于Qt网络编程: 基于tcp协议 c/s模式编程 所需要的类:QTcpServer QTcpSocket 利用qt基于tcp协议编写c/s模式程序: 两个类中的信号: QTcpServer : ne ...
- qml(Qt Quick)做界面
qml(Qt Quick)做界面 来源 https://www.zhihu.com/question/24880681/answer/29324824 本人是Qt初学者,正在写一个会计小软件(Lin ...
- Qt常用的登录界面设计
记录一下Qt常用的登录界面的设计 方便以后使用! 1.QpushButton改变一个按钮的颜色,当鼠标放上去和移开时显示不同的颜色.QPushButton { background-color: rg ...
- 第15.10节 PyQt(Python+Qt)入门学习:Qt Designer可视化设计界面组件与QWidget类相关的组件属性详解
PyQt学习有阵子了,对章节的骨架基本考虑好了,准备本节就写组件的属性的,结果一是日常工作繁忙,经常晚上还要加班,二是Qt的组件属性很多,只能逐一学习.研究和整理,花的时间有点长,不过终于将可视化设计 ...
- 基于JavaFX图形界面演示的迷宫创建与路径寻找
事情的起因是收到了一位网友的请求,他的java课设需要设计实现迷宫相关的程序--如标题概括. 我这边不方便透露相关信息,就只把任务要求写出来. 演示视频指路: 视频过审后就更新链接 完整代码链接: 网 ...
- QT基于model/view数据库编程2
Qt中数据编程主要分为以下两点:1.利用qt提供类 访问数据库或者成为简单的数据库编程2.数据库编程中引入model/view编程模型 基于model/view数据库编程: qt提供model类: Q ...
- 第九章、Qt Designer可视化设计界面布局组件介绍
老猿Python博文目录 专栏:使用PyQt开发图形界面Python应用 老猿Python博客地址 一.引言 在Qt Designer中,在左边部件栏的提供了界面布局相关部件,如图: 可以看到共包含有 ...
- window.parent != window 解决界面嵌套问题
页面在被嵌套的时,效果:,,如果用户点击“刷新”,该问题即可解决. 如果想通过代码解决的话,这个问题属于客户端的问题,不是服务器端的问题. 如果直接写:window.location.href = “ ...
随机推荐
- AcWing 1222. 密码脱落
题目链接 题目描述: X星球的考古学家发现了一批古代留下来的密码. 这些密码是由A.B.C.D 四种植物的种子串成的序列. 仔细分析发现,这些密码串当初应该是前后对称的(也就是我们说的镜像串). 由于 ...
- Python入门-运算符
运算通常可以根据最终获得的值不同,可以分两类,即结果为具体的值,结果为bool值,那么哪些结果为具体的值-->算数运算.赋值运算,哪些结果又为bool值?--->比较运算.逻辑运算和成员运 ...
- 帝国CMS灵动标签调用相关文章
标题包含关键字①.比较粗糙的匹配,可能不太精确:title like '%$navinfor[keyboard]%' ②.精确的匹配,比较消耗资源:title regexp '(^|,)$navinf ...
- 安卓记账本开发学习day7之完成进度
支持长按删除记录,与根据备注搜索相关的收入或支出情况
- Java学习day30
线程分为用户线程和守护线程,虚拟机必须确保用户线程执行完毕,虚拟机不用等待守护线程执完毕 并发:同一个对象被多个线程同时操作,例如上万了同时抢100张票,手机银行和柜台同时取同一张卡里的钱 处理多线程 ...
- 新手入门C语言第七章:C判断
C 判断 判断结构要求程序员指定一个或多个要评估或测试的条件,以及条件为真时要执行的语句(必需的)和条件为假时要执行的语句(可选的). C 语言把任何非零和非空的值假定为 true,把零或 null ...
- 【洛谷】P4555 [国家集训队]最长双回文串
P4555 [国家集训队]最长双回文串 题源:https://www.luogu.com.cn/problem/P4555 原理:Manacher 还真比KMP好理解 解决最长回文串问题 转化为长度为 ...
- 认识python-个人笔记篇
认识python 1 .python 的发展历史 一种广泛使用的解释型.高级编程.通用型编程语言,由"龟叔"吉多·范罗苏姆创造,第一版发布于1991年. Python的设计哲学强调 ...
- 【GPLT】 集合相似度(c++)
题目如下: 这题主要用来练习stl的使用,是一道比较简单的题目 AC代码如下 #include<iostream> #include<cmath> #include<ma ...
- 论文解读(DCRN)《Deep Graph Clustering via Dual Correlation Reduction》
论文信息 论文标题:Deep Graph Clustering via Dual Correlation Reduction论文作者:Yue Liu, Wenxuan Tu, Sihang Zhou, ...