Centos7.2 安装Elasticsearch 6
迁移文件到usr/local中
mv elasticsearch-6.0..tar.gz /usr/local/

cd /usr/local

tar zxvf elasticsearch-6.0..tar.gz
修改elasticsearch6.0.0文件夹的权限,es 规定 root 用户不能启动 es,所以需要使用一个其他用户来启动 es
[hongdada@localhost elasticsearch]$ ll

总用量

drwxr-xr-x.  hongdada hongdada      11月  : elasticsearch-6.0.

-rwxrw-rw-.   root     root      11月  : elasticsearch-6.0..tar.gz

[hongdada@localhost elasticsearch]$ chown -R root: elasticsearch-6.0.

chown: 正在更改"elasticsearch-6.0.0/lib/elasticsearch-6.0.0.jar" 的所有者: 不允许的操作

........

chown: 正在更改"elasticsearch-6.0.0" 的所有者: 不允许的操作

[hongdada@localhost elasticsearch]$ ll

总用量

drwxr-xr-x.  hongdada hongdada      11月  : elasticsearch-6.0.

-rwxrw-rw-.   root     root      11月  : elasticsearch-6.0..tar.gz

[hongdada@localhost elasticsearch]$ su

密码:

[root@localhost elasticsearch]# chown -R root: elasticsearch-6.0.

[root@localhost elasticsearch]# ll

总用量

drwxr-xr-x.  root root      11月  : elasticsearch-6.0.

-rwxrw-rw-.   root root  11月  : elasticsearch-6.0..tar.gz

[root@localhost elasticsearch]# chown -R hongdada:hongdada elasticsearch-6.0.

[root@localhost elasticsearch]# ll

总用量

drwxr-xr-x.  hongdada hongdada      11月  : elasticsearch-6.0.

-rwxrw-rw-.   root     root      11月  : elasticsearch-6.0..tar.gz
因为本来已经设置好了,为了copy命令重新改了权限
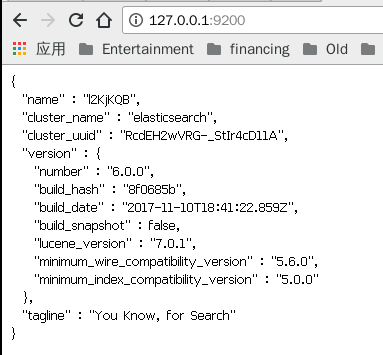
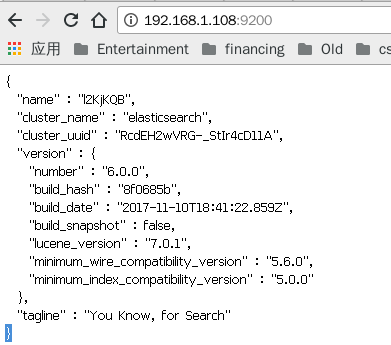
现在就可以访问本地的,但是该主机的ip192.168.1.108此时并不能访问。
要访问主机的ip,需要修改config/elasticsearch.yml文件
network.host: 0.0.0.0
取消network.host前面的注释#,并修改ip为0.0.0.0,或者本机的外网ip192.168.1.108都可以,但是0.0.0.0适用范围广。
修改配置以后要重启es,但是es的重启还有点烦,要先杀死es进程关闭,然后再次启动
重启:
[hongdada@localhost elasticsearch-6.0.]$ cd bin

[hongdada@localhost bin]$ ps -ef |grep elastic

hongdada         : pts/    :: grep --color=auto elastic

[hongdada@localhost bin]$ ps -ef |grep elasticsearch

hongdada         : pts/    :: grep --color=auto elasticsearch

[hongdada@localhost bin]$ sh elasticsearch -d

[hongdada@localhost bin]$ ps -ef |grep elastic

hongdada           : pts/    :: /usr/local/jdk/jdk1..0_121/bin/java -Xms1g -Xmx1g -XX:+UseConcMarkSweepGC -XX:CMSInitiatingOccupancyFraction= -XX:+UseCMSInitiatingOccupancyOnly -XX:+AlwaysPreTouch -server -Xss1m -Djava.awt.headless=true -Dfile.encoding=UTF- -Djna.nosys=true -XX:-OmitStackTraceInFastThrow -Dio.netty.noUnsafe=true -Dio.netty.noKeySetOptimization=true -Dio.netty.recycler.maxCapacityPerThread= -Dlog4j.shutdownHookEnabled=false -Dlog4j2.disable.jmx=true -XX:+HeapDumpOnOutOfMemoryError -Des.path.home=/usr/local/elasticsearch/elasticsearch-6.0. -Des.path.conf=/usr/local/elasticsearch/elasticsearch-6.0./config -cp /usr/local/elasticsearch/elasticsearch-6.0./lib/* org.elasticsearch.bootstrap.Elasticsearch -d

hongdada   6586   6411  0 22:41 pts/0    00:00:00 grep --color=auto elastic

[hongdada@localhost bin]$
kill:
kill -
再次启动:
sh elasticsearch -d
安装过程中的异常:
[hongdada@localhost bin]$ sh elasticsearch

[--23T23::,][INFO ][o.e.n.Node               ] [] initializing ...

[--23T23::,][INFO ][o.e.e.NodeEnvironment    ] [l2KjKQB] using [] data paths, mounts [[/ (rootfs)]], net usable_space [.4gb], net total_space [.5gb], types [rootfs]

[--23T23::,][INFO ][o.e.e.NodeEnvironment    ] [l2KjKQB] heap size [.8mb], compressed ordinary object pointers [true]

[--23T23::,][INFO ][o.e.n.Node               ] node name [l2KjKQB] derived from node ID [l2KjKQBBSRacQ3kzNB2Qgg]; set [node.name] to override

[--23T23::,][INFO ][o.e.n.Node               ] version[6.0.], pid[], build[8f0685b/--10T18::.859Z], OS[Linux/3.10.-514.26..el7.x86_64/amd64], JVM[Oracle Corporation/Java HotSpot(TM) -Bit Server VM/1.8.0_121/25.121-b13]

[--23T23::,][INFO ][o.e.n.Node               ] JVM arguments [-Xms1g, -Xmx1g, -XX:+UseConcMarkSweepGC, -XX:CMSInitiatingOccupancyFraction=, -XX:+UseCMSInitiatingOccupancyOnly, -XX:+AlwaysPreTouch, -Xss1m, -Djava.awt.headless=true, -Dfile.encoding=UTF-, -Djna.nosys=true, -XX:-OmitStackTraceInFastThrow, -Dio.netty.noUnsafe=true, -Dio.netty.noKeySetOptimization=true, -Dio.netty.recycler.maxCapacityPerThread=, -Dlog4j.shutdownHookEnabled=false, -Dlog4j2.disable.jmx=true, -XX:+HeapDumpOnOutOfMemoryError, -Des.path.home=/usr/local/elasticsearch/elasticsearch-6.0., -Des.path.conf=/usr/local/elasticsearch/elasticsearch-6.0./config]

[--23T23::,][INFO ][o.e.p.PluginsService     ] [l2KjKQB] loaded module [aggs-matrix-stats]

[--23T23::,][INFO ][o.e.p.PluginsService     ] [l2KjKQB] loaded module [analysis-common]

[--23T23::,][INFO ][o.e.p.PluginsService     ] [l2KjKQB] loaded module [ingest-common]

[--23T23::,][INFO ][o.e.p.PluginsService     ] [l2KjKQB] loaded module [lang-expression]

[--23T23::,][INFO ][o.e.p.PluginsService     ] [l2KjKQB] loaded module [lang-mustache]

[--23T23::,][INFO ][o.e.p.PluginsService     ] [l2KjKQB] loaded module [lang-painless]

[--23T23::,][INFO ][o.e.p.PluginsService     ] [l2KjKQB] loaded module [parent-join]

[--23T23::,][INFO ][o.e.p.PluginsService     ] [l2KjKQB] loaded module [percolator]

[--23T23::,][INFO ][o.e.p.PluginsService     ] [l2KjKQB] loaded module [reindex]

[--23T23::,][INFO ][o.e.p.PluginsService     ] [l2KjKQB] loaded module [repository-url]

[--23T23::,][INFO ][o.e.p.PluginsService     ] [l2KjKQB] loaded module [transport-netty4]

[--23T23::,][INFO ][o.e.p.PluginsService     ] [l2KjKQB] loaded module [tribe]

[--23T23::,][INFO ][o.e.p.PluginsService     ] [l2KjKQB] no plugins loaded

[--23T23::,][INFO ][o.e.d.DiscoveryModule    ] [l2KjKQB] using discovery type [zen]

[--23T23::,][INFO ][o.e.n.Node               ] initialized

[--23T23::,][INFO ][o.e.n.Node               ] [l2KjKQB] starting ...

[--23T23::,][INFO ][o.e.t.TransportService   ] [l2KjKQB] publish_address {192.168.1.108:}, bound_addresses {[::]:}

[--23T23::,][INFO ][o.e.b.BootstrapChecks    ] [l2KjKQB] bound or publishing to a non-loopback or non-link-local address, enforcing bootstrap checks

ERROR: [] bootstrap checks failed

[]: max file descriptors [] for elasticsearch process is too low, increase to at least []

[]: max virtual memory areas vm.max_map_count [] is too low, increase to at least []

[--23T23::,][INFO ][o.e.n.Node               ] [l2KjKQB] stopping ...

[--23T23::,][INFO ][o.e.n.Node               ] [l2KjKQB] stopped

[--23T23::,][INFO ][o.e.n.Node               ] [l2KjKQB] closing ...

[--23T23::,][INFO ][o.e.n.Node               ] [l2KjKQB] closed
这里面很明显的有两个参数的值太小
1.max file descriptors [4096] for elasticsearch process is too low, increase to at least [65536]
修改/etc/security/limits.conf文件,添加或修改如下行:
*        hard    nofile

*        soft    nofile
2.max virtual memory areas vm.max......
修改 /etc/sysctl.conf 文件,添加如下行:
vm.max_map_count=
修改好了以后,调用sysctl -a查看,发现参数并没有变动,要重启才可以。
重启以后,再启动es即可,就可以通过主机ip访问。
这个时候可以在本机通过本机ip访问,还没有开防火墙,外网是不可以访问的。
https://www.biaodianfu.com/centos-7-install-elasticsearch.html
http://blog.csdn.net/sinat_29581293/article/details/53894033
http://blog.csdn.net/lu_wei_wei/article/details/51263153
http://blog.csdn.net/kongxx/article/details/52993057
http://blog.csdn.net/Gamer_gyt/article/details/52960941
Centos7.2 安装Elasticsearch 6的更多相关文章
- Centos7下安装Elasticsearch 5.6.6
环境 因为elasticsearch是用java编写的,所以需要先安装JDK ES 5,安装需要 JDK 8 以上ES 6.5,安装需要 JDK 11 以上ES 7.2.1,内置了 JDK 12 安装 ...
- 在centos7上安装elasticSearch
因为elasticsearch是用java编写的,所以需要先安装JDK: jdk1.8的安装:安装指导 elasticsearch的下载和安装 一.下载elasticSearch 1.下载地址: ht ...
- centos7环境安装ElasticSearch
操作系统: Centos7 .64位 ========================================= 查看系统版本和系统位数: [root@localhost /]# cat /e ...
- centos7下安装elasticSearch错误总结(单节点模式)
1.首先确定你安装了jdk,版本需要1.8以上 2.上传elasticsearchjar包,只需配置一个文件即可 修改配置文件config/elasticsearch.yml network.h ...
- Centos7中安装elasticsearch
第一步:必须要有jre支持 elasticsearch是用Java实现的,跑elasticsearch必须要有jre支持,所以必须先安装jre 第二步:下载elasticsearch 进入官方下载 h ...
- Centos7 中安装Elasticsearch
1.下载安装包 1.1 下载elasticsearch 7.13.3 curl -L -O https://artifacts.elastic.co/downloads/elasticsearch/e ...
- Centos7.4安装elasticsearch6.3+kibana6.3集群
Centos7.4安装elasticsearch+kibana集群 Centos7.4安装elasticsearch+kibana集群 主机环境 软件环境 主机规划 主机安装前准备 安装jdk1.8 ...
- Centos7安装elasticsearch、logstash、kibana、elasticsearch head
环境:Centos7, jdk1.8 安装logstash 1.下载logstash 地址:https://artifacts.elastic.co/downloads/logstash/logsta ...
- ElasticSearch | centos7 上安装ES
0 参考博客文章(感谢!!!) [1] https://www.jianshu.com/p/10949f44ce9c 在linux服务器上安装jdk [2] https://www.elastic ...
随机推荐
- 【aws】
云服务器EC2 动态调整云服务器ec2 cpu.内存大小: 在ec2实例上右键,Instance settings--> Change Instance Type 选择一个合适的type 云数据 ...
- Django单元测试简单示例
对一个功能的验证往往是需要很多多测试用例,可以把测试用例集合在一起执行,这就产生了测试套件TestSuite 的概念,它是用来组装单个测试用例,规定用例的执行的顺序,而且TestSuite也可以嵌套T ...
- linux平台mysql密码设置
登录mysql默认没有指定账号 查看默认账号是谁 select user(); mysql> select user();+----------------+| user() |+------- ...
- Jmeter接口测试自动化 (三)(数据驱动测试)
本文转载至http://www.cnblogs.com/chengtch/p/6105532.html 当我研究要通过用例优先级控制用例是否执行时,我发现了用"如果(if)控制器" ...
- js全选反选
<style type="text/css"> table { width: 800px; text-align: left; border-collapse: col ...
- Apache-Shiro介绍
Apache Shiro是一个强大且易用的Java安全框架,执行身份验证.授权.密码学和会话管理.使用Shiro的易于理解的API,您可以快速.轻松地获得任何应用程序,从最小的移动应用程序到最大的网络 ...
- VS中代码对齐等快捷键
在VS2008中,选定代码后,按Ctrl+K+F组合键,可以自动进行代码对齐. 注意:要先按下Ctrl和K,再按下F,因为Ctrl+F是查找的快捷键. 也可以先按下Ctrl+K,再按下Ctrl+F. ...
- 取n的某些位
实例十一:取n的某些位 方法:result=(n>>4)&(~(~0<<4)) 取出某数n的低4位. 数值0 0000 0000 ~0 1111 1111 ~0& ...
- Python2 和Python3 的差异总结
一.基本语法差异 1.1 核心类差异 Python3对Unicode字符的原生支持 Python2中使用 ASCII 码作为默认编码方式导致string有两种类型str和unicode,Python3 ...
- nginx 总结
本文转自:http://freeloda.blog.51cto.com/2033581/1288553 ,感谢大神的辛勤付出! 大纲 一.前言 二.环境准备 三.安装与配置Nginx 四.Nginx之 ...