kafka学习(五)Spring Boot 整合 Kafka
文章更新时间:2020/06/08
一、创建Spring boot 工程
创建过程不再描述,创建后的工程结构如下:

POM文件中要加入几个依赖:
<?xml version="1.0" encoding="UTF-8"?>

<project xmlns="http://maven.apache.org/POM/4.0.0" xmlns:xsi="http://www.w3.org/2001/XMLSchema-instance"

         xsi:schemaLocation="http://maven.apache.org/POM/4.0.0 https://maven.apache.org/xsd/maven-4.0.0.xsd">

    <modelVersion>4.0.0</modelVersion>

    <parent>

        <groupId>org.springframework.boot</groupId>

        <artifactId>spring-boot-starter-parent</artifactId>

        <version>2.1.9.RELEASE</version>

        <relativePath/> <!-- lookup parent from repository -->

    </parent>

    <groupId>com.zhbf</groupId>

    <artifactId>springboot</artifactId>

    <version>0.0.1-SNAPSHOT</version>

    <name>springboot</name>

    <description>Demo project for Spring Boot</description>

    <properties>

        <java.version>1.8</java.version>

    </properties>

    <dependencies>

        <dependency>

            <groupId>org.springframework.boot</groupId>

            <artifactId>spring-boot-starter-web</artifactId>

        </dependency>

        <dependency>

            <groupId>org.projectlombok</groupId>

            <artifactId>lombok</artifactId>

            <optional>true</optional>

        </dependency>

        <dependency>

            <groupId>org.springframework.boot</groupId>

            <artifactId>spring-boot-starter-test</artifactId>

            <scope>test</scope>

        </dependency>

        <!--引入kafka依赖-->

        <dependency>

            <groupId>org.springframework.kafka</groupId>

            <artifactId>spring-kafka</artifactId>

        </dependency>

        <!-- 添加 gson 依赖 -->

        <dependency>

            <groupId>com.google.code.gson</groupId>

            <artifactId>gson</artifactId>

            <version>2.8.5</version>

        </dependency>

    </dependencies>

    <build>

        <plugins>

            <plugin>

                <groupId>org.springframework.boot</groupId>

                <artifactId>spring-boot-maven-plugin</artifactId>

            </plugin>

        </plugins>

    </build>

</project>
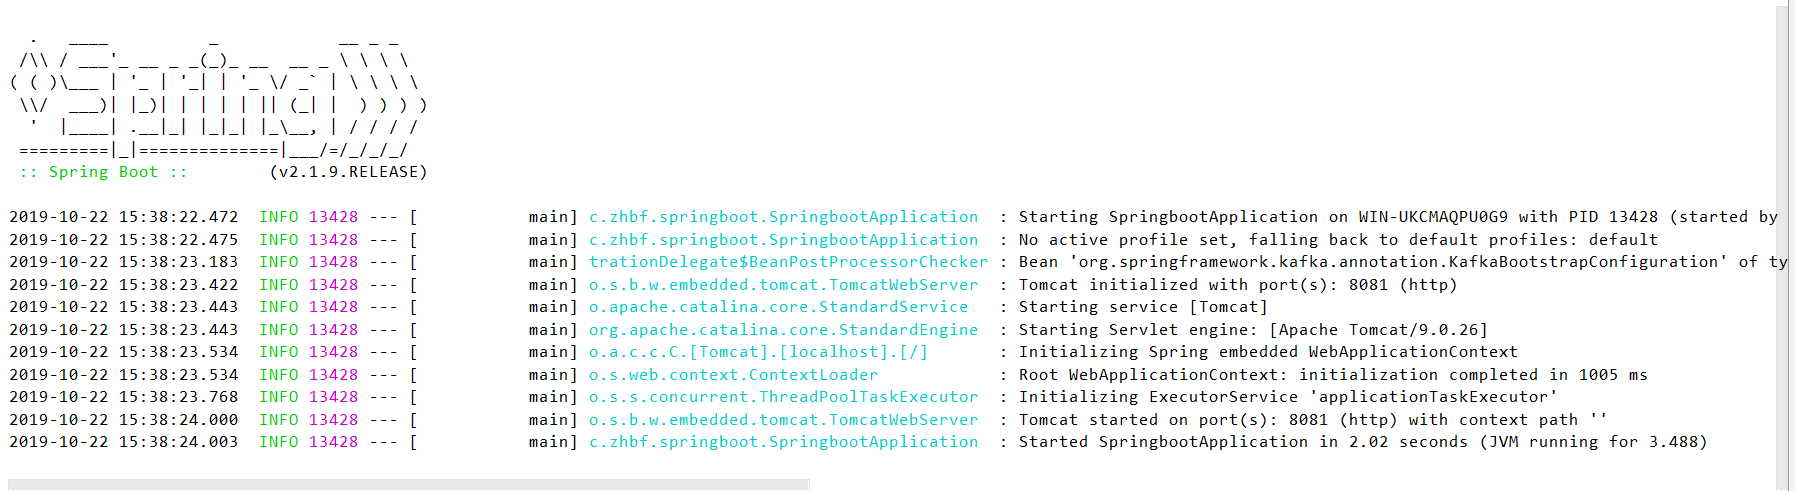
启动SpringbootApplication.java,出现下图界面则说明工程创建好了:
二、创建kafka生产者类,并通过控制器调用
kafka生产者类
/**

 * Kafka消息生产类

 */

@Log

@Component

public class KafkaProducer {

    @Resource

    private KafkaTemplate<String, String> kafkaTemplate;

    @Value("${kafka.topic.user}")

    private String topicUser;//topic名称

    /**

     * 发送用户消息

     *

     * @param user 用户信息

     */

    public void sendUserMessage(User user) {

        GsonBuilder builder = new GsonBuilder();

        builder.setPrettyPrinting();

        builder.setDateFormat("yyyy-MM-dd HH:mm:ss");

        String message = builder.create().toJson(user);

        kafkaTemplate.send(topicUser, message);

        log.info("\n生产消息至Kafka\n" + message);

    }

}
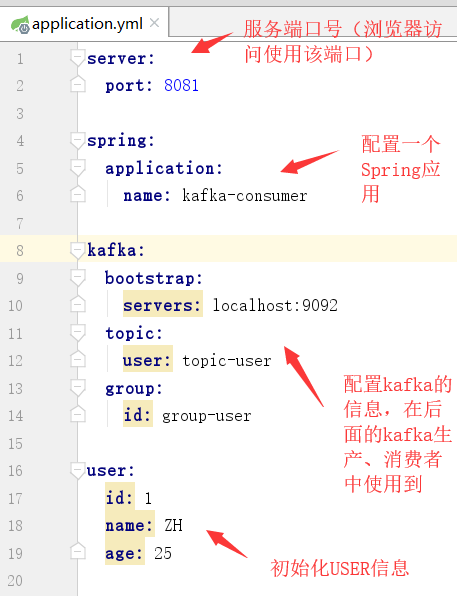
application.yml配置文件
启动ZK、kafka通讯的服务器broker,并启动消费者监听
启动方式参考上一篇文章,戳这里~
配置一个控制器,即调用kafka生成消息的入口
/**

 * 测试控制器

 * PS:@RestController 注解: 该注解是 @Controller 和 @ResponseBody 注解的合体版

 */

@RestController

@RequestMapping("/kafka")

public class KafkaController {

    @Autowired

    private User user;

    @Autowired

    private KafkaProducer kafkaProducer;

    @RequestMapping("/createMsg")

    public void createMsg() {

        kafkaProducer.sendUserMessage(user);

    }

}
启动SpringbootApplication,并通过浏览器访问控制器,生成消息


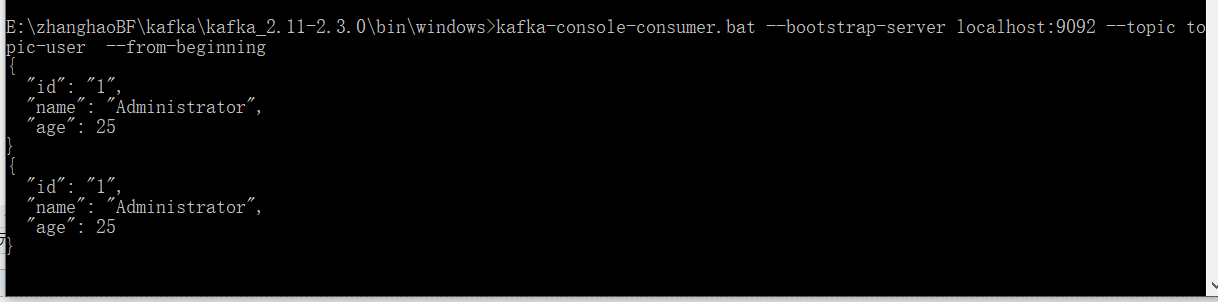
可以看到控制台和消费者窗口都打印了kafka生成的消息。
三、创建kafka消费者类,并通过控制器调用
kafka消费者类
public class KafkaConsumerDemo {
@Value("${kafka.topic.user}")
private String topicUser;//topic名称
public void consume() {
Properties props = new Properties();
// 必须设置的属性
props.put("bootstrap.servers", "127.0.0.1:9092");
props.put("key.deserializer", "org.apache.kafka.common.serialization.StringDeserializer");
props.put("value.deserializer", "org.apache.kafka.common.serialization.StringDeserializer");
props.put("group.id", "group-user");
// 可选设置属性
//提交方式配置
// 自动提交offset,每1s提交一次(提交后的消息不再消费,避免重复消费问题)
props.put("enable.auto.commit", "true");//自动提交offset:true【PS:只有当消息提交后,此消息才不会被再次接受到】
props.put("auto.commit.interval.ms", "1000");//自动提交的间隔
//消费方式配置
/**
* earliest: 当各分区下有已提交的offset时,从提交的offset开始消费;无提交的offset时,从头开始消费
* latest: 当各分区下有已提交的offset时,从提交的offset开始消费;无提交的offset时,消费新产生的该分区下的数据
* none: topic各分区都存在已提交的offset时,从offset后开始消费;只要有一个分区不存在已提交的offset,则抛出异常
*/
props.put("auto.offset.reset", "earliest ");//earliest:当各分区下有已提交的offset时,从提交的offset开始消费;无提交的offset时,从头开始消费
//拉取消息设置
props.put("max.poll.records", "100 ");//每次poll操作最多拉取多少条消息(一般不主动设置,取默认的就好)
//根据上面的配置,新增消费者对象
KafkaConsumer<String, String> consumer = new KafkaConsumer<>(props);
// 订阅topic-user topic
consumer.subscribe(Collections.singletonList(topicUser));
while (true) {
// 从服务器开始拉取数据
ConsumerRecords<String, String> records = consumer.poll(Duration.ofMillis(100));
records.forEach(record -> {
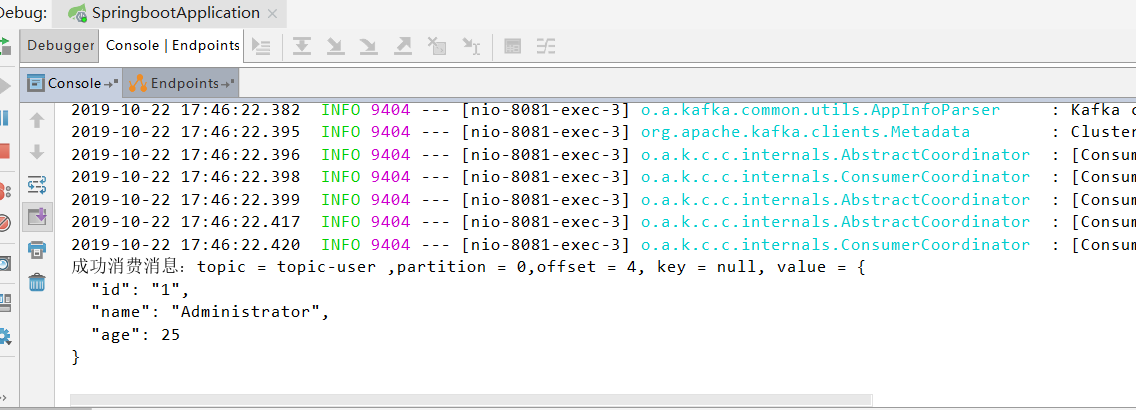
System.out.printf("成功消费消息:topic = %s ,partition = %d,offset = %d, key = %s, value = %s%n", record.topic(), record.partition(), record.offset(), record.key(), record.value());
});
}
}
}
重启SpringbootApplication,并通过浏览器访问控制器,消费消息
kafka学习(五)Spring Boot 整合 Kafka的更多相关文章
- Spring Boot 项目学习 (四) Spring Boot整合Swagger2自动生成API文档
0 引言 在做服务端开发的时候,难免会涉及到API 接口文档的编写,可以经历过手写API 文档的过程,就会发现,一个自动生成API文档可以提高多少的效率. 以下列举几个手写API 文档的痛点: 文档需 ...
- spring boot整合kafka
最近项目需求用到了kafka信息中间件,在此做一次简单的记录,方便以后其它项目用到. 引入依赖 <dependency> <groupId>org.springframewor ...
- Elasticsearch学习(3) spring boot整合Elasticsearch的原生方式
前面我们已经介绍了spring boot整合Elasticsearch的jpa方式,这种方式虽然简便,但是依旧无法解决我们较为复杂的业务,所以原生的实现方式学习能够解决这些问题,而原生的学习方式也是E ...
- Spring Boot2 系列教程(二十五)Spring Boot 整合 Jpa 多数据源
本文是 Spring Boot 整合数据持久化方案的最后一篇,主要和大伙来聊聊 Spring Boot 整合 Jpa 多数据源问题.在 Spring Boot 整合JbdcTemplate 多数据源. ...
- spring boot 2.x 系列 —— spring boot 整合 kafka
文章目录 一.kafka的相关概念: 1.主题和分区 2.分区复制 3. 生产者 4. 消费者 5.broker和集群 二.项目说明 1.1 项目结构说明 1.2 主要依赖 二. 整合 kafka 2 ...
- Elasticsearch学习(1) Spring boot整合Elasticsearch
本文的Spring Boot版本为1.5.9,Elasticsearch版本为2.4.4,话不多说,直接上代码. 一.启动Elasticsearch 在官网上下载Elasticsearch后,打开bi ...
- Elasticsearch学习(4) spring boot整合Elasticsearch的聚合操作
之前已将spring boot原生方式介绍了,接下将结介绍的是Elasticsearch聚合操作.聚合操作一般来说是解决一下复杂的业务,比如mysql中的求和和分组,由于博主踩的坑比较多,所以博客可能 ...
- spring boot 整合kafka 报错 Exception thrown when sending a message with key='null' and payload=JSON to topic proccess_trading_end: TimeoutException: Failed to update metadata after 60000 ms.
org.springframework.kafka.support.LoggingProducerListener- Exception thrown when sending a message w ...
- Spring Boot 项目学习 (三) Spring Boot + Redis 搭建
0 引言 本文主要介绍 Spring Boot 中 Redis 的配置和基本使用. 1 配置 Redis 1. 修改pom.xml,添加Redis依赖 <!-- Spring Boot Redi ...
随机推荐
- golang 判断前缀后缀、包含关系
HasPrefix 判断字符串 s 是否以 prefix 开头:strings.HasPrefix(s, prefix string) bool HasSuffix 判断字符串 s 是否以 suffi ...
- paramiko 模块 ---- python2.7
模拟远程执行命令: ? 1 2 3 4 5 6 7 8 9 10 11 12 13 14 15 16 17 18 19 20 21 import paramiko #设置日志记录 paramiko ...
- Combining STDP and Reward-Modulated STDP in Deep Convolutional Spiking Neural Networks for Digit Recognition
郑重声明:原文参见标题,如有侵权,请联系作者,将会撤销发布! Abstract 灵长类视觉系统激发了深度人工神经网络的发展,使计算机视觉领域发生了革命性的变化.然而,这些网络的能量效率比它们的生物学对 ...
- Linux bpytop工具介绍
一.工具简介: Easy to use, with a game inspired menu system. Full mouse support, all buttons with a highli ...
- 腾讯大牛教你简单的自动化测试模型(Python+Selenium)
今天讲解简单的自动化测试模型,对于刚接触自动化测试的同学,由于没有编程语言的基础,是搞不懂代码里面的函数.封装.包以及其他概念,只是了解字符串.数组.元组及字典这种最基本的名词,更不懂自动化测试框架了 ...
- Linux下关闭和开启IPv6的方法
确认IPV6是否开启 在Linux下确认IPv6是否已经被启用,可以从三个方面确定. 1.使用ifconfig查看自己的IP地址是否含有IPv6地址. eth0 Link encap:Ethernet ...
- jkd1.8 stream
目录 Stream 创建流 通过集合创建,例如Map (常用) 通过数组方式创建 通过Stream静态方法创建 中间操作 筛选和切片 filter limit skip distinct 映射 map ...
- mysql创建事务,分批次刷新大数据
对于需要刷新的大数据量,当一次刷新数据量过大时,事务太大,会导致binLog文件太大,在不同的数据库同步时,可能遇到问题,先整理如下,分批次刷新数据 DELIMITER // # 设置//为结束符,否 ...
- HDU-多校2-Everything Is Generated In Equal Probability(公式+逆元)
Problem Description One day, Y_UME got an integer N and an interesting program which is shown below: ...
- 面试【JAVA基础】多线程
本次整理的内容如下: 1.进程与线程的区别 进程是一个可执行的程序,是系统资源分配的基本单位:线程是进程内相对独立的可执行单元,是操作系统进行任务调度的基本单位. 2.进程间的通信方式 2.1.操作系 ...