【水滴石穿】FirstReactNativeProject
这个是一个小demo,项目地址为https://github.com/prsioner/FirstReactNativeProject
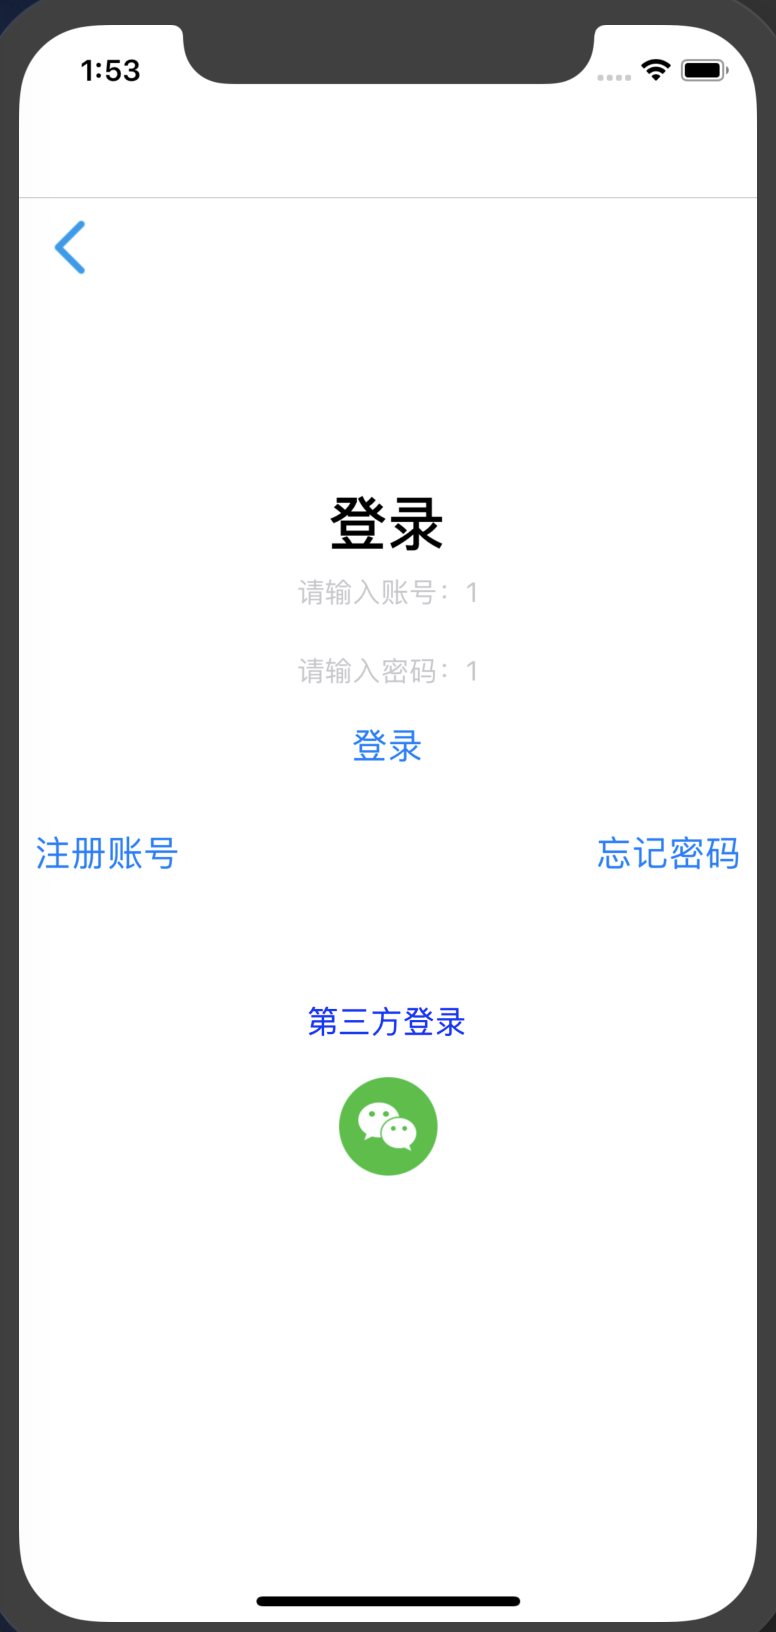
有注册,忘记密码还有登陆,应该是用到了react-navigation,让注册密码和忘记密码可以跳转到页面
先看页面效果
代码如下
从根index.js中可以看到主要内容渲染自App组件
//index.js

/**

 * @format

 */

import {AppRegistry} from 'react-native';

import App from './App';

import {name as appName} from './app.json';

AppRegistry.registerComponent(appName, () => App);
//app.js

/*

*说明:用户登录注册忘记密码等功能的页面跳转

* */

import React, {Component} from 'react';

import {Button, View, Text, Alert, Image, StyleSheet, TextInput,FlatList} from 'react-native';

import { createStackNavigator, createAppContainer } from 'react-navigation'; // Version can be specified in package.json

import loginComponentBack from './img/common_icon_arrow_back.png'

import weChatIcon from './img/common_share_logo_wechat.png'

class UserLoginComponent extends React.Component {

    /*constructor(props) {

        super(props);

        this.state = {account: '',password:''};

    }*/

    render() {

        return (

            // 尝试把`alignItems`改为`flex-start`看看

            // 尝试把`justifyContent`改为`flex-end`看看

            // 尝试把`flexDirection`改为`row`看看

            <View style={{

                flex: 1,

                flexDirection: 'column',

                //justifyContent: 'center',

                alignItems: 'stretch',

            }}>

                {/*返回键*/}

                <View >

                    <Image  source={loginComponentBack} style={styles.arrowback}/>

                </View>

                {/*登录和输入框---alignItems决定了子元素在次轴方向的排列方式(此样式设置在父元素上)*/}

                <View style={{marginTop:100,alignItems:'center'}}>

                    <Text style={styles.loginTextStyle}>登录</Text>

                    <TextInput

                        style={{height: 40}}

                        placeholder="请输入账号:1"

                        onChangeText={(account) => this.setState({account})}

                    />

                    <TextInput

                        style={{height: 40}}

                        placeholder="请输入密码:1"

                        onChangeText={(password) => this.setState({password})}

                    />

                </View>

                <Button

                    style={{marginTop:20,height: 70,paddingLeft:20,paddingRight:20,textColor:'write'}}

                    onPress={() => {

                        //todo 如何友好的判断用户输入

                       /* if((this.state.account== null||this.state.account=="" ||

                                this.state.password == null || this.state.password=="")){

                            Alert.alert("请输入账号或者密码")

                        }else {

                            if(this.state.account ==1 && this.state.password==1){

                                this.props.navigation.navigate('MoviesPage')

                            }else {

                                Alert.alert("请输入正确的账号或者密码")

                            }

                        }*/

                        if(this.state.account ==1 && this.state.password==1){this.props.navigation.navigate('MoviesPage');}

                    }}

                    title="登录"

                />

                {/*第三方登录*/}

                {/* 点击进入另一个页面 */}

                {/* this.props.navigation.navigate('RegisterAccount') */}

                <View style={{marginTop:20,flexDirection:'row',justifyContent:'space-between'}} >

                    <Button

                        style={styles.registerAccount}

                        onPress={() => {

                            this.props.navigation.navigate('RegisterAccount')

                        }}

                        title="注册账号"

                    />

                    <Button

                        style={styles.registerAccount}

                        onPress={() => {

                            this.props.navigation.navigate('ForgetPassword')

                        }}

                        title="忘记密码"

                    />

                </View>

                <View style={{marginTop:60,flexDirection:'column',alignItems:'center'}} >

                    <Text style={styles.registerAccount}>第三方登录</Text>

                    <Image source={weChatIcon} style={styles.weChatIconStyle}/>

                </View>

            </View>

        );

    }

    /**

     * 注册账号的点击事件

     */

    /*registerOnPress(){

        //Alert.alert("点击了注册账号")

        this.props.navigation.navigate('RegisterAccount')

    }

    forgetPassword(){

        this.props.navigation.navigate('ForgetPassword')

    }*/

}

// 这个页面,就是跳转到的页面居然可以跳转到其他页面

class RegisterAccount extends React.Component {

    static navigationOptions={

        title :'Register Account'

    };

    render() {

        return (

            <View style={{ flex: 1, alignItems: 'center', justifyContent: 'center' }}>

                <Text>账号注册</Text>

            </View>

        );

    }

}

var  REQUEST_URL ="https://raw.githubusercontent.com/facebook/react-native/0.51-stable/docs/MoviesExample.json";

class MainMoviesPage extends Component {

    constructor(props) {

        super(props);

        this.state = {

            data: [],

            loaded: false

        };

        // 在ES6中,如果在自定义的函数里使用了this关键字,则需要对其进行“绑定”操作,否则this的指向会变为空

        // 像下面这行代码一样,在constructor中使用bind是其中一种做法(还有一些其他做法,如使用箭头函数等)

        this.fetchData = this.fetchData.bind(this);

    }

    // componentDidMount是 React 组件的一个生命周期方法,它会在组件刚加载完成的时候调用一次,以后不会再被调用

    componentDidMount() {

        this.fetchData();

    }

    fetchData() {

        fetch(REQUEST_URL)

            .then(response => response.json())

            .then(responseData => {

                // 注意,这里使用了this关键字,为了保证this在调用时仍然指向当前组件,我们需要对其进行“绑定”操作

                this.setState({

                    data: this.state.data.concat(responseData.movies),

                    loaded: true

                });

            });

    }

    render() {

        if (!this.state.loaded) {

            return this.renderLoadingView();

        }

        return (

            <FlatList

                data={this.state.data}

                renderItem={this.renderMovie}

                style={styles.list}

                keyExtractor={item => item.id}

            />

        );

    }

    renderLoadingView() {

        return (

            <View style={styles.container}>

                <Text>Loading movies...</Text>

            </View>

        );

    }

    renderMovie({ item }) {

        // { item }是一种“解构”写法,请阅读ES2015语法的相关文档

        // item也是FlatList中固定的参数名,请阅读FlatList的相关文档

        return (

            <View style={styles.container}>

                <Image

                    source={{ uri: item.posters.thumbnail }}

                    style={styles.thumbnail}

                />

                <View style={styles.rightContainer}>

                    <Text style={styles.title}>{item.title}</Text>

                    <Text style={styles.year}>{item.year}</Text>

                </View>

            </View>

        );

    }

}

/**

 * 实现一个计数器

 */

class ForgetPassword extends React.Component {

    static navigationOptions={

        title :'Forget Password'

    };

    render() {

        return (

            <View style={{ flex: 1, alignItems: 'center', justifyContent: 'center' }}>

                <Text>忘记密码</Text>

            </View>

        );

    }

}

//这个里面是定义一些页面

const RootStack = createStackNavigator(

    {

        Home: UserLoginComponent,

        RegisterAccount: RegisterAccount,

        ForgetPassword:ForgetPassword,

        MoviesPage:MainMoviesPage

    },

    {

        initialRouteName: 'Home',

    }

);

const AppContainer = createAppContainer(RootStack);

export default class App extends React.Component {

    render() {

        return <AppContainer />;

    }

}

const styles  = StyleSheet.create({

    arrowback:{

        width:50,

        height:50

    },

    loginTextStyle:{

        color:'black',

        fontWeight: 'bold',

        fontSize: 30,

    },

    registerAccount:{

        color:'blue',

        fontSize:16,

    },

    weChatIconStyle:{

        marginTop:20,

        width:50,

        height:50

    },

    container: {

        flex: 1,

        flexDirection: "row",

        justifyContent: "center",

        alignItems: "center",

        backgroundColor: "#F5FCFF"

    },

    rightContainer: {

        flex: 1

    },

    title: {

        fontSize: 20,

        marginBottom: 8,

        textAlign: "center"

    },

    year: {

        textAlign: "center"

    },

    thumbnail: {

        width: 53,

        height: 81

    },

    list: {

        paddingTop: 20,

        backgroundColor: "#F5FCFF"

    }

});
app.js里面写了很多东西,比如定义呃跳转的页面,还有那个方法,然后跳转的页面居然都写在一个页面里面,神奇
这个叫做腐朽吧~
```.js
//page/user/navigation_jump_demo.js
/**
- 页面跳转:
- https://reactnavigation.org/docs/zh-Hans/navigating.html
- 说明:
- 定义了一个具有两个路由(Home和Details)的 stack navigator ,
- 我们让用户从Home导航到Details,以便看到另一个页面
*/
import React from 'react';
import { Button, View, Text } from 'react-native';
import { createStackNavigator, createAppContainer } from 'react-navigation'; // Version can be specified in package.json
class HomeScreen extends React.Component {
render() {
return (
<View style={{ flex: 1, alignItems: 'center', justifyContent: 'center' }}>
Home Screen
<Button
title="Go to Details"
onPress={() => this.props.navigation.navigate('Details')}
/>
);
}
}
class DetailsScreen extends React.Component {
render() {
return (
<View style={{ flex: 1, alignItems: 'center', justifyContent: 'center' }}>
Details Screen
);
}
}
const RootStack = createStackNavigator(
{
Home: HomeScreen,
Details: DetailsScreen,
},
{
initialRouteName: 'Home',
}
);
const AppContainer = createAppContainer(RootStack);
export default class App extends React.Component {
render() {
return ;
}
}
```js

//page/user/UserLoginComponent.js

/*

*说明:用户登录注册忘记密码等功能的页面跳转

* */

import React from 'react';

import {Button, View, Text, Alert, Image, StyleSheet, TextInput} from 'react-native';

import { createStackNavigator, createAppContainer } from 'react-navigation'; // Version can be specified in package.json

import loginComponentBack from './img/common_icon_arrow_back.png'

import weChatIcon from './img/common_share_logo_wechat.png'

class UserLoginComponent extends React.Component {

    /*constructor(props) {

        super(props);

        this.state = {account: '',password:''};

    }*/

    render() {

        return (

            // 尝试把`alignItems`改为`flex-start`看看

            // 尝试把`justifyContent`改为`flex-end`看看

            // 尝试把`flexDirection`改为`row`看看

            <View style={{

                flex: 1,

                flexDirection: 'column',

                //justifyContent: 'center',

                alignItems: 'stretch',

            }}>

                {/*返回键*/}

                <View >

                    <Image  source={loginComponentBack} style={styles.arrowback}/>

                </View>

                {/*登录和输入框---alignItems决定了子元素在次轴方向的排列方式(此样式设置在父元素上)*/}

                <View style={{marginTop:100,alignItems:'center'}}>

                    <Text style={styles.loginTextStyle}>登录</Text>

                    <TextInput

                        style={{height: 40}}

                        placeholder="请输入账号"

                        onChangeText={(account) => this.setState({account})}

                    />

                    <TextInput

                        style={{height: 40}}

                        placeholder="请输入密码"

                        onChangeText={(password) => this.setState({password})}

                    />

                </View>

                <Button

                    style={{marginTop:20,height: 70,paddingLeft:20,paddingRight:20,textColor:'write'}}

                    onPress={() => {

                        Alert.alert((this.state.account==null||this.state.account=="" ||

                            this.state.password == null || this.state.password=="")? "请输入账号或者密码":"账号:"+this.state.account+'\n'+"密码:"+this.state.password);

                    }}

                    title="登录"

                />

                {/*第三方登录*/}

                <View style={{marginTop:20,flexDirection:'row',justifyContent:'space-between'}} >

                    <Button

                        style={styles.registerAccount}

                        onPress={() => {

                            this.props.navigation.navigate('RegisterAccount')

                        }}

                        title="注册账号"

                    />

                    <Button

                        style={styles.registerAccount}

                        onPress={() => {

                            this.props.navigation.navigate('ForgetPassword')

                        }}

                        title="忘记密码"

                    />

                </View>

                <View style={{marginTop:60,flexDirection:'column',alignItems:'center'}} >

                    <Text style={styles.registerAccount}>第三方登录</Text>

                    <Image source={weChatIcon} style={styles.weChatIconStyle}/>

                </View>

            </View>

        );

    }

    /**

     * 注册账号的点击事件

     */

    /*registerOnPress(){

        //Alert.alert("点击了注册账号")

        this.props.navigation.navigate('RegisterAccount')

    }

    forgetPassword(){

        this.props.navigation.navigate('ForgetPassword')

    }*/

}

class RegisterAccount extends React.Component {

    static navigationOptions={

        title :'Register Account'

    };

    render() {

        return (

            <View style={{ flex: 1, alignItems: 'center', justifyContent: 'center' }}>

                <Text>账号注册</Text>

            </View>

        );

    }

}

class ForgetPassword extends React.Component{

    static navigationOptions={

        title :'Forget Password'

    };

    render(){

        return (

            <View>

                <Text>忘记密码页面</Text>

            </View>

        )

    }

}

const RootStack = createStackNavigator(

    {

        Home: UserLoginComponent,

        RegisterAccount: RegisterAccount,

        ForgetPassword:ForgetPassword

    },

    {

        initialRouteName: 'Home',

    }

);

const AppContainer = createAppContainer(RootStack);

export default class App extends React.Component {

    render() {

        return <AppContainer />;

    }

}

const styles  = StyleSheet.create({

    arrowback:{

        width:50,

        height:50

    },

    loginTextStyle:{

        color:'black',

        fontWeight: 'bold',

        fontSize: 30,

    },

    registerAccount:{

        color:'blue',

        fontSize:16,

    },

    weChatIconStyle:{

        marginTop:20,

        width:50,

        height:50

    }

});
这个项目不行啊~~~
【水滴石穿】FirstReactNativeProject的更多相关文章
- iOS 开发笔记 -- 各种细枝末节的知识(水滴石穿)
在此总结整理,遇到的各种的小问题: 1.通过从字典(数组)中取出的NSString的length==0 作为if的判断条件导致的carsh: 由于在字典中通过Key取出值之后直接做了length相关操 ...
- 【水滴石穿】react-native-book
先推荐一个学习的地址:https://ke.qq.com/webcourse/index.html#cid=203313&term_id=100240778&taid=12778558 ...
- 【水滴石穿】rnTest
其实就是一个小的demo,不过代码分的挺精巧的 先放地址:https://github.com/linchengzzz/rnTest 来看看效果 确实没有什么可以说的,不过代码部分还行 先入口文件 / ...
- 【水滴石穿】rn_statusbar
先放项目地址https://github.com/hezhii/rn_statusbar 来看一下效果 咩有感觉很怎么样,看代码 根入口文件 //index.js //看代码我们知道入口是app.js ...
- 【水滴石穿】react-native-ble-demo
项目的话,是想打开蓝牙,然后连接设备 点击已经连接的设备,我们会看到一些设备 不过我这边在开启蓝牙的时候报错了 先放作者的项目地址: https://github.com/hezhii/react-n ...
- 【水滴石穿】ReactNative-Redux-Thunk
老实说,运行出来的项目让人失望,毕竟我想看各种有趣的demo啊- 先放上源码地址:https://github.com/ludejun/ReactNative-Redux-Thunk 我们来一起看看代 ...
- 【水滴石穿】mobx-todos
我觉得代码在有些程序员手里,就好像是画笔,可以创造很多东西 不要觉得创意少就叫没有创意,每天进步一点点,世界更美好 首先源码地址为:https://github.com/byk04712/mobx-t ...
- 【水滴石穿】ReactNativeMobxFrame
项目地址如下:https://github.com/FTD-ZF/ReactNativeMobxFrame 应该可以说的是,项目也只是一个花架子,不过底部的tab稍微改变了 我们一起来看代码 //in ...
- 【水滴石穿】react-native-aze
说个题外话,早上打开电脑的时候,电脑变成彩色的了,锅是我曾经安装的一个chrome扩展,没有经过我的同意开启了 (也许是昨天迷迷糊糊开启了) 上午运行项目都不成功,还以为被黑客攻击了---然后下午就排 ...
随机推荐
- goland破解
PyCharm是由著名的JetBrains公司所打造的一款功能强大的Python IDE,它具有一般IDE都具备的功能,并且使用起来非常方便好用.最近需求PyCharm激活码的网友非常多,小编就在这里 ...
- mapreduce.Job: Running job: job_1553100392548_0001
这几天一直在尝试一个mapreduce的例子,但是一直都是卡在mapreduce.Job: Running job: job_1553100392548_0001,查看日志也不报错,查看每个配置文件没 ...
- Python基本数据类型之字典,集合,range
注: ange()是python的内置函数,用于创建整数的列表,可以生成递增或者递减的数列.ange也是python的内置函数,用于创造xrange对象用于迭代. 在python3中,range() ...
- html常用标签详解3-a标签
a标签 1.a标签的属性 a标签属于行内元素标签,双标签<a></a> href:a标签的跳转地址 target:打开方式(_self自身:_blank:新窗口) title: ...
- Mybatis框架+原理
https://www.cnblogs.com/luoxn28/p/6417892.html(转载,蛮详细的)
- 【linux之路】常用的命令
用bash插入代码 1.查看ubuntu的版本号 lsb_release –a //linux标准基础(Linux Standards Base):release发布 2.查看Ubuntu的内核 un ...
- LUOGU P4074 [WC2013]糖果公园 (树上带修莫队)
传送门 解题思路 树上带修莫队,搞了两天..终于开O2+卡常大法贴边过了...bzoj上跑了183s..其实就是把树上莫队和带修莫队结合到一起,首先求出括号序,就是进一次出一次那种的,然后如果求两个点 ...
- JDK中有关23个经典设计模式的示例
Creational patterns Abstract factory (recognizeable by creational methods returning an abstract/inte ...
- 通过原生JS打印一个空心菱形图案
<!doctype html> <html> <head> <meta charset="utf-8"> <title> ...
- leetcode 850. Rectangle Area II
给定一些矩形2 求覆盖面积 矩形不超过200个 1 算法1 朴素思想 虽然朴素但是代码却有意思 利用容斥原理 复杂度高达 N*2^N class Solution: def intersect(rec ...