Unity编辑器扩展-Custom List, displaying data your way
本文转自http://catlikecoding.com/unity/tutorials/editor/custom-list/
Custom List, displaying data your way
- create a custom editor
- use
SerializedObject - manipulate a
SerializedPropertythat represents an array or list - use an enumeration for option flags
- use GUI buttons
This tutorial comes after the Custom Data tutorial.
This tutorial is for Unity version 4.3 and above. The older version can still be found here.
 Customized lists.
Creating Test Data
We start with the finished Custom Data tutorial project, or by creating a new empty project and importing custom-data.unitypackage.
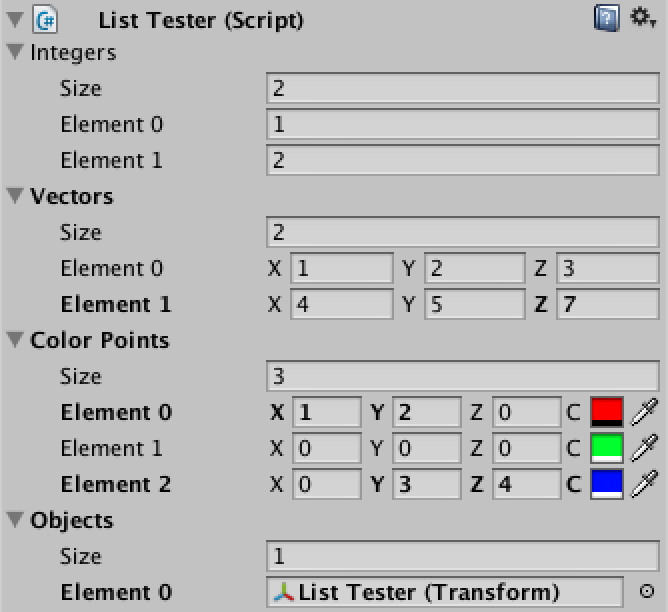
Then we create a new test script named ListTester with some test arrays, and make a new prefab and prefab instance with it, so we can see it all works as expected.
using UnityEngine;

public class ListTester : MonoBehaviour {

	public int[] integers;

	public Vector3[] vectors;

	public ColorPoint[] colorPoints;

	public Transform[] objects;

}
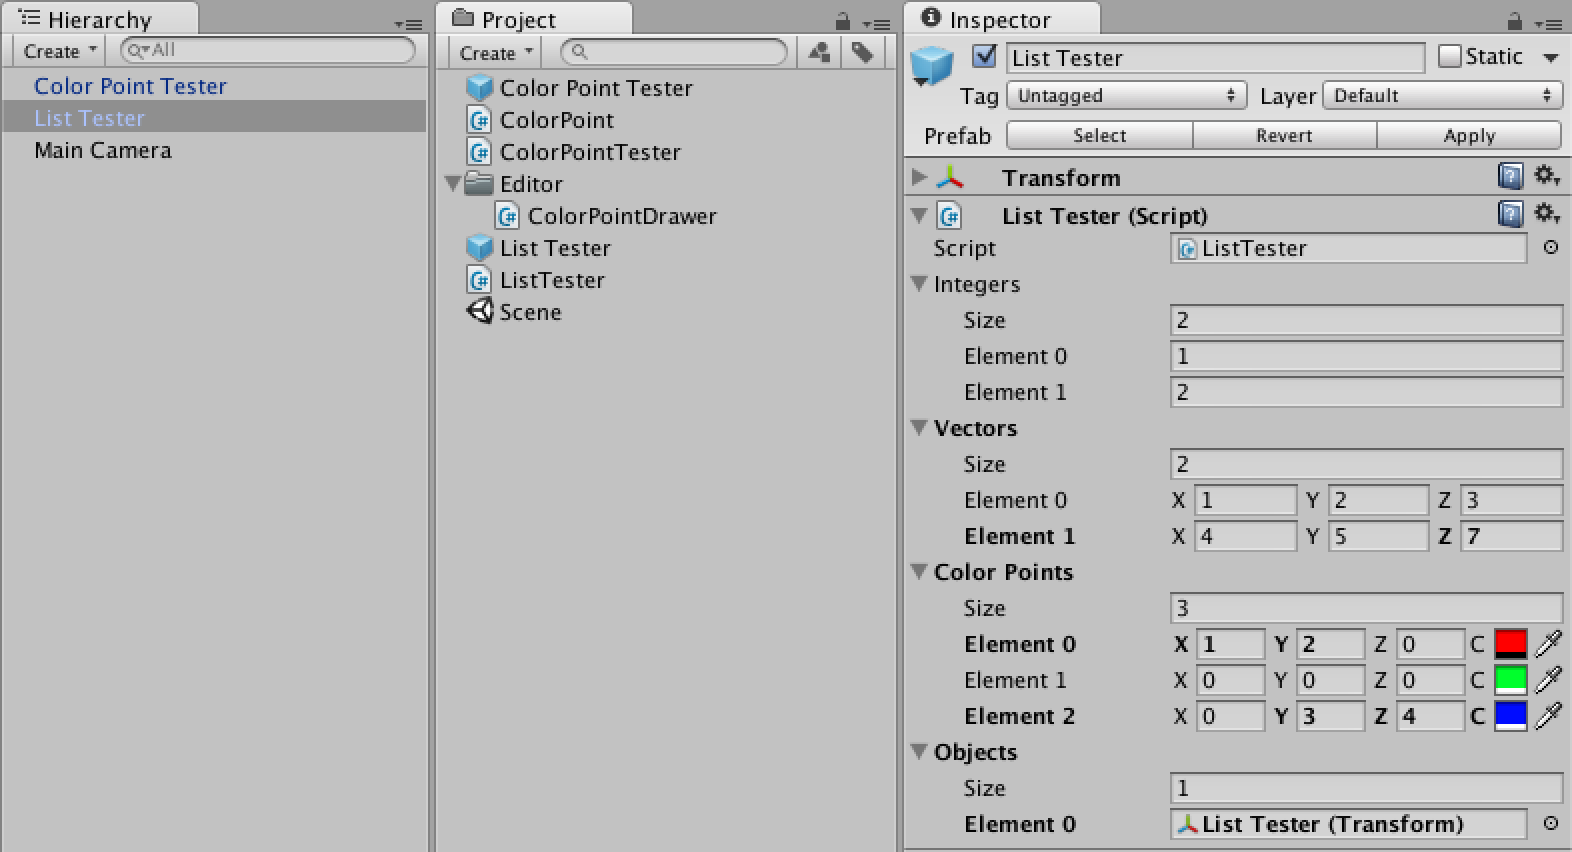 New test object, with wide inspector.
Creating a Custom Inspector
UnityEditor.Editor, and apply the UnityEditor.CustomEditor attribute to tell Unity that we want it to do the drawing for our component.using UnityEditor;
using UnityEngine; [CustomEditor(typeof(ListTester))]
public class ListTesterInspector : Editor {
}
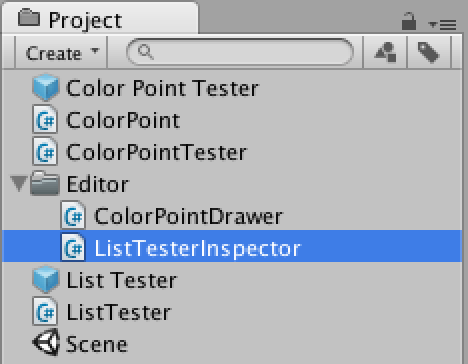 Custom inspector script.
OnInspectorGUI method of the Editorclass. Leaving the method empty will result in an empty inspector as well. public override void OnInspectorGUI () {
}
![]() Empty inspector.
Empty inspector.
SerializedObject instead of a single SerializedProperty. Secondly, an instance of the editor exists as long as the object stays selected, keeping a reference to its data instead of getting it via a method parameter. Finally, we can use EditorGUILayout, which takes care of positioning for us.
We can get to the serialized object via the serializedObject property. To prepare it for editing, we must first synchronize it with the component it represents, by calling its Update method. Then we can show the properties. And after we are done, we have to commit any changes via its ApplyModifiedProperties method. This also takes care of Unity's undo history. In between these two is where we'll draw our properties.
	public override void OnInspectorGUI () {

		serializedObject.Update();

		EditorGUILayout.PropertyField(serializedObject.FindProperty("integers"));

		EditorGUILayout.PropertyField(serializedObject.FindProperty("vectors"));

		EditorGUILayout.PropertyField(serializedObject.FindProperty("colorPoints"));

		EditorGUILayout.PropertyField(serializedObject.FindProperty("objects"));

		serializedObject.ApplyModifiedProperties();

	}
 Inspector with empty properties.
PropertyField doesn't show any children – like array elements – unless we tell it to do so. public override void OnInspectorGUI () {
serializedObject.Update();
EditorGUILayout.PropertyField(serializedObject.FindProperty("integers"), true);
EditorGUILayout.PropertyField(serializedObject.FindProperty("vectors"), true);
EditorGUILayout.PropertyField(serializedObject.FindProperty("colorPoints"), true);
EditorGUILayout.PropertyField(serializedObject.FindProperty("objects"), true);
serializedObject.ApplyModifiedProperties();
}
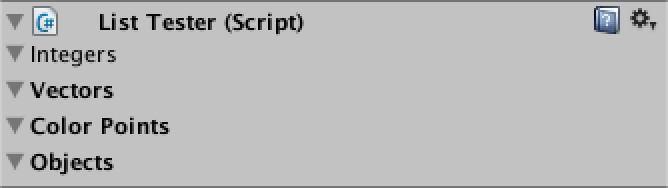
 Inspector with children.
Creating an Editor List
PropertyFieldmethod. We will name this method Show and put it in its own static utility class, so we can use it wherever we want. We'll name this class EditorList and place it in the Editor folder.using UnityEditor;
using UnityEngine; public static class EditorList { public static void Show (SerializedProperty list) {
}
}
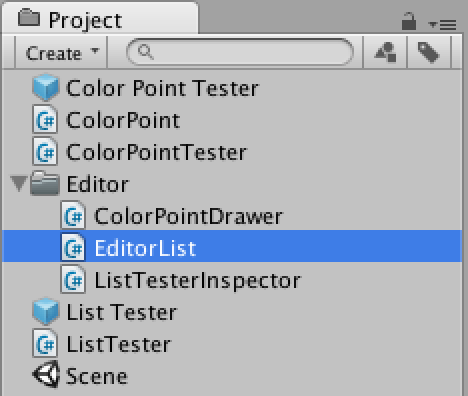 EditorList script.
	public override void OnInspectorGUI () {

		serializedObject.Update();

		EditorList.Show(serializedObject.FindProperty("integers"));

		EditorList.Show(serializedObject.FindProperty("vectors"));

		EditorList.Show(serializedObject.FindProperty("colorPoints"));

		EditorList.Show(serializedObject.FindProperty("objects"));

		serializedObject.ApplyModifiedProperties();

	}
EditorGUILayout.PropertyField without having it show the children of the list. Then we can show the list elements ourselves with help of the arraySize property and the GetArrayElementAtIndex method of SerializedProperty. We'll leave the size for later.public static void Show (SerializedProperty list) {
EditorGUILayout.PropertyField(list);
for (int i = 0; i < list.arraySize; i++) {
EditorGUILayout.PropertyField(list.GetArrayElementAtIndex(i));
}
}
 Lists without indented elements.
Properly Indenting
	public static void Show (SerializedProperty list) {

		EditorGUILayout.PropertyField(list);

		EditorGUI.indentLevel += 1;

		for (int i = 0; i < list.arraySize; i++) {

			EditorGUILayout.PropertyField(list.GetArrayElementAtIndex(i));

		}

		EditorGUI.indentLevel -= 1;

	}
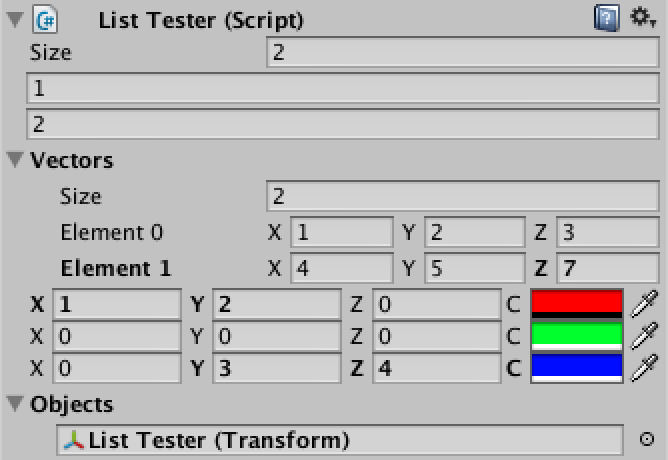
 Messed up indenting.
ColorPointDrawer behaves well.public override void OnGUI (Rect position, SerializedProperty property, GUIContent label) {
int oldIndentLevel = EditorGUI.indentLevel;
label = EditorGUI.BeginProperty(position, label, property);
Rect contentPosition = EditorGUI.PrefixLabel(position, label);
if (position.height > 16f) {
position.height = 16f;
EditorGUI.indentLevel += 1;
contentPosition = EditorGUI.IndentedRect(position);
contentPosition.y += 18f;
}
contentPosition.width *= 0.75f;
EditorGUI.indentLevel = 0;
EditorGUI.PropertyField(contentPosition, property.FindPropertyRelative("position"), GUIContent.none);
contentPosition.x += contentPosition.width;
contentPosition.width /= 3f;
EditorGUIUtility.labelWidth = 14f;
EditorGUI.PropertyField(contentPosition, property.FindPropertyRelative("color"), new GUIContent("C"));
EditorGUI.EndProperty();
EditorGUI.indentLevel = oldIndentLevel;
}
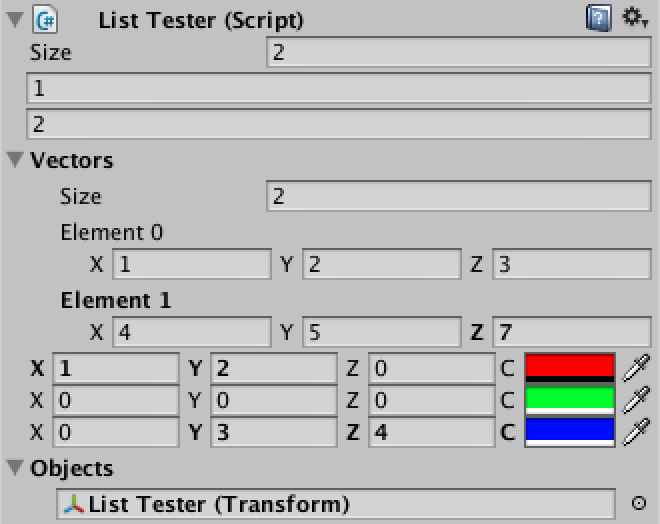
 Correct indenting, but no collapsing.
Collapsing Lists
isExpanded property of our list.public static void Show (SerializedProperty list) {
EditorGUILayout.PropertyField(list);
EditorGUI.indentLevel += 1;
if (list.isExpanded) {
for (int i = 0; i < list.arraySize; i++) {
EditorGUILayout.PropertyField(list.GetArrayElementAtIndex(i));
}
}
EditorGUI.indentLevel -= 1;
}
 Correctly collapsing.
Showing the Size
	public static void Show (SerializedProperty list) {

		EditorGUILayout.PropertyField(list);

		EditorGUI.indentLevel += 1;

		if (list.isExpanded) {

			EditorGUILayout.PropertyField(list.FindPropertyRelative("Array.size"));

			for (int i = 0; i < list.arraySize; i++) {

				EditorGUILayout.PropertyField(list.GetArrayElementAtIndex(i));

			}

		}

		EditorGUI.indentLevel -= 1;

	}
 Complete lists.
Customizing the List
	public static void Show (SerializedProperty list, bool showListSize = true) {

		EditorGUILayout.PropertyField(list);

		EditorGUI.indentLevel += 1;

		if (list.isExpanded) {

			if (showListSize) {

				EditorGUILayout.PropertyField(list.FindPropertyRelative("Array.size"));

			}

			for (int i = 0; i < list.arraySize; i++) {

				EditorGUILayout.PropertyField(list.GetArrayElementAtIndex(i));

			}

		}

		EditorGUI.indentLevel -= 1;

	}
	public override void OnInspectorGUI () {

		serializedObject.Update();

		EditorList.Show(serializedObject.FindProperty("integers"));

		EditorList.Show(serializedObject.FindProperty("vectors"));

		EditorList.Show(serializedObject.FindProperty("colorPoints"), false);

		EditorList.Show(serializedObject.FindProperty("objects"), false);

		serializedObject.ApplyModifiedProperties();

	}
 Hiding some of the list sizes.
	public static void Show (SerializedProperty list, bool showListSize = true, bool showListLabel = true) {

		if (showListLabel) {

			EditorGUILayout.PropertyField(list);

			EditorGUI.indentLevel += 1;

		}

		if (!showListLabel || list.isExpanded) {

			if (showListSize) {

				EditorGUILayout.PropertyField(list.FindPropertyRelative("Array.size"));

			}

			for (int i = 0; i < list.arraySize; i++) {

				EditorGUILayout.PropertyField(list.GetArrayElementAtIndex(i));

			}

		}

		if (showListLabel) {

			EditorGUI.indentLevel -= 1;

		}

	}
	public override void OnInspectorGUI () {

		serializedObject.Update();

		EditorList.Show(serializedObject.FindProperty("integers"), true, false);

		EditorList.Show(serializedObject.FindProperty("vectors"));

		EditorList.Show(serializedObject.FindProperty("colorPoints"), false, false);

		EditorList.Show(serializedObject.FindProperty("objects"), false);

		serializedObject.ApplyModifiedProperties();

	}
 Hiding some of the list labels.
Using Flags
The first thing we need to do is create an enumeration of all our options. We name itEditorListOption and give it the System.Flags attribute. We place it in its own script file or in the same script as EditorList, but outside of the class.
using UnityEditor;

using UnityEngine;

using System;

[Flags]

public enum EditorListOption {

}
|.[Flags]
public enum EditorListOption {
None = 0,
ListSize = 1,
ListLabel = 2,
Default = ListSize | ListLabel
}
Show method can now be replaced with a single options parameter. Then we'll extract the individual options with the help of the bitwise AND operator &and store them in local variables to keep things clear.public static void Show (SerializedProperty list, EditorListOption options = EditorListOption.Default) {
bool
showListLabel = (options & EditorListOption.ListLabel) != 0,
showListSize = (options & EditorListOption.ListSize) != 0; if (showListLabel) {
EditorGUILayout.PropertyField(list);
EditorGUI.indentLevel += 1;
}
if (!showListLabel || list.isExpanded) {
if (showListSize) {
EditorGUILayout.PropertyField(list.FindPropertyRelative("Array.size"));
}
for (int i = 0; i < list.arraySize; i++) {
EditorGUILayout.PropertyField(list.GetArrayElementAtIndex(i));
}
}
if (showListLabel) {
EditorGUI.indentLevel -= 1;
}
}
	public override void OnInspectorGUI () {

		serializedObject.Update();

		EditorList.Show(serializedObject.FindProperty("integers"), EditorListOption.ListSize);

		EditorList.Show(serializedObject.FindProperty("vectors"));

		EditorList.Show(serializedObject.FindProperty("colorPoints"), EditorListOption.None);

		EditorList.Show(serializedObject.FindProperty("objects"), EditorListOption.ListLabel);

		serializedObject.ApplyModifiedProperties();

	}
Hiding the Element Labels
[Flags]

public enum EditorListOption {

	None = 0,

	ListSize = 1,

	ListLabel = 2,

	ElementLabels = 4,

	Default = ListSize | ListLabel | ElementLabels,

	NoElementLabels = ListSize | ListLabel

}
Show method is extract this option and perform a simple check. Let's also move the element loop to its own private method, for clarity.public static void Show (SerializedProperty list, EditorListOption options = EditorListOption.Default) {
bool
showListLabel = (options & EditorListOption.ListLabel) != 0,
showListSize = (options & EditorListOption.ListSize) != 0; if (showListLabel) {
EditorGUILayout.PropertyField(list);
EditorGUI.indentLevel += 1;
}
if (!showListLabel || list.isExpanded) {
if (showListSize) {
EditorGUILayout.PropertyField(list.FindPropertyRelative("Array.size"));
}
ShowElements(list, options);
}
if (showListLabel) {
EditorGUI.indentLevel -= 1;
}
} private static void ShowElements (SerializedProperty list, EditorListOption options) {
bool showElementLabels = (options & EditorListOption.ElementLabels) != 0; for (int i = 0; i < list.arraySize; i++) {
if (showElementLabels) {
EditorGUILayout.PropertyField(list.GetArrayElementAtIndex(i));
}
else {
EditorGUILayout.PropertyField(list.GetArrayElementAtIndex(i), GUIContent.none);
}
}
}
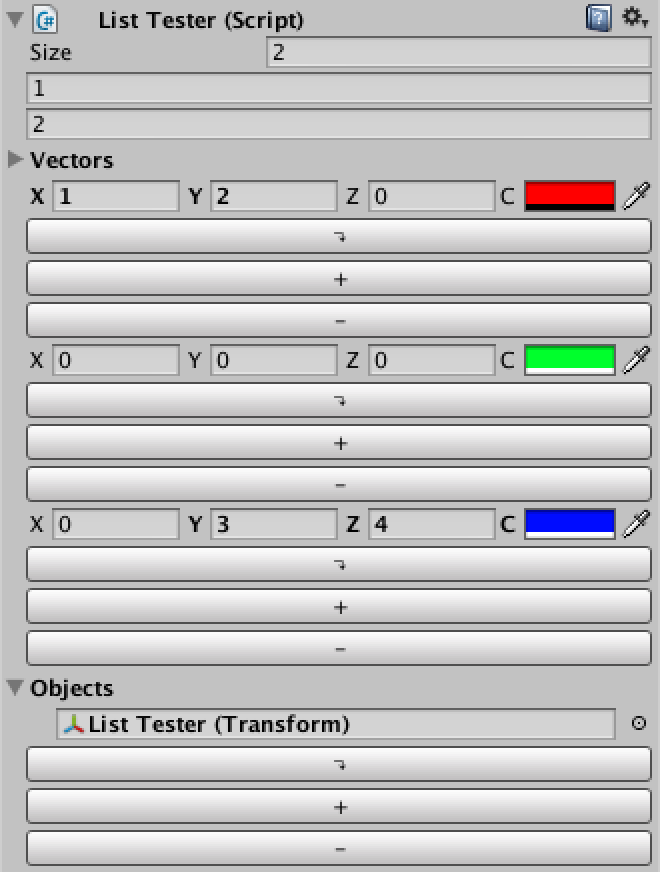
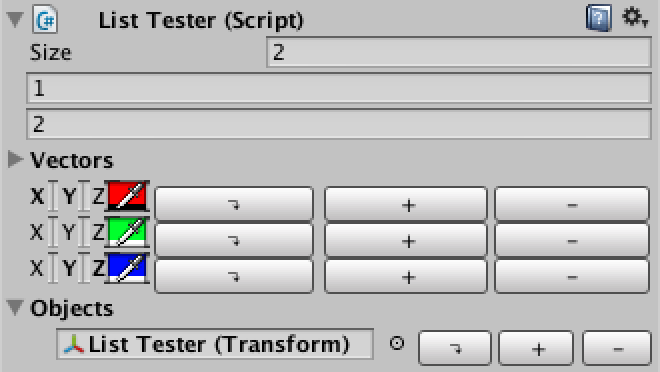
 Hiding some of the element labels, wide and narrow.
ColorPointDrawer does not claim an extra line when it does not receive a label.public override float GetPropertyHeight (SerializedProperty property, GUIContent label) {
return label != GUIContent.none && Screen.width < 333 ? (16f + 18f) : 16f;
}
 No longer needlessly claiming extra lines.
Adding Buttons
First we'll add an option for buttons, and also a convenient option to activate everything.
[Flags]

public enum EditorListOption {

	None = 0,

	ListSize = 1,

	ListLabel = 2,

	ElementLabels = 4,

	Buttons = 8,

	Default = ListSize | ListLabel | ElementLabels,

	NoElementLabels = ListSize | ListLabel,

	All = Default | Buttons

}
We predefine static GUIContent for these buttons and include handy tooltips as well. We also add a separate method for showing the buttons and call it after each element, if desired.
	private static GUIContent

		moveButtonContent = new GUIContent("\u21b4", "move down"),

		duplicateButtonContent = new GUIContent("+", "duplicate"),

		deleteButtonContent = new GUIContent("-", "delete");

	private static void ShowElements (SerializedProperty list, EditorListOption options) {

		bool

			showElementLabels = (options & EditorListOption.ElementLabels) != 0,

			showButtons = (options & EditorListOption.Buttons) != 0;

		for (int i = 0; i < list.arraySize; i++) {

			if (showElementLabels) {

				EditorGUILayout.PropertyField(list.GetArrayElementAtIndex(i));

			}

			else {

				EditorGUILayout.PropertyField(list.GetArrayElementAtIndex(i), GUIContent.none);

			}

			if (showButtons) {

				ShowButtons();

			}

		}

	}

	private static void ShowButtons () {

		GUILayout.Button(moveButtonContent);

		GUILayout.Button(duplicateButtonContent);

		GUILayout.Button(deleteButtonContent);

	}
	public override void OnInspectorGUI () {

		serializedObject.Update();

		EditorList.Show(serializedObject.FindProperty("integers"), EditorListOption.ListSize);

		EditorList.Show(serializedObject.FindProperty("vectors"));

		EditorList.Show(serializedObject.FindProperty("colorPoints"), EditorListOption.Buttons);

		EditorList.Show(

			serializedObject.FindProperty("objects"),

			EditorListOption.ListLabel | EditorListOption.Buttons);

		serializedObject.ApplyModifiedProperties();

	}
 Quite huge buttons.
EditorGUILayout.BeginHorizontal andEditorGUILayout.EndHorizontal.private static void ShowElements (SerializedProperty list, EditorListOption options) {
bool
showElementLabels = (options & EditorListOption.ElementLabels) != 0,
showButtons = (options & EditorListOption.Buttons) != 0; for (int i = 0; i < list.arraySize; i++) {
if (showButtons) {
EditorGUILayout.BeginHorizontal();
}
if (showElementLabels) {
EditorGUILayout.PropertyField(list.GetArrayElementAtIndex(i));
}
else {
EditorGUILayout.PropertyField(list.GetArrayElementAtIndex(i), GUIContent.none);
}
if (showButtons) {
ShowButtons();
EditorGUILayout.EndHorizontal();
}
}
}
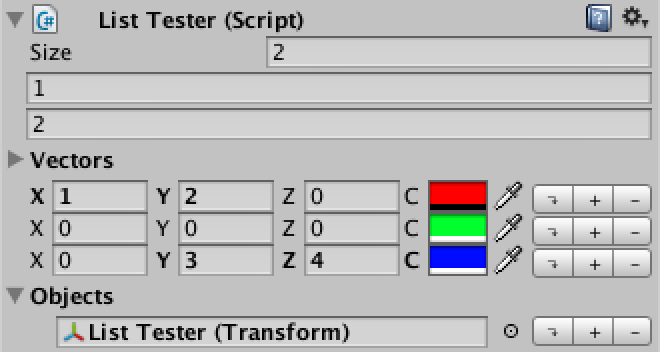
 Pretty large buttons.
	private static GUILayoutOption miniButtonWidth = GUILayout.Width(20f);

	private static void ShowButtons () {

		GUILayout.Button(moveButtonContent, EditorStyles.miniButtonLeft, miniButtonWidth);

		GUILayout.Button(duplicateButtonContent, EditorStyles.miniButtonMid, miniButtonWidth);

		GUILayout.Button(deleteButtonContent, EditorStyles.miniButtonRight, miniButtonWidth);

	}
 Mini buttons.
Fortunately, adding functionality to the buttons is very simple, as we can directly use the methods for array manipulation provided by SerializedProperty. We need the list and the current element index for this to work, so we add them as parameters to our ShowButtons method and pass them along inside the loop of ShowElements.
- How does
Buttonwork? - What happens when we move the bottom element?
- What are the contents of a new item?
	private static void ShowElements (SerializedProperty list, EditorListOption options) {

		bool

			showElementLabels = (options & EditorListOption.ElementLabels) != 0,

			showButtons = (options & EditorListOption.Buttons) != 0;

		for (int i = 0; i < list.arraySize; i++) {

			if (showButtons) {

				EditorGUILayout.BeginHorizontal();

			}

			if (showElementLabels) {

				EditorGUILayout.PropertyField(list.GetArrayElementAtIndex(i));

			}

			else {

				EditorGUILayout.PropertyField(list.GetArrayElementAtIndex(i), GUIContent.none);

			}

			if (showButtons) {

				ShowButtons(list, i);

				EditorGUILayout.EndHorizontal();

			}

		}

	}

	private static void ShowButtons (SerializedProperty list, int index) {

		if (GUILayout.Button(moveButtonContent, EditorStyles.miniButtonLeft, miniButtonWidth)) {

			list.MoveArrayElement(index, index + 1);

		}

		if (GUILayout.Button(duplicateButtonContent, EditorStyles.miniButtonMid, miniButtonWidth)) {

			list.InsertArrayElementAtIndex(index);

		}

		if (GUILayout.Button(deleteButtonContent, EditorStyles.miniButtonRight, miniButtonWidth)) {

			list.DeleteArrayElementAtIndex(index);

		}

	}
While this is how Unity handles deletion in this case, it is weird. Instead, we want the element to always be removed, not sometimes cleared. We can enforce this by checking whether the list's size has remained the same after deleting the element. If so, it has only been cleared and we should delete it again, for real this time.
	private static void ShowButtons (SerializedProperty list, int index) {

		if (GUILayout.Button(moveButtonContent, EditorStyles.miniButtonLeft, miniButtonWidth)) {

			list.MoveArrayElement(index, index + 1);

		}

		if (GUILayout.Button(duplicateButtonContent, EditorStyles.miniButtonMid, miniButtonWidth)) {

			list.InsertArrayElementAtIndex(index);

		}

		if (GUILayout.Button(deleteButtonContent, EditorStyles.miniButtonRight, miniButtonWidth)) {

			int oldSize = list.arraySize;

			list.DeleteArrayElementAtIndex(index);

			if (list.arraySize == oldSize) {

				list.DeleteArrayElementAtIndex(index);

			}

		}

	}
	private static GUIContent

		moveButtonContent = new GUIContent("\u21b4", "move down"),

		duplicateButtonContent = new GUIContent("+", "duplicate"),

		deleteButtonContent = new GUIContent("-", "delete"),

		addButtonContent = new GUIContent("+", "add element");

	private static void ShowElements (SerializedProperty list, EditorListOption options) {

		bool

			showElementLabels = (options & EditorListOption.ElementLabels) != 0,

			showButtons = (options & EditorListOption.Buttons) != 0;

		for (int i = 0; i < list.arraySize; i++) {

			if (showButtons) {

				EditorGUILayout.BeginHorizontal();

			}

			if (showElementLabels) {

				EditorGUILayout.PropertyField(list.GetArrayElementAtIndex(i));

			}

			else {

				EditorGUILayout.PropertyField(list.GetArrayElementAtIndex(i), GUIContent.none);

			}

			if (showButtons) {

				ShowButtons(list, i);

				EditorGUILayout.EndHorizontal();

			}

		}

		if (showButtons && list.arraySize == 0 && GUILayout.Button(addButtonContent, EditorStyles.miniButton)) {

			list.arraySize += 1;

		}

	}
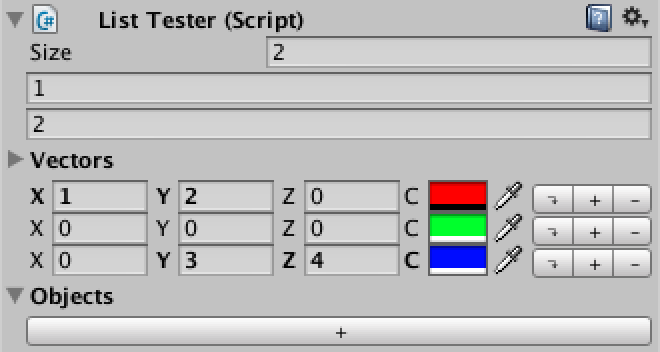 A big add button.
Only Allowing Lists
ListTester that is not a list.public int notAList;
ListTestInspector. public override void OnInspectorGUI () {
serializedObject.Update();
EditorList.Show(serializedObject.FindProperty("integers"), EditorListOption.ListSize);
EditorList.Show(serializedObject.FindProperty("vectors"));
EditorList.Show(serializedObject.FindProperty("colorPoints"), EditorListOption.Buttons);
EditorList.Show(
serializedObject.FindProperty("objects"),
EditorListOption.ListLabel | EditorListOption.Buttons);
EditorList.Show(serializedObject.FindProperty("notAList"));
serializedObject.ApplyModifiedProperties();
}
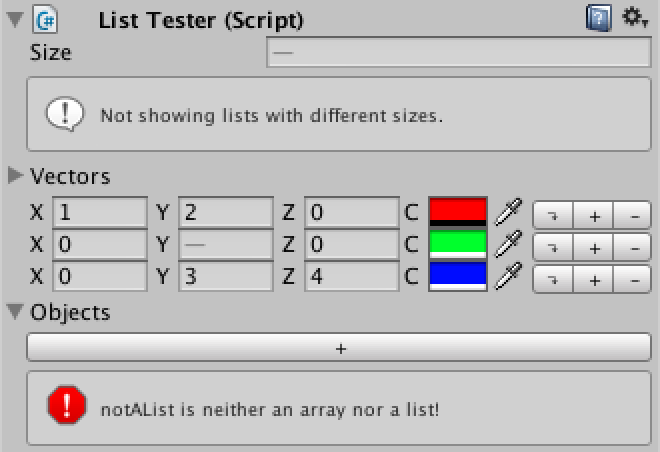
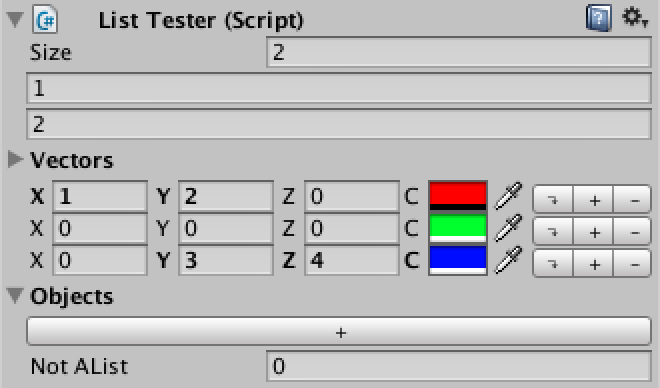 Not a list shown.
	public static void Show (SerializedProperty list, EditorListOption options = EditorListOption.Default) {

		if (!list.isArray) {

			EditorGUILayout.HelpBox(list.name + " is neither an array nor a list!", MessageType.Error);

			return;

		}

		bool

			showListLabel = (options & EditorListOption.ListLabel) != 0,

			showListSize = (options & EditorListOption.ListSize) != 0;

		if (showListLabel) {

			EditorGUILayout.PropertyField(list);

			EditorGUI.indentLevel += 1;

		}

		if (!showListLabel || list.isExpanded) {

			if (showListSize) {

				EditorGUILayout.PropertyField(list.FindPropertyRelative("Array.size"));

			}

			ShowElements(list, options);

		}

		if (showListLabel) {

			EditorGUI.indentLevel -= 1;

		}

	}
 Only lists allowed.
Multi-object Editing
 No multi-object editing yet.
CanEditMultipleObjects attribute to our ListTesterInspector.[CustomEditor(typeof(ListTester)), CanEditMultipleObjects]
 Multi-object editing.
	public static void Show (SerializedProperty list, EditorListOption options = EditorListOption.Default) {

		if (!list.isArray) {

			EditorGUILayout.HelpBox(list.name + " is neither an array nor a list!", MessageType.Error);

			return;

		}

		bool

			showListLabel = (options & EditorListOption.ListLabel) != 0,

			showListSize = (options & EditorListOption.ListSize) != 0;

		if (showListLabel) {

			EditorGUILayout.PropertyField(list);

			EditorGUI.indentLevel += 1;

		}

		if (!showListLabel || list.isExpanded) {

			SerializedProperty size = list.FindPropertyRelative("Array.size");

			if (showListSize) {

				EditorGUILayout.PropertyField(size);

			}

			if (size.hasMultipleDifferentValues) {

				EditorGUILayout.HelpBox("Not showing lists with different sizes.", MessageType.Info);

			}

			else {

				ShowElements(list, options);

			}

		}

		if (showListLabel) {

			EditorGUI.indentLevel -= 1;

		}

	}
Divergent lists will not be shown.
Downloads
- custom-list.unitypackage
- The finished project.
Unity编辑器扩展-Custom List, displaying data your way的更多相关文章
- unity 编辑器扩展简单入门
unity 编辑器扩展简单入门 通过使用编辑器扩展,我们可以对一些机械的操作实现自动化,而不用使用额外的环境,将工具与开发环境融为一体:并且,编辑器扩展也提供GUI库,来实现可视化操作:编辑器扩展甚至 ...
- Unity编辑器扩展 Chapter7--使用ScriptableObject持久化存储数据
Unity编辑器扩展 Chapter7--使用ScriptableObject持久化存储数据 unity unity Editor ScirptableObject Unity编辑器扩展 Chapt ...
- Unity编辑器扩展chapter1
Unity编辑器扩展chapter1 unity通过提供EditorScript API 的方式为我们提供了方便强大的编辑器扩展途径.学好这一部分可以使我们学会编写一些工具来提高效率,甚至可以自制一些 ...
- Unity编辑器扩展Texture显示选择框
学习NGUI插件的时候,突然间有一个问题为什么它这些属性可以通过弹出窗口来选中呢? 而我自己写的组件只能使用手动拖放的方式=.=. Unity开发了组件Inspector视图扩展API,如果我们要写插 ...
- Unity 编辑器扩展
自定义检视面板的使用: 先是定义一个脚本文件,我们来修饰它的检视面板: [HelpURL("http://www.baidu.com")] public class Atr : M ...
- Unity 编辑器扩展 场景视图内控制对象
http://blog.csdn.net/akof1314/article/details/38129031 假设有一个敌人生成器类,其中有个属性range用来表示敌人生成的范围区域大小,那么可以用O ...
- Unity编辑器扩展 Chapter3--Create Custom Inspector
一.Create Custom Inspector 重绘inspector面板一方面是我们的挂在脚本的窗口变得友好,另一方面可以让其变得更强大,比如添加一些有效性验证. 二.重要说明 1.Editor ...
- Unity编辑器扩展
在开发中有可能需要自己开发编辑器工具,在Unity中界面扩展常见两种情况,拿某插件为例: 1,自建窗口扩展 2,脚本Inspector显示扩展 不管使用那种样式,都需要经常用到两个类EditorGUI ...
- Unity 编辑器扩展 Chapter2—Gizmos
二. 使用Gizoms绘制网格及矩阵转换使用 1. 创建Leve类,作为场景控制类: using UnityEngine; //使用namespace方便脚本管理 namespace RunAndJu ...
随机推荐
- 天池医疗AI大赛支持有感
从去年大概11月份开始一直到现在,大部分的精力在天池医疗AI大赛的研发和支持上面,也算深度支持了20几只复赛参赛队伍的复赛进程.总的感觉其实与现在媒体宣传的"中国成为AI大国"ba ...
- Dapper查询返回Datatable
dapper封装的扩展方法中,没有直接返回datatable的方法,项目中有些时候需要用到这样的返回格式,而为了项目数据框架的统一性, 不好直接用其他框架,如果直接将查询出来的泛型集合转datatab ...
- Oracle:查询各组最新的一条记录
oracle中怎么查询各组中最新的一条记录呢?比如说现在有一个表中几条数据如下: 有两种写法:写法一:over partition by 分析函数 SELECT * FROM (select ID_, ...
- C# 一些学习作业
下载地址:http://pan.baidu.com/s/1dEGCJdf 包括: 实现QQ旋转窗体功能 非“按角度旋转”,实现的是立体旋转. 实现QQ旋转窗体功能,窗口为不规则图像,打开时旋转180度 ...
- mysql学习笔记--数据库预处理
一.概念 1. 预编译一次,可以多次执行.用来解决一条sql语句频繁执行的问题 2. 语法 a. 预处理语句:preapre 预处理名字 from 'sql语句' b. 执行预处理:execute 预 ...
- 企业BGP网络规划案例(四)
关于路由的发布和接收使用route-map过滤,防止本AS作为一个转发区域. 在XRV3上和XRV4上使用prefix-list 进行路由接搜和发布的过滤 XRV3配置 =============== ...
- jquery 中dataTable显示加载中,图片或文字
引入js文件 <script type="text/javascript" src="${basePath}/lib/datatables/1.10.0/jquer ...
- Codeforces Round #553 (Div. 2) D题
题目网址:http://codeforces.com/contest/1151/problem/D 题目大意:给出n组数对,(ai , bi),调整这n组数对的位置,最小化 ∑(ai*( i -1)+ ...
- setTimeout与Promise的区别
1,4,3,2 Promise是一个micro task 主线程是一个task micro task queue会在task后面执行 setTimeout返回的函数是一个新的task macro ...
- centos 批量杀死进程
ps aux | grep 进程名| grep -v grep | awk '{print $2}' | xargs kill -9