吴裕雄 python 机器学习——半监督学习标准迭代式标记传播算法LabelPropagation模型
import numpy as np

import matplotlib.pyplot as plt

from sklearn import  metrics

from sklearn import datasets

from sklearn.semi_supervised import LabelPropagation

def load_data():

    '''

    加载数据集

    '''

    digits = datasets.load_digits()

    ######   混洗样本 ########

    rng = np.random.RandomState(0)

    indices = np.arange(len(digits.data)) # 样本下标集合

    rng.shuffle(indices) # 混洗样本下标集合

    X = digits.data[indices]

    y = digits.target[indices]

    ###### 生成未标记样本的下标集合 ####

    # 只有 10% 的样本有标记

    n_labeled_points = int(len(y)/10)

    # 后面 90% 的样本未标记

    unlabeled_indices = np.arange(len(y))[n_labeled_points:]

    return X,y,unlabeled_indices

#半监督学习标准迭代式标记传播算法LabelPropagation模型

def test_LabelPropagation(*data):

    '''

    测试 LabelPropagation 的用法

    '''

    X,y,unlabeled_indices=data

    # 必须拷贝,后面要用到 y

    y_train=np.copy(y)

    # 未标记样本的标记设定为 -1

    y_train[unlabeled_indices]=-1

    clf=LabelPropagation(max_iter=100,kernel='rbf',gamma=0.1)

    clf.fit(X,y_train)

    ### 获取预测准确率

    # 预测标记

    predicted_labels = clf.transduction_[unlabeled_indices]

    # 真实标记

    true_labels = y[unlabeled_indices]

    print("Accuracy:%f"%metrics.accuracy_score(true_labels,predicted_labels))

    # 或者 print("Accuracy:%f"%clf.score(X[unlabeled_indices],true_labels))

# 获取半监督分类数据集

data=load_data()

# 调用 test_LabelPropagation

test_LabelPropagation(*data)

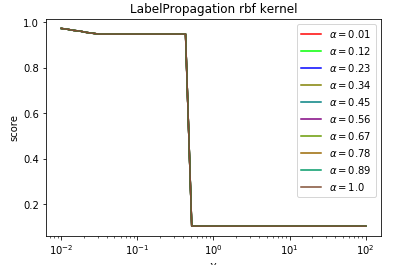
def test_LabelPropagation_rbf(*data):

    '''

    测试 LabelPropagation 的 rbf 核时,预测性能随 alpha 和 gamma 的变化

    '''

    X,y,unlabeled_indices=data

    # 必须拷贝,后面要用到 y

    y_train=np.copy(y)

    # 未标记样本的标记设定为 -1

    y_train[unlabeled_indices]=-1

    fig=plt.figure()

    ax=fig.add_subplot(1,1,1)

    alphas=np.linspace(0.01,1,num=10,endpoint=True)

    gammas=np.logspace(-2,2,num=50)

     # 颜色集合,不同曲线用不同颜色

    colors=((1,0,0),(0,1,0),(0,0,1),(0.5,0.5,0),(0,0.5,0.5),(0.5,0,0.5),(0.4,0.6,0),(0.6,0.4,0),(0,0.6,0.4),(0.5,0.3,0.2))

    ## 训练并绘图

    for alpha,color in zip(alphas,colors):

        scores=[]

        for gamma in gammas:

            clf=LabelPropagation(max_iter=100,gamma=gamma,alpha=alpha,kernel='rbf')

            clf.fit(X,y_train)

            scores.append(clf.score(X[unlabeled_indices],y[unlabeled_indices]))

        ax.plot(gammas,scores,label=r"$\alpha=%s$"%alpha,color=color)

    ### 设置图形

    ax.set_xlabel(r"$\gamma$")

    ax.set_ylabel("score")

    ax.set_xscale("log")

    ax.legend(loc="best")

    ax.set_title("LabelPropagation rbf kernel")

    plt.show()

# 调用 test_LabelPropagation_rbf

test_LabelPropagation_rbf(*data)
def test_LabelPropagation_knn(*data):

    '''

   测试 LabelPropagation 的 knn 核时,预测性能随 alpha 和 n_neighbors 的变化

    '''

    X,y,unlabeled_indices=data

    y_train=np.copy(y) # 必须拷贝,后面要用到 y

    y_train[unlabeled_indices]=-1 # 未标记样本的标记设定为 -1

    fig=plt.figure()

    ax=fig.add_subplot(1,1,1)

    alphas=np.linspace(0.01,1,num=10,endpoint=True)

    Ks=[1,2,3,4,5,8,10,15,20,25,30,35,40,50]

    # 颜色集合,不同曲线用不同颜色

    colors=((1,0,0),(0,1,0),(0,0,1),(0.5,0.5,0),(0,0.5,0.5),(0.5,0,0.5),(0.4,0.6,0),(0.6,0.4,0),(0,0.6,0.4),(0.5,0.3,0.2))

    ## 训练并绘图

    for alpha,color in zip(alphas,colors):

        scores=[]

        for K in Ks:

            clf=LabelPropagation(max_iter=100,n_neighbors=K,alpha=alpha,kernel='knn')

            clf.fit(X,y_train)

            scores.append(clf.score(X[unlabeled_indices],y[unlabeled_indices]))

        ax.plot(Ks,scores,label=r"$\alpha=%s$"%alpha,color=color)

    ### 设置图形

    ax.set_xlabel(r"$k$")

    ax.set_ylabel("score")

    ax.legend(loc="best")

    ax.set_title("LabelPropagation knn kernel")

    plt.show()

# 调用 test_LabelPropagation_knn

test_LabelPropagation_knn(*data)

吴裕雄 python 机器学习——半监督学习标准迭代式标记传播算法LabelPropagation模型的更多相关文章
- 吴裕雄 python 机器学习——半监督学习LabelSpreading模型
import numpy as np import matplotlib.pyplot as plt from sklearn import metrics from sklearn import d ...
- 吴裕雄 python 机器学习——人工神经网络与原始感知机模型
import numpy as np from matplotlib import pyplot as plt from mpl_toolkits.mplot3d import Axes3D from ...
- 吴裕雄 python 机器学习——分类决策树模型
import numpy as np import matplotlib.pyplot as plt from sklearn import datasets from sklearn.model_s ...
- 吴裕雄 python 机器学习——回归决策树模型
import numpy as np import matplotlib.pyplot as plt from sklearn import datasets from sklearn.model_s ...
- 吴裕雄 python 机器学习——线性判断分析LinearDiscriminantAnalysis
import numpy as np import matplotlib.pyplot as plt from matplotlib import cm from mpl_toolkits.mplot ...
- 吴裕雄 python 机器学习——逻辑回归
import numpy as np import matplotlib.pyplot as plt from matplotlib import cm from mpl_toolkits.mplot ...
- 吴裕雄 python 机器学习——ElasticNet回归
import numpy as np import matplotlib.pyplot as plt from matplotlib import cm from mpl_toolkits.mplot ...
- 吴裕雄 python 机器学习——Lasso回归
import numpy as np import matplotlib.pyplot as plt from sklearn import datasets, linear_model from s ...
- 吴裕雄 python 机器学习——岭回归
import numpy as np import matplotlib.pyplot as plt from sklearn import datasets, linear_model from s ...
随机推荐
- keepalived高可用工具
1.准备俩台虚拟机,一台主机,一台备机 我这里模拟的是 主机ip: 192.168.42.66 masternginx 备机ip: 192.168.42.77 slavenginx 虚拟ip: 192 ...
- VMware vSphere Client
复制虚拟机 在虚拟机关机状态下,选中一个虚拟机,文件 - 导出 - 导出OVF模板,导出成功后,再文件 - 部署OVF模板(修改IP.MAC.主机名称)
- C++类this指针为空时的几个误区
代码: class test{ public: static void f1(){cout<<y<<endl;} void f2(){cout<<y<< ...
- axios的基本用法与并发请求
一.axios的基本用法 <router-link to="" class="a1" @click.native="logins"&g ...
- rest_framework:解析器
一.解析器的作用 根据请求头content-type选择对应的解析器对请求体内容进行处理. 有application/json,x-www-form-urlencoded,form-data等格式 二 ...
- R parallel包学习笔记2
这个部分我在datacamp上面学习笔记,可视化的性能很差,使用的函数也很少. 可以参考一下大佬的博客园个人感觉他们讲的真的很详细 https://cosx.org/2016/09/r-and-par ...
- kali 所有版本
首先打开kali官方网站 第一步 第二步 找到 第三步点击标黄色的地方 http://cdimage.kali.org/ 第四步将网址中的cdimage替换为old http://old.kali.o ...
- 【网站】Kiwi浏览器中文网
2020年1月1日上线 访问地址:http://huangenet.gitee.io/kiwibrowser/
- 阿里云MySQL安装到centos,并链接。
Last login: Wed Jan 22 11:21:17 on ttys001 wulaguixiaomianyangdeMacBook-Pro:~ xingwen$ ssh root@47.9 ...
- Mybatis面试问题集锦
1.#{}和${}的区别是什么? 答:mybatis在处理#{}时,会将sql中的#{}替换为?号,调用PreparedStatement的set方法来赋值: mybatis在处理 $ { } 时,就 ...