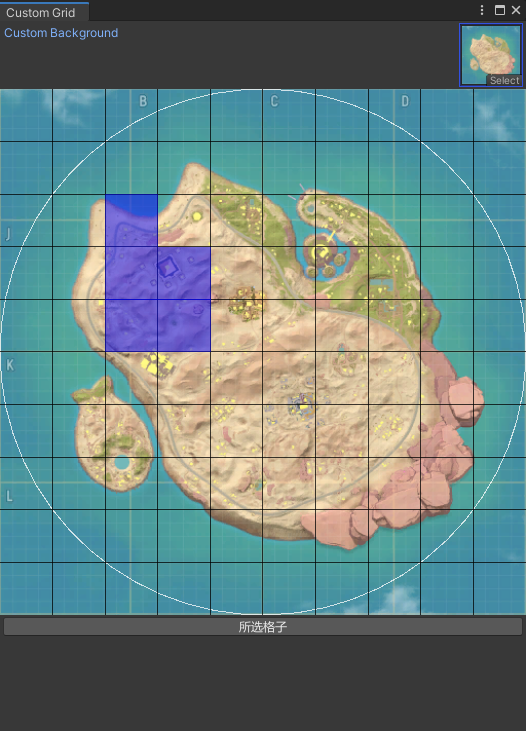
Unity 编辑器格子工具
using UnityEditor;

using UnityEngine;

public class CustomGridWindow3 : EditorWindow

{

    private Texture2D customBackgroundTexture;

    private Vector2 gridSize = new Vector2(10, 10);

    private Color[] cellColors;

    private bool isSelecting = false;

    private Vector2 selectionStart;

    private Vector2 selectionEnd;

    [MenuItem("工具/格子3")]

    public static void ShowWindow()

    {

        GetWindow<CustomGridWindow3>("Custom Grid");

    }

    private void OnEnable()

    {

        InitializeCellColors();

    }

    private void InitializeCellColors()

    {

        cellColors = new Color[(int)(gridSize.x * gridSize.y)];

        for (int i = 0; i < cellColors.Length; i++)

        {

            cellColors[i] = Color.clear; // 初始颜色为透明

        }

    }

    private void OnGUI()

    {

        customBackgroundTexture = EditorGUILayout.ObjectField("Custom Background", customBackgroundTexture, typeof(Texture2D), false) as Texture2D;

        if (customBackgroundTexture != null)

        {

            Rect gridRect = GUILayoutUtility.GetRect(position.width, position.width / gridSize.x * gridSize.y);

            Event e = Event.current;

            // 处理鼠标点击事件

            if (e.isMouse && gridRect.Contains(e.mousePosition))

            {

                Vector2 mousePos = e.mousePosition - gridRect.position;

                int cellX = Mathf.FloorToInt(mousePos.x / gridRect.width * gridSize.x);

                int cellY = Mathf.FloorToInt(mousePos.y / gridRect.height * gridSize.y);

                int cellIndex = (int)(cellY * gridSize.x + cellX);

                if (e.type == EventType.MouseDown && e.button == 0)

                {

                    isSelecting = true;

                    selectionStart = new Vector2(cellX, cellY);//按下鼠标是起点

                }

                else if (e.type == EventType.MouseUp && e.button == 0)

                {

                    isSelecting = false;

                    selectionEnd = new Vector2(cellX, cellY);//松开鼠标是终点

                    ApplySelection();

                }

                else if (isSelecting && e.type == EventType.MouseDrag)

                {

                    selectionEnd = new Vector2(cellX, cellY);//拖拽

                }

            }

            // 绘制背景图

            GUI.DrawTexture(gridRect, customBackgroundTexture, ScaleMode.ScaleToFit);

            // 绘制网格边框

            Handles.color = Color.white;

            Handles.DrawWireDisc(gridRect.center, Vector3.forward, gridRect.width / 2f);

            // 绘制网格线

            Handles.color = Color.black;

            float cellWidth = gridRect.width / gridSize.x;

            float cellHeight = gridRect.height / gridSize.y;

            for (int x = 1; x < gridSize.x; x++)

            {

                float xPos = gridRect.x + x * cellWidth;

                Handles.DrawLine(new Vector3(xPos, gridRect.y), new Vector3(xPos, gridRect.y + gridRect.height));

            }

            for (int y = 1; y < gridSize.y; y++)

            {

                float yPos = gridRect.y + y * cellHeight;

                Handles.DrawLine(new Vector3(gridRect.x, yPos), new Vector3(gridRect.x + gridRect.width, yPos));

            }

            // 绘制单元格颜色

            for (int y = 0; y < gridSize.y; y++)

            {

                for (int x = 0; x < gridSize.x; x++)

                {

                    int cellIndex = (int)(y * gridSize.x + x);

                    Rect cellRect = new Rect(gridRect.x + x * cellWidth, gridRect.y + y * cellHeight, cellWidth, cellHeight);

                    GUI.color = cellColors[cellIndex];

                    GUI.DrawTexture(cellRect, EditorGUIUtility.whiteTexture, ScaleMode.StretchToFill);

                }

            }

            // 绘制选择框

            if (isSelecting)

            {

                Vector2 min = Vector2.Min(selectionStart, selectionEnd);

                Vector2 max = Vector2.Max(selectionStart, selectionEnd);

                Rect selectionRect = new Rect(min.x * cellWidth, min.y * cellHeight, (max.x - min.x + 1) * cellWidth, (max.y - min.y + 1) * cellHeight);

                GUI.color = new Color(0, 0, 1, 0.2f); // 浅蓝色,带透明度

                GUI.DrawTexture(selectionRect, EditorGUIUtility.whiteTexture, ScaleMode.StretchToFill);

            }

            GUI.color = Color.white;

            // 清除选择的按钮

            if (GUILayout.Button("所选格子"))

            {

                PrintSelectionData();

            }

        }

    }

    private Color selectColor = new Color(0, 0, 1, 0.5f);

    private void ApplySelection()

    {

        for (int y = (int)selectionStart.y; y <= (int)selectionEnd.y; y++)

        {

            for (int x = (int)selectionStart.x; x <= (int)selectionEnd.x; x++)

            {

                int cellIndex = (int)(y * gridSize.x + x);

                if (cellColors[cellIndex] == selectColor) {

                    cellColors[cellIndex] = Color.clear;// 已经是蓝色设置为灰色

                } else {

                    cellColors[cellIndex] = selectColor; // 设置为蓝色,带透明度

                }

            }

        }

        Repaint();

    }

    private void PrintSelectionData()

    {

        Debug.Log("打印所选格子");

        for (int i = 0; i < cellColors.Length; i++) {

            if (cellColors[i] == selectColor) {

                Debug.Log(i + "   x:" + i % (int)gridSize.x + "   y" + i / (int)gridSize.y);

            }

        }

    }

}
Unity 编辑器格子工具的更多相关文章
- Unity编辑器 - 资源批处理工具基类
Unity编辑器 - 资源批处理工具基类 经常要对资源进行批处理,很多时候都是一次性的需求,于是弄个通用脚本. 工具是个弹出面板,处理过程有进度条,如下: 如图,子类只需要重写几个方法: using ...
- 【Unity】2.1 初识Unity编辑器
分类:Unity.C#.VS2015 创建日期:2016-03-26 一.简介 本节要点:了解Unity编辑器的菜单和视图界面,以及最基本的操作,这是入门的最基础部分,必须掌握. 二.启动界面 双击桌 ...
- Unity编辑器扩展 Chapter7--使用ScriptableObject持久化存储数据
Unity编辑器扩展 Chapter7--使用ScriptableObject持久化存储数据 unity unity Editor ScirptableObject Unity编辑器扩展 Chapt ...
- Unity 编辑器扩展 Chapter2—Gizmos
二. 使用Gizoms绘制网格及矩阵转换使用 1. 创建Leve类,作为场景控制类: using UnityEngine; //使用namespace方便脚本管理 namespace RunAndJu ...
- Unity编辑器扩展chapter1
Unity编辑器扩展chapter1 unity通过提供EditorScript API 的方式为我们提供了方便强大的编辑器扩展途径.学好这一部分可以使我们学会编写一些工具来提高效率,甚至可以自制一些 ...
- Unity编辑器 - 编辑器控制特效播放
编辑器控制特效播放 Unity的动画编辑器不能预览粒子系统的播放,为了方便预览特效,设想制作一个预览特效的工具,通常一个特效有三种组件: - Animation - Animator - Partic ...
- UNITY编辑器模式下static变量的坑
在unity中写编辑器扩展工具,如在编辑器中加个菜单,点击这个菜单项时执行打包功能. 类如下,其中的静态变量,如果每次进来不清空,则LIST会越来越大,打包函数执行完后系统不会帮我们清空 #if UN ...
- unity 编辑器扩展简单入门
unity 编辑器扩展简单入门 通过使用编辑器扩展,我们可以对一些机械的操作实现自动化,而不用使用额外的环境,将工具与开发环境融为一体:并且,编辑器扩展也提供GUI库,来实现可视化操作:编辑器扩展甚至 ...
- Unity快手上手【熟悉unity编辑器,C#脚本控制组件一些属性之类的】
Unity学习参考文档和开发工具 unity的官网文档:https://docs.unity3d.com/cn/current/Manual/ScriptingSection.html ■ 学习方式: ...
- 定制你的Unity编辑器
Unity的编辑器可以通过写脚本进行界面定制,包括添加功能菜单,今天写游戏Demo用到了记录一下. 为Unity添加子菜单 示例程序 [AddComponentMenu("Defend Ho ...
随机推荐
- 【记录】日常|shandianchengzi的三周年创作纪念日
机缘 接触 CSDN 之前,我已经倒腾过 hexo 搭建 github 博客.本地博客.图床: 接触 CSDN 之后,我还倒腾过纸质笔记.gitee 博客.博客园.知乎.b站.Notion.腾 ...
- 基于口令的密码—PBE
目录 流程 加密流程 解密流程 盐的作用 通过拉伸来改良PBE的安全性 如何生成安全口令的建议 定义: PBE是一种根据口令生成密钥并用该密钥进行加密的方法. 加密和解密都使用同一个密钥. 口令一词多 ...
- CF1930G Prefix Max Set Counting 题解
题意: 给定一棵以 1 为根的有根树,求出其所有 dfs 序中前缀最大值序列的数量.\(n\le 10^6\). 思路 显然考虑 DP. 由于是求前缀最大值序列的方案数,因此如果一些点要出现在这个序列 ...
- git管理Unity项目
git管理Unity项目的正确打开方式 在创建仓库的时候进行初始化仓库,选择.gitignore模版的时候选择Unity,就能自动过滤不需要的文件 原文链接:https://blog.csdn.net ...
- JS的哪些新特性,你都用过么?
@charset "UTF-8"; .markdown-body { line-height: 1.75; font-weight: 400; font-size: 15px; o ...
- Number of Atoms——LeetCode进阶路
原题链接https://leetcode.com/problems/number-of-atoms/ 题目描述 Given a chemical formula (given as a string) ...
- iOS快捷指令——记录今天、今年已过进度的工具
起因是看到了 大佬博客 里面一个计时的小工具,于是也想搞一个来提醒自己珍惜时间. 经过一段时间对快捷指令的摸索,最终选择了如下的方式完成: 快捷指令的链接在这里给出: https://www.iclo ...
- 使用 Certbot 申请 SSL 证书
Certbot 可以用于从 Let's Encrypt 自动申请.安装.更新免费的 HTTPS 证书(默认只有3个月有效期,可使用脚本自动续期). 1.安装 Certbot Linux:apt ins ...
- yoga14c2024(ultra7-155H)使用雷电4转接oculink外接RTX4070Ti Super跑分
yoga14c2024(ultra7-155H)使用雷电4转接oculink外接RTX4070Ti Super跑分 自媒体跑分 内屏 \[损耗=1-16731/24723\approx32.3\%\n ...
- 「Note」数论方向 - 组合数学
1. 容斥原理 1.1 介绍 解决集合内计数问题. \(S\) 为集合编号集合. \[\left | \bigcup_{i\in S}A_i \right | =\sum_{T\subseteq S\ ...