OpenGL学习--开发环境
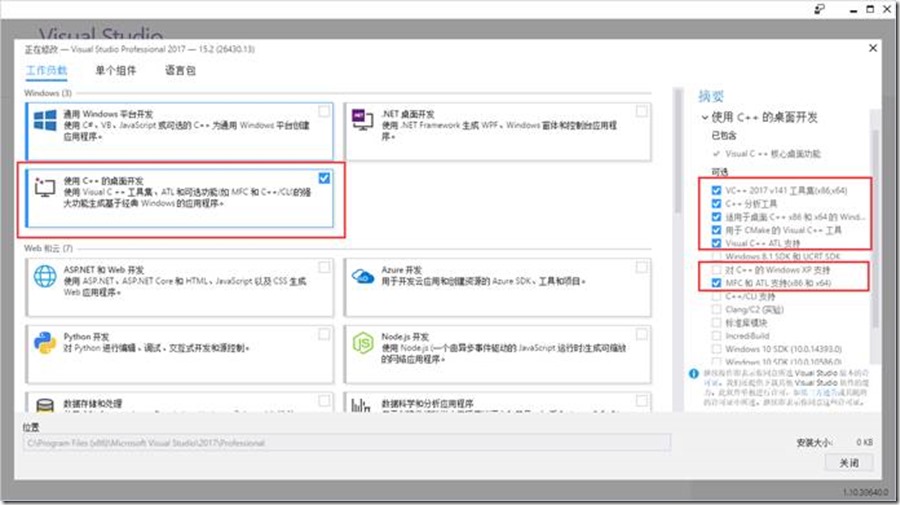
1. VS2017 Professional安装
1.1. 下载
mu_visual_studio_professional_2017_x86_x64_10049787.exe
1.2. 双击开始安装
双击mu_visual_studio_professional_2017_x86_x64_10049787.exe开始安装

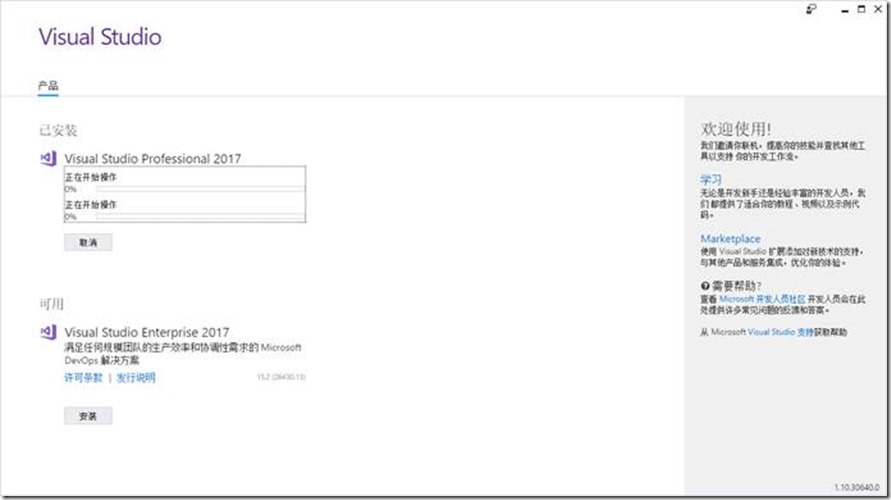
安装完成后重启计算机
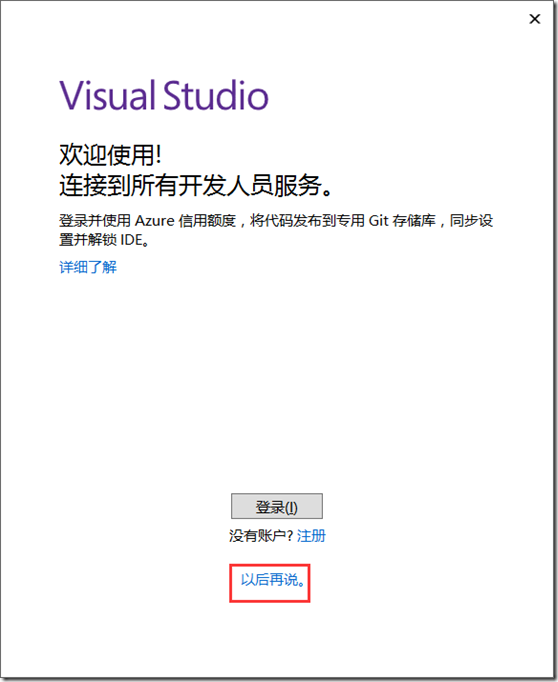
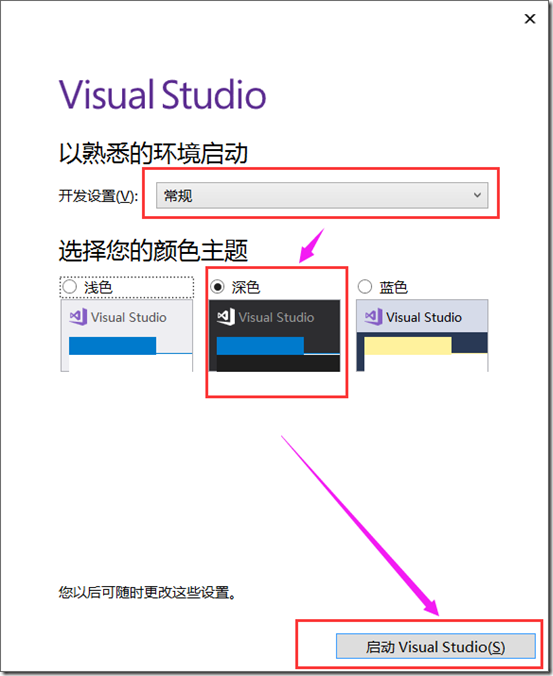
1.3. 启动
点击菜单中的【Visual Studio 2017】启动
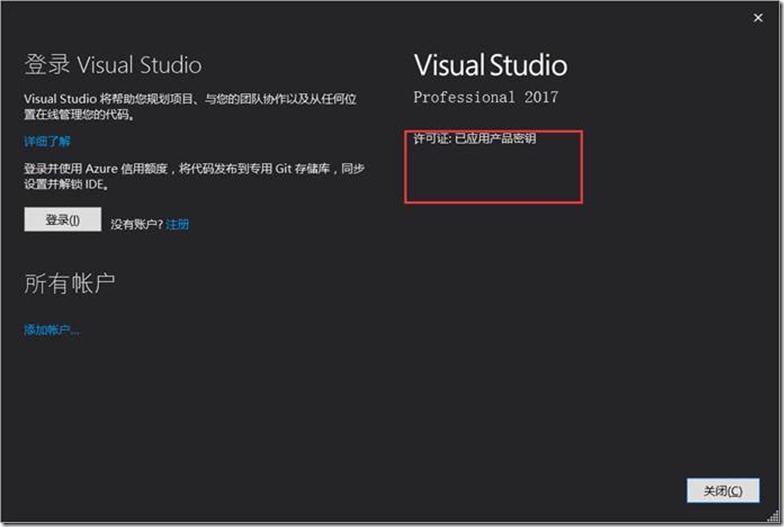
1.4. 注册
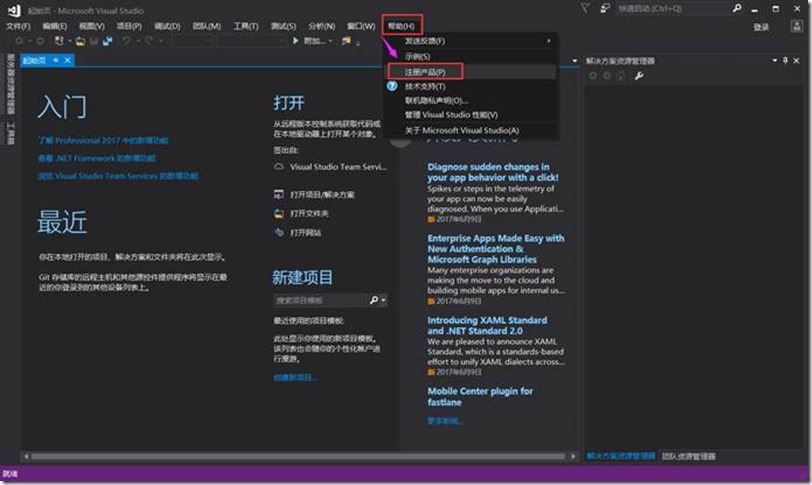
输入以下序列号
Visual Studio 2017 Key
企业版:Enterprise:
NJVYC-BMHX2-G77MM-4XJMR-6Q8QF
专业版:Professional
KBJFW-NXHK6-W4WJM-CRMQB-G3CDH
2. OpenGL环境配置
https://www.opengl.org/sdk/libs/
1.5. GLEW(OpenGL Extension Wrangler Library)
GLEW is an open-source cross-platform extension loading library with thread-safe support for multiple rendering contexts and automatic code generation capability. GLEW provides easy-to-use and efficient methods for checking OpenGL extensions and core functionality.
GLEW是一个跨平台的C++扩展库,基于OpenGL图形接口。使用OpenGL的朋友都知道,window目前只支持OpenGL1.1的函数,但 OpenGL现在都发展到2.0以上了,要使用这些OpenGL的高级特性,就必须下载最新的扩展,另外,不同的显卡公司,也会发布一些只有自家显卡才支持的扩展函数,你要想用这数函数,不得不去寻找最新的glext.h,有了GLEW扩展库,你就再也不用为找不到函数的接口而烦恼,因为GLEW能自动识别你的平台所支持的全部OpenGL高级扩展函数。也就是说,只要包含一个glew.h头文件,你就能使用gl,glu,glext,wgl,glx的全部函数。GLEW支持目前流行的各种操作系统(including Windows, Linux, Mac OS X, FreeBSD, Irix, and Solaris)。
1.5.1. 下载
https://sourceforge.net/projects/glew/?source=typ_redirect
1.5.2. 配置
1.5.2.1. glew.dll
|
bin/glew32.dll |
to |
%SystemRoot%/system32 |
1.
将
glew-2.0.0\bin\Release\Win32\glew32.dll
glew-2.0.0\bin\Release\Win32\glewinfo.exe
glew-2.0.0\bin\Release\Win32\visualinfo.exe
复制到
C:\Windows\System32
目录下
2.
将
glew-2.0.0\bin\Release\x64\glew32.dll
glew-2.0.0\bin\Release\x64\glewinfo.exe
glew-2.0.0\bin\Release\x64\visualinfo.exe
复制到
C:\Windows\SysWOW64
目录下
1.5.2.2. glew32.lib
lib/glew32.lib to {VC Root}/Lib
1.将
glew-2.0.0-win32\glew-2.0.0\lib\Release\Win32\glew32.lib
glew-2.0.0-win32\glew-2.0.0\lib\Release\Win32\glew32s.lib
复制到
C:\Program Files (x86)\Microsoft Visual Studio\2017\Professional\VC\Tools\MSVC\14.10.25017\lib\x86
目录下
2.将
glew-2.0.0-win32\glew-2.0.0\lib\Release\x64\glew32.lib
glew-2.0.0-win32\glew-2.0.0\lib\Release\x64\glew32s.lib
复制到
C:\Program Files (x86)\Microsoft Visual Studio\2017\Professional\VC\Tools\MSVC\14.10.25017\lib\x64
目录下
1.5.2.3. glew.h和wglew.h
include/GL/glew.h to {VC Root}/Include/GL
include/GL/wglew.h to {VC Root}/Include/GL
将
glew-2.0.0-win32\glew-2.0.0\include\GL
复制到
C:\Program Files (x86)\Microsoft Visual Studio\2017\Professional\VC\Tools\MSVC\14.10.25017\include\GL
目录下
1.6. GLFW
GLFW is a free, Open Source, multi-platform library for OpenGL, OpenGL ES and Vulkan application development. It provides a simple, platform-independent API for creating windows, contexts and surfaces, reading input, handling events, etc.
1.6.1. 下载
1.6.2. 配置
1.6.2.1. glfw3.dll
|
bin/glfw3.dll |
to |
%SystemRoot%/system32 |
1.
将
glfw-3.2.1.bin.WIN32\lib-vc2015\glfw3.dll
复制到
C:\Windows\System32
目录下
2.
将
glfw-3.2.1.bin.WIN64\lib-vc2015\glfw3.dll
复制到
C:\Windows\SysWOW64
目录下
1.6.2.2. glfw3.lib
1.将
glfw-3.2.1.bin.WIN32\lib-vc2015\glfw3.lib
glfw-3.2.1.bin.WIN32\lib-vc2015\glfw3dll.lib
复制到
C:\Program Files (x86)\Microsoft Visual Studio\2017\Professional\VC\Tools\MSVC\14.10.25017\lib\x86
目录下
2.将
glfw-3.2.1.bin.WIN64\lib-vc2015\glfw3.lib
glfw-3.2.1.bin.WIN64\lib-vc2015\glfw3dll.lib
复制到
C:\Program Files (x86)\Microsoft Visual Studio\2017\Professional\VC\Tools\MSVC\14.10.25017\lib\x64
目录下
1.6.2.3. glfw3.h
D:\glfw-3.2.1\include
将
glfw-3.2.1.bin.WIN64\include\GLFW
复制到
C:\Program Files (x86)\Microsoft Visual Studio\2017\Professional\VC\Tools\MSVC\14.10.25017\include\GLFW
目录下
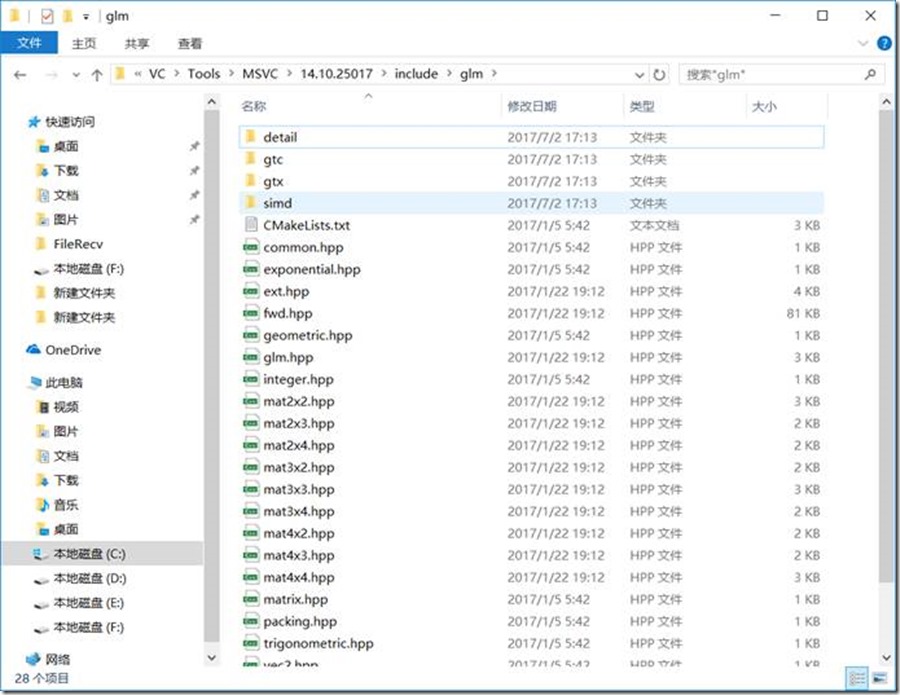
1.7. GLM
OpenGL Mathematics (GLM) is a header only C++ mathematics library for graphics software based on the OpenGL Shading Language (GLSL) specifications.
GLM provides classes and functions designed and implemented with the same naming conventions and functionality than GLSL so that anyone who knows GLSL, can use GLM as well in C++.
This project isn't limited to GLSL features. An extension system, based on the GLSL extension conventions, provides extended capabilities: matrix transformations, quaternions, data packing, random numbers, noise, etc...
1.7.1. 下载
1.7.2. 配置
将glm-0.9.8.4\glm目录复制到
C:\Program Files (x86)\Microsoft Visual Studio\2017\Professional\VC\Tools\MSVC\14.10.25017\include\
目录下
1.8. SOIL
SOIL is a tiny C library used primarily for uploading textures into OpenGL. It is based on stb_image version 1.16, the public domain code from Sean Barrett (found here). I have extended it to load TGA and DDS files, and to perform common functions needed in loading OpenGL textures. SOIL can also be used to save and load images in a variety of formats (useful for loading height maps, non-OpenGL applications, etc.)
1.8.1. 下载
http://www.lonesock.net/soil.html
1.8.2. 配置
1.8.2.1. libSOIL.a
1.将
soil\Simple OpenGL Image Library\lib\libSOIL.a
复制到
C:\Program Files (x86)\Microsoft Visual Studio\2017\Professional\VC\Tools\MSVC\14.10.25017\lib\x86
和
C:\Program Files (x86)\Microsoft Visual Studio\2017\Professional\VC\Tools\MSVC\14.10.25017\lib\x64
目录下
2.将libSOIL.a重命名为libSOIL.lib
1.8.2.2. SOIL.h
将
soil\Simple OpenGL Image Library\src\SOIL.h
复制到
C:\Program Files (x86)\Microsoft Visual Studio\2017\Professional\VC\Tools\MSVC\14.10.25017\include
目录下
3. 项目测试
3.1. 项目环境配置

注意:对于GLEW和SOIL采用的是用静态链接库的方式
3.2. 测试代码
#include <iostream>
// GLEW
#define GLEW_STATIC
#include <GL/glew.h>
// GLFW
#include <GLFW/glfw3.h>
// Function prototypes
void key_callback(GLFWwindow* window, int key, int scancode, int action, int mode);
// Window dimensions
const GLuint WIDTH = 800, HEIGHT = 600;
// Shaders
const GLchar* vertexShaderSource = "#version 330 core\n"
"layout (location = 0) in vec3 position;\n"
"void main()\n"
"{\n"
"gl_Position = vec4(position.x, position.y, position.z, 1.0);\n"
"}\0";
const GLchar* fragmentShaderSource = "#version 330 core\n"
"out vec4 color;\n"
"void main()\n"
"{\n"
"color = vec4(1.0f, 0.5f, 0.2f, 1.0f);\n"
"}\n\0";
// The MAIN function, from here we start the application and run the game loop
int main()
{
std::cout << "Starting GLFW context, OpenGL 3.3" << std::endl;
// Init GLFW
glfwInit();
// Set all the required options for GLFW
glfwWindowHint(GLFW_CONTEXT_VERSION_MAJOR, 3);
glfwWindowHint(GLFW_CONTEXT_VERSION_MINOR, 3);
glfwWindowHint(GLFW_OPENGL_PROFILE, GLFW_OPENGL_CORE_PROFILE);
glfwWindowHint(GLFW_RESIZABLE, GL_FALSE);
// Create a GLFWwindow object that we can use for GLFW's functions
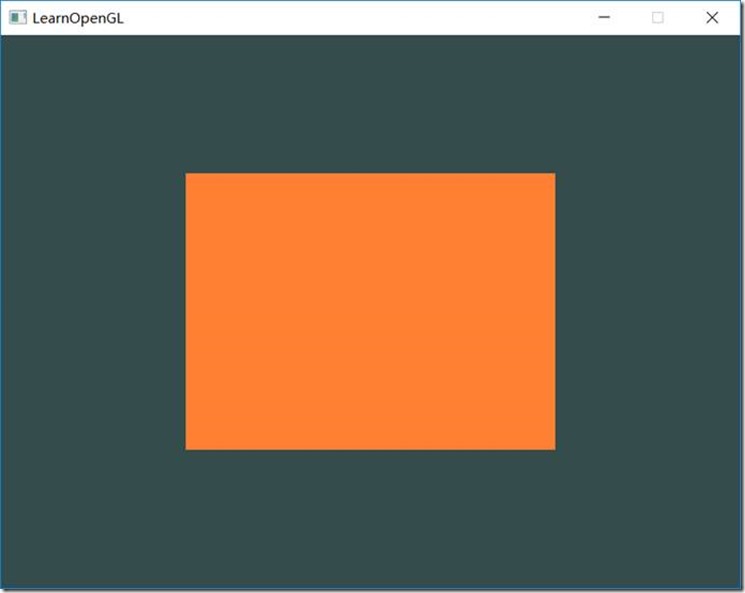
GLFWwindow* window = glfwCreateWindow(WIDTH, HEIGHT, "LearnOpenGL", nullptr, nullptr);
glfwMakeContextCurrent(window);
// Set the required callback functions
glfwSetKeyCallback(window, key_callback);
// Set this to true so GLEW knows to use a modern approach to retrieving function pointers and extensions
glewExperimental = GL_TRUE;
// Initialize GLEW to setup the OpenGL Function pointers
glewInit();
// Define the viewport dimensions
int width, height;
glfwGetFramebufferSize(window, &width, &height);
glViewport(0, 0, width, height);
// Build and compile our shader program
// Vertex shader
GLuint vertexShader = glCreateShader(GL_VERTEX_SHADER);
glShaderSource(vertexShader, 1, &vertexShaderSource, NULL);
glCompileShader(vertexShader);
// Check for compile time errors
GLint success;
GLchar infoLog[512];
glGetShaderiv(vertexShader, GL_COMPILE_STATUS, &success);
if (!success)
{
glGetShaderInfoLog(vertexShader, 512, NULL, infoLog);
std::cout << "ERROR::SHADER::VERTEX::COMPILATION_FAILED\n" << infoLog << std::endl;
}
// Fragment shader
GLuint fragmentShader = glCreateShader(GL_FRAGMENT_SHADER);
glShaderSource(fragmentShader, 1, &fragmentShaderSource, NULL);
glCompileShader(fragmentShader);
// Check for compile time errors
glGetShaderiv(fragmentShader, GL_COMPILE_STATUS, &success);
if (!success)
{
glGetShaderInfoLog(fragmentShader, 512, NULL, infoLog);
std::cout << "ERROR::SHADER::FRAGMENT::COMPILATION_FAILED\n" << infoLog << std::endl;
}
// Link shaders
GLuint shaderProgram = glCreateProgram();
glAttachShader(shaderProgram, vertexShader);
glAttachShader(shaderProgram, fragmentShader);
glLinkProgram(shaderProgram);
// Check for linking errors
glGetProgramiv(shaderProgram, GL_LINK_STATUS, &success);
if (!success) {
glGetProgramInfoLog(shaderProgram, 512, NULL, infoLog);
std::cout << "ERROR::SHADER::PROGRAM::LINKING_FAILED\n" << infoLog << std::endl;
}
glDeleteShader(vertexShader);
glDeleteShader(fragmentShader);
// Set up vertex data (and buffer(s)) and attribute pointers
//GLfloat vertices[] = {
// // First triangle
// 0.5f, 0.5f, // Top Right
// 0.5f, -0.5f, // Bottom Right
// -0.5f, 0.5f, // Top Left
// // Second triangle
// 0.5f, -0.5f, // Bottom Right
// -0.5f, -0.5f, // Bottom Left
// -0.5f, 0.5f // Top Left
//};
GLfloat vertices[] = {
0.5f, 0.5f, 0.0f, // Top Right
0.5f, -0.5f, 0.0f, // Bottom Right
-0.5f, -0.5f, 0.0f, // Bottom Left
-0.5f, 0.5f, 0.0f // Top Left
};
GLuint indices[] = { // Note that we start from 0!
0, 1, 3, // First Triangle
1, 2, 3 // Second Triangle
};
GLuint VBO, VAO, EBO;
glGenVertexArrays(1, &VAO);
glGenBuffers(1, &VBO);
glGenBuffers(1, &EBO);
// Bind the Vertex Array Object first, then bind and set vertex buffer(s) and attribute pointer(s).
glBindVertexArray(VAO);
glBindBuffer(GL_ARRAY_BUFFER, VBO);
glBufferData(GL_ARRAY_BUFFER, sizeof(vertices), vertices, GL_STATIC_DRAW);
glBindBuffer(GL_ELEMENT_ARRAY_BUFFER, EBO);
glBufferData(GL_ELEMENT_ARRAY_BUFFER, sizeof(indices), indices, GL_STATIC_DRAW);
glVertexAttribPointer(0, 3, GL_FLOAT, GL_FALSE, 3 * sizeof(GLfloat), (GLvoid*)0);
glEnableVertexAttribArray(0);
glBindBuffer(GL_ARRAY_BUFFER, 0); // Note that this is allowed, the call to glVertexAttribPointer registered VBO as the currently bound vertex buffer object so afterwards we can safely unbind
glBindVertexArray(0); // Unbind VAO (it's always a good thing to unbind any buffer/array to prevent strange bugs), remember: do NOT unbind the EBO, keep it bound to this VAO
// Uncommenting this call will result in wireframe polygons.
//glPolygonMode(GL_FRONT_AND_BACK, GL_LINE);
// Game loop
while (!glfwWindowShouldClose(window))
{
// Check if any events have been activiated (key pressed, mouse moved etc.) and call corresponding response functions
glfwPollEvents();
// Render
// Clear the colorbuffer
glClearColor(0.2f, 0.3f, 0.3f, 1.0f);
glClear(GL_COLOR_BUFFER_BIT);
// Draw our first triangle
glUseProgram(shaderProgram);
glBindVertexArray(VAO);
//glDrawArrays(GL_TRIANGLES, 0, 6);
glDrawElements(GL_TRIANGLES, 6, GL_UNSIGNED_INT, 0);
glBindVertexArray(0);
// Swap the screen buffers
glfwSwapBuffers(window);
}
// Properly de-allocate all resources once they've outlived their purpose
glDeleteVertexArrays(1, &VAO);
glDeleteBuffers(1, &VBO);
glDeleteBuffers(1, &EBO);
// Terminate GLFW, clearing any resources allocated by GLFW.
glfwTerminate();
return 0;
}
// Is called whenever a key is pressed/released via GLFW
void key_callback(GLFWwindow* window, int key, int scancode, int action, int mode)
{
if (key == GLFW_KEY_ESCAPE && action == GLFW_PRESS)
glfwSetWindowShouldClose(window, GL_TRUE);
}
3.3. 测试结果
------------------------------------------------------------------------------------------------------------------------------------------------
glm OpenGL的数学库,定义了很多关于向量、矩阵的操作,简洁迅速。
glfw 跨平台的对窗口资源的一个抽象库。
glad 针对不同的显卡驱动有不同的OpenGL实现,glad帮助我们隐藏这些差别欢快的使用OpenGL。
stb_image 轻量级的读取图片的库
assimp 轻量级读取模型的库
OpenGL学习--开发环境的更多相关文章
- 深度学习开发环境搭建教程(Mac篇)
本文将指导你如何在自己的Mac上部署Theano + Keras的深度学习开发环境. 如果你的Mac不自带NVIDIA的独立显卡(例如15寸以下或者17年新款的Macbook.具体可以在"关 ...
- supervessel-免费云镜像︱GPU加速的Caffe深度学习开发环境
开发环境介绍 在SuperVessel云上,我们为大家免费提供当前火热的caffe深度学习开发环境.SuperVessel的Caffe有如下优点: 1) 免去了繁琐的Caffe环境的安装配置,即申请即 ...
- 配置OpenGL的开发环境
OpenGL库资源下载 http://pan.baidu.com/s/1ntVsReL 环境搭建 将下载好的文件进行解压,可以得到后缀为.h..lib..dll三类文件,对这三类文件作如下处理: 将所 ...
- 从零开始在ubuntu上配置深度学习开发环境
从零开始在ubuntu上配置深度学习开发环境 昨天一不小心把原来配置好的台式机的开发环境破坏了,调了半天没有调回来,索性就重装一次ubuntu系统.这篇文章主要记录一个简单的.‘傻瓜式’教程. 一.U ...
- 解决 Ubuntu 18.10 使用较新的独立显卡输出无法初始化图形界面并配置深度学习开发环境
原文地址:解决 Ubuntu 18.10 使用较新的独立显卡输出无法初始化图形界面并配置深度学习开发环境 0x00 配置 硬件 OS: Ubuntu 18.10 Base Board: ASUS WS ...
- LISP学习-开发环境以及hello world
我想说说关于common lisp的开发环境问题,学习一个新的语言,如何最简单的搭建一个开发环境是至关重要的,它应该不让你在其他方面花费太多的精力,而只专注于学习语言本身. 其实我刚开始尝试的并不是c ...
- GLFW+GLAD OpenGL Mac开发环境搭建
前言 OpenGL 是什么?The Industry Standard for High Performance Graphics 这是官方解释.说白了他就是一套标准接口.对,是接口,并没有实现具体的 ...
- Ubuntu18.04下配置深度学习开发环境
在Ubuntu18.04下配置深度学习/机器学习开发环境 1.下载并安装Anaconda 下载地址:https://www.anaconda.com/distribution/#linux 安装步骤: ...
- 1.OpenGL mac开发环境搭建记录
1.安装GLEW 和GLFW,转摘至:https://www.cnblogs.com/pretty-guy/p/11357793.html 2.开始测试,整个工程报错,关键信息如下: code sig ...
随机推荐
- HTML简单登录和注册页面及input标签诠释
今天第一次接触HTML这种语言,虽然不能完全理解其中的意思,过去学的英语单词几乎也忘了差不多了,但是感觉进入这门语言学习之后就没有那么难了,一步一步来吧!下面巩固下今天学内容: HTML是一种超文本标 ...
- Android学习之一
- 剑指offer五十二之正则表达式匹配
一.题目 请实现一个函数用来匹配包括'.'和'*'的正则表达式.模式中的字符'.'表示任意一个字符,而'*'表示它前面的字符可以出现任意次(包含0次). 在本题中,匹配是指字符串的所有字符匹配整个模式 ...
- HUE配置文件hue.ini 的mapred_clusters模块详解(图文详解)(分HA集群和非HA集群)
不多说,直接上干货! 我的集群机器情况是 bigdatamaster(192.168.80.10).bigdataslave1(192.168.80.11)和bigdataslave2(192.168 ...
- Fiddler Web Debugger的截断功能(图文详解)
不多说,直接上干货! Fiddler的重头好戏是截断数据包,首先需要设置截取数据包的类型,依次打开菜单“Rules->automatic breakpoints”,可以选择“before req ...
- 根据屏幕尺寸计算rem
!(function (doc, win) { var docEle = doc.documentElement, evt = "onorientationchange" in w ...
- 终于完成了-- github.com/salomon1184/METP
- Dubbo2.7源码分析-Dubbo是如何整合spring-framework的
这篇文章是Dubbo源码分析的开端,与其说这篇文章是Dubbo源码分析,不如是spring源码分析,因为大部分都是在分析spring如何解析xml配置文件的,为了与后面的Dubbo源码分析保持一致,姑 ...
- Git报错:error: cannot open .git/FETCH_HEAD: Read-only file system
Git:git pull时报错 error: cannot open .git/FETCH_HEAD: Read-only file system 查看该文件: 未在网上找到解决办法,重启服务器就好了 ...
- [转]Asp.Net 网站多语言解决方案
本文转自:https://www.cnblogs.com/FredTang/archive/2013/01/23/2873231.html 最近领导要求实现PMSWeb应用程序的多区域语言的支持,所以 ...