SpringCloud的学习记录(4)
本篇基于上一篇写的, 在git上更改配置后, eureka-client如何更新.
我们只需要在配置文件中配置 spring-cloud-starter-bus-amqp;
这就是说我们需要装rabbitMq;
一定要先安装erlang, 成功后再安装rabbitmq. 切记
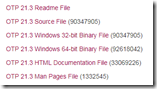
1. 先去下载erlang, 我的电脑是64位的,下载的是OTP 21.3 Windows 64-bit Binary File.
2. 点击rabbitmq下载. 至于怎么使用 rabbitmq, 搜索引擎下.
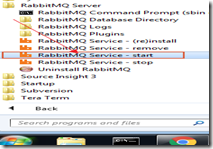
安装成功后, 启动rabbitmq, 如下

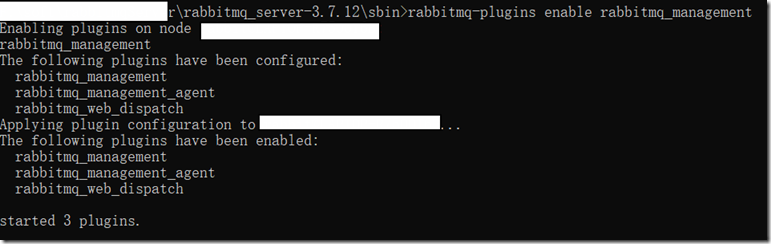
或则cmd到安装你的rebbitmq目录, 到sbin的目录, 然后输入rabbitmq-plugins enable rabbitmq_management
看到如下的打印,可以说明rabbitmq运行成功了.
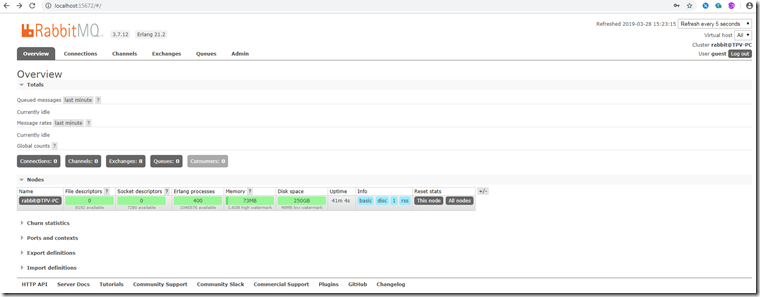
然后浏览器打开http://localhost:15672, 用户名和密码都是guest, 界面如下
说明启动成功. 下面开始改造config-server和eureka-client项目.
分别在config-server和eureka-client项目里的pom.xml添加如下配置
<dependency>

    <groupId>org.springframework.cloud</groupId>

    <artifactId>spring-cloud-starter-bus-amqp</artifactId>

</dependency>

<dependency>

    <groupId>org.springframework.boot</groupId>

    <artifactId>spring-boot-starter-actuator</artifactId>

</dependency>
然后在config-server的application.yml文件内容如下:
eureka:

  client:

    serviceUrl:

      defaultZone: http://localhost:8761/eureka/

server:

  port: 8765

spring:

  application:

    name: config-server

  cloud:

    config:

      server:

        git:
          uri: https://github.com/xxx 你的git仓库地址

          searchPaths: repos

          username: 你的git用户名

          password: 你的git密码

      label: master

  rabbitmq:

    host: 127.0.0.1

    port: 5672  // 注意这里的端口是5672,而我们刚才浏览器打开的http://localhost:15672端口是15672

    username: guest

    password: guest

management:

  endpoint:

    health:

      show-details: always

  endpoints:

    web:

      exposure:

        include: '*'
然后在eureka-client的application.yml文件内容如下:
eureka:

  client:

    serviceUrl:

      defaultZone: http://localhost:8761/eureka/

server:

  port: 8762

spring:

  application:

    name: eureka-client

  rabbitmq:

    host: 127.0.0.1

    port: 5672

    username: guest

    password: guest

management:

  endpoint:

    health:

      show-details: always

  endpoints:

    web:

      exposure:

        include: '*'
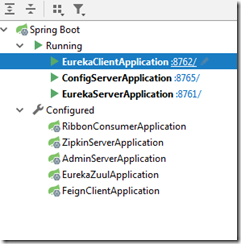
用Run DashBoard启动如下项目:
1. 先启动eureka-server项目
2. 再启动config-server项目, Event log里能看到类似如下内容:
o.s.a.r.c.CachingConnectionFactory: Attempting to connect to: [127.0.0.1:5672]

o.s.a.r.c.CachingConnectionFactory: Created new connection: rabbitConnectionFactory#40195a:0/SimpleConnection@5d73bd [delegate=amqp://guest@127.0.0.1:5672/, localPort= 4586]
3. 最后启动eureka-client项目, Event log里能看到类似如下内容(git仓库地址配置好):
c.c.c.ConfigServicePropertySourceLocator: Fetching config from server at : http://localhost:8765/

c.c.c.ConfigServicePropertySourceLocator: Located environment: name=eureka-client, profiles=[dev], label=master, version=addadb9ed2392ae7f6dddc63a5be60361e2ad8d6, state=null

b.c.PropertySourceBootstrapConfiguration: Located property source: CompositePropertySource {name='configService', propertySources=[MapPropertySource {name='configClient'},
MapPropertySource {name='https://github.com/xxx 你的git仓库地址/repos/eureka-client-dev.properties'}]}
启动完成上面三个项目后, 在浏览器打开eureka-client里的api: http://localhost:8762/testone/config

这里从git仓库取出来的message内容是hello spring io –111111, foo的内容是foo version 111111.
现在我们改变git仓里里的message内容.
如何安装curl,请戳这里.
打开cmd, 输入 curl -X POST http://localhost:8765/actuator/bus-refresh

或则用post man发送:

在config-server和eureka-client这两个项目的Event log里看到类似如下的内容:
o.s.cloud.bus.event.RefreshListener : Received remote refresh request. Keys refreshed []
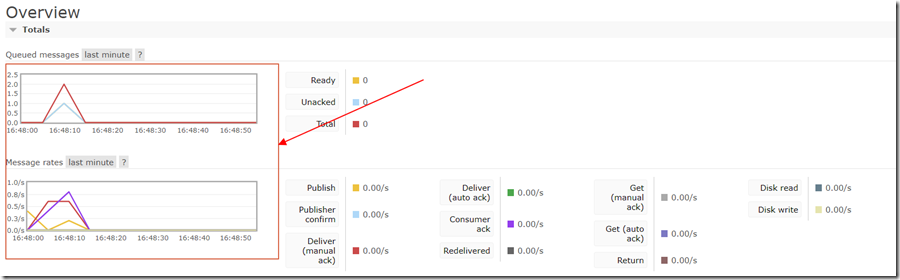
再看rabbitmq页面内容变化, 刷新页面http://localhost:15672, 显示如下:
最后页面刷新http://localhost:8762/testone/config, 就可以看到改的内容了.
我把message改成hello spring io -111111 add message(多了add message内容).

SpringCloud的学习记录(4)的更多相关文章
- SpringCloud的学习记录(1)
最近一段时间重新学习一边SpringCloud(有半年不用了),这里简单记录一下. 我用的是IntelliJ IDEA开发工具, SpringBoot的版本是2.1.3.RELEASE. 1. 构建M ...
- SPRINGCLOUD 开发学习记录
一个简单的微服务系统:服务注册和发现,服务消费,负载均衡,断路器,智能路由,配置管理 服务注册中心: eureka是一个高可用组件,没有后端缓存,每一个实例注册后向注册中心发送心跳,默认情况下,eru ...
- SpringCloud的学习记录(8)
这一章节讲zipkin-server. 在我们生成的Demo项目上右键点击New->Module->spring Initializr, 然后next, 填写Group和Artifact等 ...
- SpringCloud的学习记录(7)
这一章节讲zuul的使用. 在我们生成的Demo项目上右键点击New->Module->spring Initializr, 然后next, 填写Group和Artifact等信息, 这里 ...
- SpringCloud的学习记录(6)
这一章节讲fegin的使用. 在我们生成的Demo项目上右键点击New->Module->spring Initializr, 然后next, 填写Group和Artifact等信息, 这 ...
- SpringCloud的学习记录(5)
这一章节讲如何使用ribbon和hystrix. 在我们生成的Demo项目上右键点击New->Module->spring Initializr, 然后next, 填写Group和Arti ...
- SpringCloud的学习记录(3)
这一章节讲搭建config-server的项目. 在我们生成的Demo项目上右键点击New->Module->spring Initializr, 然后next, 填写Group和Arti ...
- SpringCloud的学习记录(2)
这一章节主要讲如何搭建eureka-client项目. 在我们生成的Demo项目上右键点击New->Module->spring Initializr, 然后next, 填写Group和A ...
- SpringCloud基础教程学习记录
这个学习记录是学习自翟永超前辈的SpringCloud的基础教程. 自己写这个教程的目的主要是在于,想要更凝练总结一些其中的一些实用点,顺便做个汇总,这样自己在复习查看的时候更加方便,也能顺着自己的思 ...
随机推荐
- Tensorflow方法介绍
一.reduce系列函数(维度操作) 1.tf.reduce_sum( input_tensor, axis=None, keep_dims=False, name=None, reduction_i ...
- 黑马学习CSS之选择器 简单选择器,结合符,选择器,选择器组, 选择器优先级,名称空间
- zabbix_get命令不存在
yum install zabbix-get.x86_64
- 树莓派使用 PPA 安装 Java 8
前言 在树莓派上安装 Java 8,与这篇的操作类似,不过树莓派不支持用 add-apt-repository 自动添加 webupd8team 的源,所以要手动添加. 步骤 在 /etc/apt/s ...
- [JavaScript]instanceof String not behaving as expected in Google Apps Script
Link: http://stackoverflow.com/questions/11571923/instanceof-string-not-behaving-as-expected-in-goog ...
- Codeforces-Salem and Sticks(枚举+思维)
Salem gave you nn sticks with integer positive lengths a1,a2,-,ana1,a2,-,an. For every stick, you ca ...
- 自定义Razor 标签
1.首先需要一个abstract class WebViewPage<T> ,继承系统的 System.Web.Mvc.WebViewPage<TModel> 再定义一个Web ...
- Nginx根据目录自动生成二级域名
前言: 每次创建二级域名如果都修改一次配置文件的话,项目多了会带来很多不必要的工作量,如果能够在一个web目录下创建一个文件夹并且自动生成文件目录的话,那真是极好的,本文就基于Nginx贴出这 ...
- 线段树 区间更新(更新区间[x,y]的值,再求任意区间[x,y]的和)
#1078 : 线段树的区间修改 时间限制:10000ms 单点时限:1000ms 内存限制:256MB 描述 对于小Ho表现出的对线段树的理解,小Hi表示挺满意的,但是满意就够了么?于是小Hi将问题 ...
- sp_executesq用法
第一种用法: --@sqlstring :就是你要执行的sql语句字符串--@ParmDefinition: @sqlstring里边用到的参数在这里声明 输出的参数要加output --sp_exe ...