SpringCloud的学习记录(3)
这一章节讲搭建config-server的项目.
在我们生成的Demo项目上右键点击New->Module->spring Initializr, 然后next, 填写Group和Artifact等信息,
这里Artifact填写configserver, 再次next,
这里选择的Web下的web和Cloud Discovery下的Eureka Discovery, 同时选择Cloud Config下的Config Server.
最后在Module Name中填写config-server.
生成的pom.xml文件如下:
在src->main->resources下建立application.yml文件, 内容如下
eureka:

  client:

    serviceUrl:

      defaultZone: http://localhost:8761/eureka/    // 这里依然是注册到eureka-server中

server:

  port: 8765

spring:

  application:

    name: config-server

  cloud:

    config:

      server:

        git:

          uri: https://github.com/xxx 你的git仓库地址

          searchPaths: repos

          username: 你的git用户名

          password: 你的git密码

      label: master
在ConfigServerApplication.java里的内容如下, 要加上@EnableConfigServer这个注解
package com.xum.configserver;

import org.springframework.boot.SpringApplication;

import org.springframework.boot.autoconfigure.SpringBootApplication;

import org.springframework.cloud.netflix.eureka.EnableEurekaClient;

import org.springframework.cloud.config.server.EnableConfigServer;

@EnableEurekaClient

@EnableConfigServer

@SpringBootApplication

public class ConfigServerApplication {

    public static void main(String[] args) {

        SpringApplication.run(ConfigServerApplication.class, args);

    }

}
这样Config-server项目搭建完成,
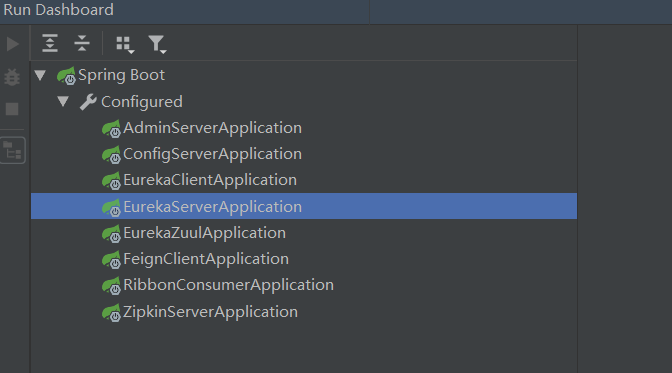
用Run DashBoard顺序启动如下项目:
1. eureka-server
2. config-server
3. eureka-client
然后再次运行上一章节的几条api就可以看到效果了
先在浏览器中输入http://localhost:8762/testone/test, 显示如下
port是eureka-client的端口

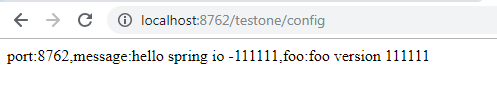
然后在浏览器中输入http://localhost:8762/testone/config, 显示如下
port是eureka-client的端口, message和foo是从git仓库中获取的, 是通过config-server项目获取的.
下一章节讲如何在改变git上的值后, eureka-client能及时的更新.
SpringCloud的学习记录(3)的更多相关文章
- SpringCloud的学习记录(1)
最近一段时间重新学习一边SpringCloud(有半年不用了),这里简单记录一下. 我用的是IntelliJ IDEA开发工具, SpringBoot的版本是2.1.3.RELEASE. 1. 构建M ...
- SPRINGCLOUD 开发学习记录
一个简单的微服务系统:服务注册和发现,服务消费,负载均衡,断路器,智能路由,配置管理 服务注册中心: eureka是一个高可用组件,没有后端缓存,每一个实例注册后向注册中心发送心跳,默认情况下,eru ...
- SpringCloud的学习记录(8)
这一章节讲zipkin-server. 在我们生成的Demo项目上右键点击New->Module->spring Initializr, 然后next, 填写Group和Artifact等 ...
- SpringCloud的学习记录(7)
这一章节讲zuul的使用. 在我们生成的Demo项目上右键点击New->Module->spring Initializr, 然后next, 填写Group和Artifact等信息, 这里 ...
- SpringCloud的学习记录(6)
这一章节讲fegin的使用. 在我们生成的Demo项目上右键点击New->Module->spring Initializr, 然后next, 填写Group和Artifact等信息, 这 ...
- SpringCloud的学习记录(5)
这一章节讲如何使用ribbon和hystrix. 在我们生成的Demo项目上右键点击New->Module->spring Initializr, 然后next, 填写Group和Arti ...
- SpringCloud的学习记录(2)
这一章节主要讲如何搭建eureka-client项目. 在我们生成的Demo项目上右键点击New->Module->spring Initializr, 然后next, 填写Group和A ...
- SpringCloud的学习记录(4)
本篇基于上一篇写的, 在git上更改配置后, eureka-client如何更新. 我们只需要在配置文件中配置 spring-cloud-starter-bus-amqp; 这就是说我们需要装rabb ...
- SpringCloud基础教程学习记录
这个学习记录是学习自翟永超前辈的SpringCloud的基础教程. 自己写这个教程的目的主要是在于,想要更凝练总结一些其中的一些实用点,顺便做个汇总,这样自己在复习查看的时候更加方便,也能顺着自己的思 ...
随机推荐
- luogu1210 回文检测
Manacher 正确读法:抹内A撤(马拉车) (跟着假硕学英语) 我们把原来的字符串,通过玄学处理,变成只留下字母,且每两个字母之间有一个奇怪的字符的那种Manacher专用字符串. 建立双射关系f ...
- 2017第八届蓝桥杯决赛(C++ B组)2.磁砖样式
磁砖样式 小明家的一面装饰墙原来是 310 的小方格. 现在手头有一批刚好能盖住2个小方格的长方形瓷砖. 瓷砖只有两种颜色:黄色和橙色. 小明想知道,对于这么简陋的原料,可以贴出多少种不同的花样来. ...
- Long类型比较不能直接用等于
在判断两个Long型数据是否相等的时候遇到了一个问题. 使用“==”的疑问 if (user.getId() == admin.getId()) { return true; } else { ret ...
- c++中STL中的next_permutation函数基本用法
对于next_permutation函数是针对于排列组合问题的库函数,它的排序方式是按照字典的方式排列的·: 如以下代码对于next_permutation函数的初步解释: #include<c ...
- PS常用快捷键大全
察看图像类别 说明:: --- Shift键 : --- 空格键 *--- 在Imageready中不适用 § --- 只在Imageready中可用 动作 结果 双击工具箱::或Ct ...
- jquery深入学习
样式操作: addclass(); //指定添加css类 removeclass();//移除指定css类 hasclass()://判断存不存在 toggleclass();//切换css类名,有 ...
- opencv-将分离合并图像(Red通道>125置255<=置0)
#include <iostream> #include <opencv2/opencv.hpp> #include "opencv2/imgproc/imgproc ...
- STL effectiv 条款7 复习 未完成
该条款很好的解决了 容器中存放指针释放的问题,for_each函数调用可以参考自己的前面的博客 为什么会有这个条款呢 很多时候 我们将new过的指针存放到容器中,我们有时候错误的认为 容器对象析构 ...
- windows下修改了系统变量里java_home所引用的jdk,但是查询jdk的版本并没有发生改变
# 原因:因为%SystemRoot%\system32 在引用这个环境变量时,会默认C:\Windows\System32下的jdk版本 # 解决方法: 把jdk的配置放在path前面就可以了
- ST-LINK接口定义
ST-LINKIII管脚定义及接法: ST-LINK IIILED灯三种状态含义: 常亮:目标板与ST-LINK在SWIM模式或者JTAG/SWD模式下已经通讯初始化. 闪烁:目标板与ST-L ...